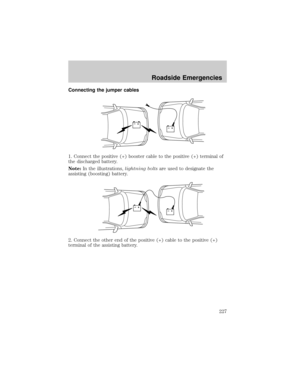
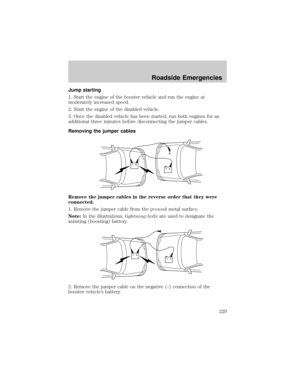
Page 209 of 320

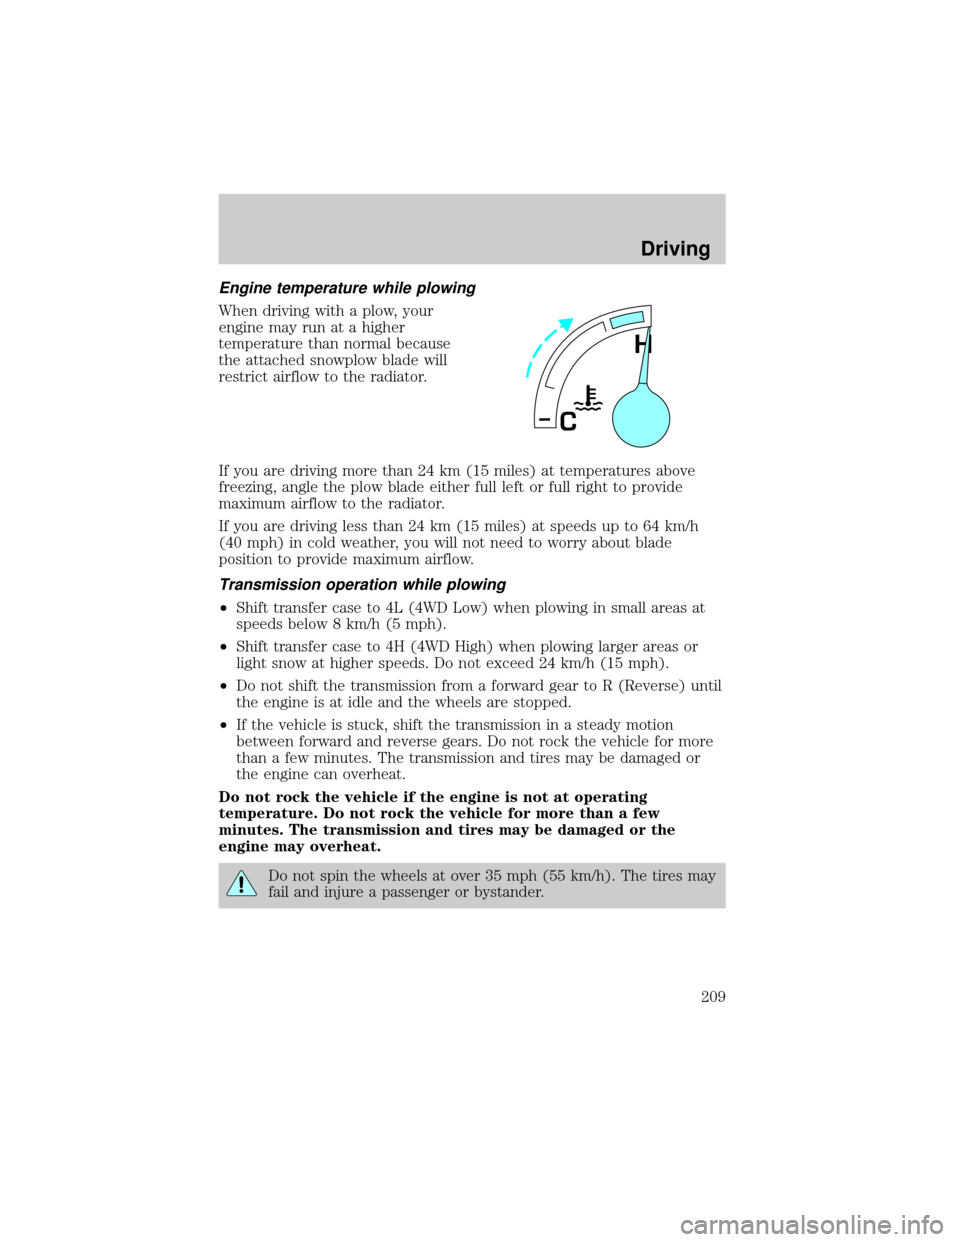
Engine temperature while plowing
When driving with a plow, your
engine may run at a higher
temperature than normal because
the attached snowplow blade will
restrict airflow to the radiator.
If you are driving more than 24 km (15 miles) at temperatures above
freezing, angle the plow blade either full left or full right to provide
maximum airflow to the radiator.
If you are driving less than 24 km (15 miles) at speeds up to 64 km/h
(40 mph) in cold weather, you will not need to worry about blade
position to provide maximum airflow.
Transmission operation while plowing
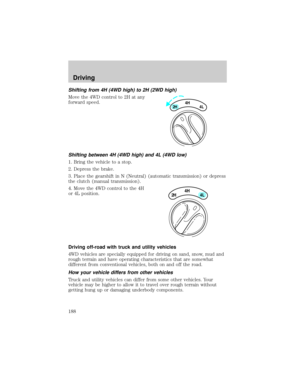
²Shift transfer case to 4L (4WD Low) when plowing in small areas at
speeds below 8 km/h (5 mph).
²Shift transfer case to 4H (4WD High) when plowing larger areas or
light snow at higher speeds. Do not exceed 24 km/h (15 mph).
²Do not shift the transmission from a forward gear to R (Reverse) until
the engine is at idle and the wheels are stopped.
²If the vehicle is stuck, shift the transmission in a steady motion
between forward and reverse gears. Do not rock the vehicle for more
than a few minutes. The transmission and tires may be damaged or
the engine can overheat.
Do not rock the vehicle if the engine is not at operating
temperature. Do not rock the vehicle for more than a few
minutes. The transmission and tires may be damaged or the
engine may overheat.
Do not spin the wheels at over 35 mph (55 km/h). The tires may
fail and injure a passenger or bystander.
H
C
Driving
209
Page 210 of 320

GETTING ROADSIDE ASSISTANCE
To fully assist if you should have a vehicle concern, Ford Motor Company
offers a complimentary roadside assistance program. This program is
separate from the New Vehicle Limited Warranty. The service is available:
²24±hours, seven days a week
²for the Basic warranty period (Canada) or New Vehicle Limited
Warranty period (U.S.) of three years or 60 000 km (36 000 miles),
whichever comes first on Ford and Mercury vehicles, and four years or
80 000 km (50 000 miles) on Lincoln vehicles
Roadside assistance will cover:
²changing a flat tire
²jump-starts
²lock-out assistance
²limited fuel delivery*
²towing of your disabled vehicle to the nearest Ford Motor Company
dealership, or your selling dealer if within 25 kms (15.5 miles) of the
nearest Ford Motor Company dealership (one tow per disablement).
Even non-warranty related tows, like accidents or getting stuck in the
mud or snow, are covered (some exclusions apply, such as impound
towing or repossession).
* Canadian customers refer to yourRoadside Assistance supplement
for exact fuel amounts.
USING ROADSIDE ASSISTANCE
Complete the roadside assistance identification card and place it in your
wallet for quick reference. In the United States, this card is found in the
Owner Guide portfolio in the glove compartment in Ford vehicles and is
mailed to you if you own a Mercury or Lincoln. In Canada, the card is
found in the Roadside Assistance book in the glove compartment.
U.S. Ford or Mercury vehicle customers who require roadside assistance,
call 1±800±241±3673; Lincoln vehicle customers call 1±800±521±4140.
Canadian customers who require roadside assistance, call
1±800±665±2006.
If you need to arrange roadside assistance for yourself, Ford Motor
Company will reimburse a reasonable amount. To obtain reimbursement
information, U.S. Ford or Mercury vehicles customers call
1-800-241-3673; Lincoln vehicle customers call 1±800±521±4140.
Roadside Emergencies
210
Page 211 of 320

Canadian customers who need to obtain reimbursement information, call
1±800±665±2006.
ROADSIDE COVERAGE BEYOND BASIC WARRANTY
In the United States, you may purchase additional roadside assistance
coverage beyond this period through the Ford Auto Club by contacting
your Ford or Lincoln Mercury dealer.
Similarly in Canada, for uninterrupted Roadside Assistance coverage, you
may purchase extended coverage prior to your Basic Warranty's Roadside
Assistance expiring. For more information and enrollment, contact
1±877±294±2582 or visit our website at www.ford.ca.
HAZARD FLASHER
Use only in an emergency to warn traffic of vehicle breakdown,
approaching danger, etc. The hazard flashers can be operated when the
ignition is off.
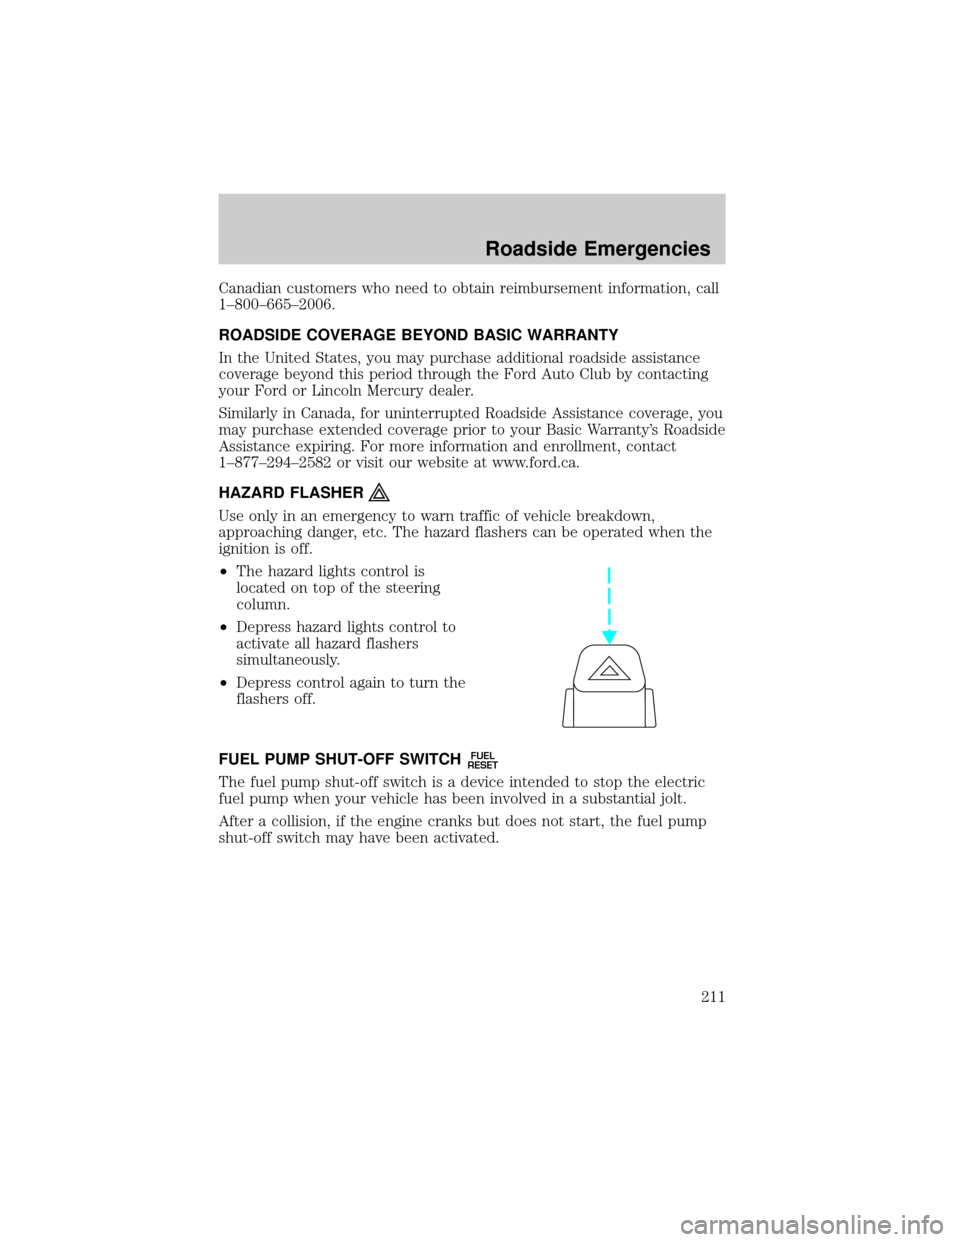
²The hazard lights control is
located on top of the steering
column.
²Depress hazard lights control to
activate all hazard flashers
simultaneously.
²Depress control again to turn the
flashers off.
FUEL PUMP SHUT-OFF SWITCH
FUEL
RESET
The fuel pump shut-off switch is a device intended to stop the electric
fuel pump when your vehicle has been involved in a substantial jolt.
After a collision, if the engine cranks but does not start, the fuel pump
shut-off switch may have been activated.
Roadside Emergencies
211
Page 212 of 320
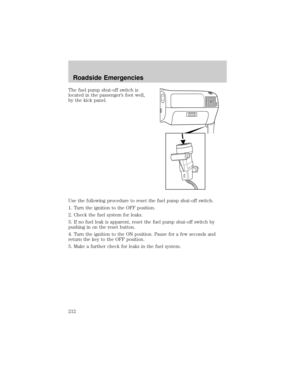
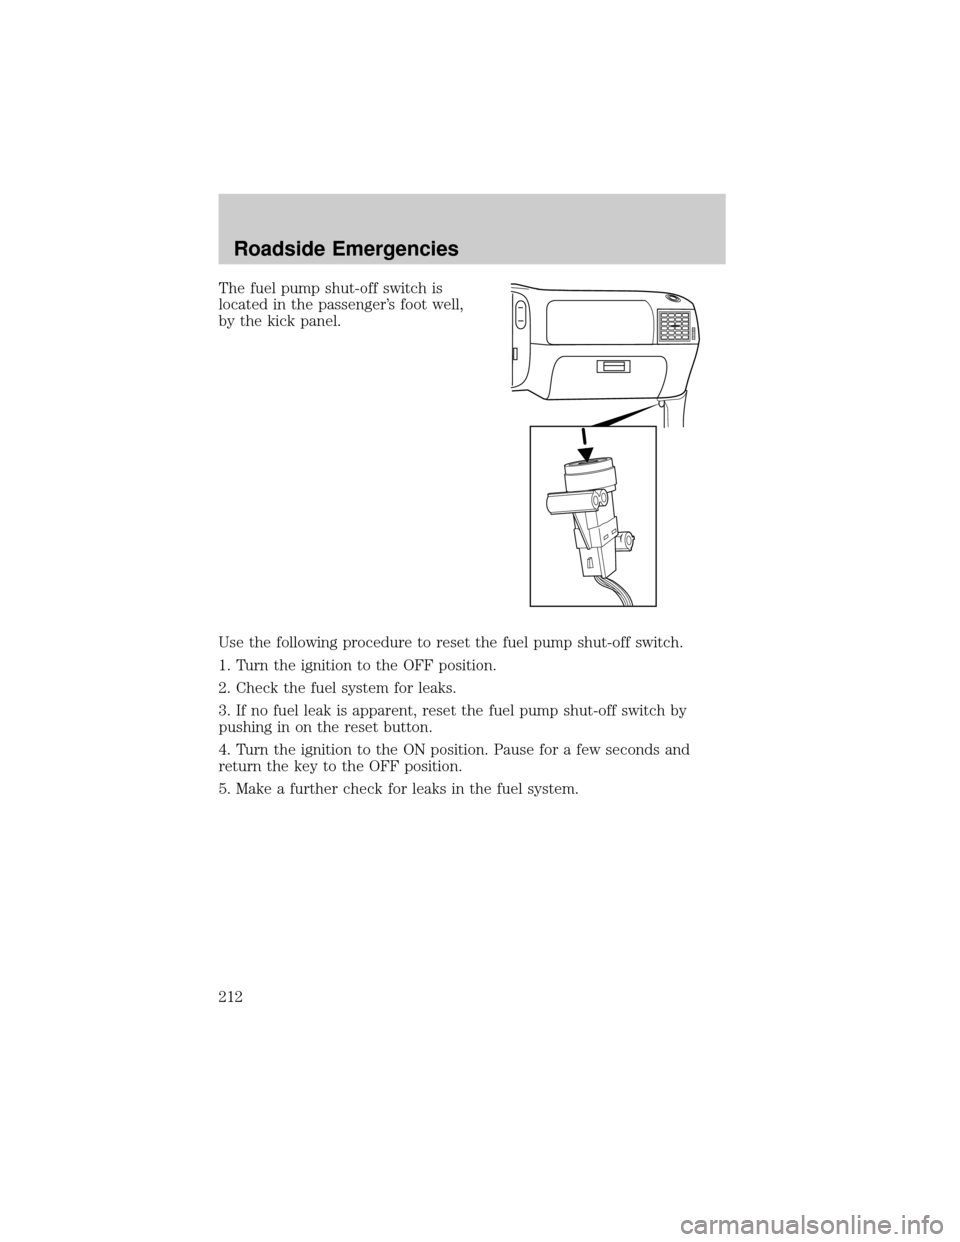
The fuel pump shut-off switch is
located in the passenger's foot well,
by the kick panel.
Use the following procedure to reset the fuel pump shut-off switch.
1. Turn the ignition to the OFF position.
2. Check the fuel system for leaks.
3. If no fuel leak is apparent, reset the fuel pump shut-off switch by
pushing in on the reset button.
4. Turn the ignition to the ON position. Pause for a few seconds and
return the key to the OFF position.
5. Make a further check for leaks in the fuel system.
Roadside Emergencies
212
Page 213 of 320
FUSES AND RELAYS
Fuses
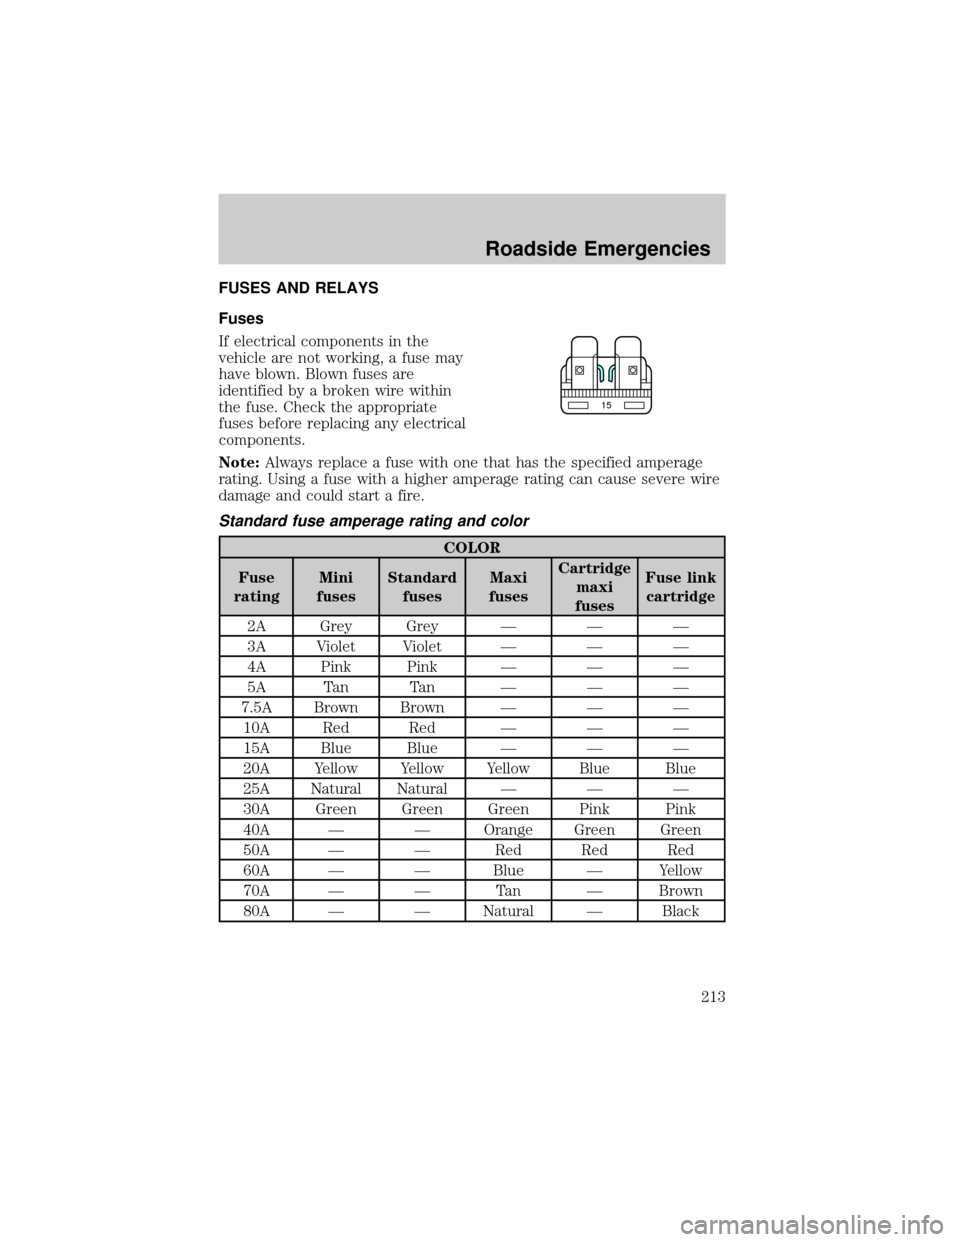
If electrical components in the
vehicle are not working, a fuse may
have blown. Blown fuses are
identified by a broken wire within
the fuse. Check the appropriate
fuses before replacing any electrical
components.
Note:Always replace a fuse with one that has the specified amperage
rating. Using a fuse with a higher amperage rating can cause severe wire
damage and could start a fire.
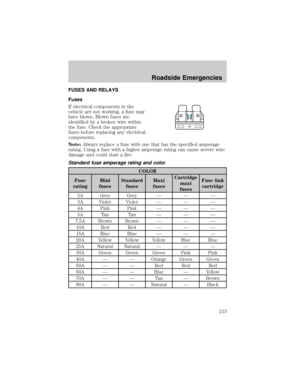
Standard fuse amperage rating and color
COLOR
Fuse
ratingMini
fusesStandard
fusesMaxi
fusesCartridge
maxi
fusesFuse link
cartridge
2A Grey Grey Ð Ð Ð
3A Violet Violet Ð Ð Ð
4A Pink Pink Ð Ð Ð
5A Tan Tan Ð Ð Ð
7.5A Brown Brown Ð Ð Ð
10A Red Red Ð Ð Ð
15A Blue Blue Ð Ð Ð
20A Yellow Yellow Yellow Blue Blue
25A Natural Natural Ð Ð Ð
30A Green Green Green Pink Pink
40A Ð Ð Orange Green Green
50A Ð Ð Red Red Red
60A Ð Ð Blue Ð Yellow
70A Ð Ð Tan Ð Brown
80A Ð Ð Natural Ð Black
15
Roadside Emergencies
213
Page 214 of 320
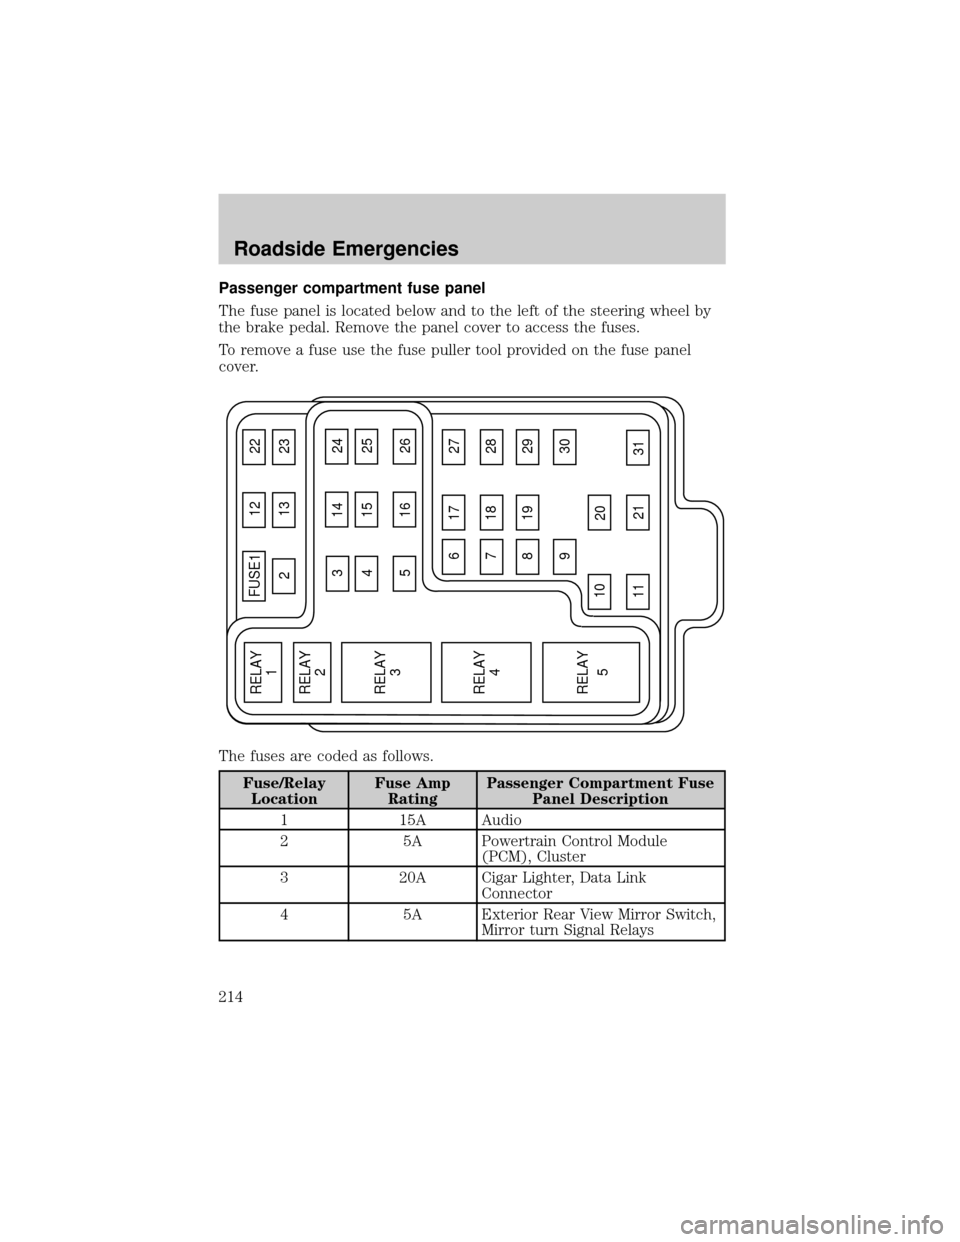
Passenger compartment fuse panel
The fuse panel is located below and to the left of the steering wheel by
the brake pedal. Remove the panel cover to access the fuses.
To remove a fuse use the fuse puller tool provided on the fuse panel
cover.
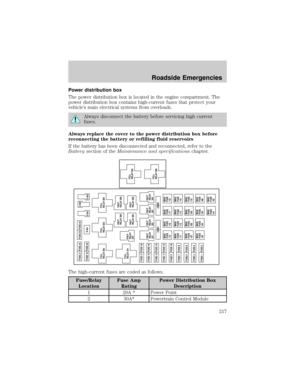
The fuses are coded as follows.
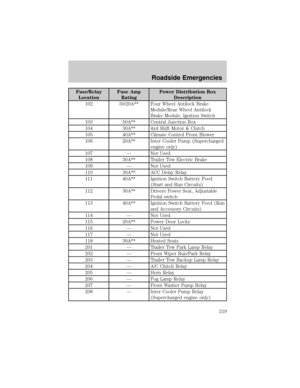
Fuse/Relay
LocationFuse Amp
RatingPassenger Compartment Fuse
Panel Description
1 15A Audio
2 5A Powertrain Control Module
(PCM), Cluster
3 20A Cigar Lighter, Data Link
Connector
4 5A Exterior Rear View Mirror Switch,
Mirror turn Signal Relays
FUSE1 12 22
21323
617 27
718 28
819 29
930
20
31 21 11 10
RELAY
5 RELAY
4 RELAY
3 RELAY
2 RELAY
1
31424
41525
51626
Roadside Emergencies
214
Page 215 of 320
Fuse/Relay
LocationFuse Amp
RatingPassenger Compartment Fuse
Panel Description
5 15A Speed Control Module, Reverse
Lamp, Climate Mode Switch,
Daytime Running Lamp Relay,
Digital Transmission Range (DTR)
Sensor
6 5A Cluster, Brake Shift Interlock
Solenoid, GEM Module
7 Ð Not Used
8 5A Radio, Remote Entry Module,
GEM Module, In-vehicle
entertainment system (SuperCrew
only)
9 Ð Not Used
10 Ð Not Used
11 30A Front Washer Pump Relay, Wiper
Run/Park Relay, Wiper Hi/LO
Relay, Windshield Wiper Motor
12 Ð Not Used
13 20A Stop Lamp Switch (Lamps),
Turn/Hazard Flasher
14 15A Battery Saver Relay, Interior
Lamp Relay
15 5A Stop Lamp Switch, (Speed
Control, Brake Shift Interlock),
GEM Module, RABS Module
16 20A Headlamps (Hi Beams), Cluster
(Hi Beam Indicator)
17 Ð Not Used
18 5A Instrument Illumination (Dimmer
Switch Power)
19 Ð Not Used
20 5A Audio, GEM Module, Powertrain
Control Module (PCM),
Transmission Range Sensor
Roadside Emergencies
215
Page 216 of 320

Fuse/Relay
LocationFuse Amp
RatingPassenger Compartment Fuse
Panel Description
21 15A Digital Transmission Range (DTR)
Sensor, Clutch Switch, Starter
Relay, I/P fuse 20
22 10A Air Bag Module, Passenger Airbag
Deactivation Module
23 10A Trailer Tow Battery Charge Relay,
Turn/Hazard Flasher, 4x4
Solenoids, 4x4 Relays, Overhead
Console, 4 Wheel Anti-Lock Brake
System (4WABS) Module, EC
Mirror, Heated Seats
24 10A Function Selector Switch
Assembly
25 Ð Not Used
26 10A Right Side Low Beam Headlamp
27 5A Foglamp Relay and Foglamp
Indicator, Main Light Switch
(upstream)
28 10A Left Side Low Beam Headlamp
29 5A Autolamp Module, Transmission
Overdrive Control Switch, Central
Security Module,Belt Minder
30 30A Passive Anti Theft Transceiver,
Cluster, Ignition Coils, Powertrain
Control Module Relay, Coil on
Plugs, Radio Noise Capacitor, ECC
Diode
31 Ð Not Used
Relay 1 Ð Interior Lamp Relay
Relay 2 Ð Battery Saver Relay
Relay 3 Ð Not Used
Relay 4 Ð One Touch Down Window Relay
Relay 5 Ð ACC Delay Relay
Roadside Emergencies
216