Page 73 of 320

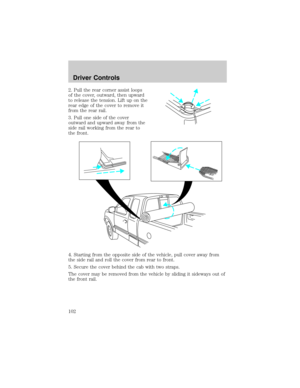
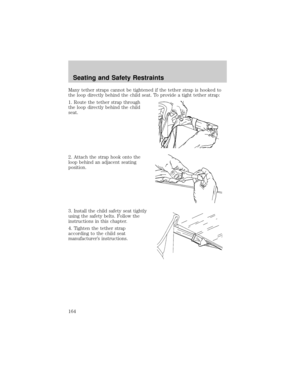
6. Align top and bottom ribs of
parking lamp assembly with
corresponding slots on front of
vehicle.
7. Push gently until parking lamp
assembly seats (you will hear a
snap).
8. Install screw on lamp assembly.
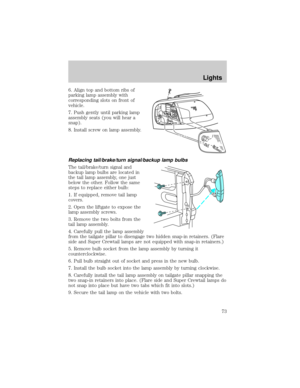
Replacing tail/brake/turn signal/backup lamp bulbs
The tail/brake/turn signal and
backup lamp bulbs are located in
the tail lamp assembly, one just
below the other. Follow the same
steps to replace either bulb:
1. If equipped, remove tail lamp
covers.
2. Open the liftgate to expose the
lamp assembly screws.
3. Remove the two bolts from the
tail lamp assembly.
4. Carefully pull the lamp assembly
from the tailgate pillar to disengage two hidden snap-in retainers. (Flare
side and Super Crewtail lamps are not equipped with snap-in retainers.)
5. Remove bulb socket from the lamp assembly by turning it
counterclockwise.
6. Pull bulb straight out of socket and press in the new bulb.
7. Install the bulb socket into the lamp assembly by turning clockwise.
8. Carefully install the tail lamp assembly on tailgate pillar snapping the
two snap-in retainers into place. (Flare side and Super Crewtail lamps do
not snap into place but have two tabs which fit into slots.)
9. Secure the tail lamp on the vehicle with two bolts.
Lights
73
Page 74 of 320
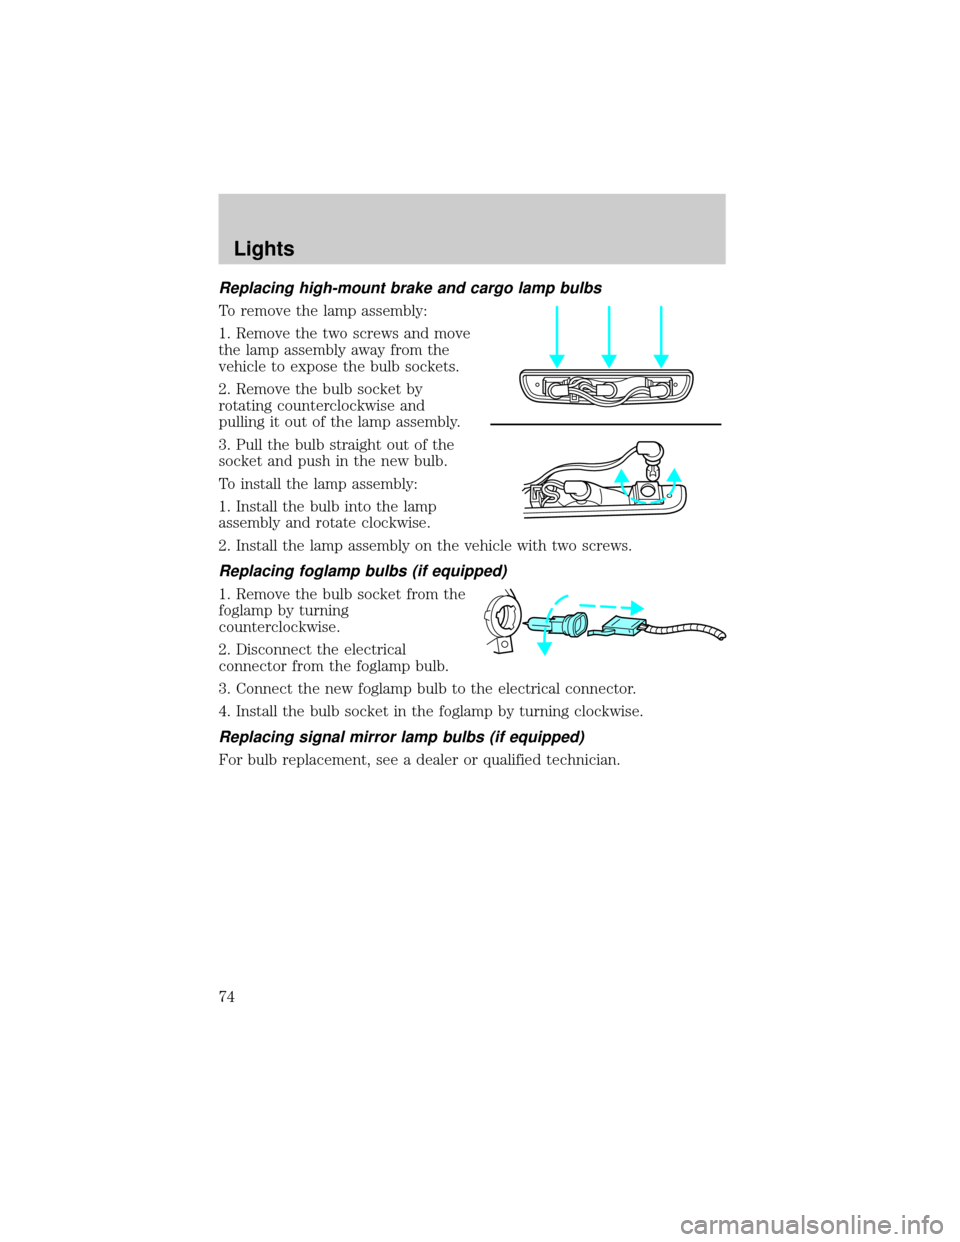
Replacing high-mount brake and cargo lamp bulbs
To remove the lamp assembly:
1. Remove the two screws and move
the lamp assembly away from the
vehicle to expose the bulb sockets.
2. Remove the bulb socket by
rotating counterclockwise and
pulling it out of the lamp assembly.
3. Pull the bulb straight out of the
socket and push in the new bulb.
To install the lamp assembly:
1. Install the bulb into the lamp
assembly and rotate clockwise.
2. Install the lamp assembly on the vehicle with two screws.
Replacing foglamp bulbs (if equipped)
1. Remove the bulb socket from the
foglamp by turning
counterclockwise.
2. Disconnect the electrical
connector from the foglamp bulb.
3. Connect the new foglamp bulb to the electrical connector.
4. Install the bulb socket in the foglamp by turning clockwise.
Replacing signal mirror lamp bulbs (if equipped)
For bulb replacement, see a dealer or qualified technician.
Lights
74
Page 75 of 320
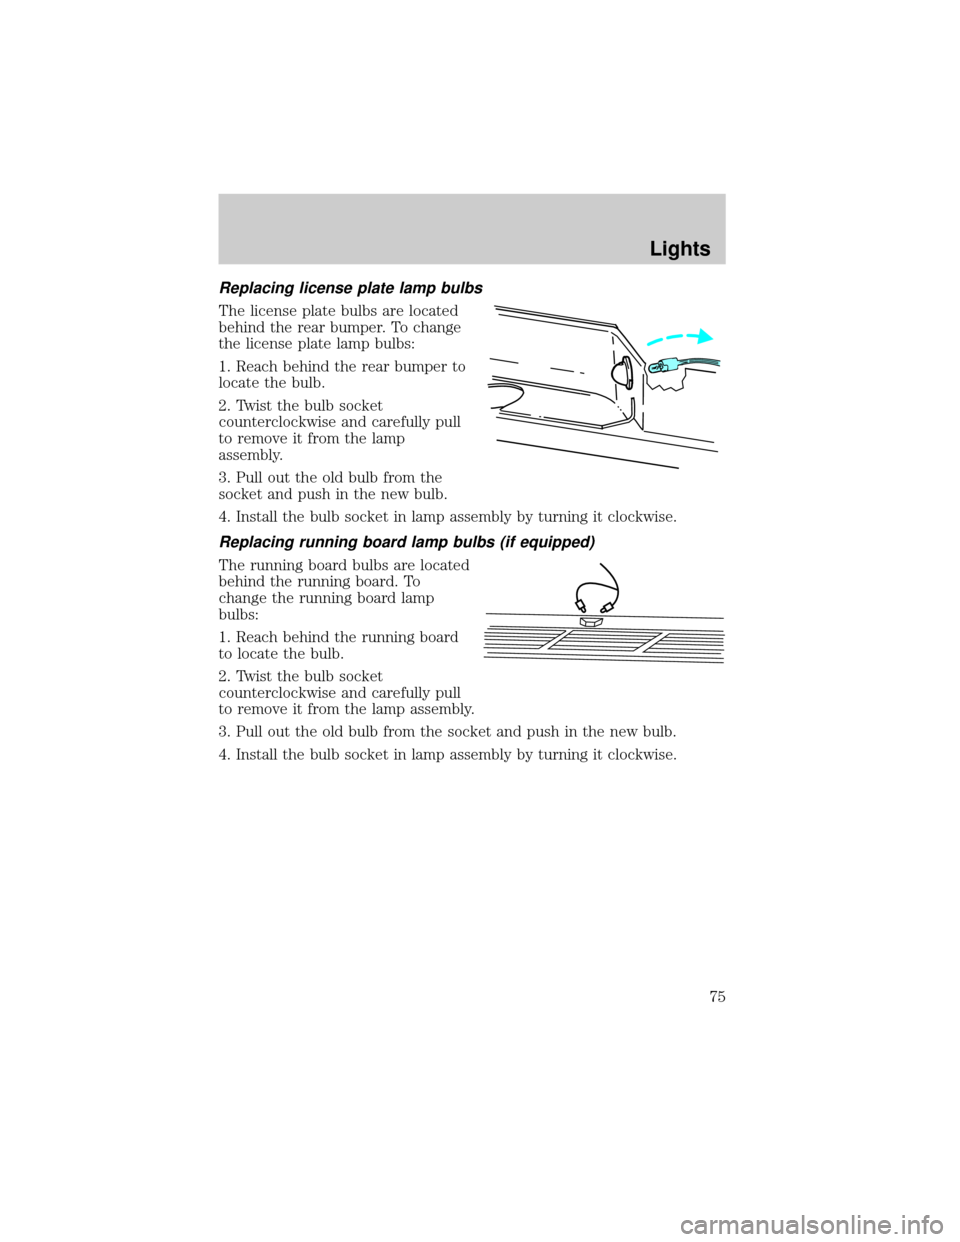
Replacing license plate lamp bulbs
The license plate bulbs are located
behind the rear bumper. To change
the license plate lamp bulbs:
1. Reach behind the rear bumper to
locate the bulb.
2. Twist the bulb socket
counterclockwise and carefully pull
to remove it from the lamp
assembly.
3. Pull out the old bulb from the
socket and push in the new bulb.
4. Install the bulb socket in lamp assembly by turning it clockwise.
Replacing running board lamp bulbs (if equipped)
The running board bulbs are located
behind the running board. To
change the running board lamp
bulbs:
1. Reach behind the running board
to locate the bulb.
2. Twist the bulb socket
counterclockwise and carefully pull
to remove it from the lamp assembly.
3. Pull out the old bulb from the socket and push in the new bulb.
4. Install the bulb socket in lamp assembly by turning it clockwise.
Lights
75
Page 76 of 320

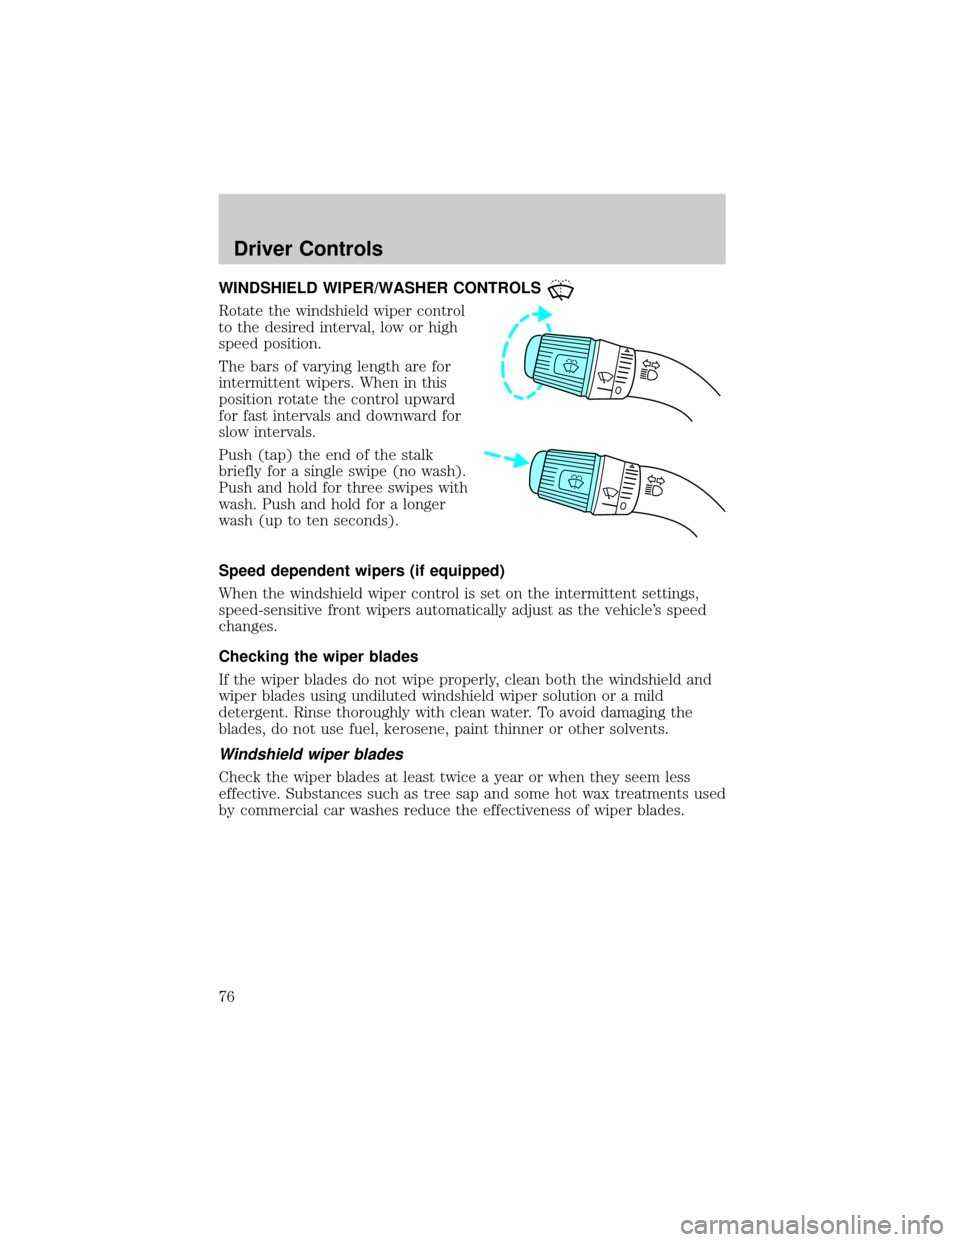
WINDSHIELD WIPER/WASHER CONTROLS
Rotate the windshield wiper control
to the desired interval, low or high
speed position.
The bars of varying length are for
intermittent wipers. When in this
position rotate the control upward
for fast intervals and downward for
slow intervals.
Push (tap) the end of the stalk
briefly for a single swipe (no wash).
Push and hold for three swipes with
wash. Push and hold for a longer
wash (up to ten seconds).
Speed dependent wipers (if equipped)
When the windshield wiper control is set on the intermittent settings,
speed-sensitive front wipers automatically adjust as the vehicle's speed
changes.
Checking the wiper blades
If the wiper blades do not wipe properly, clean both the windshield and
wiper blades using undiluted windshield wiper solution or a mild
detergent. Rinse thoroughly with clean water. To avoid damaging the
blades, do not use fuel, kerosene, paint thinner or other solvents.
Windshield wiper blades
Check the wiper blades at least twice a year or when they seem less
effective. Substances such as tree sap and some hot wax treatments used
by commercial car washes reduce the effectiveness of wiper blades.
Driver Controls
76
Page 77 of 320
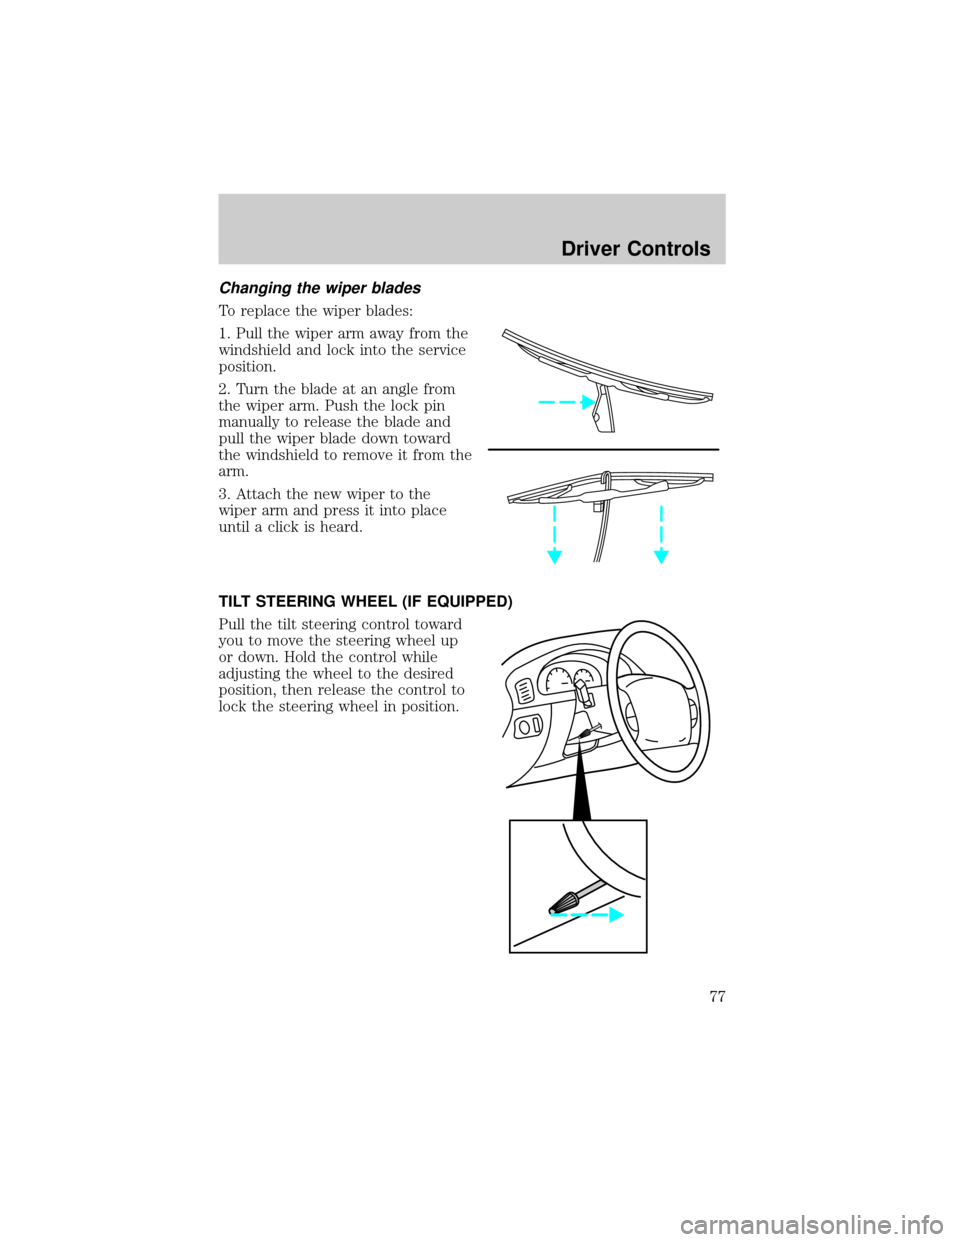
Changing the wiper blades
To replace the wiper blades:
1. Pull the wiper arm away from the
windshield and lock into the service
position.
2. Turn the blade at an angle from
the wiper arm. Push the lock pin
manually to release the blade and
pull the wiper blade down toward
the windshield to remove it from the
arm.
3. Attach the new wiper to the
wiper arm and press it into place
until a click is heard.
TILT STEERING WHEEL (IF EQUIPPED)
Pull the tilt steering control toward
you to move the steering wheel up
or down. Hold the control while
adjusting the wheel to the desired
position, then release the control to
lock the steering wheel in position.
Driver Controls
77
Page 78 of 320
Never adjust the steering wheel when the vehicle is moving.
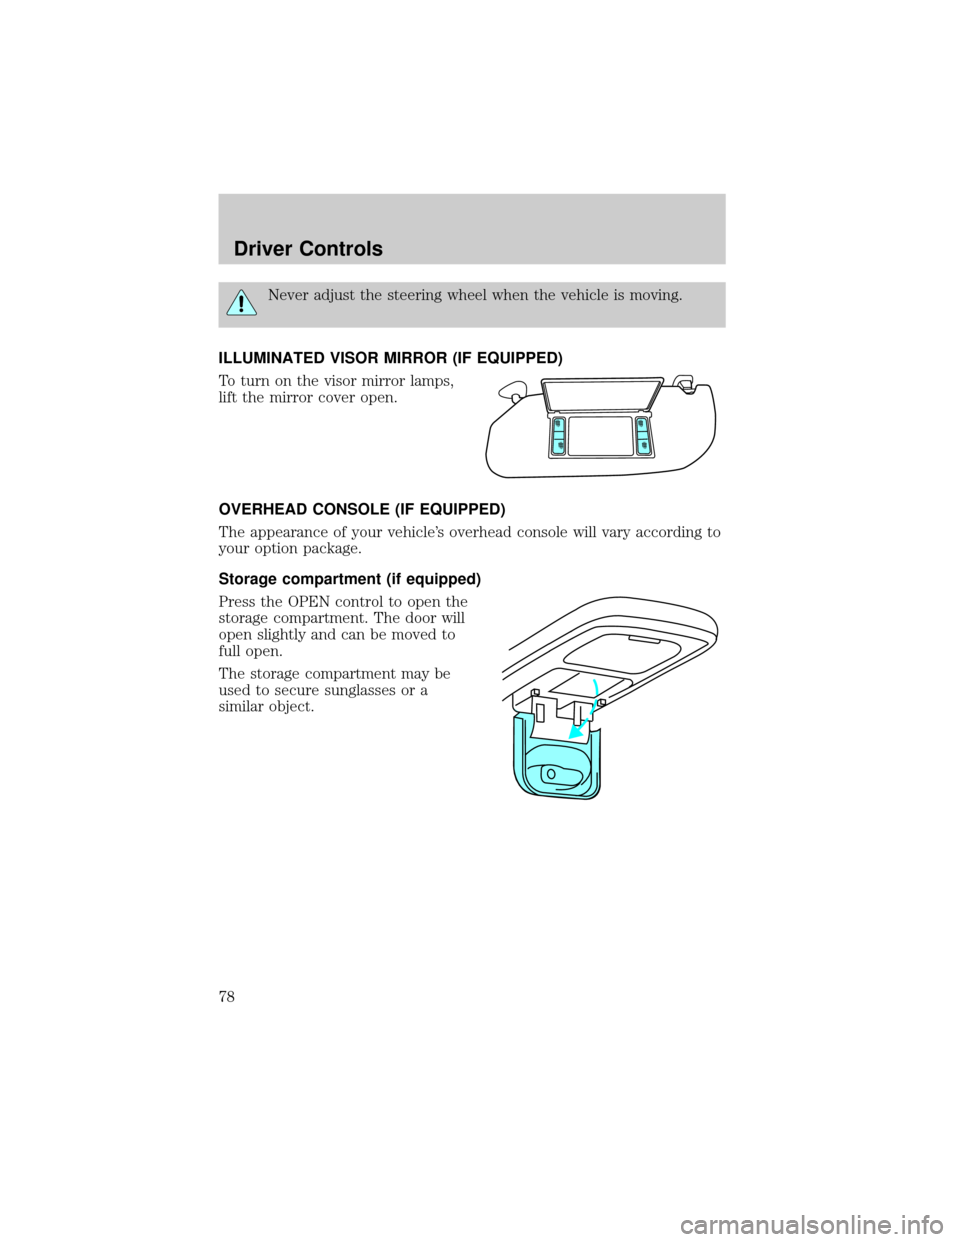
ILLUMINATED VISOR MIRROR (IF EQUIPPED)
To turn on the visor mirror lamps,
lift the mirror cover open.
OVERHEAD CONSOLE (IF EQUIPPED)
The appearance of your vehicle's overhead console will vary according to
your option package.
Storage compartment (if equipped)
Press the OPEN control to open the
storage compartment. The door will
open slightly and can be moved to
full open.
The storage compartment may be
used to secure sunglasses or a
similar object.
Driver Controls
78
Page 79 of 320
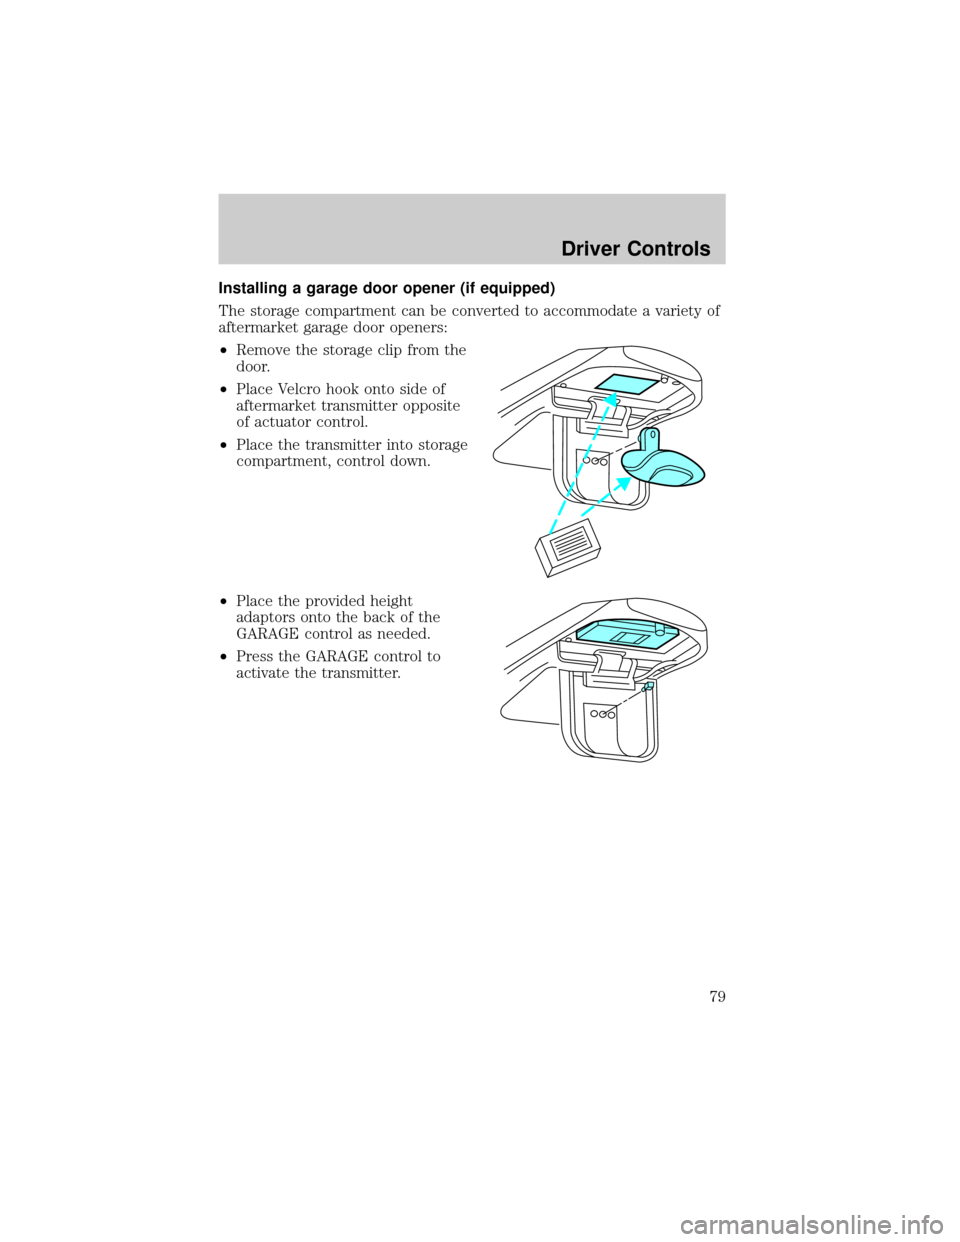
Installing a garage door opener (if equipped)
The storage compartment can be converted to accommodate a variety of
aftermarket garage door openers:
²Remove the storage clip from the
door.
²Place Velcro hook onto side of
aftermarket transmitter opposite
of actuator control.
²Place the transmitter into storage
compartment, control down.
²Place the provided height
adaptors onto the back of the
GARAGE control as needed.
²Press the GARAGE control to
activate the transmitter.
Driver Controls
79
Page 80 of 320

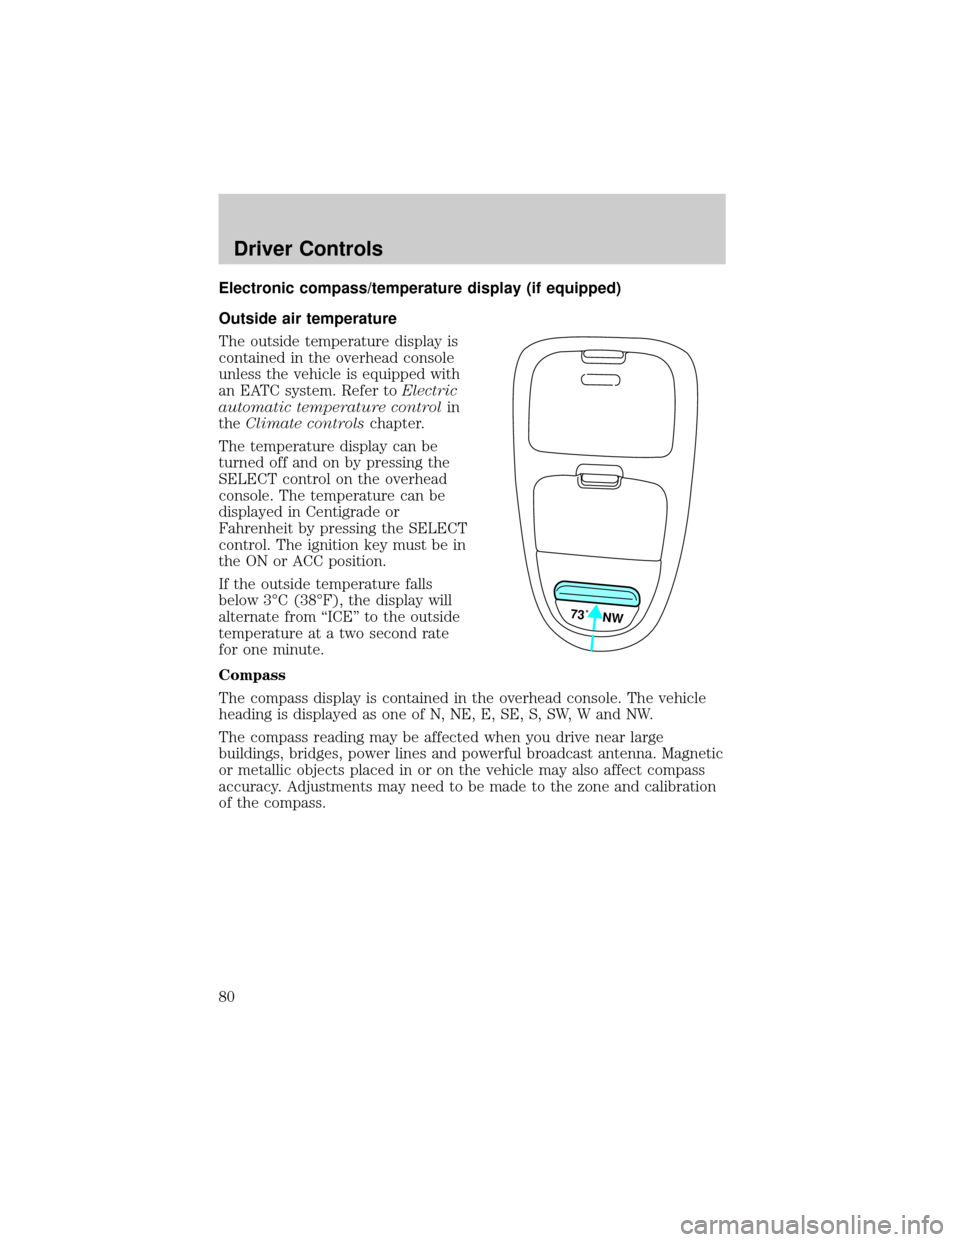
Electronic compass/temperature display (if equipped)
Outside air temperature
The outside temperature display is
contained in the overhead console
unless the vehicle is equipped with
an EATC system. Refer toElectric
automatic temperature controlin
theClimate controlschapter.
The temperature display can be
turned off and on by pressing the
SELECT control on the overhead
console. The temperature can be
displayed in Centigrade or
Fahrenheit by pressing the SELECT
control. The ignition key must be in
the ON or ACC position.
If the outside temperature falls
below 3ÉC (38ÉF), the display will
alternate from ªICEº to the outside
temperature at a two second rate
for one minute.
Compass
The compass display is contained in the overhead console. The vehicle
heading is displayed as one of N, NE, E, SE, S, SW, W and NW.
The compass reading may be affected when you drive near large
buildings, bridges, power lines and powerful broadcast antenna. Magnetic
or metallic objects placed in or on the vehicle may also affect compass
accuracy. Adjustments may need to be made to the zone and calibration
of the compass.
73˚ NW
Driver Controls
80