2002 FIAT DUCATO 244 lock
[x] Cancel search: lockPage 21 of 246
CONNECT Nav
20
VIDEO
Selecting and confirming “VIDEO” by
rotating and pressing the knob 22-
fig. 1will allow the following settings:
1)“DAYTIME BRIGHTNESS”: en-
ables to adjust the display brightness
in day mode. To perform the adjust-
ment, select and confirm this option
by rotating and pressing the knob 22-
fig. 1. Rotate the knob 22-fig. 1
clockwise to increase brightness and
counterclockwise to decrease it.
2)“DAYTIME CONTRAST”: to ad-
just contrast in daytime brightness
mode. To perform the adjustment, se-
lect and confirm this option by rotat-
ing and pressing the knob 22-fig. 1.
Rotate the knob 22-fig. 1clockwise
to increase contrast and counter-
clockwise to decrease it. A special message will then be dis-
played, asking the user to insert the
provided SETUP CD or to wait if the
SETUP CD is already inserted. A series
of messages will inform the user about
procedure progress and end: it is es-
sential to not “disturb” the system dur-
ing this operation.
Do not start the engine or disconnect
the battery during the language change
operation.
Should this take place, the first time
you turn the system on, a special mes-
sage will be displayed communicating
that the language change operation shall
be concluded inserting the SETUP CD:
“WARNING: LANGUAGE CHANGE
FAILED. PLEASE REPEAT PROCE-
DURE”.Selecting CONNECT by turning and
pressing the knob 22-fig. 1, the display
will show the following submenu:
– VIDEO
– POWER OFF
– SERIAL DATA INTERFACE
– FLEET MANAGEMENT.
Page 22 of 246
CONNECT Nav
21
3)“NIGHTTIME BRIGHTNESS”:
enables to adjust the display brightness
in night mode. To perform the ad-
justment, select and confirm this op-
tion by rotating and pressing the knob
22-fig. 1. Rotate the knob 22-fig. 1
clockwise to increase brightness and
counterclockwise to decrease it.
4)“NIGHTTIME CONTRAST”: to
adjust contrast in nighttime brightness
mode. To perform the adjustment, se-
lect and confirm this option by rotat-
ing and pressing the knob 22-fig. 1.
Rotate the knob 22-fig. 1clockwise
to increase contrast and counter-
clockwise to decrease it.5)“MODE, DIMMING, CON-
TRAST”: selecting and confirming this
option by rotating and pressing the
knob 22-fig. 1, the following settings
are possible:
“AUTOMATIC”: enables to adjust
automatically the day/night mode de-
pending on vehicle lights switching
on/off.
“DAY”: activates day mode.
“NIGHT”: activates night mode.
After selecting the required setting,
press the knob 22-fig. 1to confirm.
If the automatic mode is “DAY” on-
ly day adjustment is displayed and the
night one is deactivated.
If the automatic mode is “NIGHT”
only night adjustment is displayed and
the day one is deactivated.POWER OFF
Select and confirm “POWER OFF”
by rotating and pressing the knob 22-
fig. 1to access the type of setting that
determines CONNECT switching off
(dependent on or independent of ig-
nition key).
Possible settings, only with ignition
key at MAR, are the following:
– “key-dependent auto-off”
– “key-independent auto-off”
Current activated setting will be high-
lighted.
Select and confirm the required set-
ting by rotating and pressing the knob
22-fig. 1.
Page 23 of 246
CONNECT Nav
22
SERIAL - MODEM
(data interface)
This function enables to connect an
external device (e.g.: portable com-
puter) to the CONNECT Nav system
that in this case will act as a modem.
To implement such configuration the
link between the external device and
the CONNECT Nav system connec-
tion (to be found in central position
under the dashboard) shall be per-
formed using the cable provided with
the system.
The max. data transmission speed is
that provided for the cellular tele-
phone mode (TEL) and is equal to 9.6
Kbps, as established by the commu-
nication with GSM cell network.
During data transmission (modem
function on), the CONNECT Nav
condition is the following:
– telephone mode off (TEL-OFF);
– incoming calls blocked;– call forwarding blocked;
– navigator (NAV) function can be
activated; if navigation is on data trans-
mission can be slow;
– all audio functions (radio, CD) can
be activated
– emergency call can be forwarded
by pressing •25-fig. 1.
IMPORTANTThe modem func-
tion cannot be activated during a call.IMPORTANTPress button •to
abort the modem function; the system
will restore the GSM telephone mode
for the selected function and will re-
quest to enter the PIN code; data ex-
changed during transmission will be
lost (unless data back-up have been
performed by user’s computer appli-
cations).
The modem function will not be re-
stored automatically by the system
when the emergency or service call is
over. To restore it repeat the proce-
dure from the beginning.
Page 64 of 246

CONNECT Nav
63
ENTERING THE PIN CODE
IMPORTANT The PIN code (Per-
sonal Identification Number) prevents
unauthorised use of SIM card services.
PIN is asked by the CONNECT sys-
tem in the following cases:
– When the system is switched on,
with SIM card already inserted into the
SIM reader and PIN lock is enabled on
that SIM card.
– When a SIM card is inserted into
the SIM reader, and the system is al-
ready on, and PIN lock is enabled on
that SIM card.
– When “TEL” button 19-fig. 1is
pushed to switch on a previously
switched off telephone module (TEL
OFF), and the SIM card is inserted into
the SIM reader, the PIN lock is enabled
on that SIM card and PIN code has nev-
er been inserted before.
– When the user tries to make a
non-emergency call and the SIM card
is inserted into the SIM reader, PIN
lock is enabled on that SIM card and
PIN code has never been inserted be-
fore.To enter the PIN code (between 4
and 8 digits) use keys 1 ÷ 12-fig. 1and
then press the knob 22-fig. 1to con-
firm. Entered digits are shown by as-
terisks on the display.
If a PIN code digit needs to be cor-
rected, press “ESC” 23-fig. 1to delete
it and write it again correctly.
IMPORTANT if the user refuses to
insert PIN, a dialog box is displayed,
saying that telephone functions will not
be available till the insertion of the cor-
rect PIN. Only emergency calls (like
police or S.O.S., etc...) will always be
enabled; in this case only input box will
be available on the display.
IMPORTANTafter the max. num-
ber of unsuccessful PIN code entries,
the card is locked. To unlock the card,
enter both the PUK code (Pin Un-
blocking Key) and the new PIN.
The network signal search begins af-
ter entering the PIN code and the dis-
play shows the main telephone func-
tion page. After connection, the display
shows the network provider’s name.INCOMING CALLS
Whichever is the system active
mode, when an external telephone call
comes in, a dialog box will be over-
lapped fig. 50on the current window
that shows the following information:
– Call from;
– Name of the calling party (if avail-
able in the directory);
– Caller phone number, if this service
is available from the network provider;
fig. 50
F0D2034g
Page 136 of 246
CONNECT Nav
135
When automatic medical advice is
enabled, to avoid accidental forward-
ing, the user has about 10 seconds,
from pressing the
•25-fig. 1key, to
interrupt the call; to block the call,
simply press “ESC” 23-fig. 1.
IMPORTANTThe medical advice
centre number cannot be set by the
user.
“ROADSIDE ASSIST.”
FUNCTION
Selecting the “ROADSIDE ASSIST.”
function on the “SOS” menu main
page using the knob 22-fig. 1and
pressing it to confirm, after about 10
seconds a message calling for road as-
sistance is sent to the Targasysop-
erator, completed with the position of
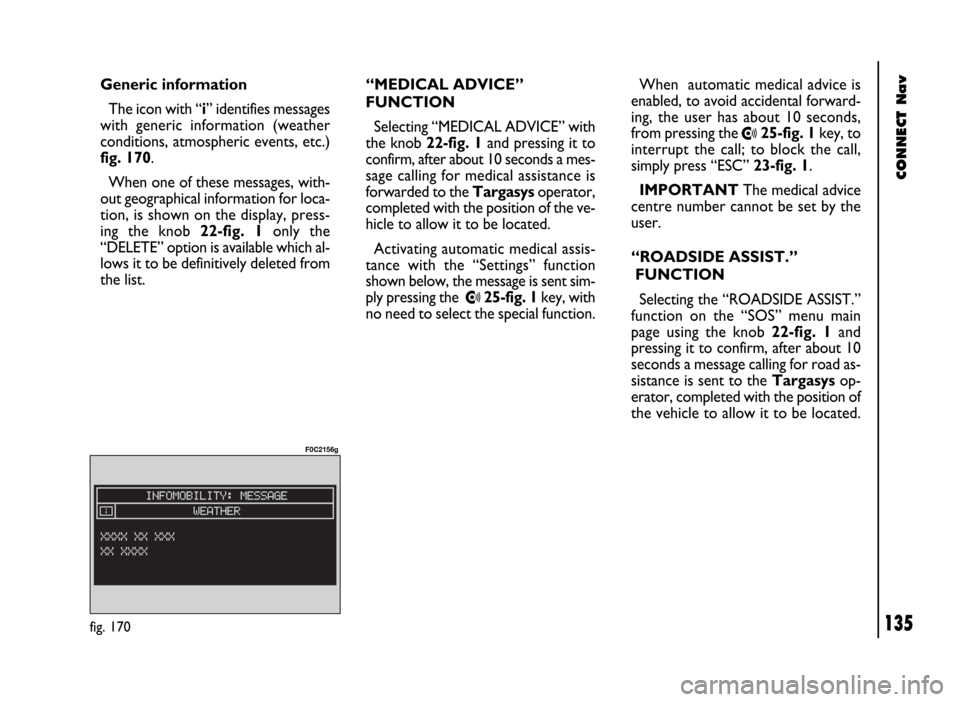
the vehicle to allow it to be located. Generic information
The icon with “i” identifies messages
with generic information (weather
conditions, atmospheric events, etc.)
fig. 170.
When one of these messages, with-
out geographical information for loca-
tion, is shown on the display, press-
ing the knob 22-fig. 1 only the
“DELETE” option is available which al-
lows it to be definitively deleted from
the list.“MEDICAL ADVICE”
FUNCTION
Selecting “MEDICAL ADVICE” with
the knob 22-fig. 1and pressing it to
confirm, after about 10 seconds a mes-
sage calling for medical assistance is
forwarded to the Targasysoperator,
completed with the position of the ve-
hicle to allow it to be located.
Activating automatic medical assis-
tance with the “Settings” function
shown below, the message is sent sim-
ply pressing the
•25-fig. 1key, with
no need to select the special function.
fig. 170
F0C2156g
Page 157 of 246
CONNECT Nav+
156
VOLUME ADJUSTMENT
To increase the volume: turn the
knob 16-fig. 1clockwise.
To lower the volume: turn the knob
16-fig. 1counter-clockwise.
During adjustment, the volume lev-
el is shown graphically on the display
(only in the main menu of audio
sources).
IMPORTANTThe volume of
PTY31 Alarm/Traffic Announcement
(TA), telephone, telephone ringer and
voice recognition can be adjusted sep-
arately.
Automatic volume lowering
during phone calls
During phone calls, the radio volume
is turned down automatically and the
screen shows the telephone symbol.MUTE function (turning down
the audio volume)
To turn off the volume of the audio
system (Radio, CD), with any operat-
ing mode on (MAIN, NAV, TRIP),
keep the button 18-fig. 1pressed; this
way the radio turns off and the display
shows the wording “Audio OFF”. To
turn the radio on again, briefly press
the button 18-fig. 1, thereby turning
the audio function on again with the
corresponding screen.
NAV MUTE function (excluding
navigator voice messages)
To turn off the navigator voice in-
structions keep the “NAV” key
pressed 20-fig. 1. The volume will
lower gradually (Soft Mute function)
and the display will show the word-
ing “NAV MUTE”.
Too high a volume may be
a danger for the driver and
for other persons in the traffic. The
volume should therefore always be
adjusted in such a way as to still be
able to hear the noises in the sur-
rounding environment (for example
horns, ambulances, police cars,
etc.).
WARNING
Page 168 of 246

CONNECT Nav+
167
MODEM (data interface)
This function enables to connect an
external device (e.g.: portable com-
puter) to the CONNECT Nav+ that
in this case will act as a modem. To im-
plement such configuration the link be-
tween the external device and the
CONNECT Nav+ connection (to be
found in central position under the
dashboard) shall be performed using
the cable provided with the system.
The max. data transmission speed is
that provided for the cellular tele-
phone mode (TEL) and is equal to 9.6
Kbps, as established by the commu-
nication with GSM cell network.
During data transmission (modem
function on), the CONNECT Nav+
condition is the following:
– telephone mode off (TEL-OFF);
– incoming calls blocked;– call forwarding blocked;
– navigator (NAV) function can be
activated; if navigation is on data trans-
mission can be slow;
– all audio functions (radio, CD) can
be activated
– emergency call can be forwarded
by pressing •25-fig. 1.IMPORTANTThe modem func-
tion cannot be activated during a call.
IMPORTANTPress button •to
abort the modem function; the system
will restore the GSM telephone mode
for the selected function and will re-
quest to enter the PIN code; data ex-
changed during transmission will be
lost (unless data back-up have been
performed by user’s computer appli-
cations).
The modem function will not be re-
stored automatically by the system
when the emergency or service call is
over. To restore it repeat the proce-
dure from the beginning.
Page 189 of 246
CONNECT Nav+
188
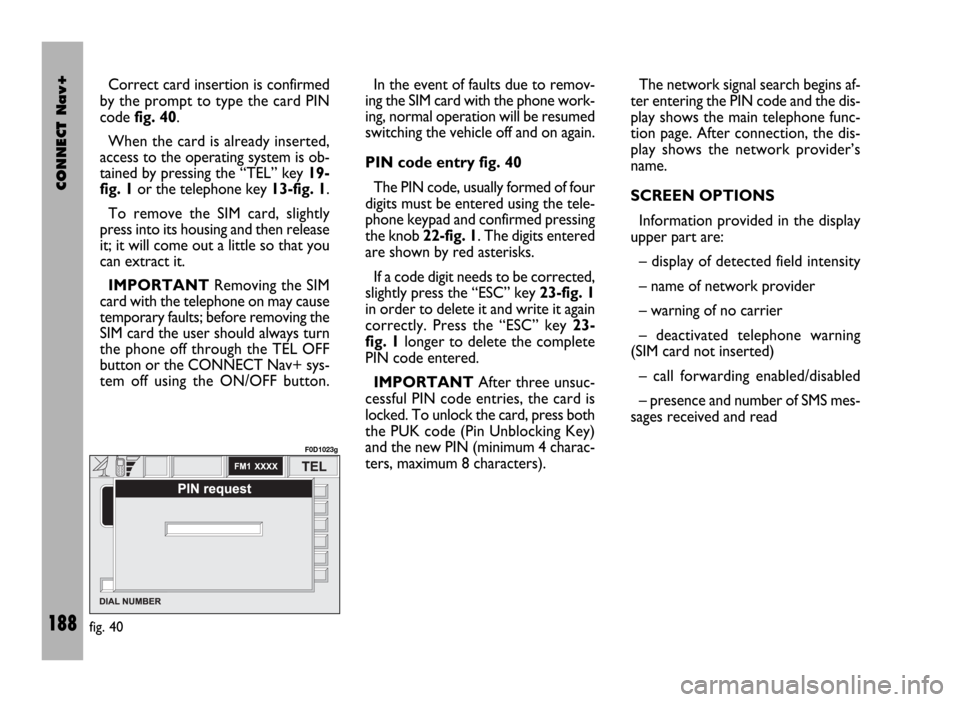
Correct card insertion is confirmed
by the prompt to type the card PIN
code fig. 40.
When the card is already inserted,
access to the operating system is ob-
tained by pressing the “TEL” key 19-
fig. 1or the telephone key 13-fig. 1.
To remove the SIM card, slightly
press into its housing and then release
it; it will come out a little so that you
can extract it.
IMPORTANTRemoving the SIM
card with the telephone on may cause
temporary faults; before removing the
SIM card the user should always turn
the phone off through the TEL OFF
button or the CONNECT Nav+ sys-
tem off using the ON/OFF button.In the event of faults due to remov-
ing the SIM card with the phone work-
ing, normal operation will be resumed
switching the vehicle off and on again.
PIN code entry fig. 40
The PIN code, usually formed of four
digits must be entered using the tele-
phone keypad and confirmed pressing
the knob 22-fig. 1. The digits entered
are shown by red asterisks.
If a code digit needs to be corrected,
slightly press the “ESC” key 23-fig. 1
in order to delete it and write it again
correctly. Press the “ESC” key 23-
fig. 1longer to delete the complete
PIN code entered.
IMPORTANTAfter three unsuc-
cessful PIN code entries, the card is
locked. To unlock the card, press both
the PUK code (Pin Unblocking Key)
and the new PIN (minimum 4 charac-
ters, maximum 8 characters).The network signal search begins af-
ter entering the PIN code and the dis-
play shows the main telephone func-
tion page. After connection, the dis-
play shows the network provider’s
name.
SCREEN OPTIONS
Information provided in the display
upper part are:
– display of detected field intensity
– name of network provider
– warning of no carrier
– deactivated telephone warning
(SIM card not inserted)
– call forwarding enabled/disabled
– presence and number of SMS mes-
sages received and read
fig. 40
F0D1023g