2002 FIAT DUCATO 244 length
[x] Cancel search: lengthPage 9 of 246
CONNECT Nav
8
– Never use chemical products for
cleaning (e.g. spray cans, antistatics or
thinners) as they might damage the
surface of Compact Discs.
– After listening to them put Com-
pact Discs back in their boxes to avoid
marking or scoring which could cause
skipping when playing.
– Do not expose Compact Discs to
direct sunlight, high temperatures or
damp for prolonged lengths of time to
prevent them from bending.
– Do not stick labels or write on the
recorded surface of Compact Discs.
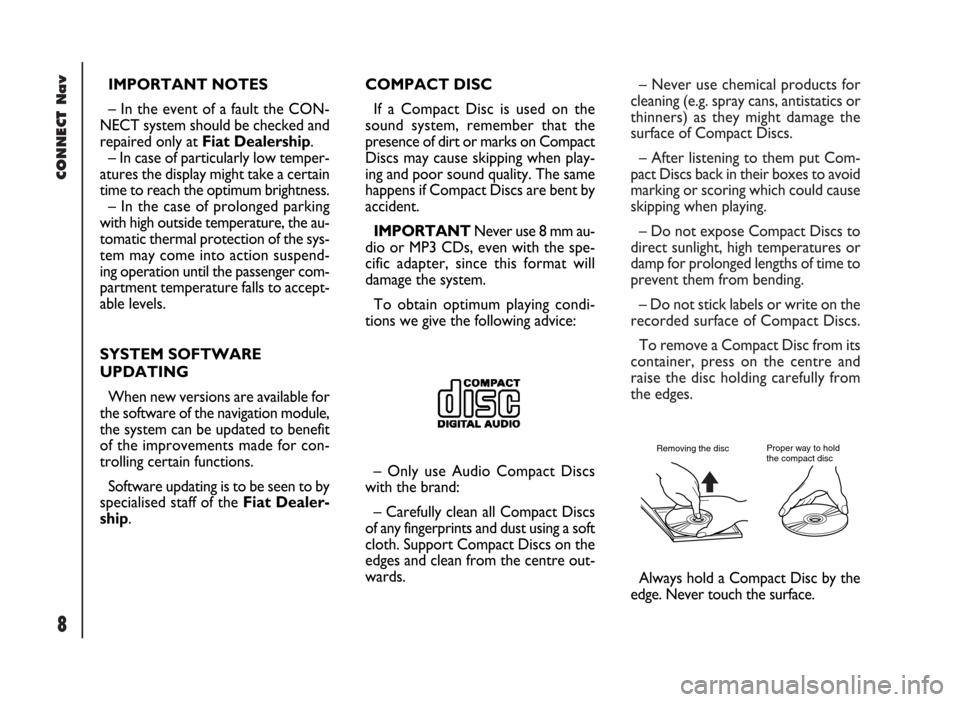
To remove a Compact Disc from its
container, press on the centre and
raise the disc holding carefully from
the edges.
Proper way to hold
the compact discRemoving the disc
IMPORTANT NOTES
– In the event of a fault the CON-
NECT system should be checked and
repaired only at Fiat Dealership.
– In case of particularly low temper-
atures the display might take a certain
time to reach the optimum brightness.
– In the case of prolonged parking
with high outside temperature, the au-
tomatic thermal protection of the sys-
tem may come into action suspend-
ing operation until the passenger com-
partment temperature falls to accept-
able levels.
SYSTEM SOFTWARE
UPDATING
When new versions are available for
the software of the navigation module,
the system can be updated to benefit
of the improvements made for con-
trolling certain functions.
Software updating is to be seen to by
specialised staff of the Fiat Dealer-
ship.COMPACT DISC
If a Compact Disc is used on the
sound system, remember that the
presence of dirt or marks on Compact
Discs may cause skipping when play-
ing and poor sound quality. The same
happens if Compact Discs are bent by
accident.
IMPORTANTNever use 8 mm au-
dio or MP3 CDs, even with the spe-
cific adapter, since this format will
damage the system.
To obtain optimum playing condi-
tions we give the following advice:
– Only use Audio Compact Discs
with the brand:
– Carefully clean all Compact Discs
of any fingerprints and dust using a soft
cloth. Support Compact Discs on the
edges and clean from the centre out-
wards.
Always hold a Compact Disc by the
edge. Never touch the surface.
Page 15 of 246
CONNECT Nav
14
Voice recognition button
Button 4turns on voice recognition
as follows:
– brief press on the button: voice
recognition on/off
– prolonged press on the button:
voice message storage.
Frequency range and audio
source select button
To cyclically select the frequency
ranges and audio sources available,
briefly and repeatedly press the “SRC”
button 5.
The available frequencies and audio
sources are: FM1, FM2, FM3, LW,
MW, CD.Multifunction keys
Multifunction keys 6and 7makes it
possible to call the preset radio sta-
tions in the frequency band set and se-
lect the next or previous track when
playing a CD.
Press key 6to choose the next sta-
tions or to play the next CD track.
Press key 7to choose the previous
stations or to play the previous CD
track.Telephone button
Button 8activates the main functions
of the telephone, depending on the
conditions active when the button is
pressed and the length of the press
(short or long).
Short push:
– taking an incoming call
– sending a call to the last number di-
alled previously
– sending a call to the number dialled
using the phone keypad.
Long push:
– reject incoming call.
Page 53 of 246
CONNECT Nav
52
MP3 MODE
To guarantee optimum playing, use
top quality CDs duplicated at as low
as possible speed.
The system can recognize the type
of Compact Disc inserted.
During the reading procedure to rec-
ognize the disk the display shows
“WARNING - Reading CD. Please
wait” and then “Exploring MP3..”.
IMPORTANTNever use 8 cm au-
dio or MP3 CDs, even with the spe-
cific adapter, since this format will
damage the system.
IMPORTANTThe system builds
MP3 CD folder-organized structure of
files; folders are organized in sequence
with their own mp3 tracks (up to max.
four levels of folders/subdirectories).
Folder and file name length shall not ex-
ceed 20 characters.
Characters: blank, ‘(apostrophe), (
and )(open and closed brackets) are
not admitted in track names.When creating MP3 CD you must not
use these characters to name files oth-
erwise the system will not be able to
play it.
Since a full MP3 CD could hypotheti-
cally include thousands of MP3 files, a
999 music pieces limit is imposed by the
system. If the user inserts a MP3 CD
which has more than 999 tracks (files)
in it, then only the first 999 files will be
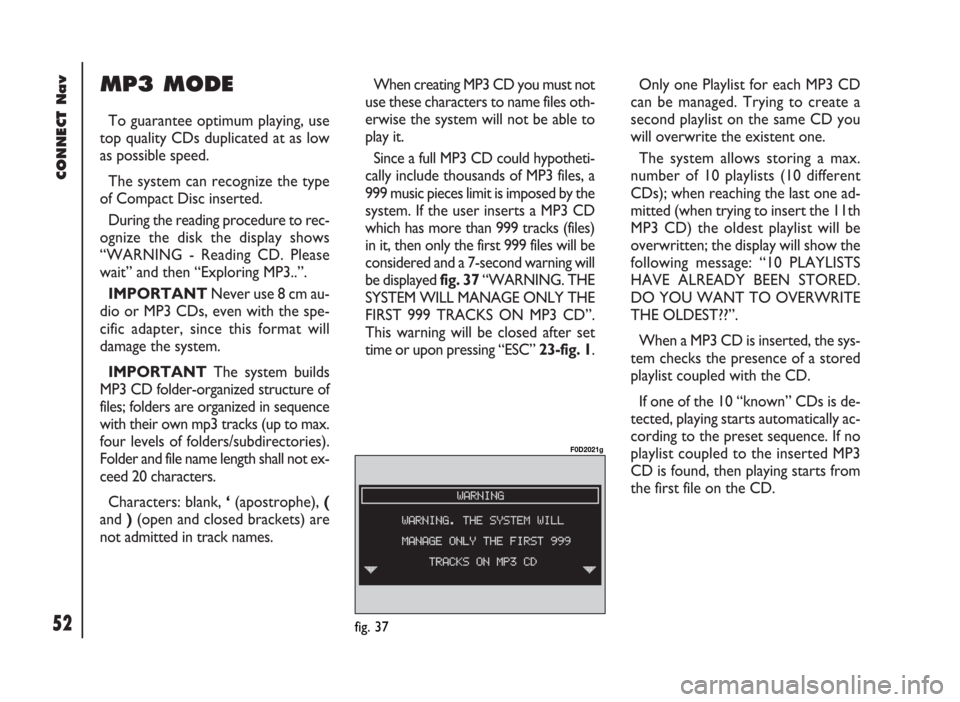
considered and a 7-second warning will
be displayed fig. 37 “WARNING. THE
SYSTEM WILL MANAGE ONLY THE
FIRST 999 TRACKS ON MP3 CD”.
This warning will be closed after set
time or upon pressing “ESC” 23-fig. 1.Only one Playlist for each MP3 CD
can be managed. Trying to create a
second playlist on the same CD you
will overwrite the existent one.
The system allows storing a max.
number of 10 playlists (10 different
CDs); when reaching the last one ad-
mitted (when trying to insert the 11th
MP3 CD) the oldest playlist will be
overwritten; the display will show the
following message: “10 PLAYLISTS
HAVE ALREADY BEEN STORED.
DO YOU WANT TO OVERWRITE
THE OLDEST??”.
When a MP3 CD is inserted, the sys-
tem checks the presence of a stored
playlist coupled with the CD.
If one of the 10 “known” CDs is de-
tected, playing starts automatically ac-
cording to the preset sequence. If no
playlist coupled to the inserted MP3
CD is found, then playing starts from
the first file on the CD.
fig. 37
F0D2021g
Page 65 of 246
CONNECT Nav
64
To accept the call, proceed as
follows:
– short push on button ò13-fig. 1;
dialog box disappears and ring stops,
the display shows the string “call in
progress”.
To close the conversation,
proceed as follows:
– press button ò13-fig. 1; the sys-
tem returns automatically to the pre-
vious mode and the display shows the
relevant status.
To refuse the call, proceed as
follows:
– long push on button ò13-fig. 1;
dialog box disappears and ring stops.
In this case the screen will remain the
one shown before the incoming call.
IMPORTANT: dialog box disap-
pears and ring stops also if the line is
unwillingly lost.OUTGOING CALLS
To start a call, proceed as
follows:
– enter the telephone mode as pre-
viously described;
– dial the required number using the
multifunction keys 1 ÷ 12-fig. 1;
– to enter the international prefix
(“+” char), push button “*/+” at
length;
dialled number is shown in the input
box on the display; max. 20 digits can
be input and in case there is no enough
space to keep the whole string, the in-
terface will provide a left string scroll;
– to start a call, press button ò13-
fig. 1; active screen becomes the one
shown in fig. 47.
To enter a phone number, follow
these instructions:
Press briefly one of the multifunction
keys 1 ÷ 12-fig. 1to enter the cor-
responding digit or character;More particularly keys “*” and “#”
can be used.
Press continuously button “+” to en-
ter the international prefix (“+” char);
Press continuously keys 1 ÷ 9-fig. 1
to select the corresponding frequent
number set (see paragraph “Frequent
Numbers”);
Short push on “ESC” 23-fig. 1clears
the last input digit;
Long push on “ESC” 23-fig. 1clears
all entered digits;
DIALLING A SERVICE
NUMBER
Following the instructions given in
the previous paragraph, the user can
dial service numbers (e.g.: ←#
xxxxx←) according to ETSI Standard
GSM 02.30.
Page 83 of 246

CONNECT Nav
82
MESSAGES
SMS - (Short Message Service)
“MESSAGES” function allows read-
ing and sending short messages (max-
imum length is 160 characters) by
GSM phone.
Read and sent messages are stored
into two separate boxes, which how-
ever share a common memory sec-
tion; so the sum of sent and read
stored messages must not exceed the
maximum number of allowed SMSs (it
depends on the SIM card.
Telephone module stops input of
new messages when the buffer is full
and the “DIAL” option is disabled.
In this case the display shows a string
with the following warning message:
“FURTHER MESSAGES CANNOT BE
STORED OR RECEIVED”.Selecting and confirming “MES-
SAGES” with the knob 22-fig. 1dis-
plays the screen in fig. 85with the fol-
lowing icon keys:
– DIAL
– SELECT
– CENTER NUMBER.
“DIAL”
Select and confirm “DIAL” with the
knob 22-fig. 1, the display will show
fig. 86 screen with the following op-
tions:TEXT: displays the following options
fig. 87:
– “ADD”: to add a new message us-
ing the keypad; the counter shows the
number of still available characters
fig. 88; in case of mistake, select
“DelC” to delete the last entered char-
acter or “Del” to delete the entire
string.
– “VIEW MESSAGE”: to display the
text of the message fig. 89;
– “OK”: to confirm.
fig. 85
F0D2066g
fig. 86
F0D2067g
Page 90 of 246
CONNECT Nav
89
– “REDIAL”: in case of busy line, re-
dials automatically the called number
(for a preset number of times); to stop
redialling press key 2-fig. 1at length.
– “CALL FORWARDING”: enables
or disables call divert;
– “CALL FORWARDING NO.”: al-
lows input of the phone number to
which call is diverted.
– “ENABLE CALL WAITING”: en-
ables or disables incoming call an-
nouncement;A beep will be heard to indicate an
incoming call during an active phone
conversation. To accept the incoming
call press the knob 22-fig. 1; the first
call will wait until the second conver-
sation is ended or until the first caller
hangs up the phone.
To refuse the incoming call press
“ESC” 23-fig. 1; no interference with
the active call will be generated.
– “OK”: to accept and store settings.When the user modifies the call for-
warding settings, the display shows
“WARNING! OPERATION IN
PROGRESS: PLEASE WAIT …”.
When this operation is ended, the dis-
play shows “CALL FORWARDING -
OPERATION CONCLUDED”.
Should it be impossible to modify set-
tings, the display shows “CALL FOR-
WARDING” – “OPERATION NOT
PERFORMED”.
Page 92 of 246
91
CONNECT Nav
IMPORTANT NOTES
– Accurate self-adjustment of the nav-
igation system requires approx. 100
km of travel the first time and when
tyres are changed; during this stage the
calculated position could be less accu-
rate.
– Continuous lack of grip at the
wheels (for example skidding on ice),
makes the system temporarily detect
an incorrect position.The navigation system is completely
managed by the telematic system,
therefore the only operations that may
be required are replacement of the
CD-ROM to set the map of another
area or an updated map.
Access to the navigation main func-
tions is gained by short push on
“NAV” 20-fig. 1.
A long push on the “NAV” key 20-
fig. 1turns the NAV MUTE function
on and therefore voice instructions will
be muted. To turn the NAV MUTE
function off, press again the “NAV” key
20-fig. 1at length.Each time you start the engine and se-
lect the navigation function, the display
will show the cautions for using the sys-
tem; the text displayed is as follows:
“The FIAT navigation system guides
you in traffic and helps you reach your
destination. Local traffic regulations
must take precedence over the ma-
noeuvres indicated by the navigation
system. The driver is responsible for
operating the vehicle and observing all
traffic regulations”.
This page will not be displayed as long
as the ignition key is to MAR.
Page 147 of 246
CONNECT Nav+
146
IMPORTANT NOTES
– In the event of a fault the CON-
NECT Nav+ should be checked and
repaired only by Fiat Dealership.
– In the case of particularly low tem-
peratures the display might take a cer-
tain time to reach optimum brightness.
– In the case of prolonged parking
with high outside temperature, the au-
tomatic thermal protection of the sys-
tem may come into action suspend-
ing operation until the passenger com-
partment temperature falls to accept-
able levels.SYSTEM SOFTWARE
UPDATING
When new versions are available for
the software of the navigation module
of the CONNECT Nav+, the system
can be updated to benefit of the im-
provements made for controlling cer-
tain functions. Software updating is to
be seen to by specialised staff of the
Fiat Dealership.
COMPACT DISC
If a Compact Disc is used on the
sound system, remember that the
presence of dirt or marks on Compact
Discs may cause skipping when play-
ing and poor sound quality. The same
happens if Compact Discs are bent by
accident.
IMPORTANTNever use 8 mm au-
dio CDs, even with the specific
adapter, since this format will damage
the system.To obtain optimum playing condi-
tions we give the following advice:
– Only use Audio Compact Discs
with the brand:
– Carefully clean all Compact Discs
of any fingerprints and dust using a soft
cloth. Support Compact Discs on the
edges and clean from the centre out-
wards.
– Never use chemical products for
cleaning (e.g. spray cans, antistatics or
thinners) as they might damage the
surface of Compact Discs.
– After listening to them put Com-
pact Discs back in their boxes to avoid
marking or scoring which could cause
skipping when playing.
– Do not expose Compact Discs to
direct sunlight, high temperatures or
damp for prolonged lengths of time to
prevent them from bending.
– Do not stick labels or write on the
recorded surface of Compact Discs.
Be careful not to knock the
display with pointed or
hard objects and avoid touching
with the hands. Do not press on the
display when cleaning and in the
event of breakage do not touch the
fluid that could come out. In case
of contact with the skin wash im-
mediately with water and soap.
WARNING