Page 83 of 246

CONNECT Nav
82
MESSAGES
SMS - (Short Message Service)
“MESSAGES” function allows read-
ing and sending short messages (max-
imum length is 160 characters) by
GSM phone.
Read and sent messages are stored
into two separate boxes, which how-
ever share a common memory sec-
tion; so the sum of sent and read
stored messages must not exceed the
maximum number of allowed SMSs (it
depends on the SIM card.
Telephone module stops input of
new messages when the buffer is full
and the “DIAL” option is disabled.
In this case the display shows a string
with the following warning message:
“FURTHER MESSAGES CANNOT BE
STORED OR RECEIVED”.Selecting and confirming “MES-
SAGES” with the knob 22-fig. 1dis-
plays the screen in fig. 85with the fol-
lowing icon keys:
– DIAL
– SELECT
– CENTER NUMBER.
“DIAL”
Select and confirm “DIAL” with the
knob 22-fig. 1, the display will show
fig. 86 screen with the following op-
tions:TEXT: displays the following options
fig. 87:
– “ADD”: to add a new message us-
ing the keypad; the counter shows the
number of still available characters
fig. 88; in case of mistake, select
“DelC” to delete the last entered char-
acter or “Del” to delete the entire
string.
– “VIEW MESSAGE”: to display the
text of the message fig. 89;
– “OK”: to confirm.
fig. 85
F0D2066g
fig. 86
F0D2067g
Page 84 of 246
CONNECT Nav
83
TELEPHONE NUMBER: displays the
following options:
– “MANUAL INPUT” fig. 90 : to en-
ter the phone number through the
keypad;
– “INPUT FROM DIRECTORY”: lets
the user choose a number from the di-
rectory instead of direct number di-alling (see paragraph “DIRECTORY”
for further details);
“STORE”: (enabled if message text
is present) stores the message for lat-
er delivery. When the buffer is full, the
display will show the message “MEM-
ORY FULL”.SEND: (enabled only if phone num-
ber is present) sends the message; the
display shows “USER INFORMA-
TION” – “ PLEASE WAIT..”; after
sending the message successfully the
display will show “MESSAGE SENT”
otherwise “ERROR IN SENDING
MESSAGE” will be displayed.
fig. 87
F0D2068g
fig. 88
F0D2069g
fig. 90
F0D2071g
fig. 89
F0D2070g
Page 86 of 246

When selecting types 3or 4from the
above list, the display will show the
screen in fig. 93, with the following
options:
– “VIEW MESSAGE”
– “DELETE”
– “CALL”
– “ANSWER”
Selecting and confirming “VIEW MES-
SAGE” rotating and pressing the knob
22-fig. 1will display the selected mes-
sage. Selecting and confirming “DELETE”
rotating and pressing the knob 22-
fig. 1activates selected message dele-
tion. A confirmation dialog is shown
for user confirmation; pressing the
knob 22-fig. 1starts message deletion
from SIM card.
Selecting and confirming “CALL” ro-
tating and pressing the knob 22-fig. 1
starts a call to the sender of the mes-
sage; the display shows “CALL IN
PROGRESS”.
Selecting and confirming “ANSWER”
rotating and pressing the knob 22-fig. 1
lets the user reply to the received mes-
sage with a new SMS.
Press “ESC” 23-fig. 1to quit and go
back to fig. 92screen.“CENTER NUMBER”
Selecting “CENTER NUMBER”
(provider phone number) using the
keypad (keys 0-9, +, *, #) rotating the
knob 22-fig. 1and pressing it to con-
firm, the user can set the service
Provider phone number.
CONNECT Nav
85fig. 93
F0D2074g
Page 90 of 246
CONNECT Nav
89
– “REDIAL”: in case of busy line, re-
dials automatically the called number
(for a preset number of times); to stop
redialling press key 2-fig. 1at length.
– “CALL FORWARDING”: enables
or disables call divert;
– “CALL FORWARDING NO.”: al-
lows input of the phone number to
which call is diverted.
– “ENABLE CALL WAITING”: en-
ables or disables incoming call an-
nouncement;A beep will be heard to indicate an
incoming call during an active phone
conversation. To accept the incoming
call press the knob 22-fig. 1; the first
call will wait until the second conver-
sation is ended or until the first caller
hangs up the phone.
To refuse the incoming call press
“ESC” 23-fig. 1; no interference with
the active call will be generated.
– “OK”: to accept and store settings.When the user modifies the call for-
warding settings, the display shows
“WARNING! OPERATION IN
PROGRESS: PLEASE WAIT …”.
When this operation is ended, the dis-
play shows “CALL FORWARDING -
OPERATION CONCLUDED”.
Should it be impossible to modify set-
tings, the display shows “CALL FOR-
WARDING” – “OPERATION NOT
PERFORMED”.
Page 92 of 246
91
CONNECT Nav
IMPORTANT NOTES
– Accurate self-adjustment of the nav-
igation system requires approx. 100
km of travel the first time and when
tyres are changed; during this stage the
calculated position could be less accu-
rate.
– Continuous lack of grip at the
wheels (for example skidding on ice),
makes the system temporarily detect
an incorrect position.The navigation system is completely
managed by the telematic system,
therefore the only operations that may
be required are replacement of the
CD-ROM to set the map of another
area or an updated map.
Access to the navigation main func-
tions is gained by short push on
“NAV” 20-fig. 1.
A long push on the “NAV” key 20-
fig. 1turns the NAV MUTE function
on and therefore voice instructions will
be muted. To turn the NAV MUTE
function off, press again the “NAV” key
20-fig. 1at length.Each time you start the engine and se-
lect the navigation function, the display
will show the cautions for using the sys-
tem; the text displayed is as follows:
“The FIAT navigation system guides
you in traffic and helps you reach your
destination. Local traffic regulations
must take precedence over the ma-
noeuvres indicated by the navigation
system. The driver is responsible for
operating the vehicle and observing all
traffic regulations”.
This page will not be displayed as long
as the ignition key is to MAR.
Page 93 of 246
92
CONNECT Nav
NAVIGATION CD-
ROM PLAYER
The navigator CD-ROM player 28-
fig. 1is located on the CONNECT
front panel and it is the same used for
the audio CD. Therefore, it is not pos-
sible to use the player for audio and
navigation CD-ROM at the same time:
however, the navigation system can
operate partially even without insert-
ing the navigation CD-ROM.
In this case, when pressing key
˚26-
fig. 1to remove the CD-ROM with
navigation function engaged (to then
insert an audio CD), the following two
cases may occur:– no route is calculated: only the ve-
hicle position is displayed on the map;
– the route previously calculated is
still valid, the system provides the user
with any instruction to reach the des-
tination.
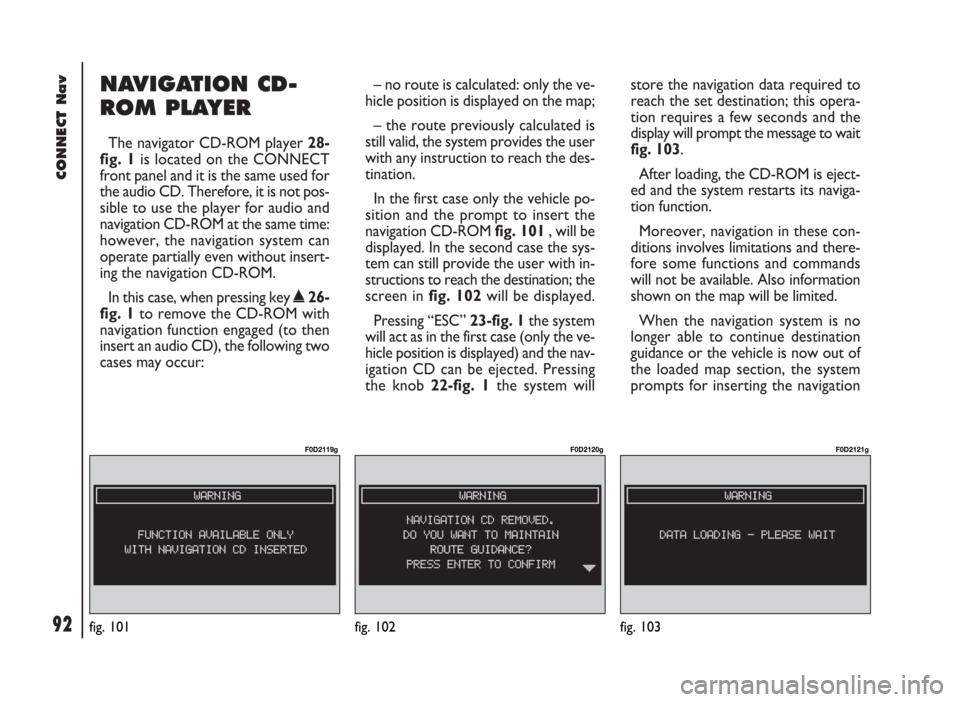
In the first case only the vehicle po-
sition and the prompt to insert the
navigation CD-ROM fig. 101, will be
displayed. In the second case the sys-
tem can still provide the user with in-
structions to reach the destination; the
screen in fig. 102will be displayed.
Pressing “ESC” 23-fig. 1the system
will act as in the first case (only the ve-
hicle position is displayed) and the nav-
igation CD can be ejected. Pressing
the knob 22-fig. 1the system willstore the navigation data required to
reach the set destination; this opera-
tion requires a few seconds and the
display will prompt the message to wait
fig. 103.
After loading, the CD-ROM is eject-
ed and the system restarts its naviga-
tion function.
Moreover, navigation in these con-
ditions involves limitations and there-
fore some functions and commands
will not be available. Also information
shown on the map will be limited.
When the navigation system is no
longer able to continue destination
guidance or the vehicle is now out of
the loaded map section, the system
prompts for inserting the navigation
fig. 101
F0D2119g
fig. 102
F0D2120g
fig. 103
F0D2121g
Page 99 of 246
98
CONNECT Nav
VOICE RECOGNITION
(where provided)
“VOICE RECOGNITION” allows to
associate a voice sample to a destina-
tion stored in the directory. Selecting
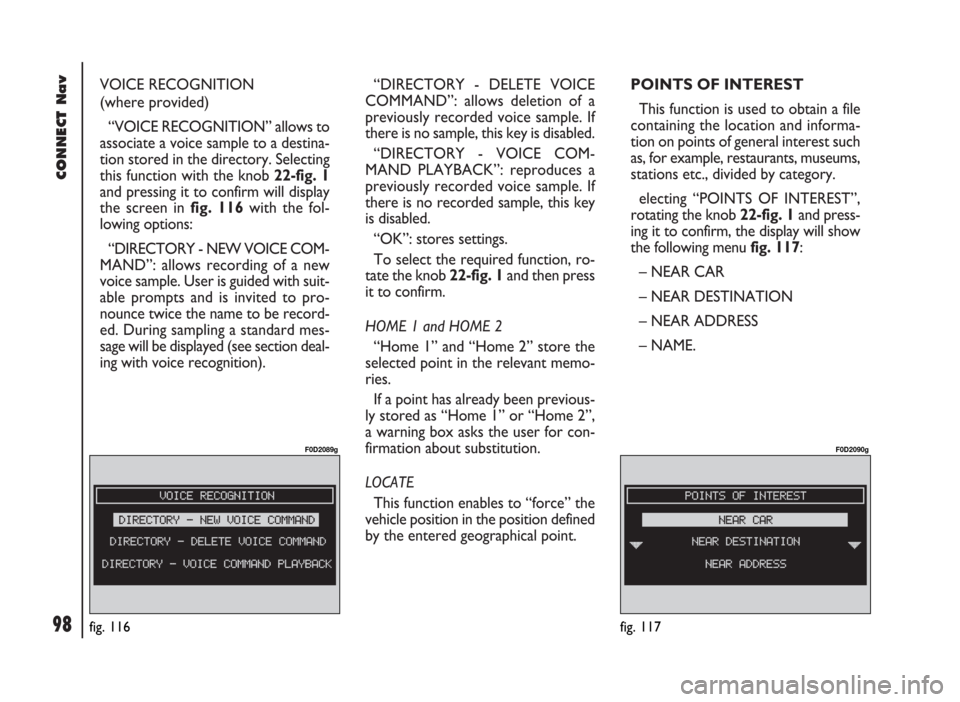
this function with the knob 22-fig. 1
and pressing it to confirm will display
the screen in fig. 116with the fol-
lowing options:
“DIRECTORY - NEW VOICE COM-
MAND”: allows recording of a new
voice sample. User is guided with suit-
able prompts and is invited to pro-
nounce twice the name to be record-
ed. During sampling a standard mes-
sage will be displayed (see section deal-
ing with voice recognition). “DIRECTORY - DELETE VOICE
COMMAND”: allows deletion of a
previously recorded voice sample. If
there is no sample, this key is disabled.
“DIRECTORY - VOICE COM-
MAND PLAYBACK”: reproduces a
previously recorded voice sample. If
there is no recorded sample, this key
is disabled.
“OK”: stores settings.
To select the required function, ro-
tate the knob 22-fig. 1and then press
it to confirm.
HOME 1 and HOME 2
“Home 1” and “Home 2” store the
selected point in the relevant memo-
ries.
If a point has already been previous-
ly stored as “Home 1” or “Home 2”,
a warning box asks the user for con-
firmation about substitution.
LOCATE
This function enables to “force” the
vehicle position in the position defined
by the entered geographical point.POINTS OF INTEREST
This function is used to obtain a file
containing the location and informa-
tion on points of general interest such
as, for example, restaurants, museums,
stations etc., divided by category.
electing “POINTS OF INTEREST”,
rotating the knob 22-fig. 1and press-
ing it to confirm, the display will show
the following menu fig. 117:
– NEAR CAR
– NEAR DESTINATION
– NEAR ADDRESS
– NAME.
fig. 117
F0D2090g
fig. 116
F0D2089g
Page 100 of 246
99
CONNECT Nav
Near car
“NEAR CAR” allows the user to find
the services near the current vehicle
position as follows:
– “CATEGORY”: allows service cat-
egory (hotels, restaurants,..) selection
in the system data-base using the key-
pad.
– “LIST OF SERVICES”: will provide
the list of available services for the
specified category. The list is scrolled
by rotating the knob 22-fig. 1and
pressing it to confirm.
The list shows the service name, dis-
tance and direction.
– “INFO”: to get information on the
selected service with respect to the
chosen point of interest.
– “OK”: to use the point of interest.Near destination
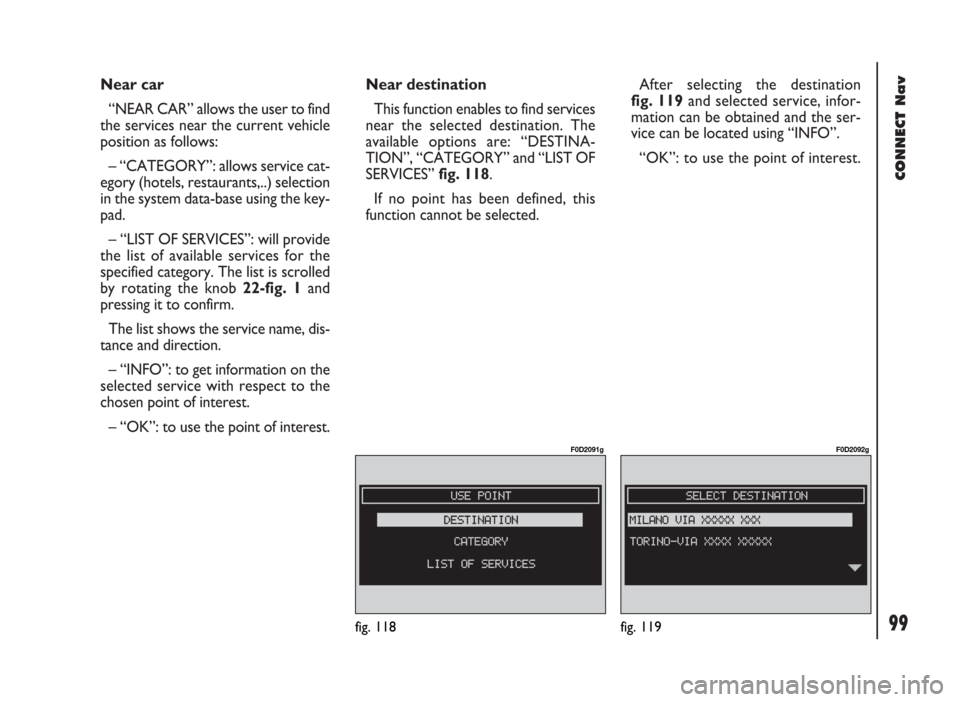
This function enables to find services
near the selected destination. The
available options are: “DESTINA-
TION”, “CATEGORY” and “LIST OF
SERVICES” fig. 118.
If no point has been defined, this
function cannot be selected.After selecting the destination
fig. 119and selected service, infor-
mation can be obtained and the ser-
vice can be located using “INFO”.
“OK”: to use the point of interest.
fig. 118
F0D2091g
fig. 119
F0D2092g