Page 19 of 246
CONNECT Nav
18
MAIN MODE
The MAIN mode is activated by
pushing the “MAIN” button 17-fig. 1
on the front panel.
It is possible to access the Set-up
menu from the MAIN mode.
To access the Set-up menu, display
the page MAIN then push on knob 22-
fig.1. Set-up functions will be ac-
cessed (refer to the SET-UP chapter).
Depress several times “ESC” 23-
fig.1 for returning to the display of
MAIN.STANDARD INFORMATION
The display shows information rele-
vant to the main system modules:
– AUDIO
– TELEPHONE
– NAVIGATOR
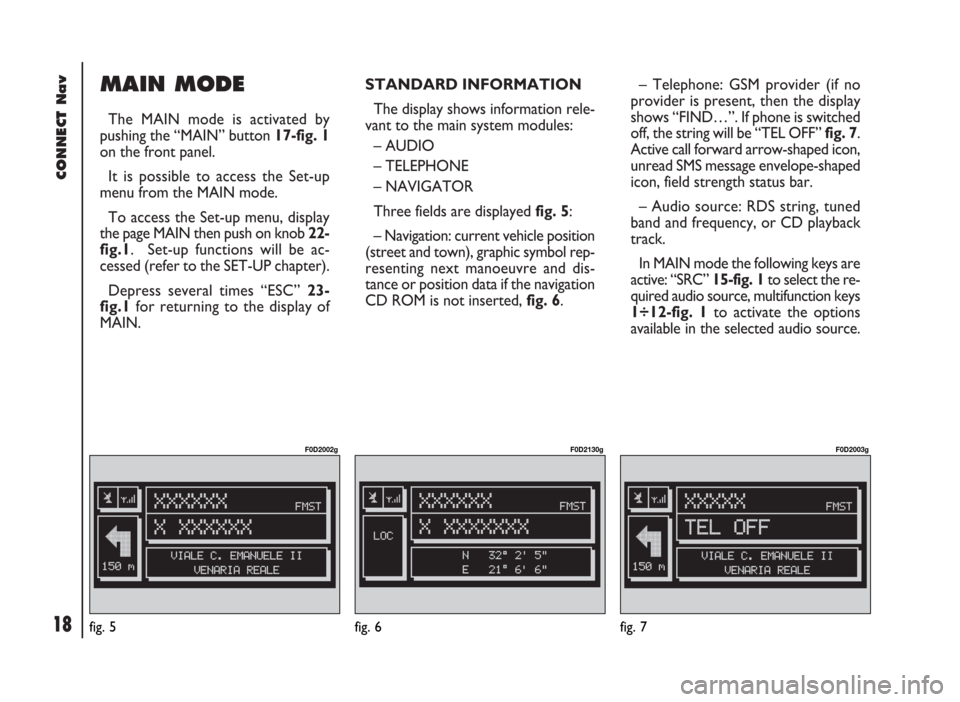
Three fields are displayed fig. 5:
– Navigation: current vehicle position
(street and town), graphic symbol rep-
resenting next manoeuvre and dis-
tance or position data if the navigation
CD ROM is not inserted, fig. 6.– Telephone: GSM provider (if no
provider is present, then the display
shows “FIND…”. If phone is switched
off, the string will be “TEL OFF” fig. 7.
Active call forward arrow-shaped icon,
unread SMS message envelope-shaped
icon, field strength status bar.
– Audio source: RDS string, tuned
band and frequency, or CD playback
track.
In MAIN mode the following keys are
active: “SRC” 15-fig. 1to select the re-
quired audio source, multifunction keys
1÷12-fig. 1to activate the options
available in the selected audio source.
fig. 5
F0D2002g
fig. 6
F0D2130g
fig. 7
F0D2003g
Page 20 of 246
CONNECT Nav
19
“SETUP” FUNCTION
The SETUP mode enables to set dif-
ferent vehicle and CONNECT system
operating modes and parameters.
To enter the SETUP mode, press the
MAIN button 17-fig. 1and then the
knob 22-fig. 1, the display will show
the following menu fig. 8:
– LANGUAGE
– CONNECT.
fig. 8
F0D2161g
Select LANGUAGE by rotating knob
22-fig. 1and confirm by depressing it.
Languages available with system will be
displayed: ITALIAN, GERMAN, ENG-
LISH, FRENCH, PORTUGUESE and
DUTCH; select the required language
by turning knob 22-fig 1, then depress
it to confirm the operation.WARNINGChange of language will
involve both the written text and the
language of vocal commands.
WARNINGBefore starting language
change procedure, be sure that the
provided SETUP CD is available and
ready to be used.
WARNINGTo change the language
the ignition key shall be at MARand
the system shall be on.
Page 22 of 246
CONNECT Nav
21
3)“NIGHTTIME BRIGHTNESS”:
enables to adjust the display brightness
in night mode. To perform the ad-
justment, select and confirm this op-
tion by rotating and pressing the knob
22-fig. 1. Rotate the knob 22-fig. 1
clockwise to increase brightness and
counterclockwise to decrease it.
4)“NIGHTTIME CONTRAST”: to
adjust contrast in nighttime brightness
mode. To perform the adjustment, se-
lect and confirm this option by rotat-
ing and pressing the knob 22-fig. 1.
Rotate the knob 22-fig. 1clockwise
to increase contrast and counter-
clockwise to decrease it.5)“MODE, DIMMING, CON-
TRAST”: selecting and confirming this
option by rotating and pressing the
knob 22-fig. 1, the following settings
are possible:
“AUTOMATIC”: enables to adjust
automatically the day/night mode de-
pending on vehicle lights switching
on/off.
“DAY”: activates day mode.
“NIGHT”: activates night mode.
After selecting the required setting,
press the knob 22-fig. 1to confirm.
If the automatic mode is “DAY” on-
ly day adjustment is displayed and the
night one is deactivated.
If the automatic mode is “NIGHT”
only night adjustment is displayed and
the day one is deactivated.POWER OFF
Select and confirm “POWER OFF”
by rotating and pressing the knob 22-
fig. 1to access the type of setting that
determines CONNECT switching off
(dependent on or independent of ig-
nition key).
Possible settings, only with ignition
key at MAR, are the following:
– “key-dependent auto-off”
– “key-independent auto-off”
Current activated setting will be high-
lighted.
Select and confirm the required set-
ting by rotating and pressing the knob
22-fig. 1.
Page 28 of 246
CONNECT Nav
27fig. 16
F0D2168g
fig. 17
F0D2166g
fig. 18
F0D2167g
– turn knob 22-fig. 1to select the
required value, then press to confirm;
– turn knob 22-fig. 1to select “VE-
HICLE ID” then press to confirm; the
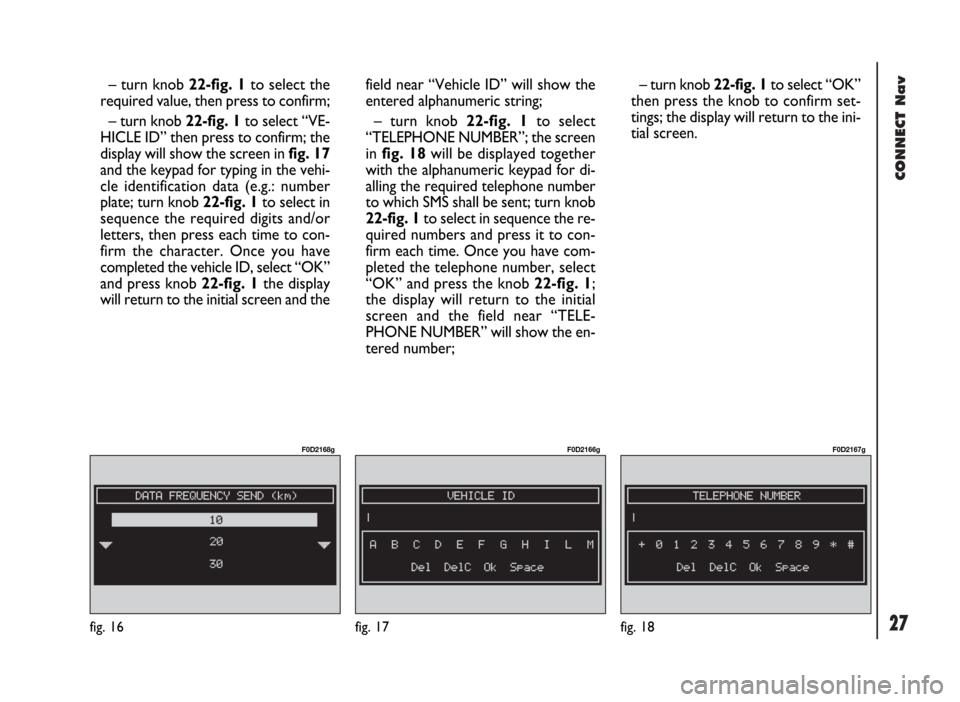
display will show the screen in fig. 17
and the keypad for typing in the vehi-
cle identification data (e.g.: number
plate; turn knob 22-fig. 1to select in
sequence the required digits and/or
letters, then press each time to con-
firm the character. Once you have
completed the vehicle ID, select “OK”
and press knob 22-fig. 1the display
will return to the initial screen and thefield near “Vehicle ID” will show the
entered alphanumeric string;
– turn knob 22-fig. 1to select
“TELEPHONE NUMBER”; the screen
in fig. 18will be displayed together
with the alphanumeric keypad for di-
alling the required telephone number
to which SMS shall be sent; turn knob
22-fig. 1to select in sequence the re-
quired numbers and press it to con-
firm each time. Once you have com-
pleted the telephone number, select
“OK” and press the knob 22-fig. 1;
the display will return to the initial
screen and the field near “TELE-
PHONE NUMBER” will show the en-
tered number;– turn knob 22-fig. 1to select “OK”
then press the knob to confirm set-
tings; the display will return to the ini-
tial screen.
Page 30 of 246
29
CONNECT Nav
The audio system is turned on by
pressing briefly the “AUDIO” but-
ton18-fig. 1which displays the main
functions of the radio.
Keeping the “AUDIO” button 18-
fig. 1, pressed longer, with the audio
system on and any operating mode ac-
tive, the “stand-by” mode is switched
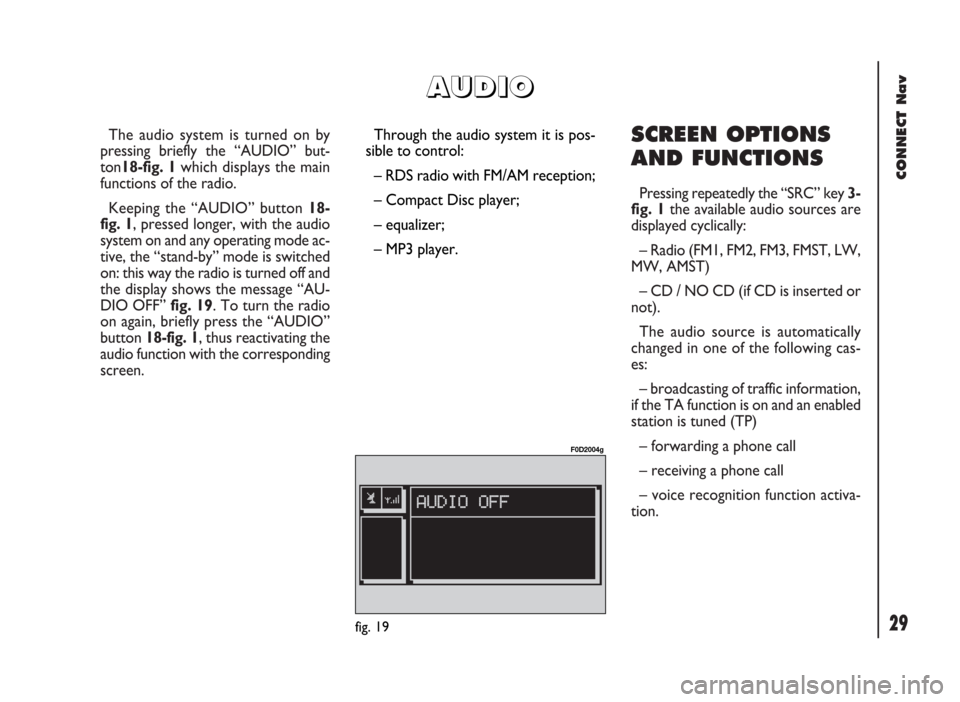
on: this way the radio is turned off and
the display shows the message “AU-
DIO OFF” fig. 19. To turn the radio
on again, briefly press the “AUDIO”
button 18-fig. 1, thus reactivating the
audio function with the corresponding
screen. SCREEN OPTIONS
AND FUNCTIONS
Pressing repeatedly the “SRC” key 3-
fig. 1the available audio sources are
displayed cyclically:
– Radio (FM1, FM2, FM3, FMST, LW,
MW, AMST)
– CD / NO CD (if CD is inserted or
not).
The audio source is automatically
changed in one of the following cas-
es:
– broadcasting of traffic information,
if the TA function is on and an enabled
station is tuned (TP)
– forwarding a phone call
– receiving a phone call
– voice recognition function activa-
tion.
A A
U U
D D
I I
O O
Through the audio system it is pos-
sible to control:
– RDS radio with FM/AM reception;
– Compact Disc player;
– equalizer;
– MP3 player.
fig. 19
F0D2004g
Page 31 of 246
CONNECT Nav
30
RADIO MODE
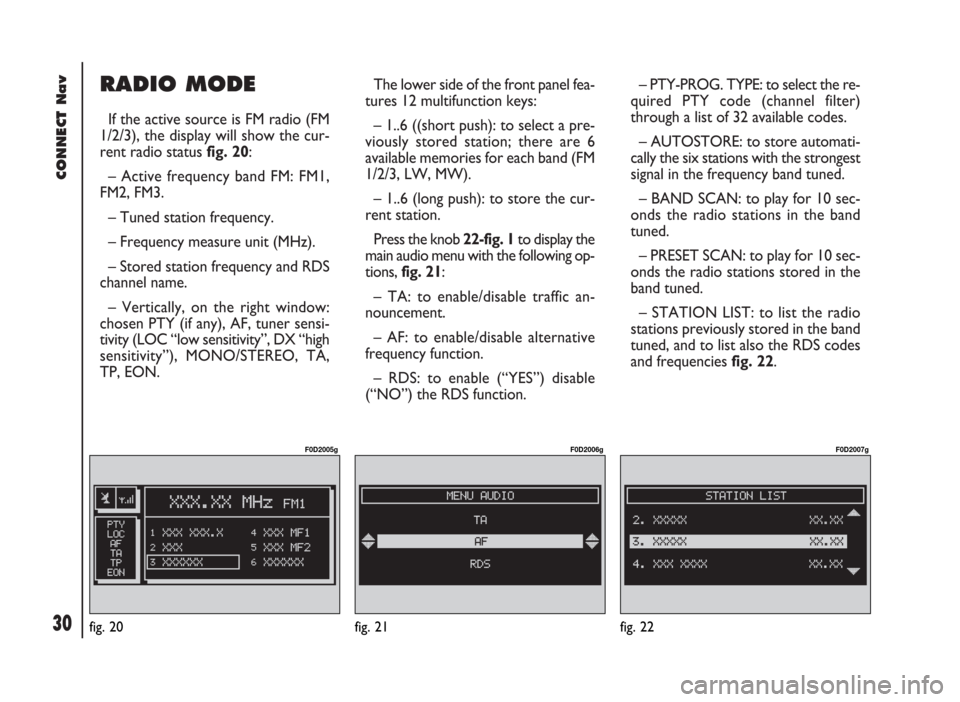
If the active source is FM radio (FM
1/2/3), the display will show the cur-
rent radio status fig. 20:
– Active frequency band FM: FM1,
FM2, FM3.
– Tuned station frequency.
– Frequency measure unit (MHz).
– Stored station frequency and RDS
channel name.
– Vertically, on the right window:
chosen PTY (if any), AF, tuner sensi-
tivity (LOC “low sensitivity”, DX “high
sensitivity”), MONO/STEREO, TA,
TP, EON.The lower side of the front panel fea-
tures 12 multifunction keys:
– 1..6 ((short push): to select a pre-
viously stored station; there are 6
available memories for each band (FM
1/2/3, LW, MW).
– 1..6 (long push): to store the cur-
rent station.
Press the knob 22-fig. 1to display the
main audio menu with the following op-
tions, fig. 21:
– TA: to enable/disable traffic an-
nouncement.
– AF: to enable/disable alternative
frequency function.
– RDS: to enable (“YES”) disable
(“NO”) the RDS function.– PTY-PROG. TYPE: to select the re-
quired PTY code (channel filter)
through a list of 32 available codes.
– AUTOSTORE: to store automati-
cally the six stations with the strongest
signal in the frequency band tuned.
– BAND SCAN: to play for 10 sec-
onds the radio stations in the band
tuned.
– PRESET SCAN: to play for 10 sec-
onds the radio stations stored in the
band tuned.
– STATION LIST: to list the radio
stations previously stored in the band
tuned, and to list also the RDS codes
and frequencies fig. 22.
fig. 20
F0D2005g
fig. 21
F0D2006g
fig. 22
F0D2007g
Page 32 of 246
31
CONNECT Nav
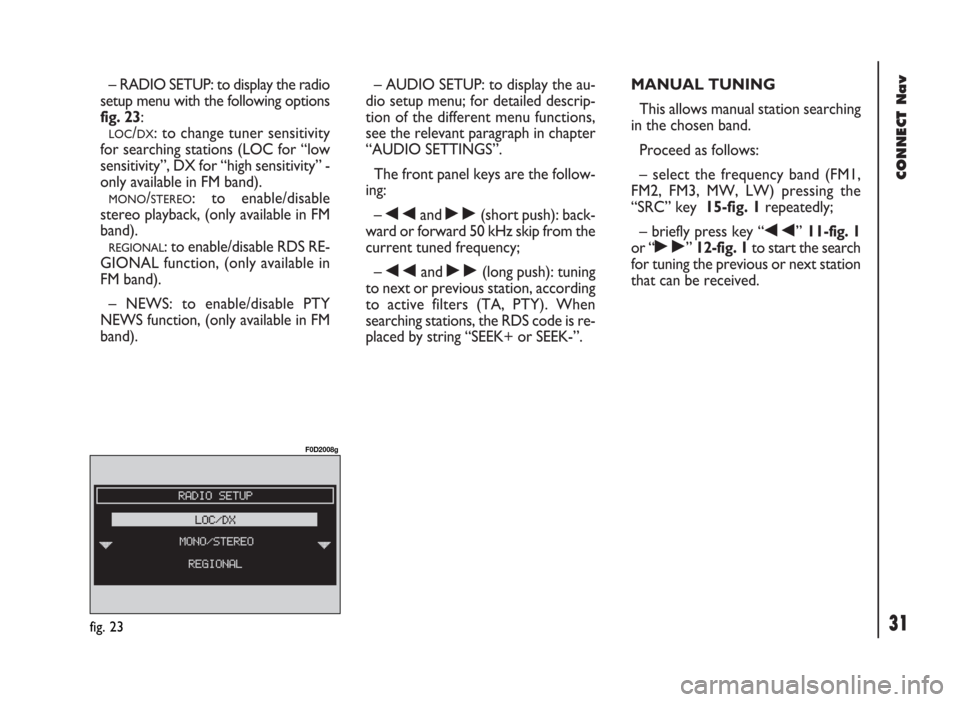
– RADIO SETUP: to display the radio
setup menu with the following options
fig. 23:
LOC/DX: to change tuner sensitivity
for searching stations (LOC for “low
sensitivity”, DX for “high sensitivity” -
only available in FM band).
MONO/STEREO: to enable/disable
stereo playback, (only available in FM
band).
REGIONAL: to enable/disable RDS RE-
GIONAL function, (only available in
FM band).
– NEWS: to enable/disable PTY
NEWS function, (only available in FM
band).– AUDIO SETUP: to display the au-
dio setup menu; for detailed descrip-
tion of the different menu functions,
see the relevant paragraph in chapter
“AUDIO SETTINGS”.
The front panel keys are the follow-
ing:
–
÷and ˜(short push): back-
ward or forward 50 kHz skip from the
current tuned frequency;
–
÷and ˜(long push): tuning
to next or previous station, according
to active filters (TA, PTY). When
searching stations, the RDS code is re-
placed by string “SEEK+ or SEEK-”.MANUAL TUNING
This allows manual station searching
in the chosen band.
Proceed as follows:
– select the frequency band (FM1,
FM2, FM3, MW, LW) pressing the
“SRC” key 15-fig. 1repeatedly;
– briefly press key “
÷” 11-fig. 1
or “
˜” 12-fig. 1to start the search
for tuning the previous or next station
that can be received.
fig. 23
F0D2008g
Page 33 of 246
CONNECT Nav
32
AUTOMATIC TUNING
This function seeks automatically sta-
tions in the chosen band.
Proceed as follows:
– select the frequency band (FM1,
FM2, FM3, MW, LW) pressing repeat-
edly the “SRC” key 15-fig. 1;
– press “
÷” 11-fig. 1or “˜”
12-fig. 1to start the search for tun-
ing the previous or next station that
can be received.
If the “TA” function is on (traffic in-
formation), the tuner only seeks sta-
tions that broadcast traffic bulletins.
If the “PTY” function is on, the tuner
only seeks PTY stations.MANUAL STATION
STORAGE
The station being heard can be
stored in the range chosen with the
multifunction keys 1÷ 6-fig. 1.
Keep one of these keys pressed until
the display shows the number of the key
with which the station has been stored.
A confirmation beep will indicate that
the station has been stored.LISTENING TO STORED
STATIONS
Proceed as follows:
– choose the required frequency
band (FM1, FM2, FM3, FMST, LW,
MW or AMST) pressing repeatedly
the “SRC” key 15-fig. 1;
– press briefly one of the multifunc-
tion keys 1÷ 6-fig. 1.
In the FM1, FM2, FM3 and FMST
bands, if reception is poor and the
“AF” alternative frequency seek func-
tion is on, a station with the strongest
signal that is broadcasting the same
programme is automatically sought.