Page 181 of 486

2-73
Mirrors
Inside Day/Night Rearview Mirror
To reduce glare from lights behind you, pull the lever
toward you (to the night position). To return the mirror
to the day position, press the lever away from you.
Power Remote Control Rearview Mirrors
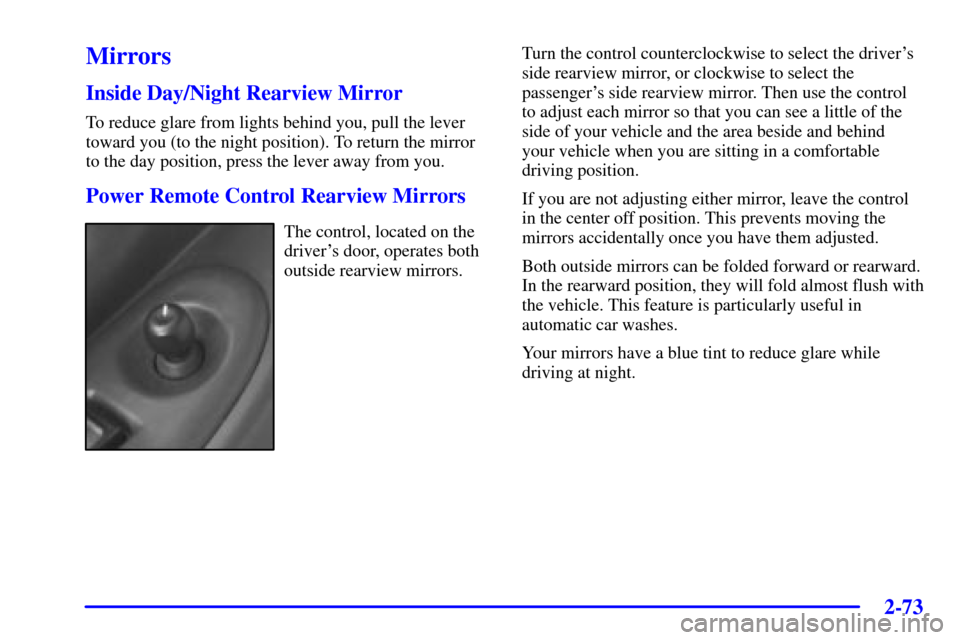
The control, located on the
driver's door, operates both
outside rearview mirrors.Turn the control counterclockwise to select the driver's
side rearview mirror, or clockwise to select the
passenger's side rearview mirror. Then use the control
to adjust each mirror so that you can see a little of the
side of your vehicle and the area beside and behind
your vehicle when you are sitting in a comfortable
driving position.
If you are not adjusting either mirror, leave the control
in the center off position. This prevents moving the
mirrors accidentally once you have them adjusted.
Both outside mirrors can be folded forward or rearward.
In the rearward position, they will fold almost flush with
the vehicle. This feature is particularly useful in
automatic car washes.
Your mirrors have a blue tint to reduce glare while
driving at night.
Page 183 of 486
2-75
Glove Box
Your vehicle has a glove box below the instrument
panel. To open the glove box, lift the latch release.
Use the key to lock or unlock the glove box.
The glove box door has a detent to prevent the door
from lowering too far. Open the glove box until the door
is partway open, then pull the door down if you need it
fully open. To close the glove box, the door must be
pressed up past the detent.
In the door of the glove box, you will find a tissue pack
holder and clip for a pen or pencil.
Compact Overhead Console (Canada Only)
The front overhead console includes two reading lamps,
a storage compartment and a switchbank.
Page 185 of 486

2-77
3. Line up the button of the garage door opener with
one of the four buttons on the compartment door.
Make sure the garage door opener button is facing
down and press the opener firmly into place.
4. Once the opener is installed, use the black pegs inside
the compartment door to make sure the lined area on
the compartment door will contact the control button
on your garage door opener when pressed.
5. Add one peg at a time until your garage door opener
operates with the compartment door closed when
you press the button.
Storage Bin
At the base of the center instrument panel console, there
is a storage bin. To open the bin, lift the latch release
and the door will fold down.
Inside the bin, you will find a tray that slides out. Slide
the tray all the way toward the rear of the vehicle until
the tray locks onto the plastic tabs at the end of the guide
rails. The tray can hold CDs or cassettes in the center
area. You can also store cassettes in the left and right
side area. The tray can be removed for cleaning or when
you want to replace the selection of CDs or cassettes.
Slide the tray back into the storage bin before closing
the bin door. The tray can also be placed in the glove
box for locked storage if desired.
Page 186 of 486
2-78
Removing and Replacing the TrayTo remove the tray, slide it almost all the way out. Don't
let the tray lock over the plastic tabs at the end of the
guide rails (A). Lift the tray out of the guide rails. The
rubber mat under the tray also lifts out for cleaning.
When the rubber mat is put back in, be sure the tabs at
the back of the mat are seated in the slots at the back of
the storage bin.
The dividers in the tray can be removed by squeezing
the plastic tabs on the bottom of the dividers, while
pulling up. Put the dividers back in by sliding them
down until the tabs click into place.
To reinstall the tray, line up the guides on the bottom of
the tray with the guide rails in the storage bin door. Slide
the tray back in.
Page 190 of 486

2-82 Convenience Center (Option)
CAUTION:
If the convenience center isn't secured properly,
it can move around in a collision or sudden stop.
People in the vehicle could be injured. Be sure to
secure the convenience center properly.
The convenience center comes with the optional
stowable seat. It provides extra storage space for the rear
of the vehicle.
To open the convenience center, pull up on the door
latch located in the front. The convenience center cover
has two automatic prop rods to hold it up and in place.
To close the convenience center cover you must pull one
of the prop rod linkages toward you while holding onto
the door latch and lower the convenience center cover to
close it.Removing the Convenience Center
1. Make sure that all items are off of the convenience
center and that it is empty.
2. Turn the hand knob counterclockwise until the knob
is loose.
3. Lift up on the hand knob to grab a hold of the
convenience center.
4. Lift up on the convenience center while pulling it
toward you and pull it out.
Replacing the Convenience Center
1. Make sure the stowable seat is properly installed in
the vehicle. See ªStowable Seatº in the Index for
more information. If the stowable seat is not in the
vehicle with the convenience center, the convenience
center will not be locked into the correct position in
the vehicle.
2. Make sure that the convenience center is closed.
3. Lift the convenience center up and into the rear of
the vehicle.
Page 191 of 486

2-83
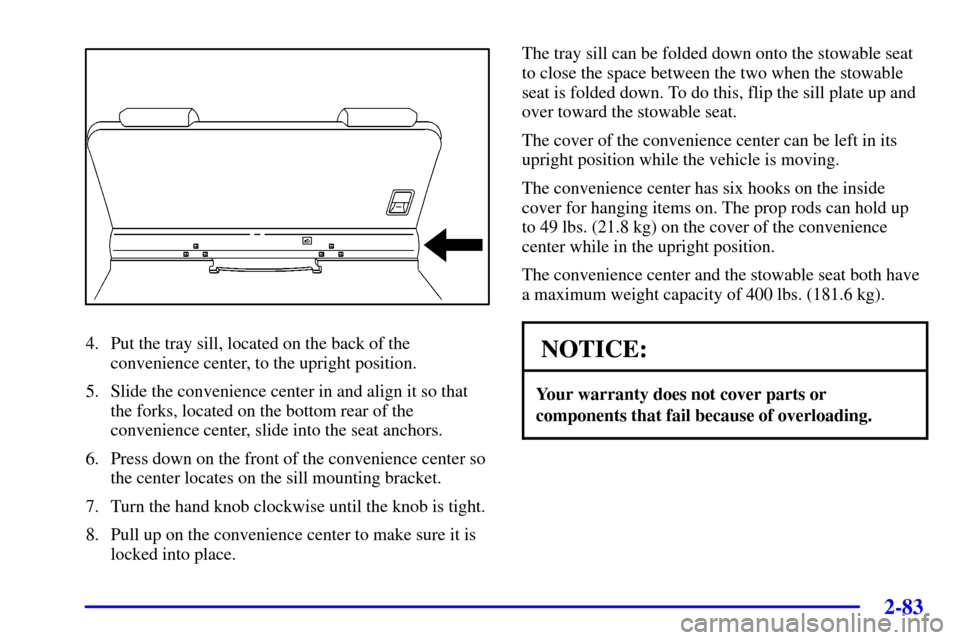
4. Put the tray sill, located on the back of the
convenience center, to the upright position.
5. Slide the convenience center in and align it so that
the forks, located on the bottom rear of the
convenience center, slide into the seat anchors.
6. Press down on the front of the convenience center so
the center locates on the sill mounting bracket.
7. Turn the hand knob clockwise until the knob is tight.
8. Pull up on the convenience center to make sure it is
locked into place.The tray sill can be folded down onto the stowable seat
to close the space between the two when the stowable
seat is folded down. To do this, flip the sill plate up and
over toward the stowable seat.
The cover of the convenience center can be left in its
upright position while the vehicle is moving.
The convenience center has six hooks on the inside
cover for hanging items on. The prop rods can hold up
to 49 lbs. (21.8 kg) on the cover of the convenience
center while in the upright position.
The convenience center and the stowable seat both have
a maximum weight capacity of 400 lbs. (181.6 kg).NOTICE:
Your warranty does not cover parts or
components that fail because of overloading.
Page 193 of 486
2-85
NOTICE:
Loading cargo that weighs more than 150 lbs.
(68 kg) on the luggage carrier may damage
your vehicle.
When you carry cargo on the luggage carrier of a
proper size and weight, put it as far forward as
you can. Then slide the crossrail up against the
rear of the load, to help keep it from moving.
You can then tie it down.
Don't exceed the maximum vehicle capacity when
loading your vehicle. For more information on vehicle
capacity and loading, see ªLoading Your Vehicleº in
the Index.
To prevent damage or loss of cargo as you're driving,
check now and then to make sure the luggage carrier and
cargo are still securely fastened.
Your luggage carrier has
release knobs set in the ends
of each crossrail.
Turn the release knobs counterclockwise to unlock the
crossrails. Slide the crossrails forward or back, as
needed, to accommodate loads of various sizes.
Page 194 of 486
2-86
After repositioning the crossrails, be sure to tighten the
release knobs by turning them clockwise. This will lock
the crossrails in place.
Use the tie-down loops on
the slider to help secure
large loads.
Sun Visors
To block out glare, you can swing down the visors. You
can also remove them from the center mount and swing
them to the side.
Visor Vanity Mirrors
Pull down the sun visor. Flip up the cover to expose the
vanity mirror.
Lighted Visor Vanity Mirrors (If Equipped)
Pull down the sun visor. Flip up the cover to expose the
vanity mirror. The lamps will come on when you open
the cover.