Page 200 of 486

2-92 OnStar Services
The following services are available within OnStar
service plans. Your vehicle comes with a specific
one
-year service plan than allows use of some or all of
the following services.
�Automatic Notification of Air Bag
Deployment: If an air bag deploys, a priority
emergency signal is automatically sent to the center.
An advisor will locate your vehicle's position, try to
contact you and assist you in the situation. If the
center is unable to contact you, an emergency service
provider will be contacted.
�Stolen Vehicle Tracking: Call the center at
1
-888-4-ONSTAR (1-888-466-7827) to report your
vehicle stolen. The system can then attempt to locate
and track your vehicle and the advisor will assist the
proper authorities.
�Roadside Assistance with Location: For vehicle
breakdowns, press the OnStar Services button. An
advisor will contact the appropriate help.�Remote Diagnostics: If an instrument panel
light comes on, press the OnStar Services button.
An advisor can perform a check of the engine
on
-board computer, and recommend what action
needs to be taken.
�OnStar MED
-NET: Med-Net can store your
personal medical history and provide it to emergency
personnel if necessary. (Requires activation and
additional fee.)
�Accident Assist: An advisor can provide
step
-by-step guidance following an accident.
�Remote Door Unlock: To contact the center, call
1
-888-4-ONSTAR. You will be required to provide
your security information. An advisor will send a
command to your vehicle to unlock itself. The
advisor can delay unlocking your vehicle. Remote
Door Unlock is disabled 48 hours after the vehicle is
parked to maintain the battery charge.
�Vehicle Locator Service: To contact the center, call
1
-888-4-ONSTAR. You will be required to provide
your security information. An advisor will send a
command to your vehicle to sound the horn and/or
flash the lamps.
Page 207 of 486
2-99
The main components of the instrument panel are the following:
A. Side Vents
B. Front Vents
C. Turn Signal/Multifunction Lever
D. Hazard Warning Flasher Switch
E. Instrument Panel Cluster
F. Center Vents
G. Audio System
H. Side Vents
I. Exterior Lamps Control
J. Hood Release
K. HornL. Ignition Switch
M. Climate Controls
N. Rear Fan Controls (Option)
O. Cupholder Tray
P. Accessory Power Outlet
Q. Storage Bin
R. Instrument Panel Switchbank
S. Glove Box
T. Front Vents
U. Instrument Panel Fuse Block
Page 213 of 486

2-105
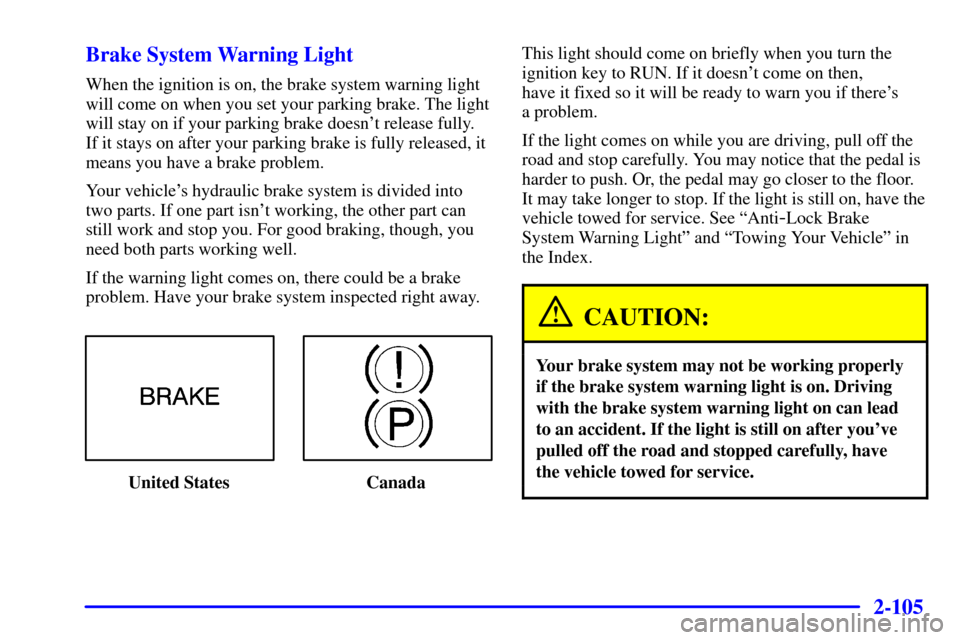
Brake System Warning Light
When the ignition is on, the brake system warning light
will come on when you set your parking brake. The light
will stay on if your parking brake doesn't release fully.
If it stays on after your parking brake is fully released, it
means you have a brake problem.
Your vehicle's hydraulic brake system is divided into
two parts. If one part isn't working, the other part can
still work and stop you. For good braking, though, you
need both parts working well.
If the warning light comes on, there could be a brake
problem. Have your brake system inspected right away.
United States CanadaThis light should come on briefly when you turn the
ignition key to RUN. If it doesn't come on then,
have it fixed so it will be ready to warn you if there's
a problem.
If the light comes on while you are driving, pull off the
road and stop carefully. You may notice that the pedal is
harder to push. Or, the pedal may go closer to the floor.
It may take longer to stop. If the light is still on, have the
vehicle towed for service. See ªAnti
-Lock Brake
System Warning Lightº and ªTowing Your Vehicleº in
the Index.
CAUTION:
Your brake system may not be working properly
if the brake system warning light is on. Driving
with the brake system warning light on can lead
to an accident. If the light is still on after you've
pulled off the road and stopped carefully, have
the vehicle towed for service.
Page 214 of 486

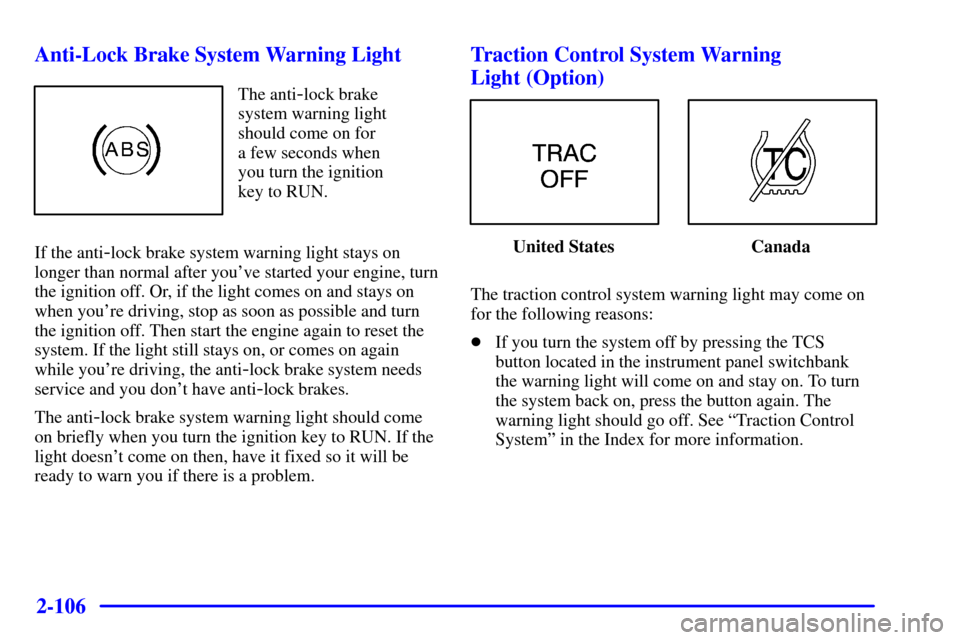
2-106 Anti-Lock Brake System Warning Light
The anti-lock brake
system warning light
should come on for
a few seconds when
you turn the ignition
key to RUN.
If the anti
-lock brake system warning light stays on
longer than normal after you've started your engine, turn
the ignition off. Or, if the light comes on and stays on
when you're driving, stop as soon as possible and turn
the ignition off. Then start the engine again to reset the
system. If the light still stays on, or comes on again
while you're driving, the anti
-lock brake system needs
service and you don't have anti
-lock brakes.
The anti
-lock brake system warning light should come
on briefly when you turn the ignition key to RUN. If the
light doesn't come on then, have it fixed so it will be
ready to warn you if there is a problem.
Traction Control System Warning
Light (Option)
United States Canada
The traction control system warning light may come on
for the following reasons:
�If you turn the system off by pressing the TCS
button located in the instrument panel switchbank
the warning light will come on and stay on. To turn
the system back on, press the button again. The
warning light should go off. See ªTraction Control
Systemº in the Index for more information.
Page 228 of 486
2-120 AWD Disable Warning Message
(If Equipped)
United States Canada
You will receive this message when there is a spare tire
on the vehicle or when the anti
-lock brake system
warning light comes on.
The all
-wheel-drive system will be disabled until the
compact spare tire is replaced by a full
-size tire. If the
warning message is still on after putting on the full
-size
tire, you need to reset the warning message. To reset
the warning message, turn the ignition off and then back
on again. If the message stays on, see you dealer right
away. See ªAll
-Wheel Driveº in the Index for
more information.
Driver Information Center
(DIC) (Option)
The DIC will show information about the vehicle and
the surroundings.
�E/M (English/Metric Button): You can change the
display to a metric or English reading at any time by
pressing E/M.
Page 233 of 486

3-
3-1
Section 3 Comfort Controls and Audio Systems
In this section, you'll find out how to operate the comfort control and audio systems offered with your vehicle.
Be sure to read about the particular systems supplied with your vehicle.
3
-2 Comfort Controls
3-3 Air Conditioning
3-4 Heating
3-4 Defogging and Defrosting
3-5 Rear Window Defogger (If Equipped)
3-6 Rear Climate Control (Vehicles without the
Entertainment System) (Option)
3
-8 Rear Climate Control (Vehicles with the
Entertainment System) (Option)
3
-10 Ventilation System
3-11 Audio Systems
3-11 Setting the Clock for Systems without Radio
Data System
3
-12 Setting the Clock for Systems with Radio Data
System (RDS)
3
-12 AM-FM Stereo
3-15 AM-FM Stereo with Compact Disc Player
with Radio Data System (RDS) and Automatic
Tone Control (If Equipped)
3
-23 AM-FM Stereo with Cassette Tape and
Compact Disc Player with Radio Data
System (RDS) and Automatic Tone
Control (If Equipped)3
-34 AM-FM Stereo with Six-Disc Compact Disc
Player with Programmable Equalization and
Radio Data System (RDS) (If Equipped)
3
-44 Entertainment System (Option)
3-52 Rear Seat Audio (Vehicles without the
Entertainment System) (If Equipped)
3
-54 Rear Seat Audio (Vehicles with the
Entertainment System) (Option)
3
-56 Theft-Deterrent Feature Non-RDS Radios
3-56 Theft-Deterrent Feature RDS Radios
3-56 Understanding Radio Reception
3-56 Understanding DVD Distortion
3-57 Tips About Your Audio System
3-58 Care of Your Cassette Tape Player
3-59 Care of Your Compact Discs and DVDs
3-59 Care of Your Compact Disc and DVD Player
3-59 Cleaning Your DVD Player
3-59 Cleaning the Video Screen
3-59 Fixed Mast Antenna
Page 234 of 486

3-2
Comfort Controls
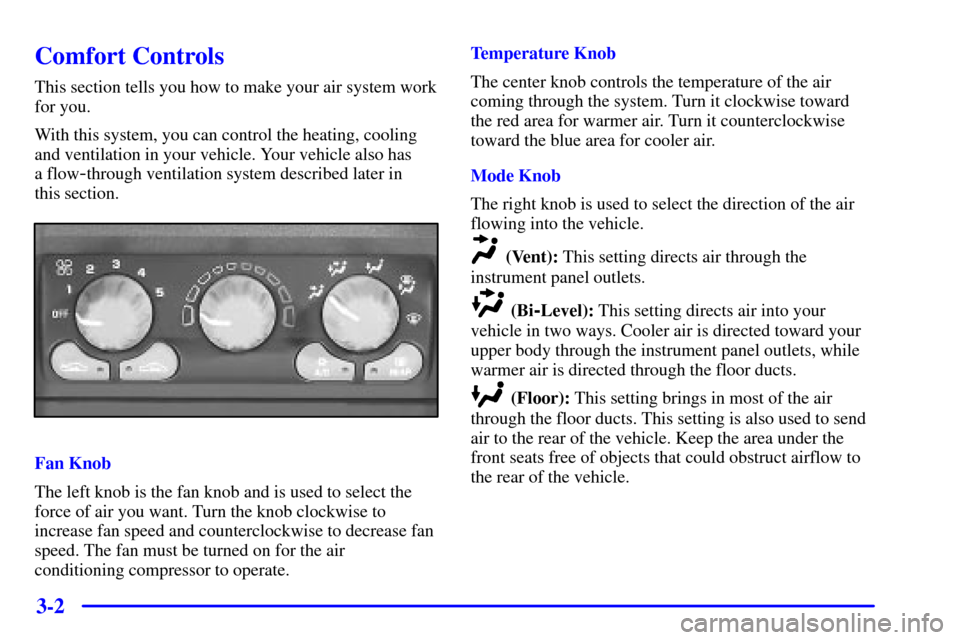
This section tells you how to make your air system work
for you.
With this system, you can control the heating, cooling
and ventilation in your vehicle. Your vehicle also has
a flow
-through ventilation system described later in
this section.
Fan Knob
The left knob is the fan knob and is used to select the
force of air you want. Turn the knob clockwise to
increase fan speed and counterclockwise to decrease fan
speed. The fan must be turned on for the air
conditioning compressor to operate.Temperature Knob
The center knob controls the temperature of the air
coming through the system. Turn it clockwise toward
the red area for warmer air. Turn it counterclockwise
toward the blue area for cooler air.
Mode Knob
The right knob is used to select the direction of the air
flowing into the vehicle.
(Vent): This setting directs air through the
instrument panel outlets.
(Bi-Level): This setting directs air into your
vehicle in two ways. Cooler air is directed toward your
upper body through the instrument panel outlets, while
warmer air is directed through the floor ducts.
(Floor): This setting brings in most of the air
through the floor ducts. This setting is also used to send
air to the rear of the vehicle. Keep the area under the
front seats free of objects that could obstruct airflow to
the rear of the vehicle.
Page 235 of 486

3-3
(Defog): This setting directs air to the windshield
and through the floor ducts. This mode is useful during
cold or inclement weather because of your vehicle's
larger windshield area.
(Defrost): This setting directs most of the air to the
windshield and side window vents.
Mode Buttons
(Outside Air): Press this button to send outside
air into your vehicle. The light in the button will glow
when outside air is in use. Using this setting while trying
to defrost or defog the windows will help clear the vents
of moisture. While floor, defog or defrost mode is
selected, the system will automatically go to outside
air mode.
(Recirculation): Press this button to limit the
amount of outside air entering your vehicle. The light in
the button will glow when outside air is in use. You may
use this setting to limit odors entering your vehicle.
Operating the Heating/Ventilation/Air Conditioning
(HVAC) system in the recirculation mode may cause
fogging of the vehicle's windows when the weather iscold and damp. To clear the fog, switch the HVAC
system to either the defog or defrost mode and increase
the fan speed. To avoid re
-fogging of the windows,
operate the HVAC system in the outside air mode.
A/C (Air Conditioning): Press this button to turn
the air conditioning compressor on and off. The light in
the button will glow when the air conditioning is in use.
Air Conditioning
On very hot days, your vehicle will cool down more
quickly and economically if you open the windows long
enough to let hot, inside air escape. For all settings,
adjust the temperature control knob and fan speed
as desired.
To get maximum cooling or a quick cool
-down on
very hot days, press the A/C and recirculation buttons
and turn the temperature knob counterclockwise toward
the blue area. Adjust the mode knob to direct the air to
the desired location. This setting should not be used for
long periods of time because the air may become too
cold and dry. Push the A/C button again the to turn off
the air conditioning.