2002 CHEVROLET AVEO check oil
[x] Cancel search: check oilPage 1771 of 5127
Light
Air Bag Readiness.......................................3-26
Anti-Lock Brake System Warning...................3-27
Brake System Warning.................................3-20
Charging Systems.......................................3-27
Daytime Running Lamps Indicator..................3-33
Door Ajar...................................................3-33
Fog Lamp..................................................3-32
Highbeam On.............................................3-22
Low Fuel Warning.......................................3-23
Malfunction Indicator....................................3-28
Oil Pressure...............................................3-32
Safety Belt Reminder...................................3-25
Safety Belt Reminder Tone...........................3-20
Loading Your Vehicle.......................................4-32
Lockout Protection..........................................2-10
Locks
Central Door Unlocking System....................... 2-8
Door........................................................... 2-7
Leaving Your Vehicle....................................2-10
Lockout Protection.......................................2-10
Rear Door Security Locks............................... 2-9
Long Trip/Highway Definition.............................. 6-6
Long Trip/Highway Intervals............................... 6-6
Long Trip/Highway Scheduled Maintenance........6-14
Loss of Control...............................................4-14
Low Fuel Warning Light...................................3-23M
Maintenance Schedule
At Each Fuel Fill.........................................6-19
At Least Once a Month................................6-19
At Least Once a Year..................................6-21
At Least Twice a Year..................................6-20
Brake System Inspection..............................6-25
Engine Cooling System Inspection.................6-25
Exhaust System Inspection...........................6-24
Fuel System Inspection................................6-25
How This Section is Organized....................... 6-3
Introduction.................................................. 6-2
Long Trip/Highway Scheduled Maintenance.......6-14
Maintenance Requirements............................. 6-2
Part A - Scheduled Maintenance Services......... 6-4
Part B - Owner Checks and Services.............6-19
Part C - Periodic Maintenance Inspections......6-24
Part D - Recommended Fluids and
Lubricants...............................................6-26
Part E - Maintenance Record........................6-28
Selecting the Right Schedule.......................... 6-5
Short Trip/City Scheduled Maintenance............. 6-7
Steering, Suspension and Front Drive Axle
Boot and Seal Inspection..........................6-24
Throttle System Inspection............................6-25
Using Your................................................... 6-4
Your Vehicle and the Environment................... 6-2
8
Page 1772 of 5127
Malfunction Indicator Light................................3-28
Manual Seats................................................... 1-2
Manual Transaxle............................................2-20
Fluid..........................................................5-21
Operation...................................................2-26
Manual Transaxle Check..................................6-20
Manual Windows............................................2-14
Mexico, Central America and Caribbean Islands/
Countries (Except Puerto Rico and U.S. Virgin
Islands) – Customer Assistance....................... 7-5
Mirrors
Manual Rearview Mirror................................2-34
Outside Convex Mirror.................................2-35
Outside Heated Mirrors................................2-35
Outside Manual Mirrors................................2-34
Outside Power Mirror...................................2-35
MyGMLink.com................................................ 7-3
N
New Vehicle Break-In......................................2-18
O
Odometer......................................................3-19
Off-Road Recovery..........................................4-12Oil
Engine.......................................................5-15
Pressure Light.............................................3-32
Older Children, Restraints................................1-28
Online Owner Center........................................ 7-3
Opening a Rear Door When the Security Lock
is On ........................................................... 2-9
Other Warning Devices...................................... 3-4
Outlet Adjustment............................................3-15
Outside
Convex Mirror.............................................2-35
Heated Mirrors............................................2-35
Manual Mirrors............................................2-34
Power Mirror...............................................2-35
Overseas – Customer Assistance........................ 7-5
Owners, Canadian............................................... ii
Owner’s Information........................................7-12
P
Park (P)
Shifting Into................................................2-29
Shifting Out of............................................2-30
Parking
Brake........................................................2-28
Over Things That Burn.................................2-32
9
Page 1777 of 5127
W
Warning Lights, Gages and Indicators................3-17
Warnings
Hazard Warning Flashers............................... 3-3
Other Warning Devices.................................. 3-4
Safety and Symbols......................................... iii
Vehicle Damage.............................................. iv
Washing Your Vehicle......................................5-79
Weatherstrip Lubrication...................................6-20
What Kind of Engine Oil to Use........................5-16
What to Do with Used Oil................................5-19
What to Use..................................5-23, 5-34, 5-35
Wheels
Alignment and Tire Balance..........................5-64
Replacement...............................................5-64
When to Add Engine Oil..................................5-16
When to Change Engine Oil.............................5-18
When to Check..............................................5-59
When to Check and What to Use.....................5-22
When to Check Power Steering Fluid................5-34
When to Inspect the Engine Air Cleaner/Filter........5-20Where to Put the Restraint...............................1-37
Why Safety Belts Work....................................1-11
Window Lockout.............................................2-14
Windows.......................................................2-13
Manual......................................................2-14
Power........................................................2-14
Windshield Washer........................................... 3-7
Fluid..........................................................5-35
Windshield Washer Fluid Level Check................6-19
Windshield Wiper
Blade Replacement......................................5-50
Fuses........................................................5-84
Windshield Wiper Lever..................................... 3-6
Windshield Wipers............................................ 3-6
Winter Driving................................................4-24
Wiper Blade Check.........................................6-20
Y
Your Vehicle and the Environment....................... 6-2
14
Page 1928 of 5127
Your vehicle will not pass this inspection if the OBD
(on-board diagnostic) system determines that critical
emission control systems have not been completely
diagnosed by the system. The vehicle would be
considered not ready for inspection. This can happen
if you have recently replaced your battery or if your
battery has run down. The diagnostic system is
designed to evaluate critical emission control systems
during normal driving. This may take several days
of routine driving. If you have done this and your vehicle
still does not pass the inspection for lack of OBD
system readiness, your GM dealer can prepare the
vehicle for inspection.
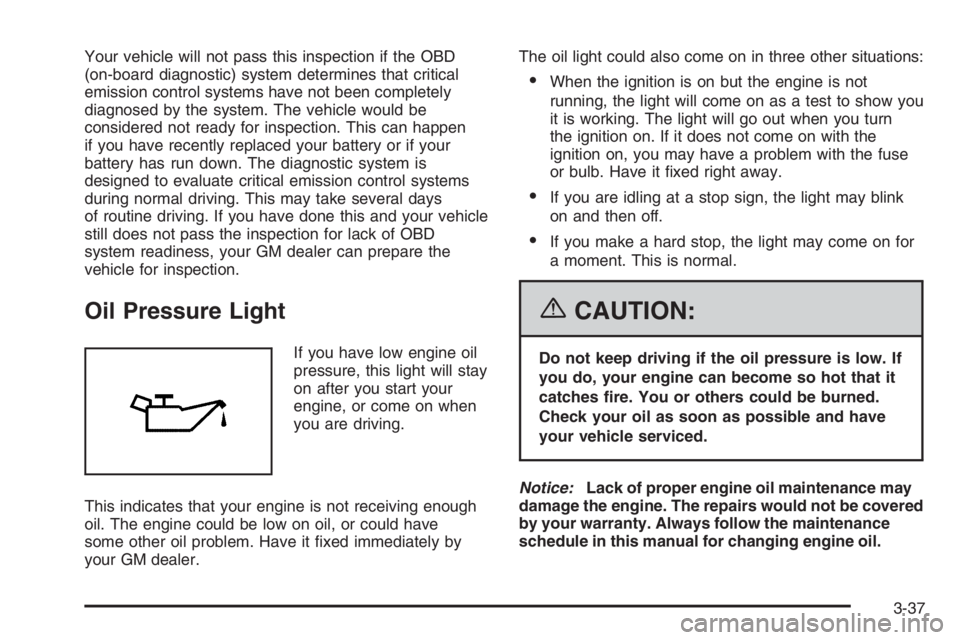
Oil Pressure Light
If you have low engine oil
pressure, this light will stay
on after you start your
engine, or come on when
you are driving.
This indicates that your engine is not receiving enough
oil. The engine could be low on oil, or could have
some other oil problem. Have it fixed immediately by
your GM dealer.The oil light could also come on in three other situations:
•When the ignition is on but the engine is not
running, the light will come on as a test to show you
it is working. The light will go out when you turn
the ignition on. If it does not come on with the
ignition on, you may have a problem with the fuse
or bulb. Have it fixed right away.
•If you are idling at a stop sign, the light may blink
on and then off.
•If you make a hard stop, the light may come on for
a moment. This is normal.
{CAUTION:
Do not keep driving if the oil pressure is low. If
you do, your engine can become so hot that it
catches re. You or others could be burned.
Check your oil as soon as possible and have
your vehicle serviced.
Notice:Lack of proper engine oil maintenance may
damage the engine. The repairs would not be covered
by your warranty. Always follow the maintenance
schedule in this manual for changing engine oil.
3-37
Page 1934 of 5127
Adjusting the Speakers (Balance/Fade)
SOUND (Balance/Fade):To adjust the balance
between the right and the left speakers, press this button
until BAL appears on the display. Then turn the
volume knob to increase or to decrease. The display will
show the balance level. When finished making the
selection, press this button to select the balance level.
To adjust the fade between the front and the rear
speakers, press this button until FAD appears on the
display. Turn the volume knob to increase or to
decrease the fade between the front and the rear
speakers. The display will show the fade level. When
finished making the selection, press this button to select
the fade level.
Playing a CD
Insert a CD partway into the slot, label side up. The
player will pull it in and the CD should begin playing.
You can insert a CD with the ignition off.
When the CD is inserted, CDP will appear on the
display. As the CD is loading Filecheck will appear on
the display. As each new track starts to play, Track and
the track number will appear on the display.If the ignition or radio is turned off with a CD in the
player, it will stay in the player. When a CD is in
the player and the ignition is turned on, the radio must
be turned on before the CD will start playback. When
the ignition and radio are turned on, the CD will
start playing where it stopped, if it was the last selected
audio source.
The CD player can play the smaller 3 inch (8 cm) single
CDs with an adapter ring. Full-size CDs and the
smaller CDs are loaded in the same manner.
If playing a CD-R, the sound quality may be reduced
due to CD-R quality, the method of recording, the quality
of the music that has been recorded, and the way the
CD-R has been handled. There may be an increase
in skipping, difficulty in finding tracks, and/or difficulty in
loading and ejecting. If these problems occur, check
the bottom surface of the CD. If the surface of the CD is
damaged, such as cracked, broken, or scratched, the
CD will not play properly. If the surface of the CD
is soiled, seeCare of Your CDs on page 3-71for more
information.
If there is no apparent damage, try a known good CD.
3-43
Page 1938 of 5127
Adjusting the Speakers (Balance/Fade)
SOUND (Balance/Fade):To adjust the balance
between the right and the left speakers, press this button
until BAL appears on the display. Turn the volume
knob to increase or to decrease. The display will show
the balance level. When finished making the selection,
press this button to select the balance level.
To adjust the fade between the front and the rear
speakers, press this button until FAD appears on the
display. Turn the volume knob to increase or to
decrease the fade between the front and the rear
speakers. The display will show the fade level. When
finished making the selection, press this button to select
the fade level.
Playing a CD
Insert a CD partway into the slot, label side up. The
player will pull it in and the CD should begin playing.
You can insert a CD with the ignition off.
When the CD is inserted, CDP will appear on the
display. As the CD is loading Filecheck will appear on
the display. As each new track starts to play, Track and
the track number will appear on the display.If the ignition or radio is turned off with a CD in the
player, it will stay in the player. When a CD is in
the player and the ignition is turned on, the radio must
be turned on before the CD will start playback. When
the ignition and radio are turned on, the CD will
start playing where it stopped, if it was the last selected
audio source.
The CD player can play the smaller 3 inch (8 cm) single
CDs with an adapter ring. Full-size CDs and the
smaller CDs are loaded in the same manner.
If playing a CD-R, the sound quality may be reduced
due to CD-R quality, the method of recording, the quality
of the music that has been recorded, and the way the
CD-R has been handled. There may be an increase
in skipping, difficulty in finding tracks, and/or difficulty in
loading and ejecting. If these problems occur, check
the bottom surface of the CD. If the surface of the CD is
damaged, such as cracked, broken, or scratched, the
CD will not play properly. If the surface of the CD
is soiled, seeCare of Your CDs on page 3-71for more
information.
If there is no apparent damage, try a known good CD.
3-47
Page 1942 of 5127
If the ignition or radio is turned off with a CD in the
player, it will stay in the player. When a CD is in
the player and the ignition is turned on, the radio must
be turned on before the CD will start playback. When
the ignition and radio are turned on, the CD will
start playing where it stopped, if it was the last selected
audio source.
The CD player can play the smaller 3 inch (8 cm) single
CDs with an adapter ring. Full-size CDs and the
smaller CDs are loaded in the same manner.
If playing a CD-R, the sound quality may be reduced due
to CD-R quality, the method of recording, the quality of
the music that has been recorded, and the way the CD-R
has been handled. There may be an increase in skipping,
difficulty in finding tracks, and/or difficulty in loading and
ejecting. If these problems occur, check the bottom
surface of the CD. If the surface of the CD is damaged,
such as cracked, broken, or scratched, the CD will not
play properly. If the surface of the CD is soiled, seeCare
of Your CDs on page 3-71for more information.
If there is no apparent damage, try a known good CD.
Do not add any label to a CD, it could get caught in the
CD player. If a CD is recorded on a personal computer
and a description label is needed, try labeling the top of
the recorded CD with a marking pen instead.
Notice:If you add any label to a CD, insert more
than one CD into the slot at a time, or attempt
to play scratched or damaged CDs, you coulddamage the CD player. When using the CD player,
use only CDs in good condition without any
label, load one CD at a time, and keep the CD player
and the loading slot free of foreign materials,
liquids, and debris.
If an error appears on the display, see “CD Messages”
later in this section.
All of the CD functions work the same while playing an
MP3, except for those listed here. See “Playing a
CD” earlier for more information.
5 DN (Down):Press this pushbutton to go to the
previous directory.
6UP:Press this pushbutton to go to the next directory.
TRACK (Previous/Next File):Turn this knob one notch
to go to the first track in the previous or to go to the next
folder. The player will continue moving backward or
forward through the CD with each turn of the knob.
DIR (Directory):Press and release this button to repeat
the tracks in the current directory. DIR will appear on
the display.
Press and release this button twice to repeat the tracks
in all of the directories. ALL will appear on the display.
Press and release this button again to turn off
repeat play.
3-51
Page 1946 of 5127
Setting the Equalization
The order for customized equalization settings are EQ
OFF, CLASSIC, DANCE, ROCK, JAZZ, POP, VOICE,
TECHNO, EQ OFF.
SOUND (Equalization):Press this button until EQ OFF
appears on the display to select customized equalization
settings designed for classic, dance, rock, jazz, pop,
voice and techno. Turn the volume knob until the desired
equalization setting appears on the display. When
finished making the selection, press the SOUND button
to set the equalization setting.
To cancel an equalization setting, press the SOUND
button until EQ OFF appears on the display, turn
the volume knob until OFF appears on the display, then
press the SOUND button again to set the equalization
setting.
Playing a CD
Insert a CD partway into the slot, label side up. The
player will pull it in and the CD should begin playing.
You can insert a CD with the ignition off.
When the CD is inserted, CDP will appear on the
display. As the CD is loading Filecheck will appear on
the display. As each new track starts to play, Track and
the track number will appear on the display.If the ignition or radio is turned off with a CD in the
player, it will stay in the player. When a CD is in
the player and the ignition is turned on, the radio must
be turned on before the CD will start playback. When
the ignition and radio are turned on, the CD will
start playing where it stopped, if it was the last selected
audio source.
The CD player can play the smaller 3 inch (8 cm) single
CDs with an adapter ring. Full-size CDs and the
smaller CDs are loaded in the same manner.
If playing a CD-R, the sound quality may be reduced
due to CD-R quality, the method of recording, the quality
of the music that has been recorded, and the way the
CD-R has been handled. There may be an increase
in skipping, difficulty in finding tracks, and/or difficulty in
loading and ejecting. If these problems occur, check
the bottom surface of the CD. If the surface of the CD is
damaged, such as cracked, broken, or scratched, the
CD will not play properly. If the surface of the CD
is soiled, seeCare of Your CDs on page 3-71for more
information.
If there is no apparent damage, try a known good CD.
3-55