2002 CHEVROLET AVEO fog light bulb
[x] Cancel search: fog light bulbPage 1579 of 5127

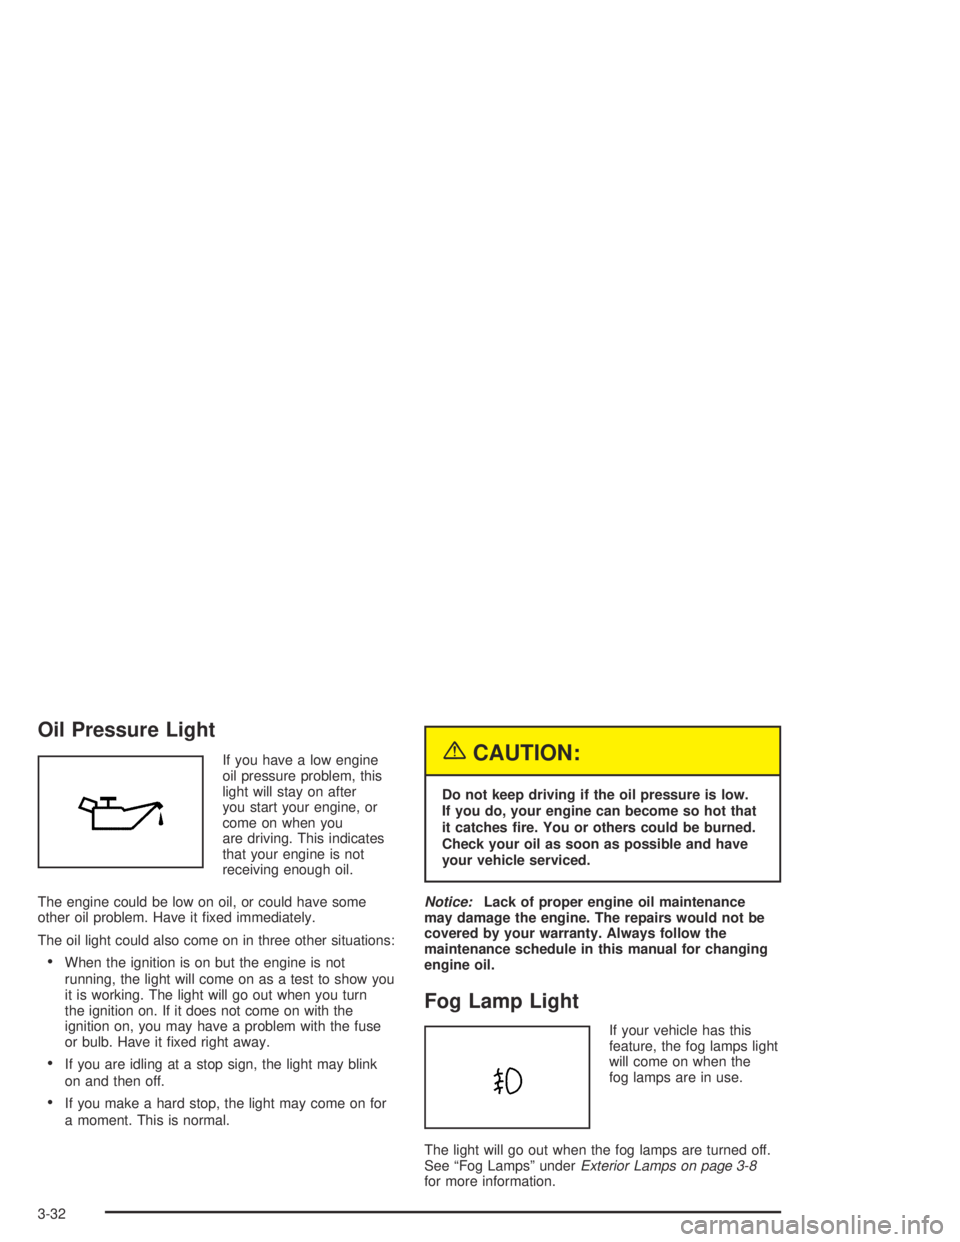
Oil Pressure Light
If you have a low engine
oil pressure problem, this
light will stay on after
you start your engine, or
come on when you
are driving. This indicates
that your engine is not
receiving enough oil.
The engine could be low on oil, or could have some
other oil problem. Have it fixed immediately.
The oil light could also come on in three other situations:
•When the ignition is on but the engine is not
running, the light will come on as a test to show you
it is working. The light will go out when you turn
the ignition on. If it does not come on with the
ignition on, you may have a problem with the fuse
or bulb. Have it fixed right away.
•If you are idling at a stop sign, the light may blink
on and then off.
•If you make a hard stop, the light may come on for
a moment. This is normal.
{CAUTION:
Do not keep driving if the oil pressure is low.
If you do, your engine can become so hot that
it catches �re. You or others could be burned.
Check your oil as soon as possible and have
your vehicle serviced.
Notice:Lack of proper engine oil maintenance
may damage the engine. The repairs would not be
covered by your warranty. Always follow the
maintenance schedule in this manual for changing
engine oil.
Fog Lamp Light
If your vehicle has this
feature, the fog lamps light
will come on when the
fog lamps are in use.
The light will go out when the fog lamps are turned off.
See “Fog Lamps” underExterior Lamps on page 3-8
for more information.
3-32
Page 1765 of 5127

B
Backglass Antenna.........................................3-44
Battery..........................................................5-39
Battery Replacement......................................... 2-6
Before Leaving on a Long Trip.........................4-21
Body Lubrication Service..................................6-21
Brake
Parking......................................................2-28
System Inspection.......................................6-25
System Warning Light..................................3-20
Brake Fluid....................................................5-36
Brake Wear...................................................5-37
Brakes..........................................................5-36
Braking........................................................... 4-6
Braking in Emergencies..................................... 4-9
Break-In, New Vehicle.....................................2-18
Bulb Replacement...........................................5-45
Fog Lamps.................................................5-48
Front Turn Signal and Parking Lamps.............5-46
Halogen Bulbs............................................5-45
Headlamp Aiming........................................5-45
Headlamps.................................................5-46
Sidemarker Lamps...............................5-48, 5-49
Taillamps, Turn Signal, Stoplamps and
Back-up Lamps........................................5-49
Turn Signal Lamps......................................5-47
Buying New Tires...........................................5-62
C
California Fuel.................................................. 5-6
Canada – Customer Assistance.......................... 7-4
Canadian Owners................................................ ii
Canadian Roadside Assistance........................... 7-7
Canceling the Rear Door Security Lock............... 2-9
Capacities and Specifications............................5-91
Carbon Monoxide...........4-24, 4-37, 2-10, 2-12, 2-32
Care of
Safety Belts................................................5-79
Your CD Player...........................................3-44
Your CDs ...................................................3-44
Cassette Tape Player Service...........................6-19
CD Messages................................................3-42
Center Rear Passenger Position, Safety Belts.....1-26
Chains, Tires..................................................5-66
Charging System Light....................................3-27
Check
Engine Light...............................................3-28
Check Engine Light.........................................3-28
Checking Coolant............................................5-24
Checking Engine Oil........................................5-15
Checking Things Under the Hood......................5-11
Checking Your Restraint Systems......................1-58
Chemical Paint Spotting...................................5-82
2
Page 1898 of 5127

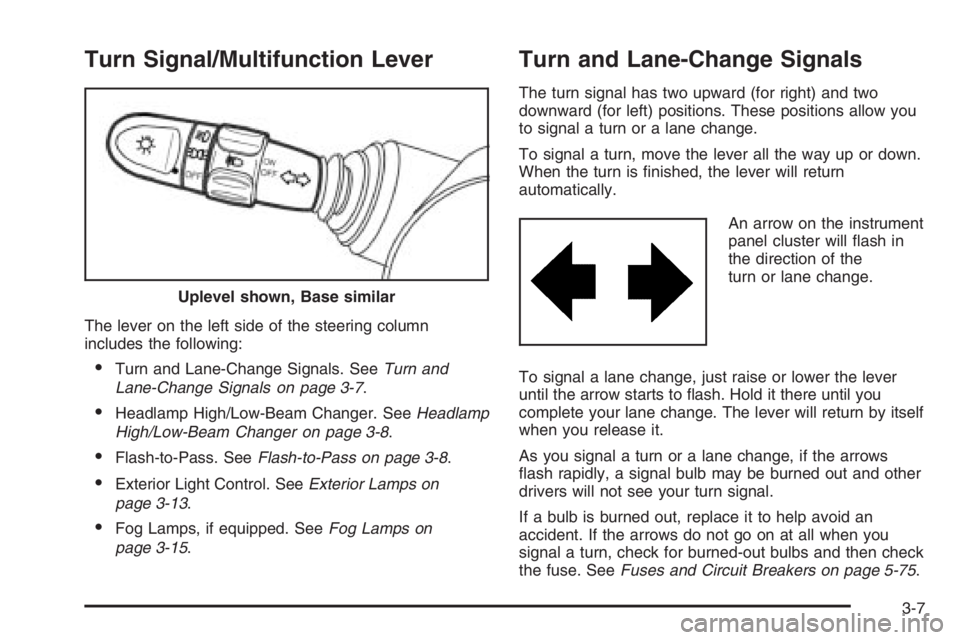
Turn Signal/Multifunction Lever
The lever on the left side of the steering column
includes the following:
•Turn and Lane-Change Signals. SeeTurn and
Lane-Change Signals on page 3-7.
•Headlamp High/Low-Beam Changer. SeeHeadlamp
High/Low-Beam Changer on page 3-8.
•Flash-to-Pass. SeeFlash-to-Pass on page 3-8.
•Exterior Light Control. SeeExterior Lamps on
page 3-13.
•Fog Lamps, if equipped. SeeFog Lamps on
page 3-15.
Turn and Lane-Change Signals
The turn signal has two upward (for right) and two
downward (for left) positions. These positions allow you
to signal a turn or a lane change.
To signal a turn, move the lever all the way up or down.
When the turn is finished, the lever will return
automatically.
An arrow on the instrument
panel cluster will flash in
the direction of the
turn or lane change.
To signal a lane change, just raise or lower the lever
until the arrow starts to flash. Hold it there until you
complete your lane change. The lever will return by itself
when you release it.
As you signal a turn or a lane change, if the arrows
flash rapidly, a signal bulb may be burned out and other
drivers will not see your turn signal.
If a bulb is burned out, replace it to help avoid an
accident. If the arrows do not go on at all when you
signal a turn, check for burned-out bulbs and then check
the fuse. SeeFuses and Circuit Breakers on page 5-75. Uplevel shown, Base similar
3-7
Page 4376 of 5127

DESCRIPTION AND OPERATION
INSTRUMENT PANEL DESCRIPTION
Cigar Lighter
The cigar lighter is located in the front portion of the floor console. To use the lighter, push it in completely.
When the lighter is hot, it will release itself from contact with the heating element. The lighter and the heating
element can be damaged if the lighter is not allowed to release itself fully from the heating element.
Ashtray
The ashtray is located below the audio system. To access the ashtray, pull it out from the center console. The
ashtray lamp will go ON when the parking lamps or the headlamps are turned ON.
Instrument Panel Vents
The center and the side vents in the instrument panel can be adjusted up and down and from side to side. The
side vents can also be aimed toward the side windows in order to defog them.
Glove Box
The glove box can be opened by pulling up on the latch handle. The glove box must be removed in order to gain
access to the passenger's side air bag module.
Digital Clock
The digital clock is located in the instrument panel, above the audio system. The clock is capable of a 12-hour
or a 24-hour display.
Instrument Cluster
The instrument cluster is located above the steering column and in the instrument cluster trim panel. The
instrument cluster contains the instruments that provide the driver with vehicle performance information. The
instrument cluster contains a speedometer, an odometer, a trip odometer, a temperature gage, a fuel gage, and
several indicator lamps. For replacement of the indicator lamp bulbs contained in the instrument cluster, refer to
Bulb Usage Specifications
and Instrument Cluster Lamp Replacement .
Speedometer/Odometer/Trip Odometer
The speedometer measures the speed of the vehicle in km/h (mph). It consists of an instrument cluster gage
connected to the vehicle speed sensor (VSS) on the transaxle output shaft.
The odometer measures in kilometers (miles) the total distance the vehicle has traveled since it was
manufactured. It consists of an instrument cluster gage connected to the VSS on the transaxle output shaft.
The trip odometer measures the distance the vehicle has traveled since the odometer was last reset. It consists of
2005 Chevrolet Aveo
2005 ACCESSORIES & EQUIPMENT Instrument Panel, Gages, & Console - Aveo
Microsoft
Friday, July 31, 2009 1:07:03 PMPage 83 © 2005 Mitchell Repair Information Company, LLC.