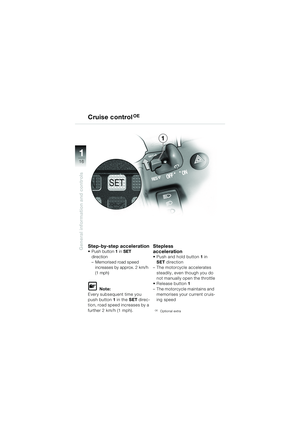
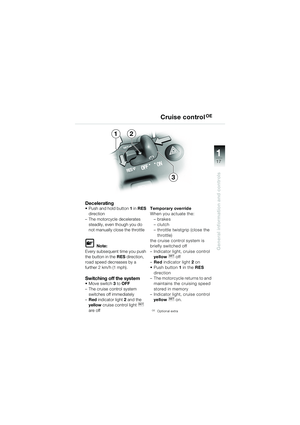
Page 41 of 96
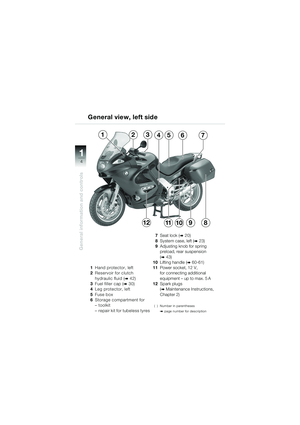
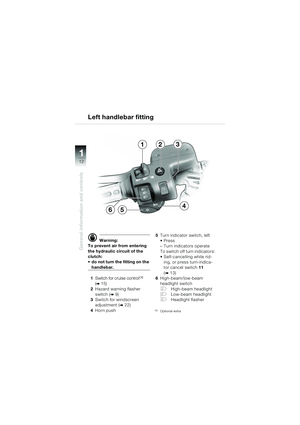
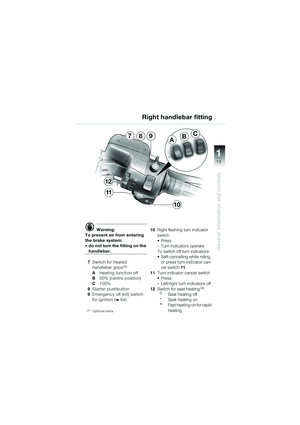
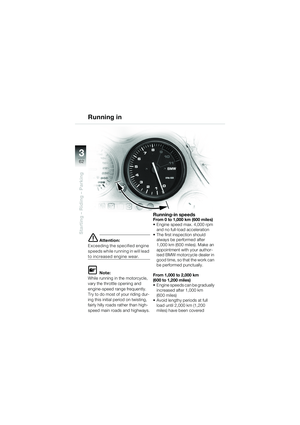
22
39
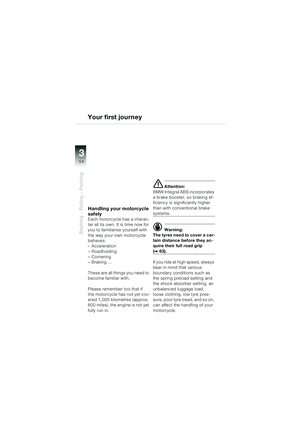
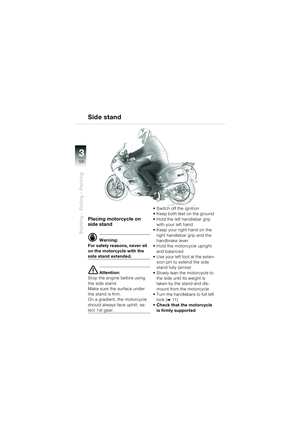
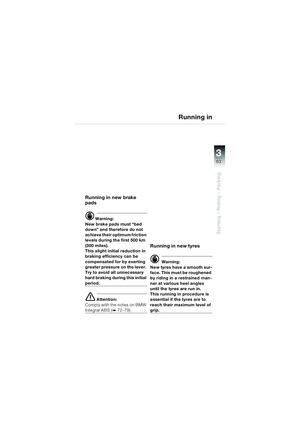
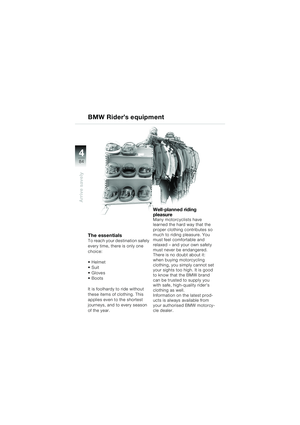
Safety check
2
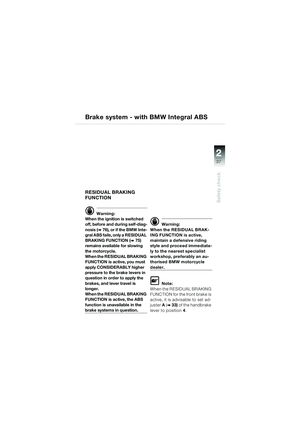
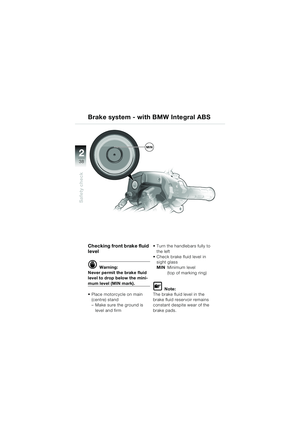
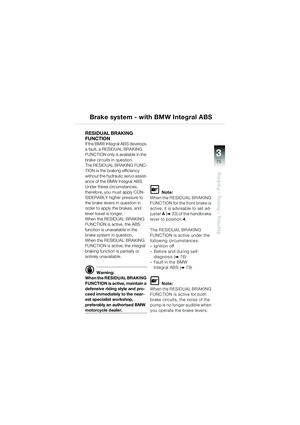
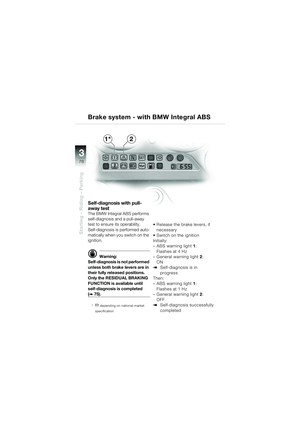
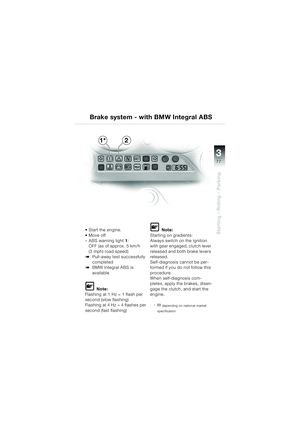
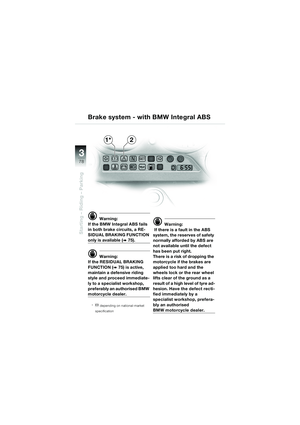
Brake system - with BMW Integral ABS
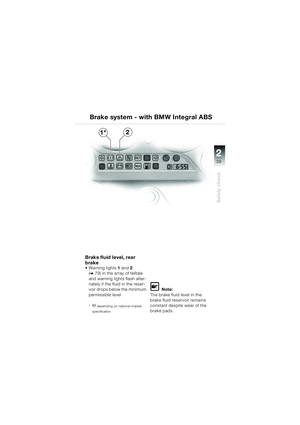
Brake fluid level, rear
brake
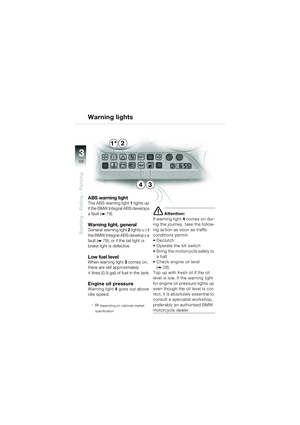
Warning lights 1 and 2
(
b 79) in the array of telltale
and warning lights flash alter-
nately if the fluid in the reser-
voir drops below the minimum
permissible level
*n depending on national-market
specification
L Note:
The brake fluid level in the
brake fluid reservoir remains
constant despite wear of the
brake pads.
1*2
10k41bkg2.book Seite 39 Donnerstag, 24. Juli 2003 9:17 09
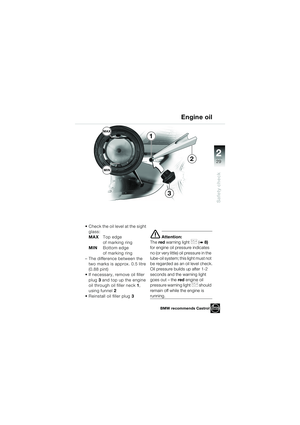
Page 42 of 96
40
Safety check
2
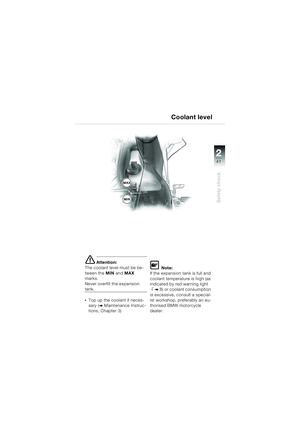
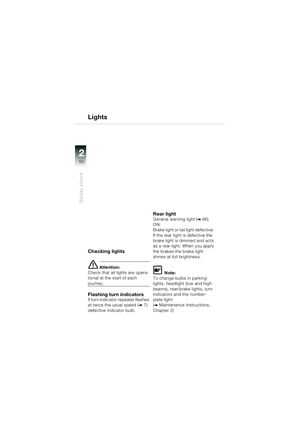
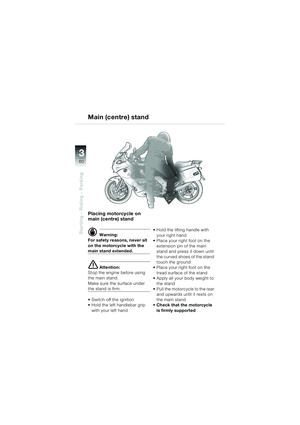
Coolant level
Checking coolant level
e Attention:
Always keep the level above the
minimum mark. Check coolant
level only when the engine is
cold. Place motorcycle on main
(centre) stand
– Make sure the ground is
level and firm.
Remove the seat if necessary
(
b 20)
Check coolant in expansion
tank:
MAX Maximum level
MIN Minimum level
10k41bkg2.book Seite 40 Donnerstag, 24. Juli 2003 9:17 09
Page 43 of 96
22
41
Safety check
2
e Attention:
The coolant level must be be-
tween the MIN and MAX
marks.
Never overfill the expansion
tank.
•Top up the coolant if neces-
sary (
b Maintenance Instruc-
tions, Chapter 3)
L Note:
If the expansion tank is full and
coolant temperature is high (as
indicated by red warning light
j b 8) or coolant consumption
is excessive, consult a special-
ist workshop, preferably an au-
thorised BMW motorcycle
dealer.
Coolant level
MAX
MIN
10k41bkg2.book Seite 41 Donnerstag, 24. Juli 2003 9:17 09
Page 44 of 96
42
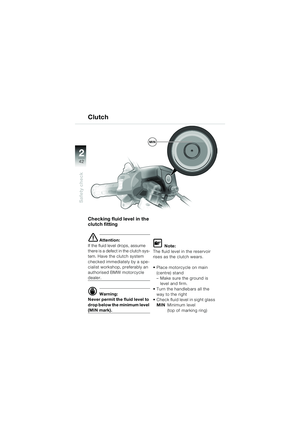
Safety check
2
Checking fluid level in the
clutch fitting
e Attention:
If the fluid level drops, assume
there is a defect in the clutch sys-
tem. Have the clutch system
checked immediately by a spe-
cialist workshop, preferably an
authorised BMW motorcycle
dealer.
d Warning:
Never permit the fluid level to
drop below the minimum level
(MIN mark).
L Note:
The fluid level in the reservoir
rises as the clutch wears.
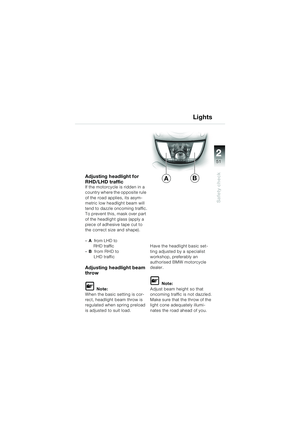
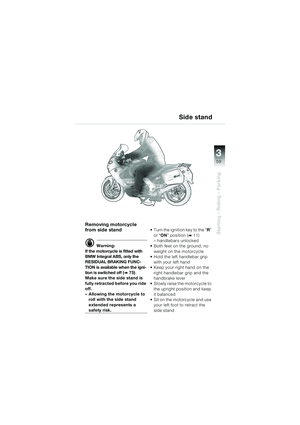
Place motorcycle on main (centre) stand
– Make sure the ground is level and firm.
Turn the handlebars all the way to the right
Check fluid level in sight glass MIN Minimum level
(top of marking ring)
Clutch
MIN
10k41bkg2.book Seite 42 Donnerstag, 24. Juli 2003 9:17 09
Page 45 of 96
22
43
Safety check
2
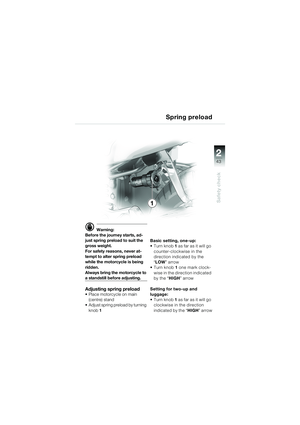
d Warning:
Before the journey starts, ad-
just spring preload to suit the
gross weight.
For safety reasons, never at-
tempt to alter spring preload
while the motorcycle is being
ridden.
Always bring the motorcycle to
a standstill before adjusting.
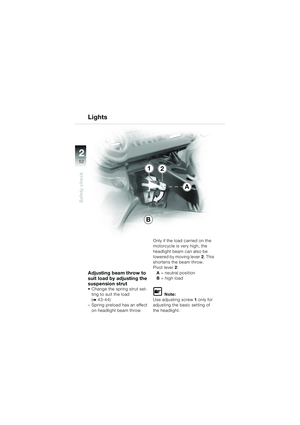
Adjusting spring preload Place motorcycle on main
(centre) stand
Adjust spring preload by turning
knob 1 Basic setting, one-up:
Turn knob 1
as far as it will go
counter-clockwise in the
direction indicated by the
“ LOW ” arrow
Turn knob 1 one mark clock-
wise in the direction indicated
by the “ HIGH” arrow
Setting for two-up and
luggage:
Turn knob 1 as far as it will go
clockwise in the direction
indicated by the “ HIGH” arrow
1 Spring preload
10k41bkg2.book Seite 43 Donnerstag, 24. Juli 2003 9:17 09
Page 46 of 96
44
Safety check
2
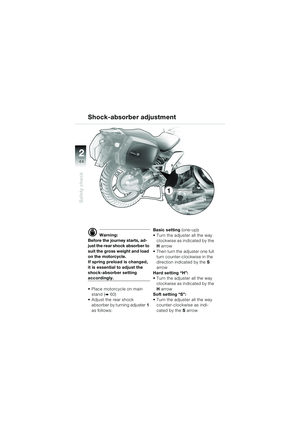
d Warning:
Before the journey starts, ad-
just the rear shock absorber to
suit the gross weight and load
on the motorcycle.
If spring preload is changed,
it is essential to adjust the
shock-absorber setting
accordingly.
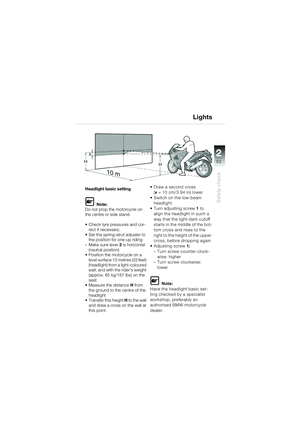
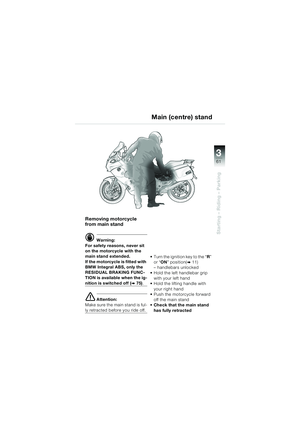
Place motorcycle on main stand (
b 60)
Adjust the rear shock absorber by turning adjuster 1
as follows: Basic setting
(one-up):
Turn the adjuster all the way clockwise as indicated by the
H arrow
Then turn the adjuster one full
turn counter-clockwise in the
direction indicated by the S
arrow
Hard setting “H”:
Turn the adjuster all the way clockwise as indicated by the
H arrow
Soft setting “S”:
Turn the adjuster all the way counter-clockwise as indi-
cated by the S arrow
Shock-absorber adjustment
1
10k41bkg2.book Seite 44 Donnerstag, 24. Juli 2003 9:17 09
Page 47 of 96
 22
45
Safety check
2
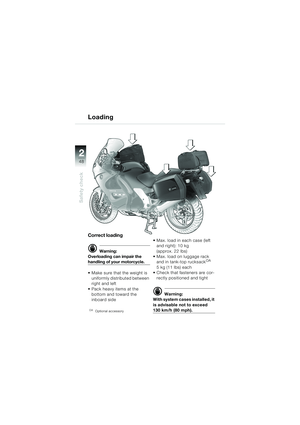
Wheels
d Warning:
Use only wheels and tyres
that BMW Motorrad has ap-
proved for your motorcycle.
For each size of tyre BMW
tests certain makes, and ap-
proves those that it ce")
22
45
Safety check
2
Wheels
d Warning:
Use only wheels and tyres
that BMW Motorrad has ap-
proved for your motorcycle.
For each size of tyre BMW
tests certain makes, and ap-
proves those that it certifies
as roadworthy.
If BMW Motorrad has not ap-
proved the wheels and tyres it
cannot assess their suitability
or provide any guarantee of
road safety.
You can obtain detailed infor-
mation from your authorised
B M W m o t o r c y c l e d e a l e r o r b y
visiting
www.bmw-motorrad.com on
the Internet
Checking wheel rims
d Warning:
Have damaged wheel rims
checked and, if necessary,
replaced by a specialist work-
shop, preferably an author-
ised BMW motorcycle dealer.
Checking tyre tread
d Warning:
Comply with local legal re-
quirements concerning mini-
mum tread depth. Worn tyres
can impair handling.
Measure tread depth at the centre of the tyre tread
BMW's minimum tread depth
recommendation:
Front ................. 2 mm (0.08 in)
Rear .................. 3 mm (0.12 in)
10k41bkg2.book Seite 45 Donnerstag, 24. Juli 2003 9:17 09
Page 48 of 96
46
Safety check
2
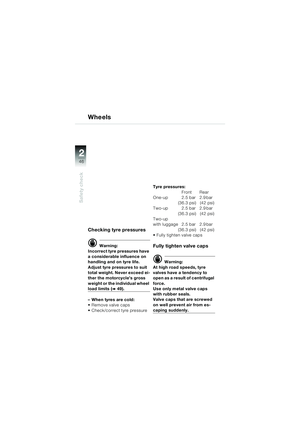
Wheels
Checking tyre pressures
d Warning:
Incorrect tyre pressures have
a considerable influence on
handling and on tyre life.
Adjust tyre pressures to suit
total weight. Never exceed ei-
ther the motorcycle’s gross
weight or the individual wheel
load limits (b 49).
– When tyres are cold:
Remove valve caps
Check/correct tyre pressure Tyre pressures:
Front Rear
O n e - u p 2 . 5 b a r 2 . 9 b a r
(36.3 psi) (42 psi)
Two-up 2.5 bar 2.9 bar
(36.3 psi) (42 psi)
Two-up
with luggage 2.5 bar 2.9 bar (36.3 psi) (42 psi)
Fully tighten valve caps
Fully tighten valve caps
d Warning:
At high road speeds, tyre
valves have a tendency to
open as a result of centrifugal
force.
Use only metal valve caps
with rubber seals.
Valve caps that are screwed
on well prevent air from es-
caping suddenly.
10k41bkg2.book Seite 46 Donnerstag, 24. Juli 2003 9:17 09


 22
39
Safety check
2
Brake system - with BMW Integral ABS
Brake fluid level, rear
brake
Warning lights 1 and 2
(
b 79) in the array of telltale
and warning lights flash alter-
nately if the flu")
 40
Safety check
2
Coolant level
Checking coolant level
e Attention:
Always keep the level above the
minimum mark. Check coolant
level only when the engine is
cold. Place motorcycle on main
(cent")
 22
41
Safety check
2
e Attention:
The coolant level must be be-
tween the MIN and MAX
marks.
Never overfill the expansion
tank.
•Top up the coolant if neces-
sary (
b Maintenance Instruc-
tions")
 42
Safety check
2
Checking fluid level in the
clutch fitting
e Attention:
If the fluid level drops, assume
there is a defect in the clutch sys-
tem. Have the clutch system
checked immediately by a s")
 22
43
Safety check
2
d Warning:
Before the journey starts, ad-
just spring preload to suit the
gross weight.
For safety reasons, never at-
tempt to alter spring preload
while the motorcycle is being")
 44
Safety check
2
d Warning:
Before the journey starts, ad-
just the rear shock absorber to
suit the gross weight and load
on the motorcycle.
If spring preload is changed,
it is essential to adjust")
 46
Safety check
2
Wheels
Checking tyre pressures
d Warning:
Incorrect tyre pressures have
a considerable influence on
handling and on tyre life.
Adjust tyre pressures to suit
total weight. Never ex")