2002 BMW 745LI SEDAN power steering
[x] Cancel search: power steeringPage 3 of 208
Inhaltsverzeichnis
Contents
Notes
6Using this Owner's Manual
6Symbols used
7The individual vehicle
7Editorial notice
8For you own safety
9REPORTING SAFETY DEFECTS
Cockpit
12Driver's side Ð Controls and displays
16Comfort and convenience Ð Controls
and displays
18Buttons in steering wheel
Control Center
19The concept
19Controller
19Control Display
20Symbols and lists
22Menus in Control Display
23Assistance window*
Voice command
25Voice command system*
25Voice commands
27Notices
27The notebook
29Brief commands
Opening and closing
34Keys
35Central locking system
35Opening and closing Ð from outside
37Opening and closing Ð from inside
38Doors
38Luggage compartment lid 40Luggage compartment
40Alarm system
42Electric power windows
43Sliding/tilt sunroof*
Adjustments
45Correct sitting position
45Seats
48Head restraints
50Safety belts
50Heated seats*
51Active seat ventilation*
52Active seat*
52Mirror
53Steering wheel adjustment
54Seat, mirror and steering wheel
memory
55Airbags
57Transporting children safely
58LATCH child-restraint system
59Child-safety locks
59Car Memory, Key Memory
Driving
61Ignition lock
62Starting the engine
62Switching off engine
62Parking brake
66Automatic transmission with L mode
69Automatic transmission with
Steptronic
71Turn signal indicators/headlamp
flasher
71Wiper system
73Washer fluid
© 2001 Bayerische Motoren Werke
Aktiengesellschaft
Munich, Germany
Reprints, in whole or part, approved
exclusively with written permission of
BMW AG, Munich.
Order No. 01 40 0 156 097
US X/2001
Printed in Germany
Printed on environmentally friendly paper
(bleached without chlorine, suitable for
recycling).
Page 14 of 208

At a glanceControlsDriving tipsCommunicationsNavigationEntertainmentMobilityReference
13
1
Rear window sun blind109
2
Rear window safety switch42
3
Electric power windows42
4
Exterior mirrors52
5
Parking brake62
6
Parking lamps and low beams96
7
Instrument lighting97
8
Turn signal indicators71
High beams, headlamp flasher97
Computer81,
Check Control80
Computer81
Standing lamps97
9
Steering wheel18
10
Info Display14
11
Automatic transmission lever66
12
Ignition lock61
13
Switching ignition on and off,
starting the engine62
14
Windshield wipers71
Rain sensor71
15
Park Distance Control (PDC)88
16
Horn: the entire surface
17
Steering wheel heating53
Steering wheel adjustment53
18
Unlocking the luggage
compartment39
19
Programmable cruise control73
20
Front fog lamps97
Front fog lamps
21
Opening the hood175
Page 46 of 208
At a glanceControlsDriving tipsCommunicationsNavigationEntertainmentMobilityReference
45
Adjustments Correct sitting position
The ideal sitting position can make a vital
contribution to relaxed, fatigue-free driving.
The correct sitting position also works
together with the safety belts and airbags
to provide occupants with maximum levels
of passive safety in an accident. To ensure
that the safety systems operate with
optimal efficiency, we strongly urge you to
observe the instructions contained in the
following section.
For additional information on transporting
children safely, refer to page 57. Correct sitting position with airbags
Always maintain an adequate
distance between yourself and the
airbags. Always hold the steering wheel by
its rim with hands at the 9 o'clock and
3 o'clock positions, to minimize the risk of
injuries to your hands and arms in the event
of airbag deployment. No one and nothing
is to come between the airbags and the
seat occupant.
To prevent possible leg injuries should the
knee airbag deploy in an accident, ensure
that the front passenger assumes a correct
sitting position. Do not use the cover of the
front airbag on the front passenger side as
a storage area for objects, or as a rest for
feet or legs.<
For airbag locations and additional infor-
mation on airbags, refer to page 55.
Correct sitting position with safety
belts For the safety of all vehicle occupants,
please comply with the following instruc-
tions for wearing safety belts.
Never allow more than one person to
wear a single safety belt. Never allow
infants or small children to ride in a
passenger's lap. Avoid twisting the belt
while routing it firmly across the hips and
shoulder. Wear it as snugly against your body as possible. Do not allow the belt to
rest against hard or fragile objects.
Do not route the belt across your neck, or
run it across sharp edges. Be sure that the
belt does not become caught or jammed.
Avoid wearing loose or bulky clothing that
would prevent the belt from resting
securely against your body; pull on the
shoulder strap periodically to keep it
tensioned. In the event of a frontal impact,
a loose lap belt could slide over your hips,
leading to abdominal injury. In addition, the
safety belt's restraint effectiveness is
reduced if the belt is worn loosely.
Expectant mothers should always wear
their safety belts, taking care to position
the lap belt against the lower hips, where it
will not exert pressure against the abdom-
inal area.<
For putting on safety belts, refer to
page 50.
Seats For your personal safety when adjusting
the seat position, please follow the instruc-
tions below carefully.
Never attempt to adjust your seat
while operating the vehicle. The seat
could respond with unexpected move-
ment, and the ensuing loss of vehicle
control could lead to an accident.
Never recline the backrest to an extremely
horizontal position while the vehicle is
underway Ð this precaution is especially
important for front passengers and the
occupants of electric power rear seats to
remember. Failure to observe these
precautions can prevent the belts from
providing effective protection against
injury, as passengers could slide under the
belts in an accident.<
Please observe the information on using
safety belts provided on page 50 and the
Page 55 of 208
Adjustments
54 3.Select "MFL." Continue to press the
controller until the desired function
appears:
>"Recirc. air"
In this mode the supply of outside air
remains blocked, refer to AUC Automatic
recirculated-air control on page 101
>"Navi info"
To repeat the most recent message from
the navigation system, refer to page 133
>"AUTO P"
To activate/deactivate Automatic Hold
refer to Automatic Hold on page 63.
You can select the displayed function using
button 1 in the steering wheel.
If you have activated the Automatic
hold feature, refer to page 63, you
can use button 1 to deactivate the system
for parking maneuvers, etc.<
Seat, mirror and steering
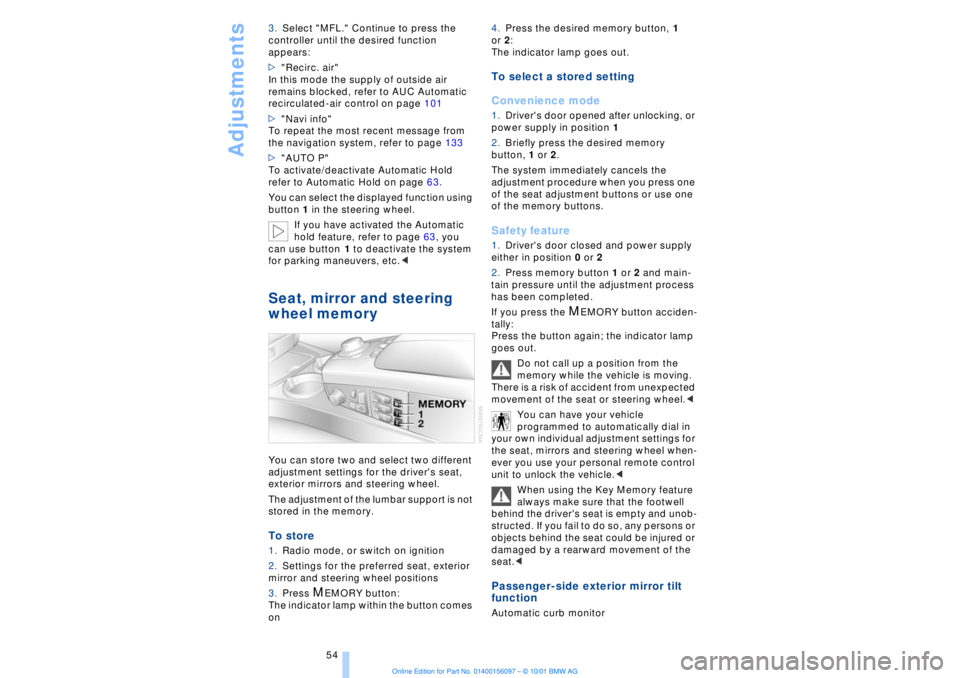
wheel memory You can store two and select two different
adjustment settings for the driver's seat,
exterior mirrors and steering wheel.
The adjustment of the lumbar support is not
stored in the memory. To store 1.Radio mode, or switch on ignition
2.Settings for the preferred seat, exterior
mirror and steering wheel positions
3.Press
M
EMORY button:
The indicator lamp within the button comes
on 4.Press the desired memory button, 1
or 2:
The indicator lamp goes out.
To select a stored setting
Convenience mode1.Driver's door opened after unlocking, or
power supply in position 1
2.Briefly press the desired memory
button, 1 or 2.
The system immediately cancels the
adjustment procedure when you press one
of the seat adjustment buttons or use one
of the memory buttons. Safety feature1.Driver's door closed and power supply
either in position 0 or 2
2.Press memory button 1 or 2 and main-
tain pressure until the adjustment process
has been completed.
If you press the
M
EMORY button acciden-
tally:
Press the button again; the indicator lamp
goes out.
Do not call up a position from the
memory while the vehicle is moving.
There is a risk of accident from unexpected
movement of the seat or steering wheel.<
You can have your vehicle
programmed to automatically dial in
your own individual adjustment settings for
the seat, mirrors and steering wheel when-
ever you use your personal remote control
unit to unlock the vehicle.<
When using the Key Memory feature
always make sure that the footwell
behind the driver's seat is empty and unob-
structed. If you fail to do so, any persons or
objects behind the seat could be injured or
damaged by a rearward movement of the
seat.<
Passenger-side exterior mirror tilt
function Automatic curb monitor
Page 67 of 208
Driving
66
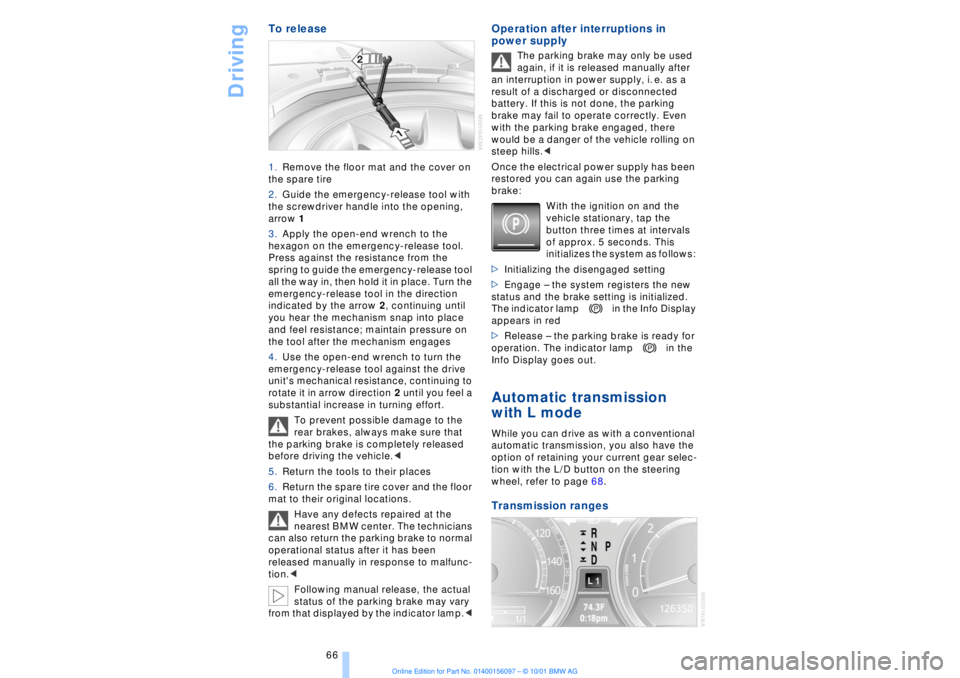
To release 1.Remove the floor mat and the cover on
the spare tire
2.Guide the emergency-release tool with
the screwdriver handle into the opening,
arrow 1
3.Apply the open-end wrench to the
hexagon on the emergency-release tool.
Press against the resistance from the
spring to guide the emergency-release tool
all the way in, then hold it in place. Turn the
emergency-release tool in the direction
indicated by the arrow 2, continuing until
you hear the mechanism snap into place
and feel resistance; maintain pressure on
the tool after the mechanism engages
4.Use the open-end wrench to turn the
emergency-release tool against the drive
unit's mechanical resistance, continuing to
rotate it in arrow direction 2 until you feel a
substantial increase in turning effort.
To prevent possible damage to the
rear brakes, always make sure that
the parking brake is completely released
before driving the vehicle.<
5.Return the tools to their places
6.Return the spare tire cover and the floor
mat to their original locations.
Have any defects repaired at the
nearest BMW center. The technicians
can also return the parking brake to normal
operational status after it has been
released manually in response to malfunc-
tion.<
Following manual release, the actual
status of the parking brake may vary
from that displayed by the indicator lamp.<
Operation after interruptions in
power supply
The parking brake may only be used
again, if it is released manually after
an interruption in power supply, i. e. as a
result of a discharged or disconnected
battery. If this is not done, the parking
brake may fail to operate correctly. Even
with the parking brake engaged, there
would be a danger of the vehicle rolling on
steep hills.<
Once the electrical power supply has been
restored you can again use the parking
brake:
With the ignition on and the
vehicle stationary, tap the
button three times at intervals
of approx. 5 seconds. This
initializes the system as follows:
>Initializing the disengaged setting
>Engage Ð the system registers the new
status and the brake setting is initialized.
The indicator lamp in the Info Display
appears in red
>Release Ð the parking brake is ready for
operation. The indicator lamp in the
Info Display goes out.
Automatic transmission
with L mode While you can drive as with a conventional
automatic transmission, you also have the
option of retaining your current gear selec-
tion with the L/D button on the steering
wheel, refer to page 68. Transmission ranges
Page 120 of 208
At a glanceControlsDriving tipsCommunicationsNavigationEntertainmentMobilityReference
119
Brake system Braking with ABS The best way to achieve optimal response
from the ABS is to apply maximum pres-
sure to the brake pedal during emergencyÐ
panic stops. Since the vehicle maintains
steering responsiveness, you can never-
theless avoid possible obstacles with a
minimum of steering effort.
Pulsation at the brake pedal combines with
sounds from the hydraulic circuits to indi-
cate to the driver that ABS is in its active
mode.
Do not drive with your foot resting on
the brake pedal. Even light but
consistent pedal pressure can lead to high
temperatures, brake wear and possibly
even brake failure.< Disc brakes
Driving in wet conditions While driving in wet conditions and in
heavy rain, it is a good idea to apply light
pressure to the brake pedal every few
miles. Monitor traffic conditions to ensure
that this maneuver does not endanger
other road users. The heat generated in this
process helps dry the pads and rotors to
ensure that full braking efficiency will then
be available when you need it. Hills You can retain full and unimpaired braking
efficiency by downshifting to a gear in
which only minimal brake applications are
needed when descending long or steep
downhill stretches.
You can further enhance the engine's
braking effect by selecting a lower gear in
the automatic transmission's manual
mode, downshifting as far as first gear on
extremely steep stretches, refer to
page 68. This strategy helps you avoid
placing excessive loads on the brake
system.
Corrosion When the vehicle is driven only occasion-
ally, during extended periods when the
vehicle is not used at all, and in operating
conditions where brake applications are
less frequent, there is an increased
tendency for corrosion to form on rotors,
while contaminants accumulate on the
brake pads. This occurs because the
minimal pressure which must be exerted by
the pads during brake applications to clean
the rotors is not reached.
Should corrosion form on the brake rotors,
the brakes will tend to respond with a
pulsating effect that even extended appli-
cation will fail to cure.
Never allow the vehicle to coast with
the transmission in neutral Ð or with
the engine switched off; there is no engine
braking when the transmission is in neutral,
and no power-assist for brakes and
steering when the engine is not running.
Never allow floor mats, carpets or any other
objects to protrude into the area around the
accelerator and brake pedals and obstruct
their movement.< Brake pads
If the brake pad wear indicator lamp
appears in the Check Control,
accompanied by a text: please take
careful note of the additional information in
the Control Display panel.
Warning lamp for Canadian models.
The brake pads have reached their
minimum pad thickness. Have them
replaced at your BMW center as soon as
possible.
For your own safety: use only brake
pads that BMW has released for your
particular vehicle model. Because BMW
cannot assess the suitability of other brake
pads for use on your vehicle, we are unable
to assume continued responsibility for the
vehicle's operating safety if non-approved
pads are installed.<
Page 178 of 208
At a glanceControlsDriving tipsCommunicationsNavigationEntertainmentMobilityReference
177
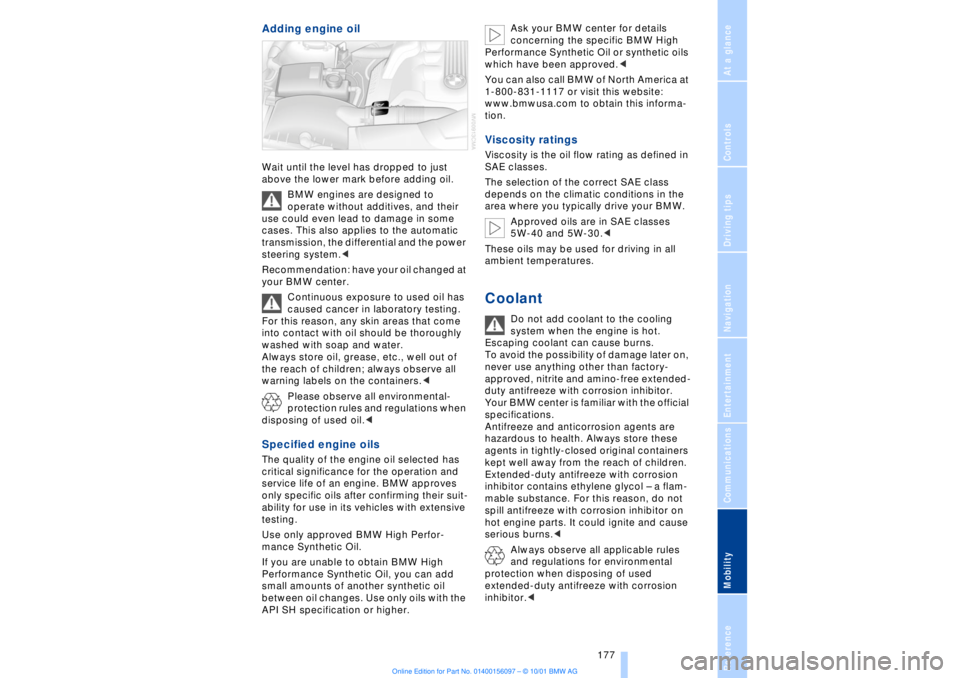
Adding engine oil Wait until the level has dropped to just
above the lower mark before adding oil.
BMW engines are designed to
operate without additives, and their
use could even lead to damage in some
cases. This also applies to the automatic
transmission, the differential and the power
steering system.<
Recommendation: have your oil changed at
your BMW center.
Continuous exposure to used oil has
caused cancer in laboratory testing.
For this reason, any skin areas that come
into contact with oil should be thoroughly
washed with soap and water.
Always store oil, grease, etc., well out of
the reach of children; always observe all
warning labels on the containers.<
Please observe all environmental-
protection rules and regulations when
disposing of used oil.< Specified engine oils The quality of the engine oil selected has
critical significance for the operation and
service life of an engine. BMW approves
only specific oils after confirming their suit-
ability for use in its vehicles with extensive
testing.
Use only approved BMW High Perfor-
mance Synthetic Oil.
If you are unable to obtain BMW High
Performance Synthetic Oil, you can add
small amounts of another synthetic oil
between oil changes. Use only oils with the
API SH specification or higher. Ask your BMW center for details
concerning the specific BMW High
Performance Synthetic Oil or synthetic oils
which have been approved.<
You can also call BMW of North America at
1-800-831-1117 or visit this website:
www.bmwusa.com to obtain this informa-
tion.
Viscosity ratingsViscosity is the oil flow rating as defined in
SAE classes.
The selection of the correct SAE class
depends on the climatic conditions in the
area where you typically drive your BMW.
Approved oils are in SAE classes
5W-40 and 5W-30.<
These oils may be used for driving in all
ambient temperatures.Coolant
Do not add coolant to the cooling
system when the engine is hot.
Escaping coolant can cause burns.
To avoid the possibility of damage later on,
never use anything other than factory-
approved, nitrite and amino-free extended-
duty antifreeze with corrosion inhibitor.
Your BMW center is familiar with the official
specifications.
Antifreeze and anticorrosion agents are
hazardous to health. Always store these
agents in tightly-closed original containers
kept well away from the reach of children.
Extended-duty antifreeze with corrosion
inhibitor contains ethylene glycol Ð a flam-
mable substance. For this reason, do not
spill antifreeze with corrosion inhibitor on
hot engine parts. It could ignite and cause
serious burns.<
Always observe all applicable rules
and regulations for environmental
protection when disposing of used
extended-duty antifreeze with corrosion
inhibitor.<
Page 190 of 208
At a glanceControlsDriving tipsCommunicationsNavigationEntertainmentMobilityReference
189
>Clearance and maneuvering capability
will be strictly limited in corners
>When mounted at an angle, the towbar
will exert lateral forces, tending to push the
vehicle sideways.
Never use a vehicle to tow another
vehicle that is heavier than itself, as
this could lead to a loss of control.< Towing
Do not tow the vehicle by the rear
axle; because the steering detent is
not operational, the wheels could turn to an
extreme angle during towing.<
1.Switch on the ignition to allow operation
of the brake lamps, turn signal indicators,
horn, parking brake and windshield wipers
2.Turn on the hazard warning flashers
where allowed by law
3.Manual release of the transmission
lockout, refer to page 70
4.Maximum towing speed:
maximum 43 mph (70 km/h)
5.Maximum towing distance:
maximum 93 miles (150 km).
If the electrical system in the towed vehicle
has failed, use an alternate means to iden-
tify the vehicle as being towed such as a
sign or warning triangle placed in the rear
window.
The steering and brakes are without
power assistance when the engine is
off. This means that higher levels of effort
will be required to operate the steering and
brakes.<
Tow-starting It is not possible to start the engine by tow-
starting the vehicle.
Jump starting, refer to page 187.
Have the source of the starting difficulties
diagnosed and repaired at your BMW
center.
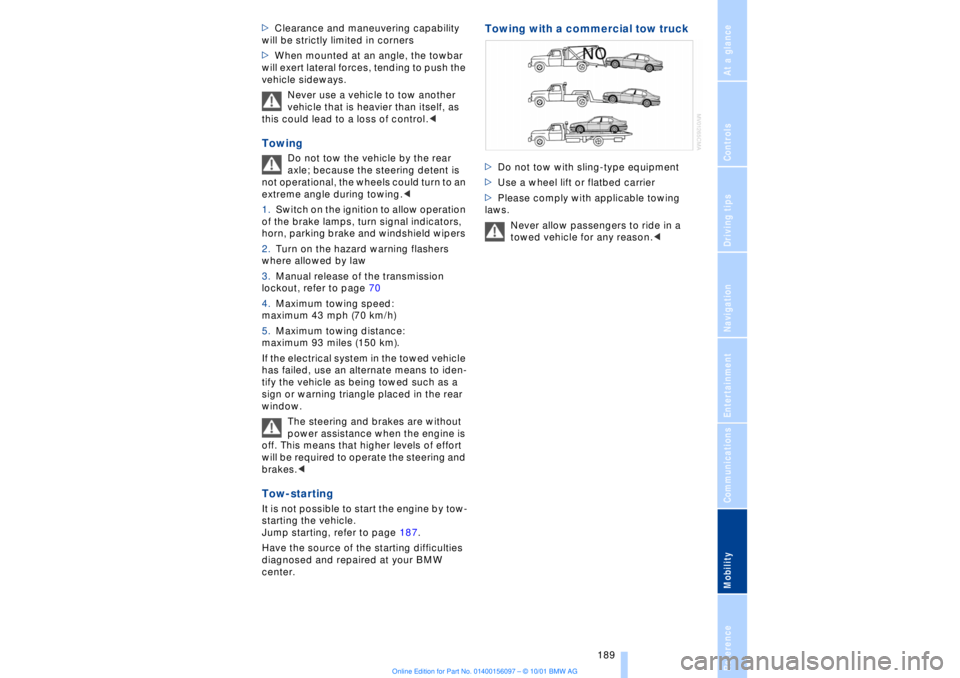
Towing with a commercial tow truck >Do not tow with sling-type equipment
>Use a wheel lift or flatbed carrier
>Please comply with applicable towing
laws.
Never allow passengers to ride in a
towed vehicle for any reason.<