Page 151 of 186
151n
OverviewControlsMaintenanceRepairsDataIndex
Lamps and bulbsThe lamps and bulbs are essential
factors contributing to the safety of your
vehicle. For this reason, you should
follow the instructions below carefully
when replacing a bulb. If you are not
familiar with any of the procedures,
consult your BMW center.
Do not touch the glass portion of a
new bulb with your bare hands
since even small amounts of impurities
burn into the surface and reduce the
service life of the bulb. Use a clean
cloth, paper napkin, or a similar mate-
rial, or hold the bulb by its metallic
base.<
A replacement bulb set is available from
your BMW center.
Whenever working on the elec-
trical system, switch off the elec-
trical accessory you are working on or
disconnect the cable from the negative
terminal of the battery. Failure to do this
could result in short circuits.
To prevent injuries and damage,
comply with any instructions provided
by the bulb manufacturer.<
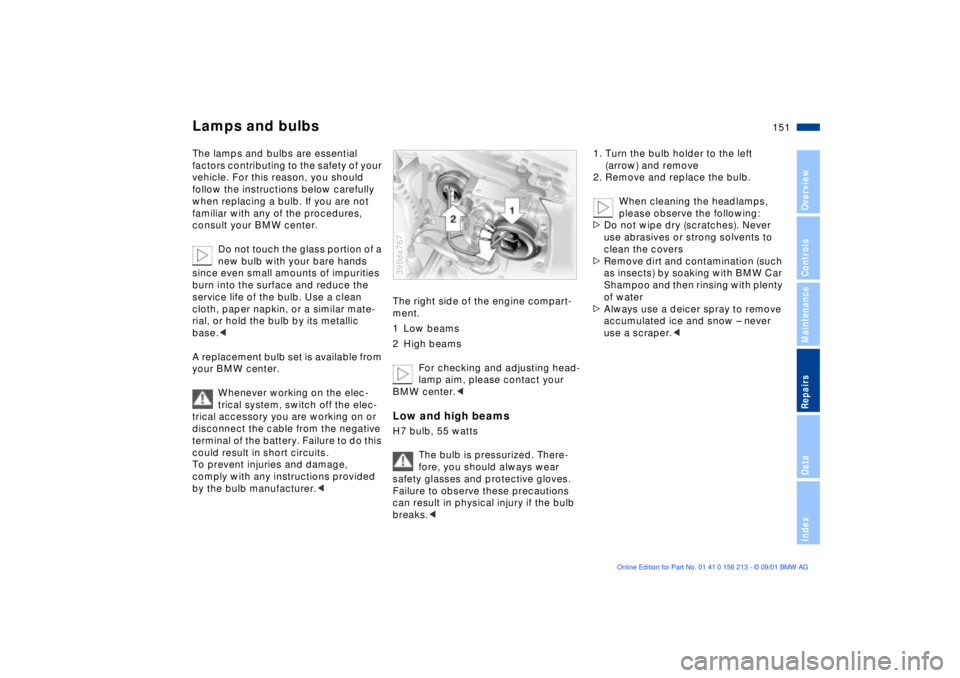
The right side of the engine compart-
ment.
1 Low beams
2 High beams
For checking and adjusting head-
lamp aim, please contact your
BMW center.< Low and high beamsH7 bulb, 55 watts
The bulb is pressurized. There-
fore, you should always wear
safety glasses and protective gloves.
Failure to observe these precautions
can result in physical injury if the bulb
breaks.< 390de767
1. Turn the bulb holder to the left
(arrow) and remove
2. Remove and replace the bulb.
When cleaning the headlamps,
please observe the following:
>Do not wipe dry (scratches). Never
use abrasives or strong solvents to
clean the covers
>Remove dirt and contamination (such
as insects) by soaking with BMW Car
Shampoo and then rinsing with plenty
of water
>Always use a deicer spray to remove
accumulated ice and snow Ð never
use a scraper.<
Page 153 of 186
153n
OverviewControlsMaintenanceRepairsDataIndex
Lamps and bulbsSide turn signals5 watt bulb
1. Use finger pressure against the rear
end of the lens (arrow) to press it
forward for removal
2. Press gently on the bulb and turn it to
the left to remove it.390de768
Front fog lampsH8 bulb, 35 watt
The bulb is pressurized. There-
fore, wear safety glasses and
protective gloves. Failure to observe
these precautions can result in physical
injury if the bulb breaks.<
1. Using a screwdriver, remove the
mounting clip for the air grill (arrow)
and remove the grill by bringing it
toward the front390de671
2. Loosen both screws (arrows)
3. Take off the cover panel next to the
headlamp
4. Turn the headlamp 903 to the left and
remove it by bringing it toward the
front
5. Disconnect the plug
6. Turn the lamp to the left and remove
it.390de672
Page 155 of 186
155n
OverviewControlsMaintenanceRepairsDataIndex
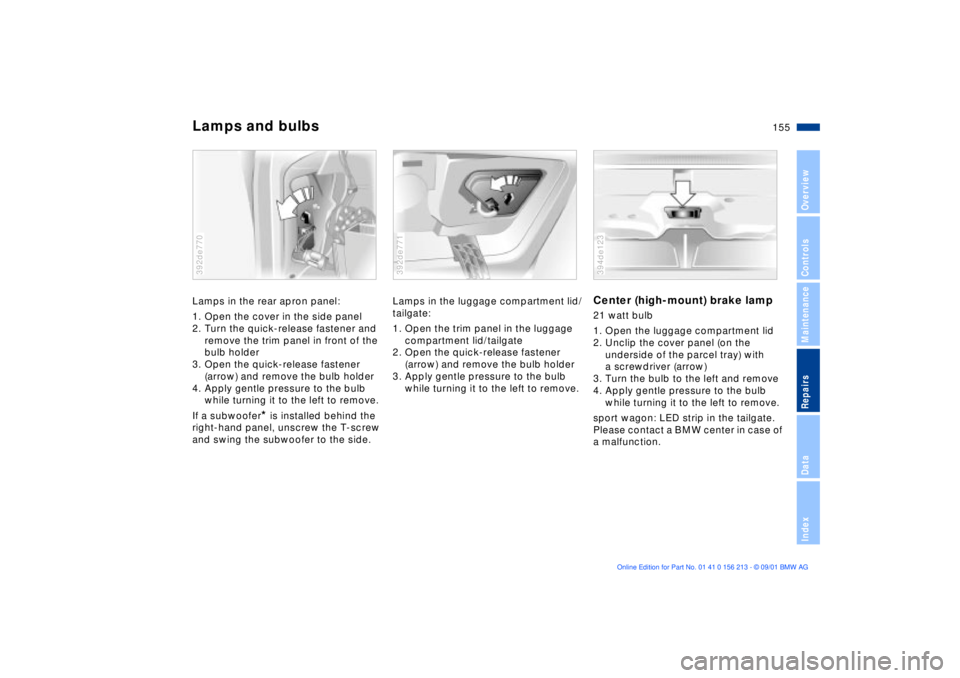
Lamps and bulbsLamps in the rear apron panel:
1. Open the cover in the side panel
2. Turn the quick-release fastener and
remove the trim panel in front of the
bulb holder
3. Open the quick-release fastener
(arrow) and remove the bulb holder
4. Apply gentle pressure to the bulb
while turning it to the left to remove.
If a subwoofer
* is installed behind the
right-hand panel, unscrew the T-screw
and swing the subwoofer to the side.
392de770
Lamps in the luggage compartment lid/
tailgate:
1. Open the trim panel in the luggage
compartment lid/tailgate
2. Open the quick-release fastener
(arrow) and remove the bulb holder
3. Apply gentle pressure to the bulb
while turning it to the left to remove.392de771
Center (high-mount) brake lamp21 watt bulb
1. Open the luggage compartment lid
2. Unclip the cover panel (on the
underside of the parcel tray) with
a screwdriver (arrow)
3. Turn the bulb to the left and remove
4. Apply gentle pressure to the bulb
while turning it to the left to remove.
sport wagon: LED strip in the tailgate.
Please contact a BMW center in case of
a malfunction.394de123
Page 157 of 186
157n
OverviewControlsMaintenanceRepairsDataIndex
Changing a wheelWhat you will needIn order to avoid rattling noises later,
note the position of the tools when you
remove them and return them to their
original positions when you are through
using them.
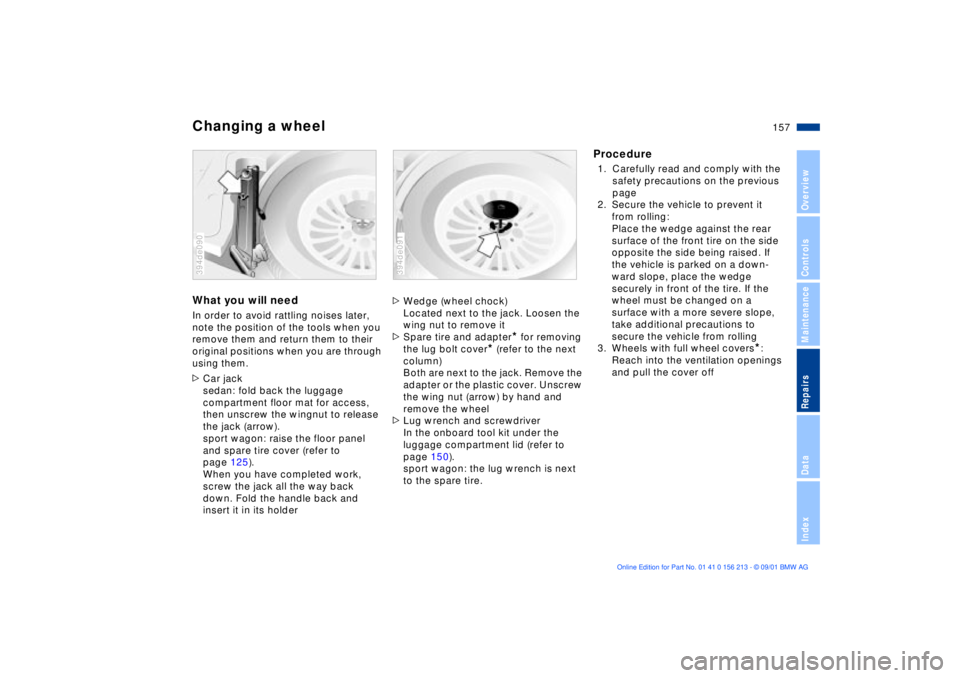
>Car jack
sedan: fold back the luggage
compartment floor mat for access,
then unscrew the wingnut to release
the jack (arrow).
sport wagon: raise the floor panel
and spare tire cover (refer to
page 125).
When you have completed work,
screw the jack all the way back
down. Fold the handle back and
insert it in its holder394de090
>Wedge (wheel chock)
Located next to the jack. Loosen the
wing nut to remove it
>Spare tire and adapter
* for removing
the lug bolt cover
* (refer to the next
column)
Both are next to the jack. Remove the
adapter or the plastic cover. Unscrew
the wing nut (arrow) by hand and
remove the wheel
>Lug wrench and screwdriver
In the onboard tool kit under the
luggage compartment lid (refer to
page 150).
sport wagon: the lug wrench is next
to the spare tire.
394de091
Procedure1. Carefully read and comply with the
safety precautions on the previous
page
2. Secure the vehicle to prevent it
from rolling:
Place the wedge against the rear
surface of the front tire on the side
opposite the side being raised. If
the vehicle is parked on a down-
ward slope, place the wedge
securely in front of the tire. If the
wheel must be changed on a
surface with a more severe slope,
take additional precautions to
secure the vehicle from rolling
3. Wheels with full wheel covers
*:
Reach into the ventilation openings
and pull the cover off
Page 159 of 186
159n
OverviewControlsMaintenanceRepairsDataIndex
Changing a wheel16. Wheels with hub covers:
Position the hub cover and press it
on tightly
17. If equipped with lug bolt covers:
Align the arrow on the cover with
the line in the wheel and press the
cover into place
18. Check and correct the tire inflation
pressure at the earliest opportunity.
For vehicles with Tire Pressure
Monitor (RDC)
*:
After mounting the spare tire or
correcting the inflation pressure,
reactivate the system. Refer to
page 99.
The vehicle jack is designed for
changing tires only. Do not
attempt to raise another vehicle model
with it or to raise any load of any kind.
To do so could cause accidents and
personal injury.
To ensure continued safety, have the
lug bolts checked with a calibrated
torque wrench [torque specification
72 lb-ft (100 Nm)] at the earliest
opportunity.<
When storing the wheel, take care to
ensure that you do not damage the
retaining pin in the spare tire recess.
If light-alloy wheels other than original
BMW light-alloy wheels have been
mounted, it may be necessary to use
different lug bolts for those wheels.
Replace the defective tire as soon as
possible and have the new wheel/tire
balanced.
Protect valve inserts against dirt using
screw-on valve stem caps. Dirty valve
stems frequently lead to slow pressure
loss.
Size 255/40 R17 94 W
* tires on
the rear axle:
In the event of a puncture or other tire
failure, it may be necessary to mount
the spare tire of different size at the
rear. This tire is suitable for use in all
load and speed ranges. Nevertheless,
you should remount a tire of the correct
size as soon as possible.<
Page 160 of 186
160n
Battery Fuses
Battery posts, terminals and other
components contain lead and lead
compounds. Wash hands after
handling.<
Battery careThe battery is maintenance-free, that is,
the original electrolyte will normally last
for the service life of the battery under
moderate climatic conditions.
For all questions that regard the
battery, please consult your BMW
center. The battery is completely main-
tenance-free; the following section is
provided for your information only.<
Do not disconnect the battery
when the engine is running, as the
ensuing voltage surge would damage
the vehicle's onboard electronics.<
Charging the batteryWhen charging the battery in the
vehicle, leave the engine off at all times.
Connect the charge cables to the termi-
nals in the engine compartment (for
terminal locations, refer to "Jump-
starting" on page 162.
Return used batteries to a recy-
cling point or your BMW center.
Maintain the battery in an upright posi-
tion for transport and storage. Secure
the battery against tilting during trans-
port.<
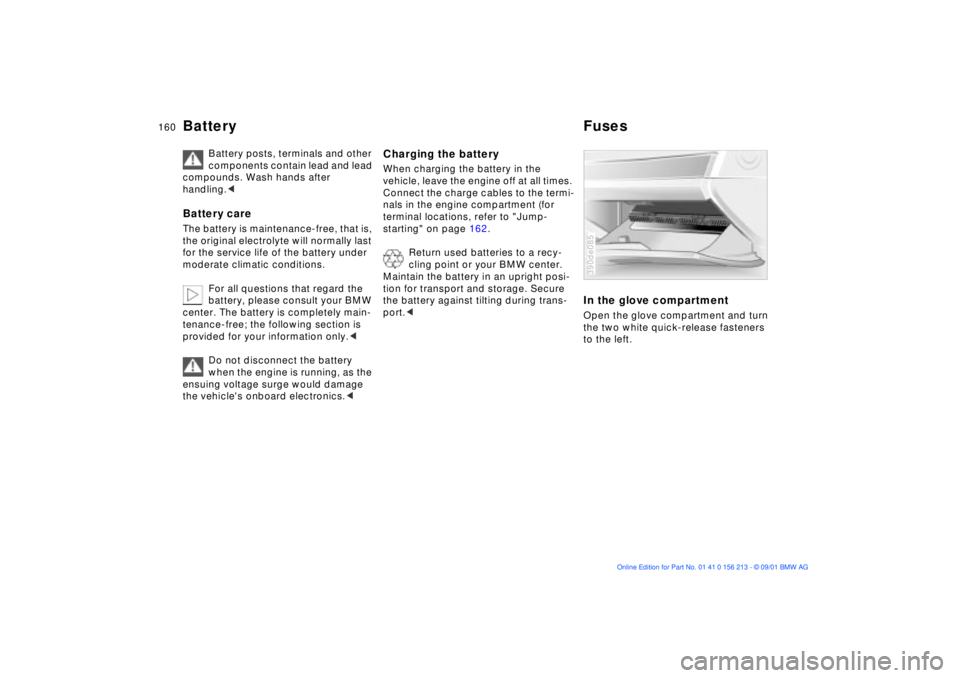
In the glove compartmentOpen the glove compartment and turn
the two white quick-release fasteners
to the left.390de085
Page 161 of 186
161n
OverviewControlsMaintenanceRepairsDataIndex
FusesIn the luggage compartmentUse the handle to pull down the trim on
the right wall.394de678
In the luggage compartment Ð
sport wagonOpen the right access door by pressing
the button and pull the trim panel to the
side.
If a subwoofer
* is installed, loosen the
T-screw and swing the subwoofer to
the side.
Do not attempt to repair a burned
fuse or replace it with a fuse
having a different color or ampere
rating. To do this could cause a fire in
the vehicle resulting from a circuit over-
load.<
392de172
Page 163 of 186
163n
OverviewControlsMaintenanceRepairsDataIndex
Jump-starting Towing the vehicle7. Start the support vehicle's engine
and let it run at an increased idling
speed for a few minutes. Start the
engine on the vehicle needing the
jump-start, and allow it to run as
usual. If the first start attempt is not
successful, wait a few minutes
before another attempt in order to
allow the discharged battery to
recharge
8. Before disconnecting the jumper
cables let the engines run for a few
minutes
9. Then disconnect the jumper cables
in reverse sequence.
Depending on the cause of the fault,
have the battery recharged by your
BMW center.
Tow fittingThe screw-in tow fitting is stored in the
onboard tool kit; be sure that it remains
in the vehicle at all times. This fitting is
designed for installation in the tow
sockets located at the front and rear of
the vehicle, and is intended for towing
on paved road surfaces only.
It should not be used to pull a vehicle
out of deep snow, mud, sand, etc.
Always observe all applicable towing
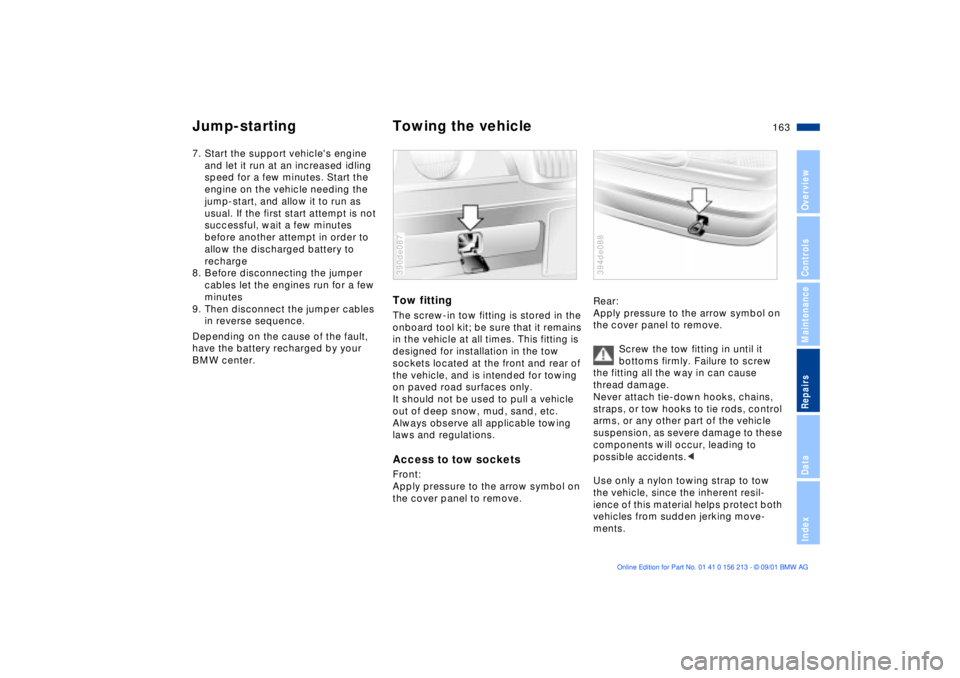
laws and regulations.Access to tow socketsFront:
Apply pressure to the arrow symbol on
the cover panel to remove.390de087
Rear:
Apply pressure to the arrow symbol on
the cover panel to remove.
Screw the tow fitting in until it
bottoms firmly. Failure to screw
the fitting all the way in can cause
thread damage.
Never attach tie-down hooks, chains,
straps, or tow hooks to tie rods, control
arms, or any other part of the vehicle
suspension, as severe damage to these
components will occur, leading to
possible accidents.<
Use only a nylon towing strap to tow
the vehicle, since the inherent resil-
ience of this material helps protect both
vehicles from sudden jerking move-
ments.394de088