Page 2627 of 4323

A04456
No.2 Idler
Pulley Bolt
Timing
Mark
Crankshaft
Pulley Bolt
A23334
Movement
(25°)
SSTOil Control Valve
Installation Hole
A23335Service Bolt
A23336
EM±40
± ENGINE MECHANICALCYLINDER HEAD
2619 Author�: Date�:
2005 SEQUOIA (RM1146U)
(a) Check the crankshaft pulley position.
Check that the timing mark of the crankshaft pulley is
aligned with the centers of the crankshaft pulley bolt and
idler pulley bolt.
NOTICE:
Having the crankshaft pulley at the wrong angle can cause
the piston head and valve head to come into contact with
each other when you remove the camshaft, causing dam-
age. So always set the crankshaft pulley at the correct
angle.
(b) Release the oil from the front bearing caps.
Using SST, rotate the camshaft timing tube from left to
right 2 to 3 times within its VVT±i range (25°) and use a
waste cloth to collect the oil from the camshaft timing oil
control valve installation hole.
SST 09960±10010 (09962±01000, 09963±00400)
NOTICE:
Approximately 20 cc (1.2 cu in.) of oil will be ejected. Take
care not to spill it.
(c) Remove the LH camshafts.
(1) Bring the service bolt hole of the sub±gear upward
by turning the hexagon head portion of the exhaust
camshaft with a wrench.
(2) Secure the sub±gear to the main gear with a service
bolt.
Recommended service bolt:
Thread diameter6 mm
Thread pitch1.0 mm
Bolt length16 to 20 mm (0.63 to 0.79 in.)
HINT:
When removing the camshaft, make sure that the torsional
spring force of the sub±gear has been eliminated by the above
operation.
(3) Align the timing mark (2±dot mark) of the camshaft
drive gear by turning the hexagon head portion of
the exhaust camshaft with a wrench.
Page 2628 of 4323

A23337
12
345
6
7
811
12 13
14
15
1617
18 2122
910 1920
A23338
Service Bolt
A23339
Approx.
10°
A23340
1 2
21
22
19 20
7
8 11
12
13
14
15
16
3
4 17
18
5
6 9
10
± ENGINE MECHANICALCYLINDER HEAD
EM±41
2620 Author�: Date�:
2005 SEQUOIA (RM1146U)
(4) Uniformly loosen the 22 bearing cap bolts in several
steps, in the sequence shown.
(5) Remove the 22 bearing cap bolts, 4 seal washers,
oil feed pipe, 9 bearing caps, camshaft housing
plug, oil control valve filter and 2 camshafts.
(d) Remove the RH camshafts.
(1) Bring the service bolt hole of the sub±gear upward
by turning the hexagon head portion of the exhaust
camshaft with a wrench.
(2) Secure the sub±gear to the main gear with a service
bolt.
Recommended service bolt:
Thread diameter6 mm
Thread pitch1.0 mm
Bolt length16 to 20 mm (0.63 to 0.79 in.)
HINT:
When removing the camshafts, make sure that the torsional
spring force of the sub±gear has been eliminated by the above
operation.
(3) Set the timing mark (1±dot mark) of the camshaft
main gear at approx. 10° angle by turning the hexa-
gon head portion of the exhaust camshaft with a
wrench.
(4) Uniformly loosen the 22 bearing cap bolts in several
steps, in the sequence shown.
(5) Remove the 22 bearing cap bolts, 4 seal washers,
oil feed pipe, 9 bearing caps, camshaft housing
plug, strainer and 2 camshafts.
HINT:
Arrange the bearing caps for RH and LH sides.
Page 2843 of 4323

B16233
Recommended Viscosity (SAE):
TEMPERATURE RANGE ANTICIPATED BEFORE NEXT OIL CHANGE5W±30°C °F
±20
±290
±1820
±740
460
1680
27100
38
LU0GV±05
B07230
Oil Pressure Gauge
Oil Pressure Switch
P08343
Adhesive
± LUBRICATIONOIL AND FILTER
LU±1
2835 Author�: Date�:
2005 SEQUOIA (RM1146U)
OIL AND FILTER
INSPECTION
1. CHECK ENGINE OIL QUALITY
Check the oil for deterioration, entry of water, discoloring or thin-
ning.
If the quality is visibly poor, replace the oil.
Oil grade:
API grade SL Energy±Conserving or ILSAC multi-
grade engine oil.
2. CHECK ENGINE OIL LEVEL
The oil level should be between the ºLº and ºFº marks on the dip-
stick.
If low, check for leakage and add oil up to the ºFº mark.
NOTICE:
Do not fill with engine oil above the ºFº mark.
3. REMOVE ENGINE UNDER COVER
4. REMOVE OIL PRESSURE SWITCH
5. INSTALL OIL PRESSURE GAUGE
6. WARM UP ENGINE
Allow the engine to warm up to normal operating temperature.
7. CHECK OIL PRESSURE
Oil pressure:
At idle29 kPa (0.3 kgf/cm2, 4.2 psi) or more
At 3,000 rpm294 ± 588 kPa (3.0 ± 6.0 kgf/cm2, 43 ± 85 psi)
8. REMOVE OIL PRESSURE GAUGE
9. REINSTALL OIL PRESSURE SWITCH
(a) Apply adhesive to 2 or 3 threads of the oil pressure switch.
Adhesive:
Part No. 08833±00080, THREE BOND 1344, LOCTITE
242 or equivalent
(b) Reinstall the oil pressure switch.
10. START ENGINE, AND CHECK FOR ENGINE OIL
LEAKS
11. REINSTALL ENGINE UNDER COVER
Page 2872 of 4323
IG0152
IG0148
P03792
± IGNITIONIGNITION SYSTEM
IG±3
2864 Author�: Date�:
2005 SEQUOIA (RM1146U)
(c) Clean the spark plugs.
If the electrode has traces of wet carbon, allow it to dry and then
clean with a spark plug cleaner.
Air pressure: Below 588 kPa (6 kgf/cm
2, 85 psi)
Duration: 20 seconds or less
HINT:
If there are traces of oil, remove it with gasoline before using the
spark plug cleaner.
(d) Check the spark plug for thread damage and insulator
damage.
If abnormal, replace the spark plug.
Recommended spark plug:
DENSO madeSK20R11
NGK madeIFR6A11
(e) Adjust the spark plug electrode gap.
Electrode gap: 1.0 to 1.1 mm (0.039 to 0.043 in.)
(f) Using a 16 mm plug wrench, install the spark plugs.
Torque: 17.5 N´m (180 kgf´cm, 13 ft´lbf)
(g) Reinstall the ignition coils (with igniter).
(see page IG±6)
Page 3043 of 4323

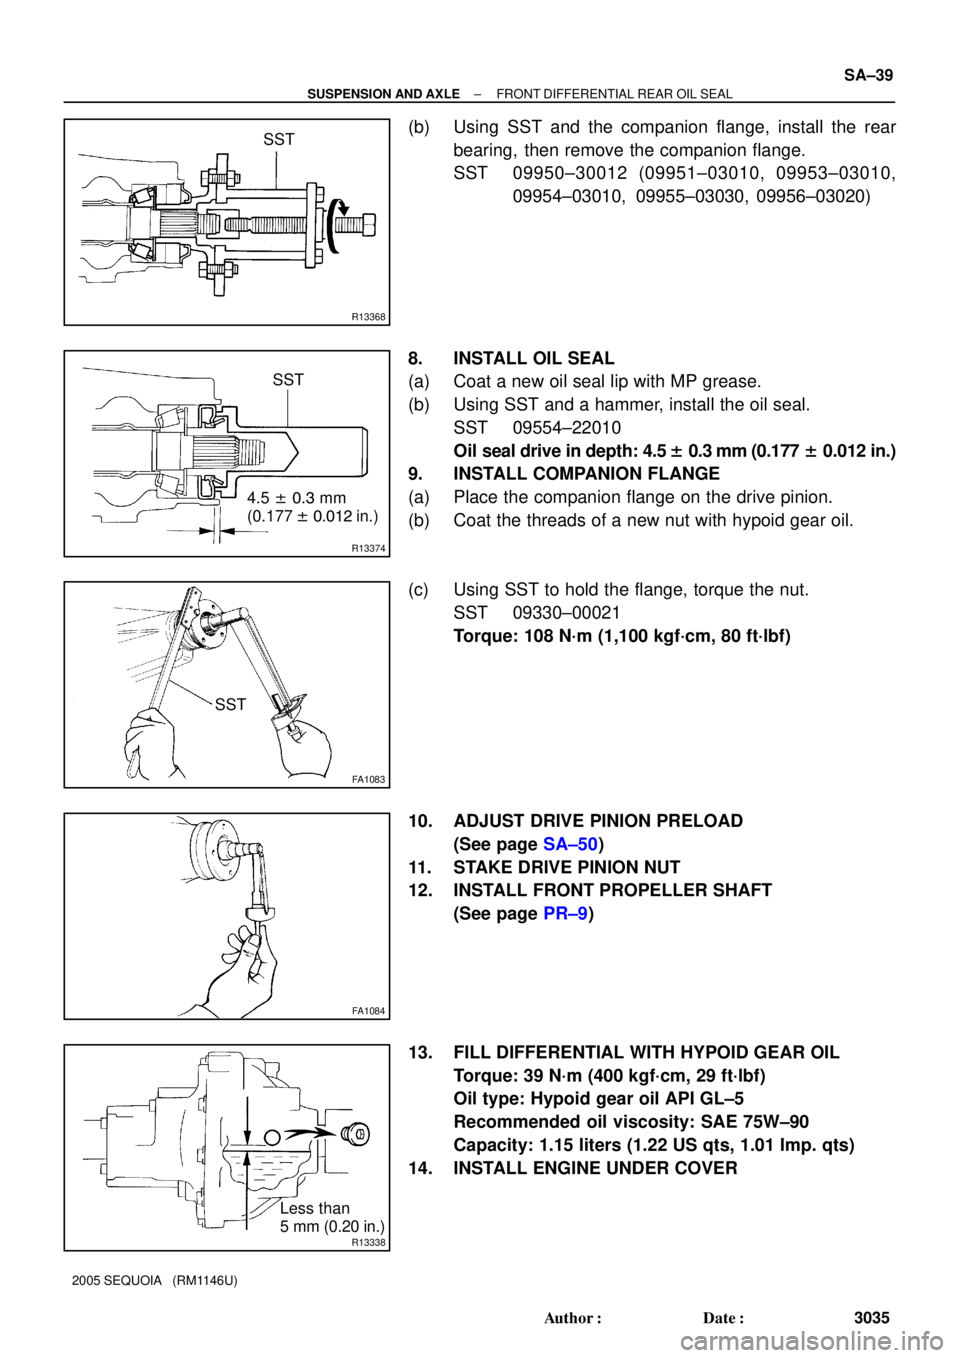
R13368
SST
R13374
SST
4.5 ± 0.3 mm
(0.177 ± 0.012 in.)
FA1083
SST
FA1084
R13338
Less than
5 mm (0.20 in.)
± SUSPENSION AND AXLEFRONT DIFFERENTIAL REAR OIL SEAL
SA±39
3035 Author�: Date�:
2005 SEQUOIA (RM1146U)
(b) Using SST and the companion flange, install the rear
bearing, then remove the companion flange.
SST 09950±30012 (09951±03010, 09953±03010,
09954±03010, 09955±03030, 09956±03020)
8. INSTALL OIL SEAL
(a) Coat a new oil seal lip with MP grease.
(b) Using SST and a hammer, install the oil seal.
SST 09554±22010
Oil seal drive in depth: 4.5 ± 0.3 mm (0.177 ± 0.012 in.)
9. INSTALL COMPANION FLANGE
(a) Place the companion flange on the drive pinion.
(b) Coat the threads of a new nut with hypoid gear oil.
(c) Using SST to hold the flange, torque the nut.
SST 09330±00021
Torque: 108 N´m (1,100 kgf´cm, 80 ft´lbf)
10. ADJUST DRIVE PINION PRELOAD
(See page SA±50)
11. STAKE DRIVE PINION NUT
12. INSTALL FRONT PROPELLER SHAFT
(See page PR±9)
13. FILL DIFFERENTIAL WITH HYPOID GEAR OIL
Torque: 39 N´m (400 kgf´cm, 29 ft´lbf)
Oil type: Hypoid gear oil API GL±5
Recommended oil viscosity: SAE 75W±90
Capacity: 1.15 liters (1.22 US qts, 1.01 Imp. qts)
14. INSTALL ENGINE UNDER COVER
Page 3112 of 4323
FA1083
SST
FA1084
R13337
Less than
5 mm (0.20 in.) SA±108
± SUSPENSION AND AXLEREAR DIFFERENTIAL FRONT OIL SEAL
3104 Author�: Date�:
2005 SEQUOIA (RM1146U)
(d) 4WD:
Using SST to hold the flange, torque the nut.
SST 09330±00021
Torque: 147 N´m (1,500 kgf´cm, 109 ft´lbf)
11. ADJUST DRIVE PINION PRELOAD
(See page SA±119)
12. STAKE DRIVE PINION NUT
13. CONNECT REAR PROPELLER SHAFT
2WD: See page PR±5
4WD: See page PR±9
14. FILL DIFFERENTIAL WITH HYPOID GEAR OIL
Torque: 49 N´m (500 kgf´cm, 36 ft´lbf)
Oil type: Hypoid gear oil API GL±5
Recommended oil viscosity:
SAE 75W ± 140 (Synthetic)
Capacity: 3.65 liters (3.86 US qts, 3.21 Imp. qts)
Page 4284 of 4323
05_SEQUOIA_U (L/O 0408)
425
2005 SEQUOIA from Aug. '04 Prod. (OM34424U)
ENGINE OIL SELECTION
ªToyota Genuine Motor Oilº is used in
your Toyota vehicle. Use Toyota approved
ªToyota Genuine Motor Oilº or equivalent
to satisfy the following grade and
viscosity.
Oil grade:
API grade SL ªEnergy±Conservingº or
ILSAC multigrade engine oil
Recommended viscosity:
SAE 5W±30
Outside temperature
SAE 5W±30 is the best choice for good
fuel economy and good starting in cold
weather.
If SAE 5W±30 is not available, SAE
10W±30 may be used. However, it
should be replaced with SAE 5W±30 at
the next oil change.
API service symbol
ILSAC certification mark
Page 4315 of 4323

05_SEQUOIA_U (L/O 0408)
456
2005 SEQUOIA from Aug. '04 Prod. (OM34424U)
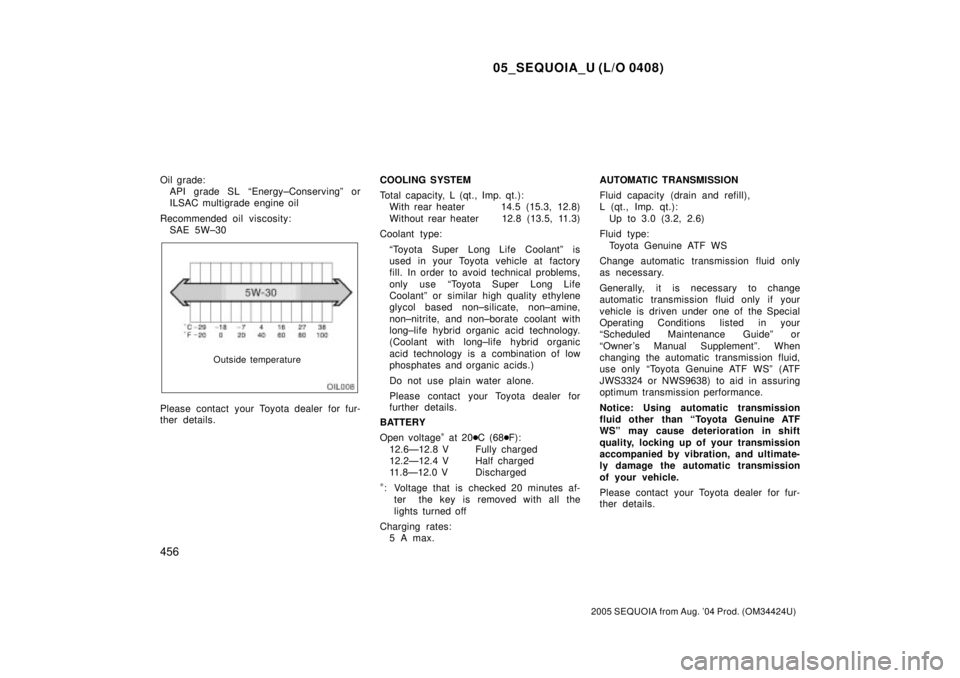
Oil grade:
API grade SL ªEnergy±Conservingº or
ILSAC multigrade engine oil
Recommended oil viscosity:
SAE 5W±30
Outside temperature
Please contact your Toyota dealer for fur-
ther details.COOLING SYSTEM
Total capacity, L (qt., Imp. qt.):
With rear heater 14.5 (15.3, 12.8)
Without rear heater 12.8 (13.5, 11.3)
Coolant type:
ªToyota Super Long Life Coolantº is
used in your Toyota vehicle at factory
fill. In order to avoid technical problems,
only use ªToyota Super Long Life
Coolantº or similar high quality ethylene
glycol based non±silicate, non±amine,
non±nitrite, and non±borate coolant with
long±life hybrid organic acid technology.
(Coolant with long±life hybrid organic
acid technology is a combination of low
phosphates and organic acids.)
Do not use plain water alone.
Please contact your Toyota dealer for
further details.
BATTERY
Open voltage
* at 20�C (68�F):
12.6Ð12.8 V Fully charged
12.2Ð12.4 V Half charged
11.8Ð12.0 V Discharged
*: Voltage that is checked 20 minutes af-
ter the key is removed with all the
lights turned off
Charging rates:
5 A max.AUTOMATIC TRANSMISSION
Fluid capacity (drain and refill),
L (qt., Imp. qt.):
Up to 3.0 (3.2, 2.6)
Fluid type:
Toyota Genuine ATF WS
Change automatic transmission fluid only
as necessary.
Generally, it is necessary to change
automatic transmission fluid only if your
vehicle is driven under one of the Special
Operating Conditions listed in your
ªScheduled Maintenance Guideº or
ªOwner 's Manual Supplementº. When
changing the automatic transmission fluid,
use only ªToyota Genuine ATF WSº (ATF
JWS3324 or NWS9638) to aid in assuring
optimum transmission performance.
Notice: Using automatic transmission
fluid other than ªToyota Genuine ATF
WSº may cause deterioration in shift
quality, locking up of your transmission
accompanied by vibration, and ultimate-
ly damage the automatic transmission
of your vehicle.
Please contact your Toyota dealer for fur-
ther details.