Page 4009 of 4323
05_SEQUOIA_U (L/O 0408)
150
2005 SEQUOIA from Aug. '04 Prod. (OM34424U)
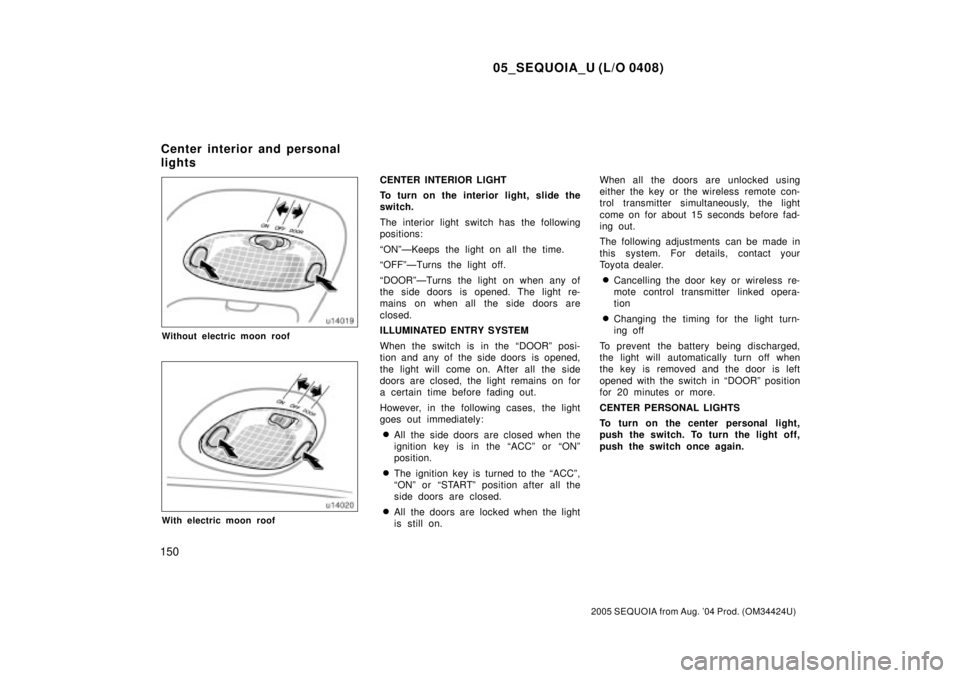
Without electric moon roof
With electric moon roof
CENTER INTERIOR LIGHT
To turn on the interior light, slide the
switch.
The interior light switch has the following
positions:
ªONºÐKeeps the light on all the time.
ªOFFºÐTurns the light off.
ªDOORºÐTurns the light on when any of
the side doors is opened. The light re-
mains on when all the side doors are
closed.
ILLUMINATED ENTRY SYSTEM
When the switch is in the ªDOORº posi-
tion and any of the side doors is opened,
the light will come on. After all the side
doors are closed, the light remains on for
a certain time before fading out.
However, in the following cases, the light
goes out immediately:
�All the side doors are closed when the
ignition key is in the ªACCº or ªONº
position.
�The ignition key is turned to the ªACCº,
ªONº or ªSTARTº position after all the
side doors are closed.
�All the doors are locked when the light
is still on.When all the doors are unlocked using
either the key or the wireless remote con-
trol transmitter simultaneously, the light
come on for about 15 seconds before fad-
ing out.
The following adjustments can be made in
this system. For details, contact your
Toyota dealer.
�Cancelling the door key or wireless re-
mote control transmitter linked opera-
tion
�Changing the timing for the light turn-
ing off
To prevent the battery being discharged,
the light will automatically turn off when
the key is removed and the door is left
opened with the switch in ªDOORº position
for 20 minutes or more.
CENTER PERSONAL LIGHTS
To turn on the center personal light,
push the switch. To turn the light off,
push the switch once again.
Center interior and personal
lights
Page 4158 of 4323
05_SEQUOIA_U (L/O 0408)
299
2005 SEQUOIA from Aug. '04 Prod. (OM34424U)
ªAUTOº button
For automatic operation of the rear air
conditioning, press the ªAUTOº button. An
indicator light will illuminate to show that
the automatic operation mode has been
selected.
In the automatic operation mode, the air
conditioning selects the most suitable fan
speed and air flow according to the tem-
perature.
You may use manual controls if you want
to select your own settings.
Fan speed selector
Select the mode button you desire to ad-
just the fan speed and push it.
In automatic operation, the fan speed is
adjusted automatically unless you desire
another fan speed mode.
Temperature selector
To increase the temperature, press the
ª�º side, to decrease it, press the ª�º
side.
The temperature display changes between
ª�Cº and ª�Fº when the unit of the outside
temperature display is changed. (For de-
tails, see ªMulti±information displayº on
page 302 in Section 1±10.)ªREARº button
You can turn on or off the rear air condi-
tioning system by pushing the button.
ªFRT+RRº button
You can cancel the operations from the
rear control panel by pushing this button.
While the operation from the rear control
panel are stopped, the front and rear air
conditioning systems can be set simulta-
neously from the front control panel.
ªOFFº button
Push the ªOFFº button to turn off the air
conditioning system.
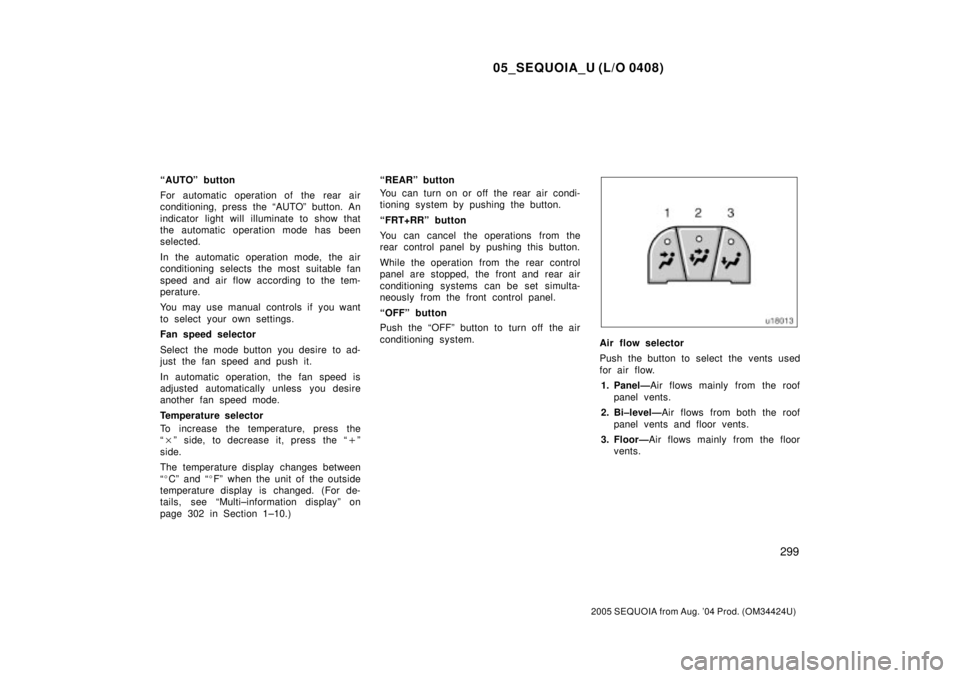
Air flow selector
Push the button to select the vents used
for air flow.
1. PanelÐAir flows mainly from the roof
panel vents.
2. Bi±levelÐAir flows from both the roof
panel vents and floor vents.
3. FloorÐAir flows mainly from the floor
vents.
Page 4160 of 4323
05_SEQUOIA_U (L/O 0408)
301
2005 SEQUOIA from Aug. '04 Prod. (OM34424U)
OPERATION OF INSTRUMENTS AND
CONTROLS
Other equipment
Multi±information display302 . . . . . . . . . . . . . . . . . . . . . . . . . . . . . . . . . . . .
Clock313 . . . . . . . . . . . . . . . . . . . . . . . . . . . . . . . . . . . . . . . . . . . . . . . . . . . . . .
Cigarette lighter and ashtrays313 . . . . . . . . . . . . . . . . . . . . . . . . . . . . . . . .
Power outlets314 . . . . . . . . . . . . . . . . . . . . . . . . . . . . . . . . . . . . . . . . . . . . . .
Power outlet315 . . . . . . . . . . . . . . . . . . . . . . . . . . . . . . . . . . . . . . . . . . . . . . .
Glove box316 . . . . . . . . . . . . . . . . . . . . . . . . . . . . . . . . . . . . . . . . . . . . . . . . . .
Garage door opener box317 . . . . . . . . . . . . . . . . . . . . . . . . . . . . . . . . . . . .
Auxiliary boxes319 . . . . . . . . . . . . . . . . . . . . . . . . . . . . . . . . . . . . . . . . . . . . .
Rear console box322 . . . . . . . . . . . . . . . . . . . . . . . . . . . . . . . . . . . . . . . . . . .
Note pad holder323 . . . . . . . . . . . . . . . . . . . . . . . . . . . . . . . . . . . . . . . . . . . .
Coin holder324 . . . . . . . . . . . . . . . . . . . . . . . . . . . . . . . . . . . . . . . . . . . . . . . .
Compact disc and cassette tape holder325 . . . . . . . . . . . . . . . . . . . . . . .
Removable console box326 . . . . . . . . . . . . . . . . . . . . . . . . . . . . . . . . . . . . .
Cup holders328 . . . . . . . . . . . . . . . . . . . . . . . . . . . . . . . . . . . . . . . . . . . . . . . .
Tie±down hooks329 . . . . . . . . . . . . . . . . . . . . . . . . . . . . . . . . . . . . . . . . . . . .
Grocery bag hooks330 . . . . . . . . . . . . . . . . . . . . . . . . . . . . . . . . . . . . . . . . .
Cargo net hooks330 . . . . . . . . . . . . . . . . . . . . . . . . . . . . . . . . . . . . . . . . . . . .
Roof luggage carrier330 . . . . . . . . . . . . . . . . . . . . . . . . . . . . . . . . . . . . . . . .
Floor mat331 . . . . . . . . . . . . . . . . . . . . . . . . . . . . . . . . . . . . . . . . . . . . . . . . . .
SECTION 1± 10
Page 4168 of 4323
05_SEQUOIA_U (L/O 0408)
309
2005 SEQUOIA from Aug. '04 Prod. (OM34424U)
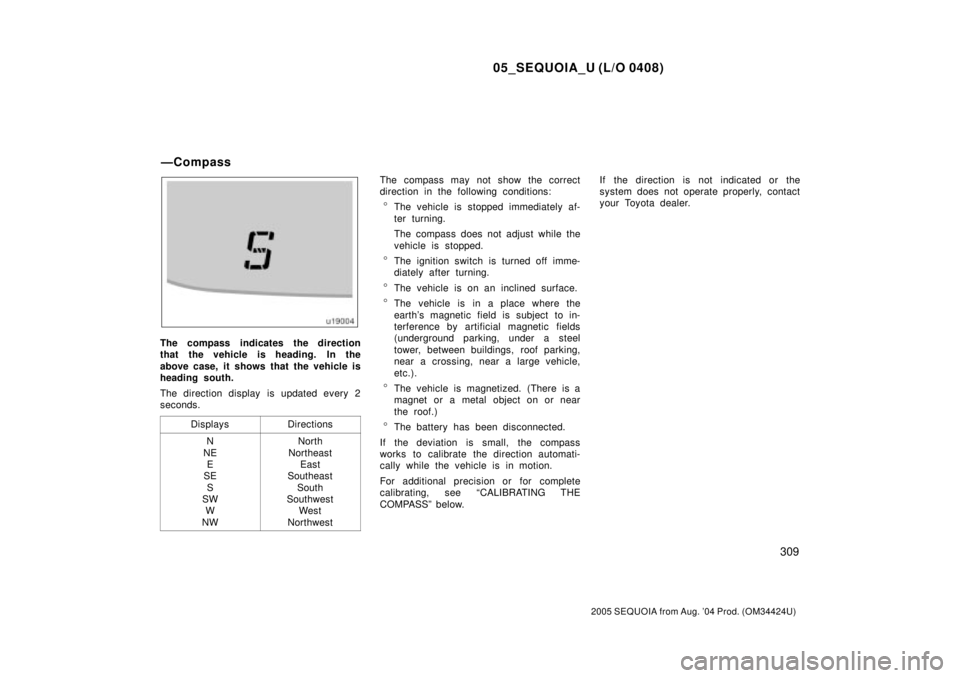
The compass indicates the direction
that the vehicle is heading. In the
above case, it shows that the vehicle is
heading south.
The direction display is updated every 2
seconds.
Displays
Directions
N
NE
E
SE
S
SW
W
NWNorth
Northeast
East
Southeast
South
Southwest
West
Northwest
The compass may not show the correct
direction in the following conditions:
�The vehicle is stopped immediately af-
ter turning.
The compass does not adjust while the
vehicle is stopped.
�The ignition switch is turned off imme-
diately after turning.
�The vehicle is on an inclined surface.
�The vehicle is in a place where the
earth's magnetic field is subject to in-
terference by artificial magnetic fields
(underground parking, under a steel
tower, between buildings, roof parking,
near a crossing, near a large vehicle,
etc.).
�The vehicle is magnetized. (There is a
magnet or a metal object on or near
the roof.)
�The battery has been disconnected.
If the deviation is small, the compass
works to calibrate the direction automati-
cally while the vehicle is in motion.
For additional precision or for complete
calibrating, see ªCALIBRATING THE
COMPASSº below.If the direction is not indicated or the
system does not operate properly, contact
your Toyota dealer.
ÐCompass
Page 4169 of 4323
05_SEQUOIA_U (L/O 0408)
310
2005 SEQUOIA from Aug. '04 Prod. (OM34424U)
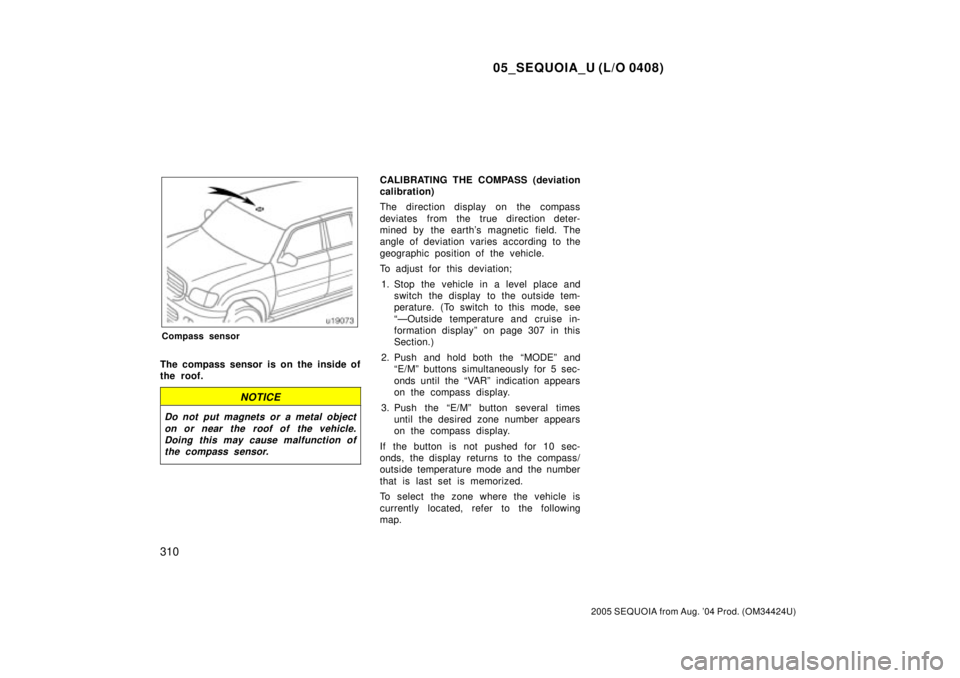
Compass sensor
The compass sensor is on the inside of
the roof.
NOTICE
Do not put magnets or a metal object
on or near the roof of the vehicle.
Doing this may cause malfunction of
the compass sensor.
CALIBRATING THE COMPASS (deviation
calibration)
The direction display on the compass
deviates from the true direction deter-
mined by the earth's magnetic field. The
angle of deviation varies according to the
geographic position of the vehicle.
To adjust for this deviation;
1. Stop the vehicle in a level place and
switch the display to the outside tem-
perature. (To switch to this mode, see
ªÐOutside temperature and cruise in-
formation displayº on page 307 in this
Section.)
2. Push and hold both the ªMODEº and
ªE/Mº buttons simultaneously for 5 sec-
onds until the ªVARº indication appears
on the compass display.
3. Push the ªE/Mº button several times
until the desired zone number appears
on the compass display.
If the button is not pushed for 10 sec-
onds, the display returns to the compass/
outside temperature mode and the number
that is last set is memorized.
To select the zone where the vehicle is
currently located, refer to the following
map.
Page 4172 of 4323
05_SEQUOIA_U (L/O 0408)
313
2005 SEQUOIA from Aug. '04 Prod. (OM34424U)
Perform circling calibration just after
you have purchased your Toyota. And
then always perform circling calibration
after the battery has been removed, re-
placed or disconnected.
�Do not perform circling calibration of
the compass in a place where the
earth's magnetic field is subject to in-
terference by artificial magnetic fields
(underground parking, under a steel
tower, between buildings, roof parking,
near a crossing, near a large vehicle,
etc.).
�During calibration, do not operate elec-
tric systems (moon roof, power win-
dows, etc.) as they may interfere with
the calibration.
CAUTION
�When doing the circling calibration,
be sure to secure a wide space,
and watch out for people and ve-
hicles in the neighborhood. Do not
violate any local traffic rules while
performing circling calibration.
�Do not adjust the display while the
vehicle is moving. Be sure to adjust
the display only when the vehicle is
stopped.
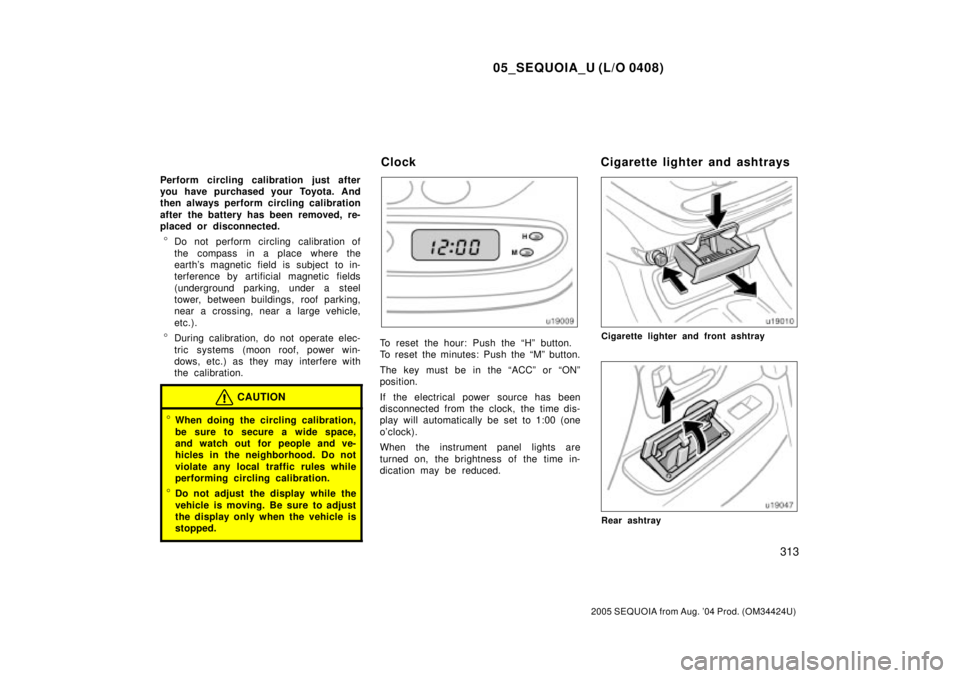
To reset the hour: Push the ªHº button.
To reset the minutes: Push the ªMº button.
The key must be in the ªACCº or ªONº
position.
If the electrical power source has been
disconnected from the clock, the time dis-
play will automatically be set to 1:00 (one
o'clock).
When the instrument panel lights are
turned on, the brightness of the time in-
dication may be reduced.Cigarette lighter and front ashtray
Rear ashtray
Clock Cigarette lighter and ashtrays
Page 4179 of 4323
05_SEQUOIA_U (L/O 0408)
320
2005 SEQUOIA from Aug. '04 Prod. (OM34424U)
Type A (over head console with electric
moon roof)
Type B (over head console without elec-
tric moon roof)
Type C (rear side trim)
Type D (rear right side panelÐwithout
rear air conditioning system)
Type E (rear left side panel)
Page 4189 of 4323
05_SEQUOIA_U (L/O 0408)
330
2005 SEQUOIA from Aug. '04 Prod. (OM34424U)
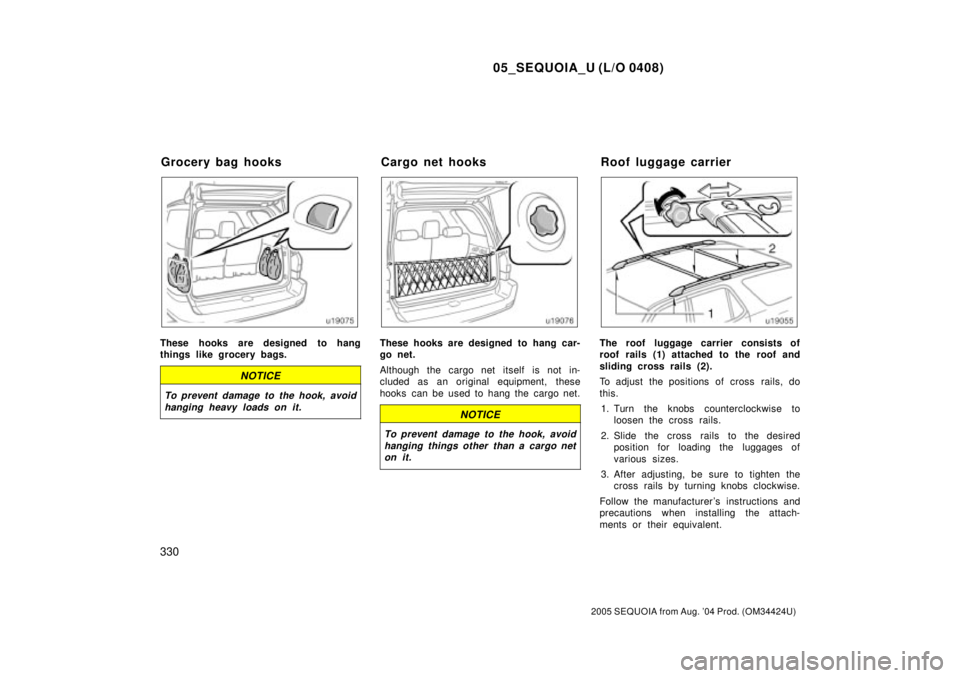
These hooks are designed to hang
things like grocery bags.
NOTICE
To prevent damage to the hook, avoid
hanging heavy loads on it.
These hooks are designed to hang car-
go net.
Although the cargo net itself is not in-
cluded as an original equipment, these
hooks can be used to hang the cargo net.
NOTICE
To prevent damage to the hook, avoid
hanging things other than a cargo net
on it.
The roof luggage carrier consists of
roof rails (1) attached to the roof and
sliding cross rails (2).
To adjust the positions of cross rails, do
this.
1. Turn the knobs counterclockwise to
loosen the cross rails.
2. Slide the cross rails to the desired
position for loading the luggages of
various sizes.
3. After adjusting, be sure to tighten the
cross rails by turning knobs clockwise.
Follow the manufacturer 's instructions and
precautions when installing the attach-
ments or their equivalent.
Grocery bag hooks Cargo net hooks Roof luggage carrier