Page 3778 of 4323
I21387
Nut A:
Nut B:
I21392
I21391
± AIR CONDITIONINGREAR A/C UNIT
AC±43
3770 Author�: Date�:
2005 SEQUOIA (RM1146U)
NOTICE:
Cap the openings immediately to keep moisture or dirt out
of the system.
HINT:
At the time of installation, refer to the following:
Lubricate 2 new O±rings with compressor oil and install them
to the tube and valve.
(d) Remove the holder and disconnect the heat sensing
tube.
(e) Loosen the 2 nuts and remove the expansion valve.
Torque:
Nut A: 13 N´m (135 kgf´cm, 10 ft´lbf)
Nut B: 22 N´m (235 kgf´cm, 16 ft´lbf)
HINT:
At the time of installation, refer to the following:
Lubricate 2 new O±rings with compressor oil and install them
to the expansion valve.
7. REMOVE EVAPORATOR
(a) Remove the 8 screws and cover.
(b) Pull out the evaporator.
8. REMOVE AIR OUTLET SERVOMOTOR
(a) Using a screwdriver, release the claw and remove the
plate.
HINT:
Tape the screwdriver tip before use.
(b) Remove the 3 screws and servomotor.
Page 3806 of 4323

AC3I9±02
I21380
I21383
± AIR CONDITIONINGREAR A/C EVAPORATOR
AC±71
3798 Author�: Date�:
2005 SEQUOIA (RM1146U)
REMOVAL
1. DISCHARGE REFRIGERANT FROM REFRIGERATION
SYSTEM
HINT:
At the time of installation, refer to the following:
�Evacuate air from the refrigeration system.
�Charge the system with refrigerant and inspect for leak-
age of refrigerant.
Specified amount:
Dual A/C: 1050 ± 50 g (37.03 ± 1.76 oz.)
2. DRAIN ENGINE COOLANT FROM RADIATOR
HINT:
It is not necessary to drain out all coolant.
3. REMOVE REAR SEAT OUTER BELT FLOOR AN-
CHORS
4. REMOVE BACKDOOR SCUFF PLATE
5. REMOVE REAR DOOR SCUFF PLATE RH
6. REMOVE UPPER BACK DOOR GARNISH
7. REMOVE REAR WINDOW SIDE GARNISH RH
8. REMOVE REAR QUARTER TRIM PANEL RH
9. REMOVE QUARTER PILLAR GARNISH RH
10. DISCONNECT LIQUID AND SUCTION TUBES
Remove the 2 bolts and disconnect both tubes.
Torque: 5.4 N´m (55 kgf´cm, 48 in.´lbf)
NOTICE:
Cap the openings immediately to keep moisture or dirt out
of the system.
HINT:
At the time of installation, refer to the following:
Lubricate 2 new O±rings with compressor oil and install them
to the tubes.
11. REMOVE AIR DUCT
(a) Remove the 3 clips and cover.
(b) Remove the 2 air ducts.
(c) Disconnect the connectors and wire harness clamps.
Page 3809 of 4323

AC3IB±02
I21380
I21383
AC±74
± AIR CONDITIONINGREAR A/C EXPANSION VALVE
3801 Author�: Date�:
2005 SEQUOIA (RM1146U)
REAR A/C EXPANSION VALVE
REMOVAL
1. DISCHARGE REFRIGERANT FROM REFRIGERATION
SYSTEM
HINT:
At the time of installation, refer to the following:
�Evacuate air from the refrigeration system.
�Charge the system with refrigerant and inspect for leak-
age of refrigerant.
Specified amount:
Dual A/C: 1050 ± 50 g (37.03 ± 1.76 oz.)
2. DRAIN ENGINE COOLANT FROM RADIATOR
HINT:
It is not necessary to drain out all coolant.
3. REMOVE REAR SEAT OUTER BELT FLOOR AN-
CHORS
4. REMOVE BACKDOOR SCUFF PLATE
5. REMOVE REAR DOOR SCUFF PLATE RH
6. REMOVE UPPER BACK DOOR GARNISH
7. REMOVE REAR WINDOW SIDE GARNISH RH
8. REMOVE REAR QUARTER TRIM PANEL RH
9. REMOVE QUARTER PILLAR GARNISH RH
10. DISCONNECT LIQUID AND SUCTION TUBES
Remove the 2 bolts and disconnect both tubes.
Torque: 5.4 N´m (55 kgf´cm, 48 in.´lbf)
NOTICE:
Cap the openings immediately to keep moisture or dirt out
of the system.
HINT:
At the time of installation, refer to the following:
Lubricate 2 new O±rings with compressor oil and install them
to the tubes.
11. REMOVE AIR DUCT
(a) Remove the 3 clips and cover.
(b) Remove the 2 air ducts.
(c) Disconnect the connectors and wire harness clamps.
Page 3810 of 4323
I21799
I21384
I21387
Nut A:
Nut B:
± AIR CONDITIONINGREAR A/C EXPANSION VALVE
AC±75
3802 Author�: Date�:
2005 SEQUOIA (RM1146U)
12. REMOVE EXPANSION VALVE
(a) Remove the 4 screws and 2 brackets.
(b) Pry out the packing.
HINT:
At the time of installation, refer to the following:
Do not refuse the packing.
(c) Using a hexagon wrench (5.0 mm (0.20 in.)), remove the
2 bolts.
Torque: 5.4 N´m (55 kgf´cm, 48 in.´lbf)
(d) Remove the 3 bolts.
(e) Lift the A/C unit until the tube and accessary can be re-
moved.
(f) Remove the tube and accessary.
(g) Remove the holder and disconnect the heat sensing
tube.
(h) Loosen the 2 nuts and remove the expansion valve.
Torque:
Nut A: 13 N´m (135 kgf´cm, 10 in.´lbf)
Nut B: 22 N´m (235 kgf´cm, 16 in.´lbf)
HINT:
At the time of installation, refer to the following:
Lubricate 2 new O±rings with compressor oil and install them
to the expansion valve.
Page 3869 of 4323
05_SEQUOIA_U (L/O 0408)
10
2005 SEQUOIA from Aug. '04 Prod. (OM34424U)
or
Driver 's seat belt reminder light*
1
Discharge warning light*
1
Low fuel level warning light*
1
Brake system warning light*
1
Malfunction indicator lamp*
1
Anti±lock brake system warning light*
1
Automatic transmission fluid temperature
warning light (four±wheel drive models)*
1
SRS warning light*
1
Open door warning light*
1
Low windshield washer fluid level warning
light*
1
Front passenger 's seat belt reminder light*
1
Vehicle stability control system/traction control
system (two±wheel drive models) or active
traction control system (four±wheel drive
models) warning light
*
1
Low tire pressure warning light*
1
Engine oil replacement reminder light*
1
Indicator symbols on the instrument panel
Page 4267 of 4323
05_SEQUOIA_U (L/O 0408)
408
2005 SEQUOIA from Aug. '04 Prod. (OM34424U)
Windows
The windows may be cleaned with any
household window cleaner.
NOTICE
�When cleaning the inside of the
back window, be careful not to
scratch or damage the heater wires
or connectors.
�When cleaning the inside of the
rear quarter window, be careful not
to scratch or damage the printed
antenna.
Air conditioning control panel, audio
panel, instrument panel, console panel,
and switches
Use a soft damp cloth for cleaning.
Soak a clean soft cloth in water or luke-
warm water then lightly wipe off dirt.
NOTICE
�Do not use organic substances (sol-
vents, kerosene, alcohol, gasoline,
etc.) or alkaline or acidic solutions.
These chemicals can cause discol-
oring, staining or peeling of the
surface.
�If you use cleaners or polishing
agents, make sure their ingredients
do not include the substances men-
tioned above.
�If you use a liquid car freshener, do
not apill the liquid onto the ve-
hicle's interior surfaces. It may con-
tain the ingredients mentioned
above. Immediately clean any spill
using the method mentioned above.
Leather Interior
The leather upholstery may be cleaned
with neutral detergent for wool.
Remove dirt using a soft cloth dampened
with 5% solution of neutral detergent for
wool. Then thoroughly wipe off all traces
of detergent with a clean damp cloth.After cleaning or whenever any part of the
leather gets wet, dry with a soft clean
cloth. Allow the leather to dry in a venti-
lated shaded area.
NOTICE
�If a stain should fail to come out
with a neutral detergent, apply a
cleaner that does not contain an
organic solvent.
�Never use organic substances such
as benzine, alcohol or gasoline, or
alkaline or acid solutions for clean-
ing the leather as these could
cause discoloring.
�Use of a nylon brush or synthetic
fiber cloth, etc. may scratch the
fine grained surface of the leather.
�Mildew may develop on soiled leath-
er upholstery. Be especially careful
to avoid oil spots. Try to keep your
upholstery always clean.
�Long exposure to direct sunlight
may cause the leather surface to
harden and shrink. Keep your ve-
hicle in a shaded area, especially in
the summer.
Page 4315 of 4323
05_SEQUOIA_U (L/O 0408)
456
2005 SEQUOIA from Aug. '04 Prod. (OM34424U)
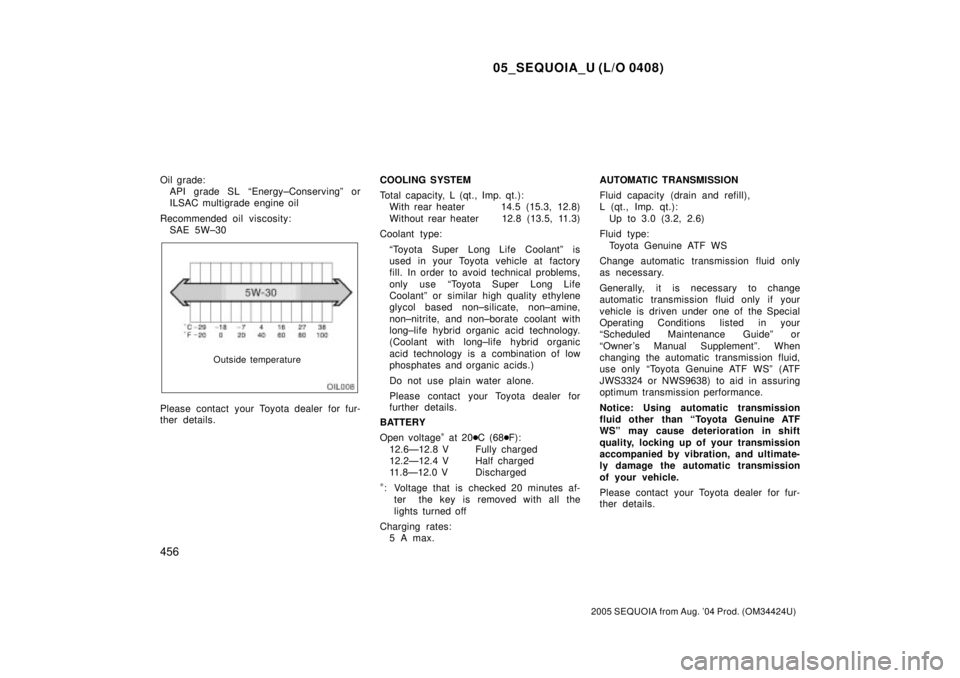
Oil grade:
API grade SL ªEnergy±Conservingº or
ILSAC multigrade engine oil
Recommended oil viscosity:
SAE 5W±30
Outside temperature
Please contact your Toyota dealer for fur-
ther details.COOLING SYSTEM
Total capacity, L (qt., Imp. qt.):
With rear heater 14.5 (15.3, 12.8)
Without rear heater 12.8 (13.5, 11.3)
Coolant type:
ªToyota Super Long Life Coolantº is
used in your Toyota vehicle at factory
fill. In order to avoid technical problems,
only use ªToyota Super Long Life
Coolantº or similar high quality ethylene
glycol based non±silicate, non±amine,
non±nitrite, and non±borate coolant with
long±life hybrid organic acid technology.
(Coolant with long±life hybrid organic
acid technology is a combination of low
phosphates and organic acids.)
Do not use plain water alone.
Please contact your Toyota dealer for
further details.
BATTERY
Open voltage
* at 20�C (68�F):
12.6Ð12.8 V Fully charged
12.2Ð12.4 V Half charged
11.8Ð12.0 V Discharged
*: Voltage that is checked 20 minutes af-
ter the key is removed with all the
lights turned off
Charging rates:
5 A max.AUTOMATIC TRANSMISSION
Fluid capacity (drain and refill),
L (qt., Imp. qt.):
Up to 3.0 (3.2, 2.6)
Fluid type:
Toyota Genuine ATF WS
Change automatic transmission fluid only
as necessary.
Generally, it is necessary to change
automatic transmission fluid only if your
vehicle is driven under one of the Special
Operating Conditions listed in your
ªScheduled Maintenance Guideº or
ªOwner 's Manual Supplementº. When
changing the automatic transmission fluid,
use only ªToyota Genuine ATF WSº (ATF
JWS3324 or NWS9638) to aid in assuring
optimum transmission performance.
Notice: Using automatic transmission
fluid other than ªToyota Genuine ATF
WSº may cause deterioration in shift
quality, locking up of your transmission
accompanied by vibration, and ultimate-
ly damage the automatic transmission
of your vehicle.
Please contact your Toyota dealer for fur-
ther details.