Page 308 of 3833
CO-2
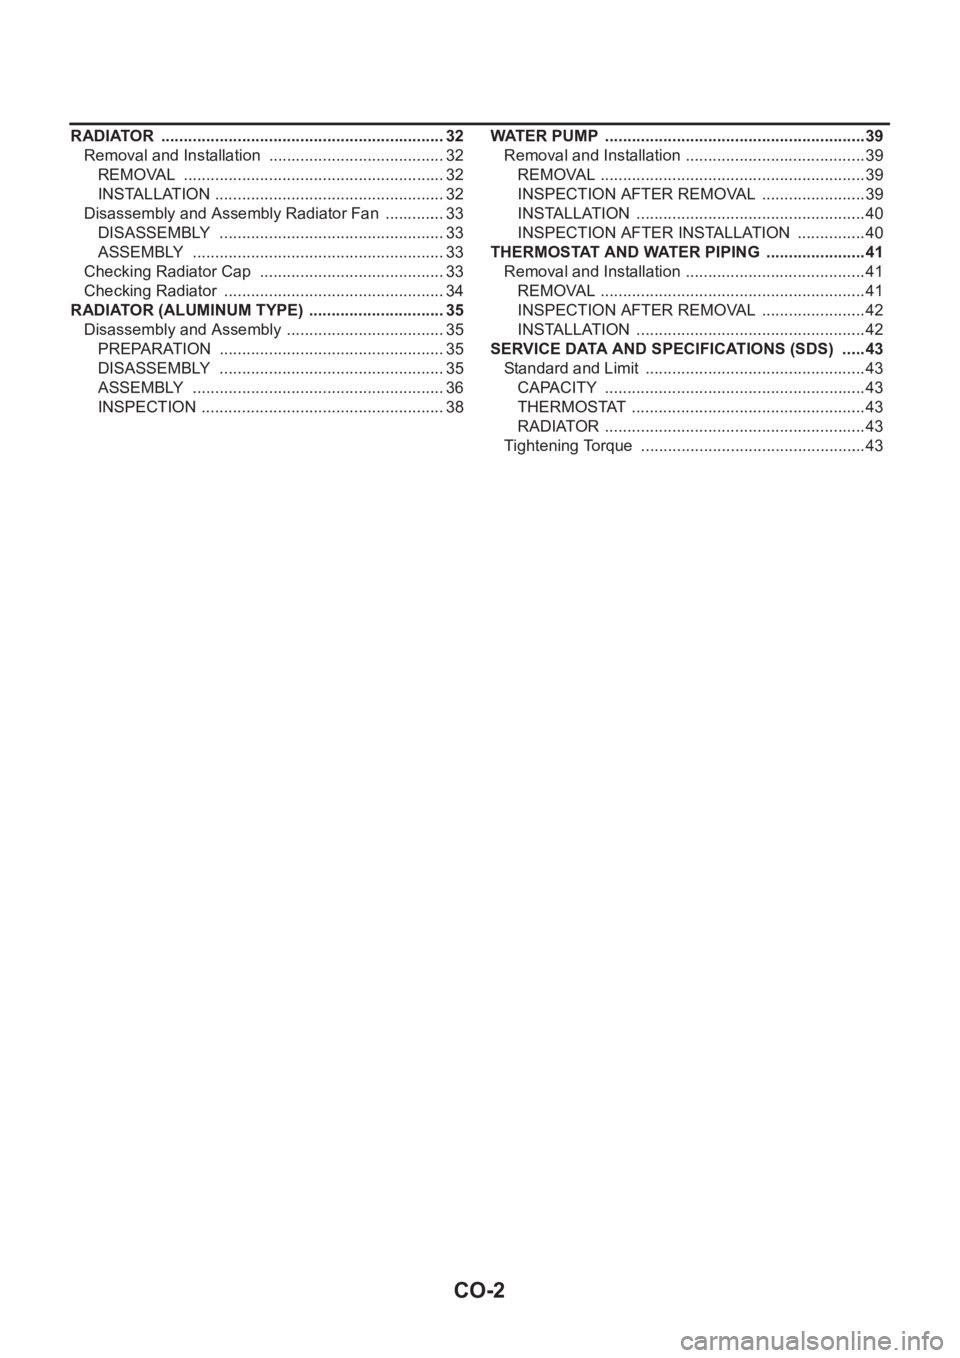
RADIATOR ................................................................ 32
Removal and Installation ........................................ 32
REMOVAL ........................................................... 32
INSTALLATION .................................................... 32
Disassembly and Assembly Radiator Fan .............. 33
DISASSEMBLY ................................................... 33
ASSEMBLY ......................................................... 33
Checking Radiator Cap .......................................... 33
Checking Radiator .................................................. 34
RADIATOR (ALUMINUM TYPE) ............................... 35
Disassembly and Assembly .................................... 35
PREPARATION ................................................... 35
DISASSEMBLY ................................................... 35
ASSEMBLY ......................................................... 36
INSPECTION ....................................................... 38WATER PUMP ........................................................... 39
Removal and Installation ......................................... 39
REMOVAL ............................................................ 39
INSPECTION AFTER REMOVAL ........................ 39
INSTALLATION .................................................... 40
INSPECTION AFTER INSTALLATION ................ 40
THERMOSTAT AND WATER PIPING ....................... 41
Removal and Installation ......................................... 41
REMOVAL ............................................................ 41
INSPECTION AFTER REMOVAL ........................ 42
INSTALLATION .................................................... 42
SERVICE DATA AND SPECIFICATIONS (SDS) ...... 43
Standard and Limit .................................................. 43
CAPACITY ........................................................... 43
THERMOSTAT ..................................................... 43
RADIATOR ........................................................... 43
Tightening Torque ................................................... 43
Page 310 of 3833
CO-4
[QR]
PREPARATION
PREPARATION
PFP:00002
Special Service ToolsEBS00KOC
Tool number
Tool nameDescription
WS39930000
Tube presserPressing the tube of liquid gasket
EG17650301
Radiator cap tester adapterAdapting radiator cap tester to radiator filler
neck
a: 28 (1.10) dia.
b: 31.4 (1.236) dia.
c: 41.3 (1.626) dia.
Unit: mm (in)
KV99103510
Radiator plate pliers AInstalling radiator upper and lower tanks
KV99103520
Radiator plate pliers BRemoving radiator upper and lower tanks
S-NT052
S-NT564
S-NT224
S-NT225
Page 311 of 3833
![NISSAN X-TRAIL 2001 Service Repair Manual OVERHEATING CAUSE ANALYSIS
CO-5
[QR]
C
D
E
F
G
H
I
J
K
L
MA
CO
OVERHEATING CAUSE ANALYSISPFP:00012
Troubleshooting ChartEBS00KOD
Symptom Check items
Cooling sys-
tem parts
malfunctionPoor heat transf](/manual-img/5/57405/w960_57405-310.png "NISSAN X-TRAIL 2001 Service Repair Manual OVERHEATING CAUSE ANALYSIS
CO-5
[QR]
C
D
E
F
G
H
I
J
K
L
MA
CO
OVERHEATING CAUSE ANALYSISPFP:00012
Troubleshooting ChartEBS00KOD
Symptom Check items
Cooling sys-
tem parts
malfunctionPoor heat transf")
OVERHEATING CAUSE ANALYSIS
CO-5
[QR]
C
D
E
F
G
H
I
J
K
L
MA
CO
OVERHEATING CAUSE ANALYSISPFP:00012
Troubleshooting ChartEBS00KOD
Symptom Check items
Cooling sys-
tem parts
malfunctionPoor heat transferWater pump malfunction Worn or loose drive belt
— Thermostat stuck closed —
Damaged finsDust contamination or
paper clogging
Physical damage
Clogged radiator cooling
tubeExcess foreign material
(rust, dirt, sand, etc.)
Reduced air flowCooling fan does not oper-
ate
Fan assembly — High resistance to fan rota-
tion
Damaged fan blades
Damaged radiator shroud — — —
Improper engine coolant
mixture ratio—— —
Poor engine coolant quality — Engine coolant viscosity —
Insufficient engine coolantEngine coolant leaksCooling hoseLoose clamp
Cracked hose
Water pump Poor sealing
Radiator capLoose
Poor sealing
RadiatorO-ring for damage, deterio-
ration or improper fitting
Cracked radiator tank
Cracked radiator core
Reservoir tank Cracked reservoir tank
Overflowing reservoir tankExhaust gas leaks into
cooling systemCylinder head deterioration
Cylinder head gasket dete-
rioration
Page 312 of 3833
CO-6
[QR]
OVERHEATING CAUSE ANALYSIS
Except cool-
ing system
parts mal-
function— Overload on engineAbusive drivingHigh engine rpm under no
load
Driving in low gear for
extended time
Driving at extremely high
speed
Powertrain system mal-
function
— Installed improper size
wheels and tires
Dragging brakes
Improper ignition timing
Blocked or restricted air
flowBlocked bumper —
— Blocked radiator grilleInstalled car brassiere
Mud contamination or
paper clogging
Blocked radiator —
Blocked condenser
Blocked air flow
Installed large fog lamp Symptom Check items
Page 315 of 3833
![NISSAN X-TRAIL 2001 Service Repair Manual ENGINE COOLANT
CO-9
[QR]
C
D
E
F
G
H
I
J
K
L
MA
CO
ENGINE COOLANTPFP:KQ100
InspectionEBS00KOG
LEVEL CHECK
●Check if the reservoir tank engine coolant level within MIN to
MAX when engine is](/manual-img/5/57405/w960_57405-314.png "NISSAN X-TRAIL 2001 Service Repair Manual ENGINE COOLANT
CO-9
[QR]
C
D
E
F
G
H
I
J
K
L
MA
CO
ENGINE COOLANTPFP:KQ100
InspectionEBS00KOG
LEVEL CHECK
●Check if the reservoir tank engine coolant level within MIN to
MAX when engine is")
ENGINE COOLANT
CO-9
[QR]
C
D
E
F
G
H
I
J
K
L
MA
CO
ENGINE COOLANTPFP:KQ100
InspectionEBS00KOG
LEVEL CHECK
●Check if the reservoir tank engine coolant level within MIN to
MAX when engine is cool.
●Adjust engine coolant if too much or too little.
CHECKING RADIATOR SYSTEM FOR LEAKS
To check for leakage, apply pressure to the cooling system with a
tester.
WARNING:
Never remove the radiator cap when the engine is hot. Serious
burns could occur from high pressure engine coolant escaping
from the radiator.
CAUTION:
Higher pressure than specified may cause radiator damage.
Changing Engine CoolantEBS00KOH
WARNING:
●To avoid being scalded, never change the engine coolant when the engine is hot.
●Wrap a thick cloth around cap and carefully remove the cap. First, turn the cap a quarter of a turn
to release built-up pressure. Then turn the cap all the way.
DRAINING ENGINE COOLANT
1. Open radiator drain plug at the bottom of radiator, and remove
radiator cap.
●Be careful not to allow engine coolant to contact drive belts.
2. Open drain plug on cylinder block.
3. Remove reservoir tank and drain engine coolant.
4. Check drained engine coolant for contaminants such as rust,
corrosion or discoloration.
If contaminated, flush engine cooling system. Refer to CO-10,
"FLUSHING COOLING SYSTEM" .
SMA412B
Testing pressure:
157 kPa (1.57 bar, 1.6 kg/cm
2 , 23 psi)
SLC134B
PBIC0236E
KBIA0163E
Page 316 of 3833
![NISSAN X-TRAIL 2001 Service Repair Manual CO-10
[QR]
ENGINE COOLANT
REFILLING ENGINE COOLANT
1. Install reservoir tank, radiator drain plug and cylinder block drain plug.
●Apply sealant to the thread of cylinder block drain plug.
Use Genui](/manual-img/5/57405/w960_57405-315.png "NISSAN X-TRAIL 2001 Service Repair Manual CO-10
[QR]
ENGINE COOLANT
REFILLING ENGINE COOLANT
1. Install reservoir tank, radiator drain plug and cylinder block drain plug.
●Apply sealant to the thread of cylinder block drain plug.
Use Genui")
CO-10
[QR]
ENGINE COOLANT
REFILLING ENGINE COOLANT
1. Install reservoir tank, radiator drain plug and cylinder block drain plug.
●Apply sealant to the thread of cylinder block drain plug.
Use Genuine Liquid Gasket or equivalent.
2. Fill radiator and reservoir tank to specified level.
●Use genuine Nissan engine coolant or equivalent in its
quality. Refer to MA-16, "
RECOMMENDED FLUIDS AND
LUBRICANTS" .
●Pour engine coolant slowly of less than 2 (1-3/4 lmp qt)
a minute to allow air in system to escape.
3. Warm up engine to normal operating temperature without radia-
tor cap installed.
●If engine coolant overflows radiator filler hole, install
radiator cap.
4. Run engine at 3,000 rpm for 10 seconds and return to idle speed
with radiator cap installed.
●Repeat two or three times.
Watch engine coolant temperature gauge so as not to overheat the engine.
5. Stop engine and cool down to less than approximately 50°C(122°F).
●Cool down using a fan to reduce the time.
●If necessary, refill radiator up to filler neck with engine coolant.
6. Refill reservoir tank to MAX level line with engine coolant.
7. Repeat steps 4 through 6 two or more times with radiator cap installed until engine coolant level no longer
drops.
8. Check cooling system for leaks with engine running.
9. Warm up engine, and check for sound of engine coolant flow while running engine from idle up to 3,000
rpm with heater temperature controller set at several position between COOL and WARM.
●Sound may be noticeable at heater unit.
10. If sound is heard, bleed air from cooling system by repeating steps 4 through 6 until engine coolant level
no longer drops.
●Clean excess engine coolant from engine.
FLUSHING COOLING SYSTEM
1. Fill radiator and reservoir tank with water and reinstall radiator cap.
2. Run engine and warm it up to normal operating temperature.
3. Rev engine two or three times under no-load.
4. Stop engine and wait until it cools down.
5. Drain water.
6. Repeat steps 1 through 5 until clear water begins to drain from radiator. Cylinder block drain plug:
: 7.8 - 11.8 N·m (0.8 -1.2 kg-m , 69 - 104 in-lb)
Engine coolant capacity (With reservoir tank):
Approx. 7.1 (6-1/4 Imp qt)
SMA182B
Reservoir tank: 0.6 (1/2 lmp qt)
SMA412B
Page 317 of 3833
![NISSAN X-TRAIL 2001 Service Repair Manual RADIATOR
CO-11
[QR]
C
D
E
F
G
H
I
J
K
L
MA
CO
RADIATORPFP:21400
Removal and InstallationEBS00KOI
WARNING:
Never remove the radiator cap when the engine is hot. Serious burns could occur from high pres](/manual-img/5/57405/w960_57405-316.png "NISSAN X-TRAIL 2001 Service Repair Manual RADIATOR
CO-11
[QR]
C
D
E
F
G
H
I
J
K
L
MA
CO
RADIATORPFP:21400
Removal and InstallationEBS00KOI
WARNING:
Never remove the radiator cap when the engine is hot. Serious burns could occur from high pres")
RADIATOR
CO-11
[QR]
C
D
E
F
G
H
I
J
K
L
MA
CO
RADIATORPFP:21400
Removal and InstallationEBS00KOI
WARNING:
Never remove the radiator cap when the engine is hot. Serious burns could occur from high pressure
engine coolant escaping from the radiator. Wrap a thick cloth around the cap. Slowly turn it a quarter
turn to allow built-up pressure to escape. Carefully remove the cap by turning it all the way.
REMOVAL
1. Drain engine coolant. Refer to CO-9, "DRAINING ENGINE COOLANT" .
2. Remove air duct with air cleaner assembly.
3. Remove A/T oil cooler hose.
●Install blind plug to avoid leakage of A/T fluid.
4. Disconnect radiator upper hose, lower hose and mounting bracket.
5. Remove radiator and radiator fan assembly
CAUTION:
Do not damage or scratch radiator core when removing.
INSTALLATION
●Reinstall any parts removed in reverse order of removal.
●Check for engine coolant leaks. Refer to CO-9, "CHECKING RADIATOR SYSTEM FOR LEAKS" .
PBIC0237E
1. Radiator 2. Bracket 3. Mounting rubber
4. A/T oil cooler hose 5. Radiator hose (lower) 6. Radiator fan assembly
7. Reservoir tank 8. Radiator hose (upper) 9. Radiator cap
Page 318 of 3833
CO-12
[QR]
RADIATOR
Disassembly and Assembly Radiator Fan
EBS00KOJ
DISASSEMBLY
1. Remove radiator fan.
2. Remove fan motor from fan shroud.
ASSEMBLY
Install in the reverse order of removal.
Checking Radiator CapEBS00KOK
●Check that there is no dirt or damage on the valve seat of the radiator cap negative-pressure valve.
●Check that there are no unusualness in the opening and closing
conditions of the negative-pressure valve.
●Pull the negative pressure valve to open it.
●Check that it close completely when released.
PBIC0238E
1. Radiator fan motors 2. Radiator fan shroud 3. Radiator fan
SMA967B
![NISSAN X-TRAIL 2001 Service Repair Manual CO-4
[QR]
PREPARATION
PREPARATION
PFP:00002
Special Service ToolsEBS00KOC
Tool number
Tool nameDescription
WS39930000
Tube presserPressing the tube of liquid gasket
EG17650301
Radiator cap tester adap](/manual-img/5/57405/w960_57405-309.png "NISSAN X-TRAIL 2001 Service Repair Manual CO-4
[QR]
PREPARATION
PREPARATION
PFP:00002
Special Service ToolsEBS00KOC
Tool number
Tool nameDescription
WS39930000
Tube presserPressing the tube of liquid gasket
EG17650301
Radiator cap tester adap")
![NISSAN X-TRAIL 2001 Service Repair Manual CO-6
[QR]
OVERHEATING CAUSE ANALYSIS
Except cool-
ing system
parts mal-
function— Overload on engineAbusive drivingHigh engine rpm under no
load
Driving in low gear for
extended time
Driving at e](/manual-img/5/57405/w960_57405-311.png "NISSAN X-TRAIL 2001 Service Repair Manual CO-6
[QR]
OVERHEATING CAUSE ANALYSIS
Except cool-
ing system
parts mal-
function— Overload on engineAbusive drivingHigh engine rpm under no
load
Driving in low gear for
extended time
Driving at e")
![NISSAN X-TRAIL 2001 Service Repair Manual CO-12
[QR]
RADIATOR
Disassembly and Assembly Radiator Fan
EBS00KOJ
DISASSEMBLY
1. Remove radiator fan.
2. Remove fan motor from fan shroud.
ASSEMBLY
Install in the reverse order of removal.
Checking R](/manual-img/5/57405/w960_57405-317.png "NISSAN X-TRAIL 2001 Service Repair Manual CO-12
[QR]
RADIATOR
Disassembly and Assembly Radiator Fan
EBS00KOJ
DISASSEMBLY
1. Remove radiator fan.
2. Remove fan motor from fan shroud.
ASSEMBLY
Install in the reverse order of removal.
Checking R")