Page 191 of 231
189
Introduction
Audio Telephone
Navigation
Index Info Services and
system settings Route guidanceIf you deviate from a recommended route, the system
automatically calculates a new route from the current
vehicle location to the requested destination.
If applicable, the message: “NEW ROUTE” will appear
on the screen along with an arrow outline indicating
the driving direction.
After the new calculation has been completed, route
guidance will continue. The arrow indicating the
driving direction will appear as usual. Deviating from the calculated route
P82.85-3043-26
Reaching your destination
When you reach the destination you will see the
destination flag in the display.
You will hear the voice output “You have reached your
destination”.
The main destination input menu is then activated and
you can now enter another destination.
Note:
When you approach and arrive at way points, you will
hear acoustic notices and this will also be shown in the
display.
P82.85-3044-26
Page 193 of 231

191
Introduction
Audio Telephone
Navigation
Index Info Services and
system settings Route guidanceActivating audio functions during route guidance
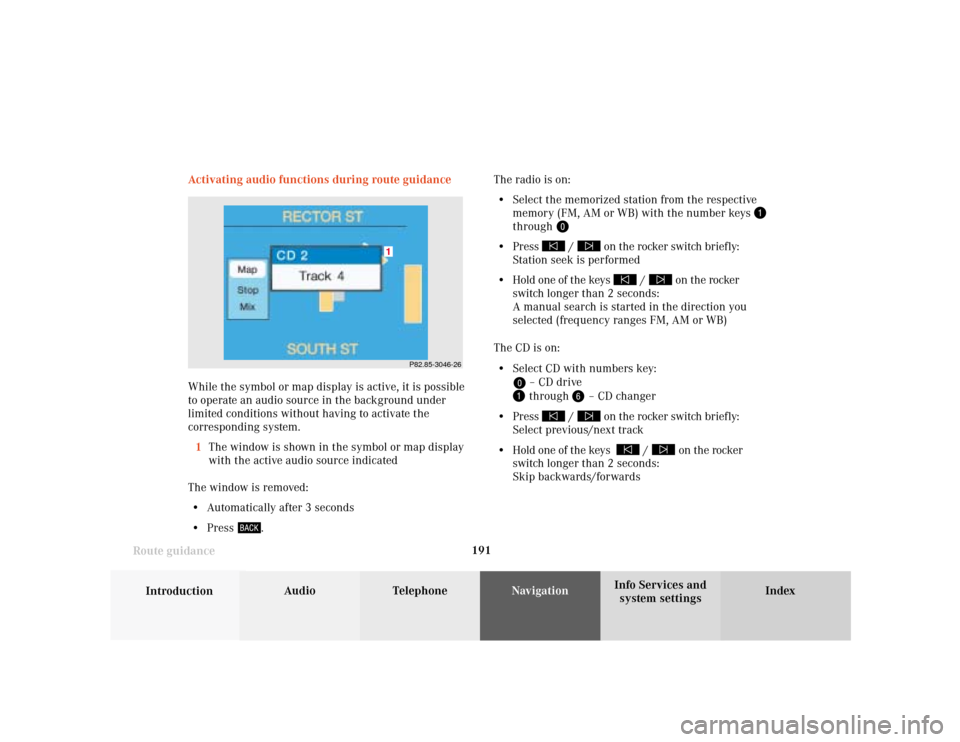
While the symbol or map display is active, it is possible
to operate an audio source in the background under
limited conditions without having to activate the
corresponding system.
1The window is shown in the symbol or map display
with the active audio source indicated
The window is removed:
• Automatically after 3 seconds
• Press
.The radio is on:
• Select the memorized station from the respective
memory (FM, AM or WB) with the number keys
through
• Press
/
on the rocker switch briefly:
Station seek is performed
• Hold one of the keys
/
on the rocker
switch longer than 2 seconds:
A manual search is started in the direction you
selected (frequency ranges FM, AM or WB)
The CD is on:
• Select CD with numbers key:
– CD drive through
– CD changer
• Press
/
on the rocker switch briefly:
Select previous/next track
• Hold one of the keys
/
on the rocker
switch longer than 2 seconds:
Skip backwards/forwards
P82.85-3046-26
1
Page 200 of 231
198
Audio TelephoneNavigation
Index IntroductionInfo Services and
system settings
Destination memory
Sorting the destination memory
Activate the destination list:
Turn the right-hand rotary/pushbutton
to highlight
the “Sort Destinations...” menu field and press to
confirm.Use the right-hand rotary/pushbutton
to highlight
the desired entry and press to confirm.
The entry is now shown in red.
Use the right-hand rotary/pushbutton to move the
entry to the desired position.
Press the right-hand rotary/pushbutton to save the
entry at that location. The entry is shown in black, the
main destination memory menu for saving destinations
is reactivated automatically.
P82.85-3055-26
P82.85-3056-26
Page 202 of 231

200
Audio TelephoneNavigation
Index IntroductionInfo Services and
system settings
Destination memory
P82.85-2667-26
Entering the vehicle position
It is only necessary to enter the vehicle position when
the system is not able to position itself automatically
with the GPS.
It is only possible to enter the vehicle position in
connection with a crossroad.
Use the right-hand rotary/pushbutton
to highlight
the menu field “Settings” in the main destination input
menu and confirm by pressing.
In the “Settings” menu (page 201) use the right-hand
rotary/pushbutton
to select the menu field “Loca-
tion...”. This activates the menu for entering the
location.
Now enter the city/suburb and street in the menu and
select the required entries from the respective lists.
See page 141 for how to enter a destination address.
After you have selected the street, you will see a
prompt for the intersection. Highlight the appropriate
cross street with the right-hand rotary/pushbutton
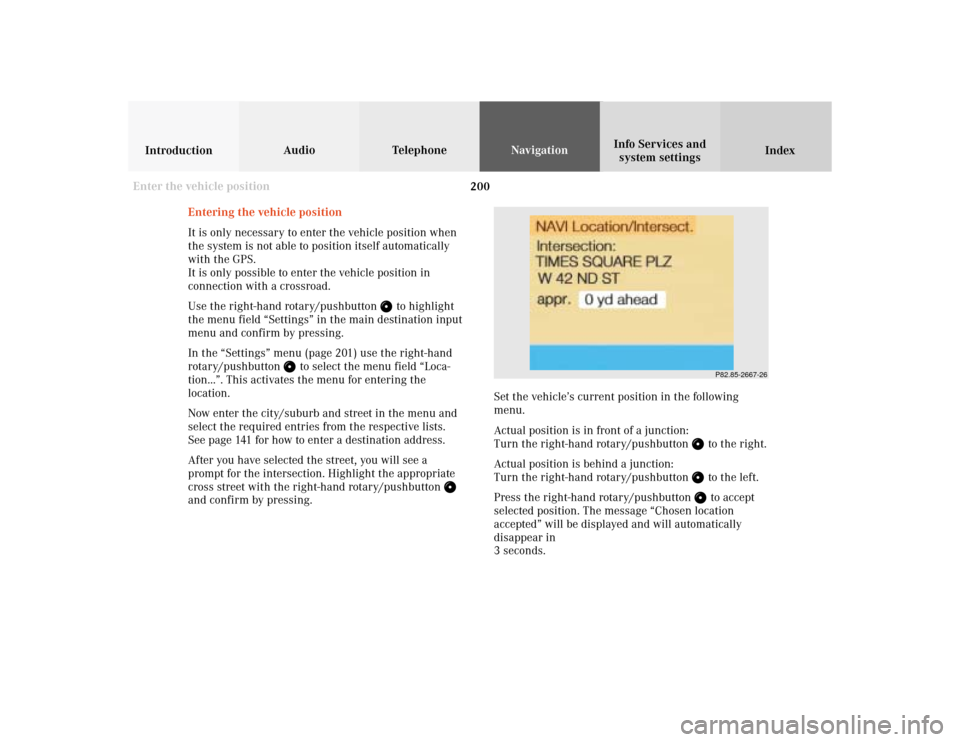
and confirm by pressing.Set the vehicle’s current position in the following
menu.
Actual position is in front of a junction:
Turn the right-hand rotary/pushbutton
to the right.
Actual position is behind a junction:
Turn the right-hand rotary/pushbutton to the left.
Press the right-hand rotary/pushbutton to accept
selected position. The message “Chosen location
accepted” will be displayed and will automatically
disappear in
3 seconds.
Enter the vehicle position
Page 207 of 231

System settings
Introduction Audio
Telephone NavigationIndex Info Services and
system settings 205
ServiceNote on (4):
In the following situations it is not possible to make a
request and the following messages appear:
• “Data Connection Cannot be Established” — request
has failed because Response Center cannot be
accessed
• “No Cellular Connection Available” — vehicle may
be in a cellular weak signal area
• “Cellular System Busy” — request has failed
because cellular system is busy, try again later
• “Data transmission failure” — request has failed
because a data transfer error has occured, try again
• “Tele Aid Call in Progress!” — request has failed
because SOS or Roadside call is in progress.
• “Tele Aid. Please visit workshop” - a hardware error
has been detected. Contact M-B Center.
• “To subscribe to information services dial
phone number” – you have not yet subscribed to
service
• “No information available at this time. Press SVC
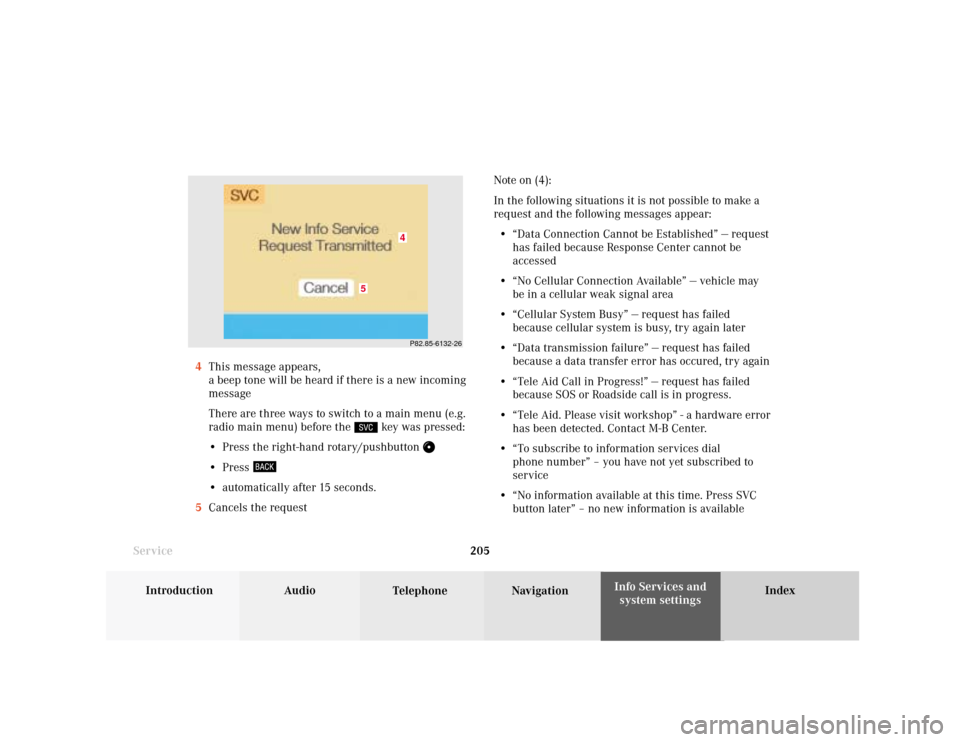
button later” – no new information is available 4This message appears,
a beep tone will be heard if there is a new incoming
message
There are three ways to switch to a main menu (e.g.
radio main menu) before the
key was pressed:
• Press the right-hand rotary/pushbutton
• Press • automatically after 15 seconds.
5Cancels the request
P82.85-6132-26
5
4
Page 217 of 231
System settings
Introduction Audio
Telephone NavigationIndex Info Services and
system settings 215
P82.85-2686-26
P82.85-3076-26
For countries with several time zones (e.g. Canada,
USA):
After you have confirmed the country, the “Timezone”
menu is activated. Highlight the zone you want with the
right-hand rotary/pushbutton
and confirm by
pressing.In the next menu, press the right-hand rotary/pushbutton
to set the menu field “Automatic S/W time”.
“Automatic S/W time” menu field - there is change of
time in this country/timezone and the dates of time
changes are known. Checkmark
indicates that
automatic time change is active.
“Summer time” menu field – the dates of time changes
are unknown, the change to the winter time must be
made manually, page 216.
Press the right-hand rotary/pushbutton
longer than 2
seconds. The settings are adopted, and the main system
menu is displayed.
Page 218 of 231

216 System settings
Audio Introduction
Telephone Navigation IndexInfo Services and
system settings
Set the date and time manually
If the clock has been disconnected from the vehicle
battery for any reason or if the dates of the change
between summer and winter time are not available in
advance, it will be necessary to set the clock manually.
Use the right-hand rotary/pushbutton
to highlight
the “Date/Time ...” menu field in the “Settings” menu
(page 209) and press to confirm.
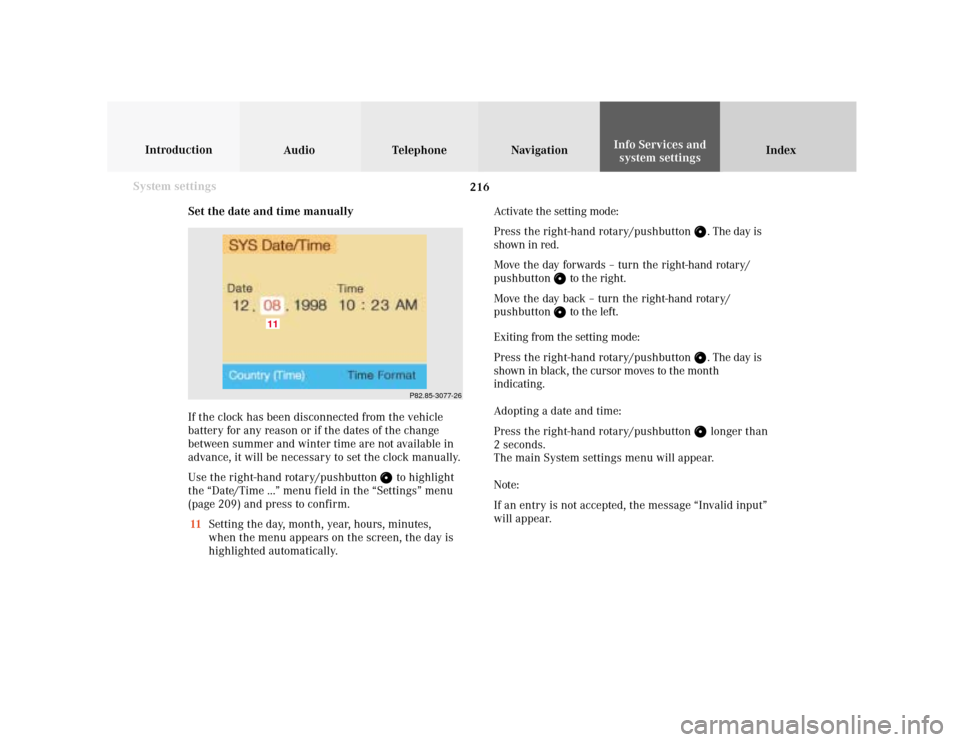
11Setting the day, month, year, hours, minutes,
when the menu appears on the screen, the day is
highlighted automatically.Activate the setting mode:
Press the right-hand rotary/pushbutton
. The day is
shown in red.
Move the day forwards – turn the right-hand rotary/
pushbutton
to the right.
Move the day back – turn the right-hand rotary/
pushbutton to the left.
Exiting from the setting mode:
Press the right-hand rotary/pushbutton
. The day is
shown in black, the cursor moves to the month
indicating.
Adopting a date and time:
Press the right-hand rotary/pushbutton longer than
2 seconds.
The main System settings menu will appear.
Note:
If an entry is not accepted, the message “Invalid input”
will appear.
P82.85-3077-26
11
Page 221 of 231
System settings
Introduction Audio
Telephone NavigationIndex Info Services and
system settings 219 Setting changeover between day and night display
In the settings menu (page 209) highlight the menu field
“Display (Day/Night)” with the rotary pushbutton
and
confirm by pressing.
The menu “Display (Day/Night)” will appear.
Setting activeSetting not activeNote:
The setting (2) is active when calling up for the first
time. A change is stored and becomes active when
COMAND is switched on again.
1Changeover of the day/night display by pressing
2Changeover of the day/night display by pressing
and headlights switch
Note:
You can change over between day display, night display
and screen switched off by repeatedly pressing
.
Press
again to switch on the screen.
If the setting (2) is selected the night display is
automatically switched on together with the headlights.
It is possible to change over to the day display by
pressing
.
P82.85-3080-26