Page 876 of 2395

10 CHECK CRANKSHAFT POSITION SENSOR (POS)-II
1. Reconnect disconnected harness connectors.
2. Turn ignition switch ªONº.
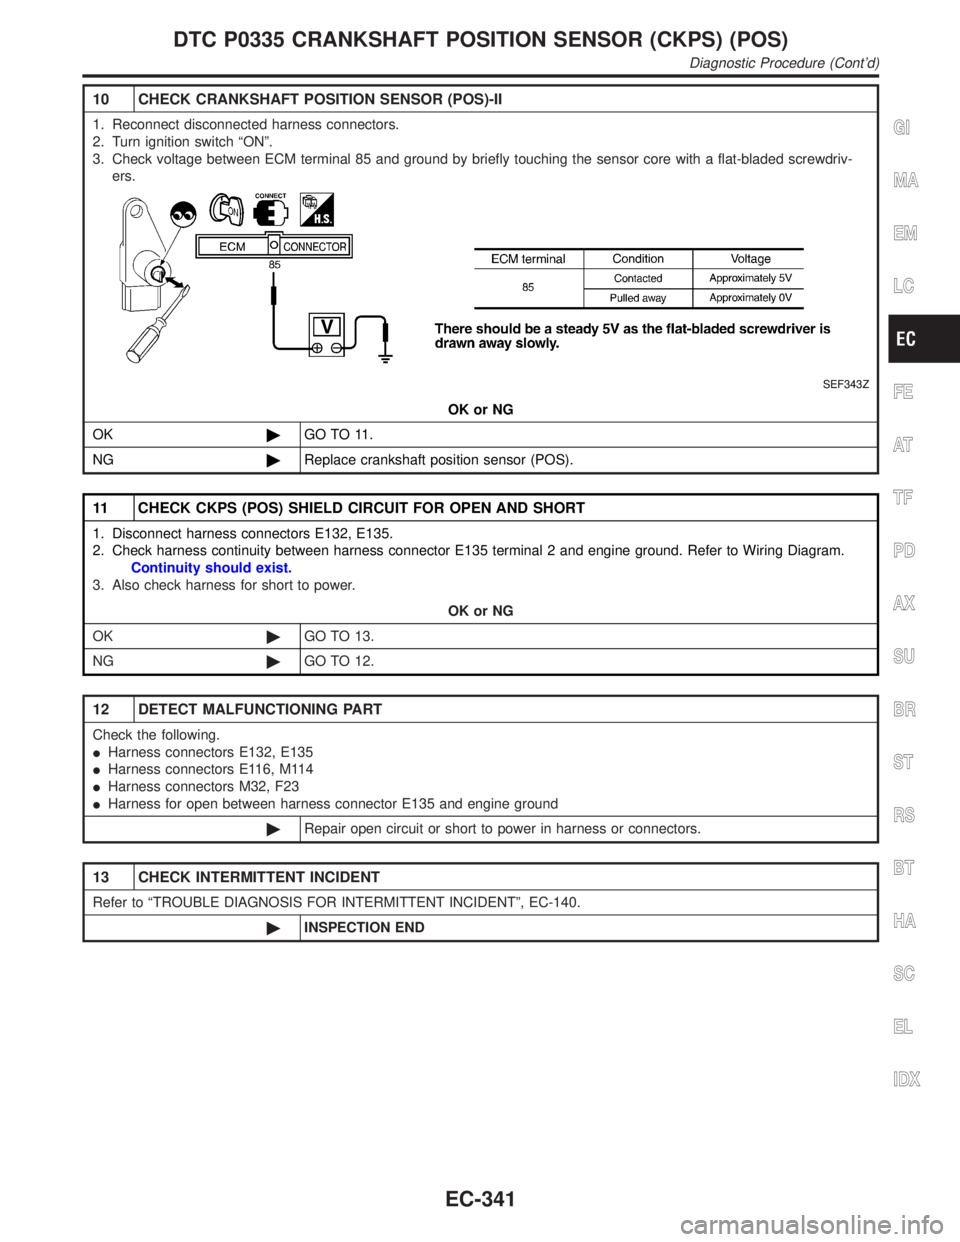
3. Check voltage between ECM terminal 85 and ground by briefly touching the sensor core with a flat-bladed screwdriv-
ers.
SEF343Z
OK or NG
OK©GO TO 11.
NG©Replace crankshaft position sensor (POS).
11 CHECK CKPS (POS) SHIELD CIRCUIT FOR OPEN AND SHORT
1. Disconnect harness connectors E132, E135.
2. Check harness continuity between harness connector E135 terminal 2 and engine ground. Refer to Wiring Diagram.
Continuity should exist.
3. Also check harness for short to power.
OK or NG
OK©GO TO 13.
NG©GO TO 12.
12 DETECT MALFUNCTIONING PART
Check the following.
IHarness connectors E132, E135
IHarness connectors E116, M114
IHarness connectors M32, F23
IHarness for open between harness connector E135 and engine ground
©Repair open circuit or short to power in harness or connectors.
13 CHECK INTERMITTENT INCIDENT
Refer to ªTROUBLE DIAGNOSIS FOR INTERMITTENT INCIDENTº, EC-140.
©INSPECTION END
GI
MA
EM
LC
FE
AT
TF
PD
AX
SU
BR
ST
RS
BT
HA
SC
EL
IDX
DTC P0335 CRANKSHAFT POSITION SENSOR (CKPS) (POS)
Diagnostic Procedure (Cont'd)
EC-341
Page 880 of 2395
Diagnostic ProcedureNBEC0202
1 CHECK STARTING SYSTEM
Turn ignition switch to ªSTARTº position.
Does the engine turn over?
Does the starter motor operate?
YesorNo
Ye s©GO TO 2.
No©Check starting system. (Refer to SC-10, ªSTARTING SYSTEMº.)
2 RETIGHTEN GROUND SCREWS
1. Turn ignition switch ªOFFº.
2. Loosen and retighten engine ground screws.
SEF959Y
©GO TO 3.
3 CHECK CMPS (PHASE) INPUT SIGNAL CIRCUIT FOR OPEN AND SHORT
1. Turn ignition switch ªOFFº.
2. Disconnect ECM harness connector and CMPS (PHASE) harness connector.
SEF982Y
3. Check harness continuity between CMPS (PHASE) terminal 2 and ECM terminals 66, 76. Refer to Wiring Diagram.
Continuity should exist.
4. Also check harness for short to ground and short to power.
OK or NG
OK©GO TO 4.
NG©Repair open circuit or short to ground or short to power in harness or connectors.
GI
MA
EM
LC
FE
AT
TF
PD
AX
SU
BR
ST
RS
BT
HA
SC
EL
IDX
DTC P0340 CAMSHAFT POSITION SENSOR (CMPS) (PHASE)
Diagnostic Procedure
EC-345
Page 881 of 2395
4 CHECK CMPS (PHASE) GROUND CIRCUIT FOR OPEN AND SHORT
1. Check harness continuity between CMPS (PHASE) terminal 1 and engine ground.
Continuity should exist.
2. Also check harness for short to power.
OK or NG
OK©GO TO 5.
NG©Repair open circuit or short to power in harness or connector.
5 CHECK CAMSHAFT POSITION SENSOR (PHASE)-I
1. Loosen the fixing bolt of the camshaft position sensor (PHASE).
2. Remove the CMPS (PHASE).
3. Visually check the CMPS (PHASE) for chipping.
SEF583P
OK or NG
OK©GO TO 6.
NG©Replace camshaft position sensor (PHASE).
6 CHECK CAMSHAFT POSITION SENSOR (PHASE)-II
Check resistance between CMPS (PHASE) terminals 1 and 2 as shown below.
SEF325X
OK or NG
OK©GO TO 7.
NG©Replace camshaft position sensor (PHASE).
7 CHECK INTERMITTENT INCIDENT
Refer to ªTROUBLE DIAGNOSIS FOR INTERMITTENT INCIDENTº, EC-140.
©INSPECTION END
DTC P0340 CAMSHAFT POSITION SENSOR (CMPS) (PHASE)
Diagnostic Procedure (Cont'd)
EC-346
Page 883 of 2395

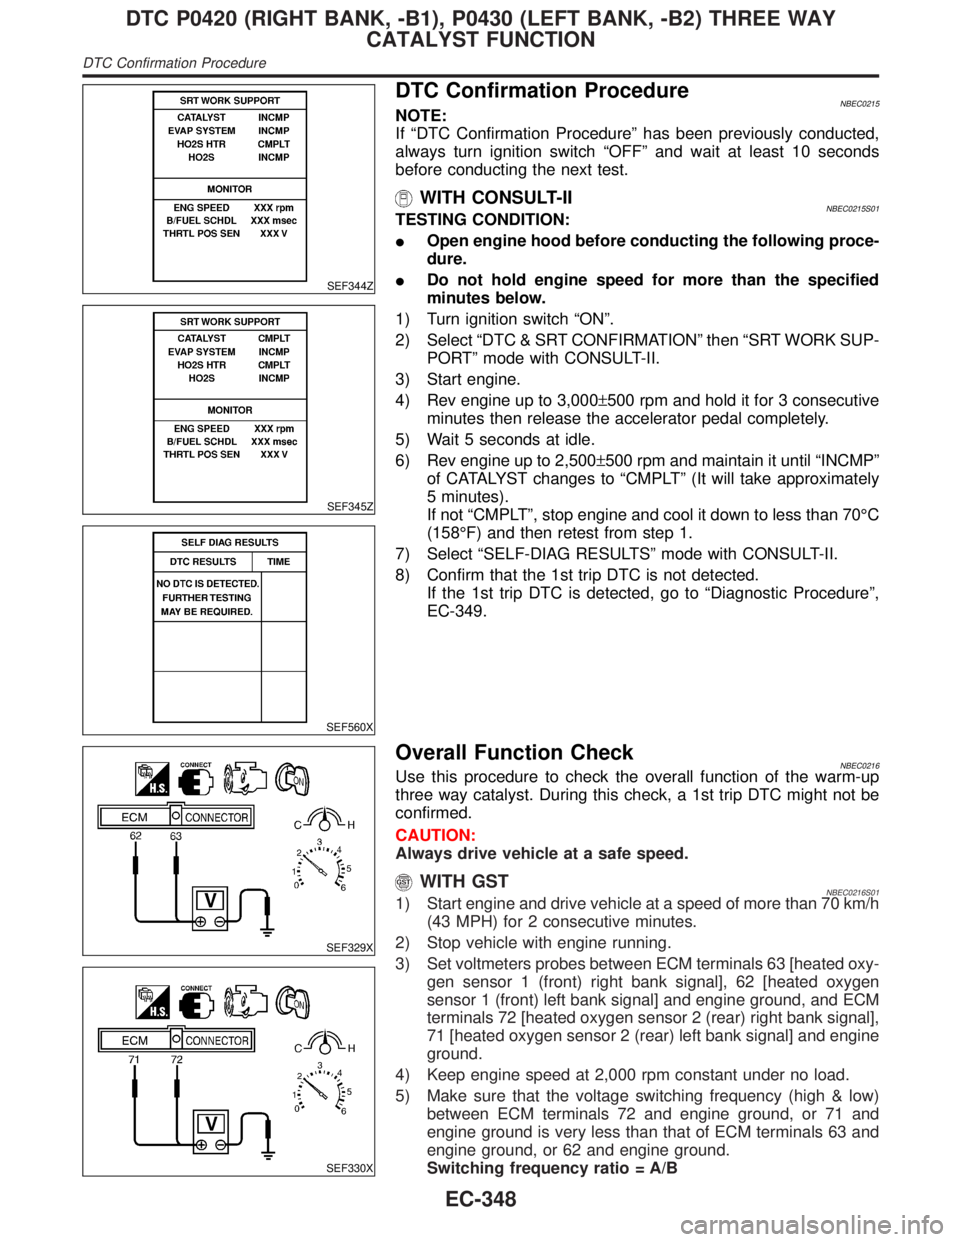
SEF344Z
DTC Confirmation ProcedureNBEC0215
SEF345Z
SEF560X
NOTE:
If ªDTC Confirmation Procedureº has been previously conducted,
always turn ignition switch ªOFFº and wait at least 10 seconds
before conducting the next test.
WITH CONSULT-IINBEC0215S01TESTING CONDITION:
IOpen engine hood before conducting the following proce-
dure.
IDo not hold engine speed for more than the specified
minutes below.
1) Turn ignition switch ªONº.
2) Select ªDTC & SRT CONFIRMATIONº then ªSRT WORK SUP-
PORTº mode with CONSULT-II.
3) Start engine.
4) Rev engine up to 3,000±500 rpm and hold it for 3 consecutive
minutes then release the accelerator pedal completely.
5) Wait 5 seconds at idle.
6) Rev engine up to 2,500±500 rpm and maintain it until ªINCMPº
of CATALYST changes to ªCMPLTº (It will take approximately
5 minutes).
If not ªCMPLTº, stop engine and cool it down to less than 70ÉC
(158ÉF) and then retest from step 1.
7) Select ªSELF-DIAG RESULTSº mode with CONSULT-II.
8) Confirm that the 1st trip DTC is not detected.
If the 1st trip DTC is detected, go to ªDiagnostic Procedureº,
EC-349.
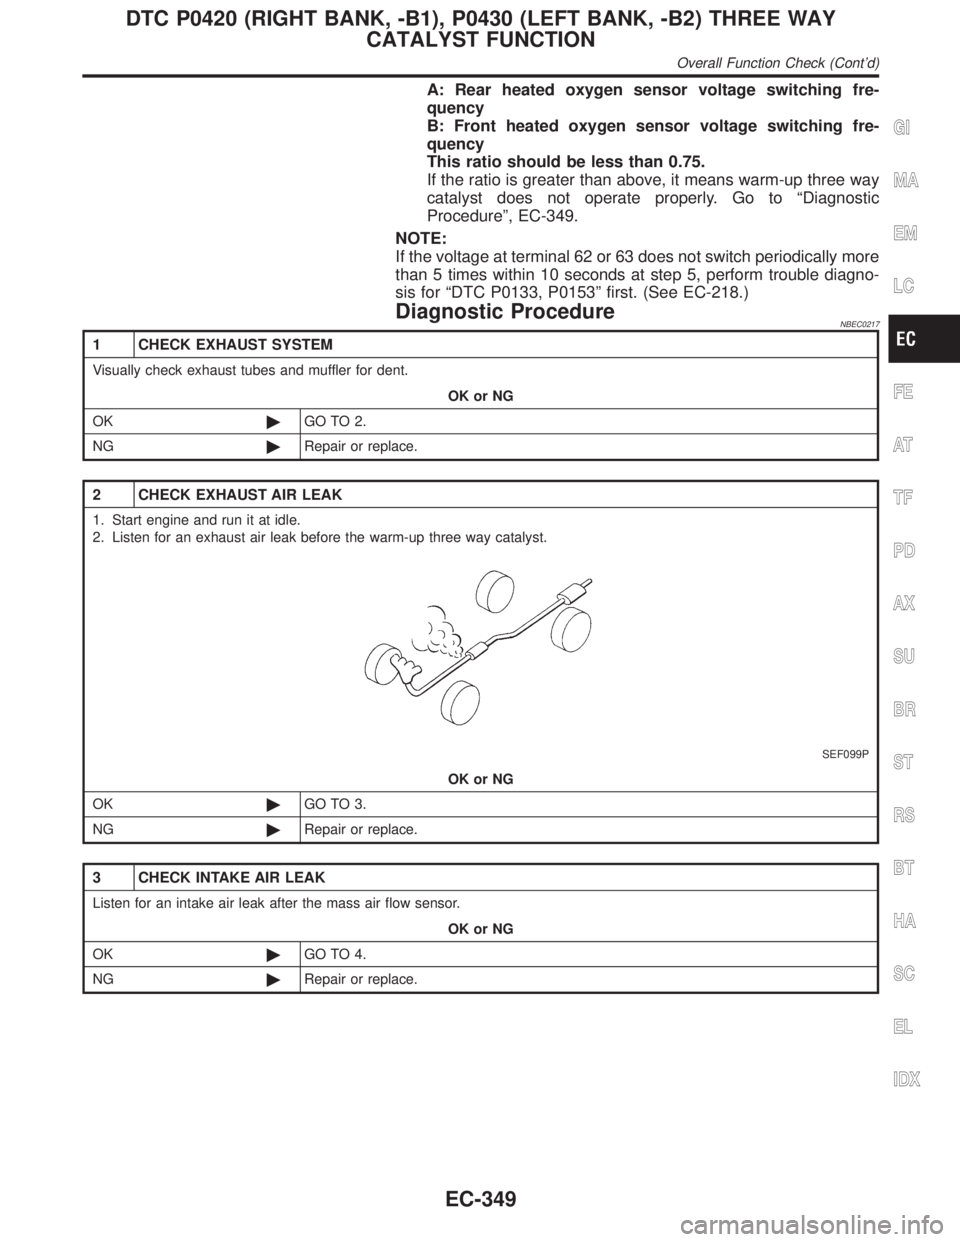
SEF329X
SEF330X
Overall Function CheckNBEC0216Use this procedure to check the overall function of the warm-up
three way catalyst. During this check, a 1st trip DTC might not be
confirmed.
CAUTION:
Always drive vehicle at a safe speed.
WITH GSTNBEC0216S011) Start engine and drive vehicle at a speed of more than 70 km/h
(43 MPH) for 2 consecutive minutes.
2) Stop vehicle with engine running.
3) Set voltmeters probes between ECM terminals 63 [heated oxy-
gen sensor 1 (front) right bank signal], 62 [heated oxygen
sensor 1 (front) left bank signal] and engine ground, and ECM
terminals 72 [heated oxygen sensor 2 (rear) right bank signal],
71 [heated oxygen sensor 2 (rear) left bank signal] and engine
ground.
4) Keep engine speed at 2,000 rpm constant under no load.
5) Make sure that the voltage switching frequency (high & low)
between ECM terminals 72 and engine ground, or 71 and
engine ground is very less than that of ECM terminals 63 and
engine ground, or 62 and engine ground.
Switching frequency ratio = A/B
DTC P0420 (RIGHT BANK, -B1), P0430 (LEFT BANK, -B2) THREE WAY
CATALYST FUNCTION
DTC Confirmation Procedure
EC-348
Page 884 of 2395

A: Rear heated oxygen sensor voltage switching fre-
quency
B: Front heated oxygen sensor voltage switching fre-
quency
This ratio should be less than 0.75.
If the ratio is greater than above, it means warm-up three way
catalyst does not operate properly. Go to ªDiagnostic
Procedureº, EC-349.
NOTE:
If the voltage at terminal 62 or 63 does not switch periodically more
than 5 times within 10 seconds at step 5, perform trouble diagno-
sis for ªDTC P0133, P0153º first. (See EC-218.)
Diagnostic ProcedureNBEC0217
1 CHECK EXHAUST SYSTEM
Visually check exhaust tubes and muffler for dent.
OK or NG
OK©GO TO 2.
NG©Repair or replace.
2 CHECK EXHAUST AIR LEAK
1. Start engine and run it at idle.
2. Listen for an exhaust air leak before the warm-up three way catalyst.
SEF099P
OK or NG
OK©GO TO 3.
NG©Repair or replace.
3 CHECK INTAKE AIR LEAK
Listen for an intake air leak after the mass air flow sensor.
OK or NG
OK©GO TO 4.
NG©Repair or replace.
GI
MA
EM
LC
FE
AT
TF
PD
AX
SU
BR
ST
RS
BT
HA
SC
EL
IDX
DTC P0420 (RIGHT BANK, -B1), P0430 (LEFT BANK, -B2) THREE WAY
CATALYST FUNCTION
Overall Function Check (Cont'd)
EC-349
Page 885 of 2395
4 CHECK IGNITION TIMING
Check the following items. Refer to ªBasic Inspectionº, EC-101.
MTBL0655
OK or NG
OK©GO TO 5.
NG©Follow the ªBasic Inspectionº.
5 CHECK INJECTORS
1. Refer to WIRING DIAGRAM for Injectors, EC-617.
2. Stop engine and then turn ignition switch ªONº.
3. Check voltage between ECM terminals 101, 102, 103, 104, 105, 107 and ground with CONSULT-II or tester.
SEF331X
OK or NG
OK©GO TO 6.
NG©Perform ªDiagnostic Procedureº, ªINJECTORº, EC-618.
DTC P0420 (RIGHT BANK, -B1), P0430 (LEFT BANK, -B2) THREE WAY
CATALYST FUNCTION
Diagnostic Procedure (Cont'd)
EC-350
Page 886 of 2395

6 CHECK IGNITION SPARK
1. Turn ignition switch ªOFFº.
2. Disconnect ignition coil assembly from rocker cover.
3. Connect a known good spark plug to the ignition coil assembly.
4. Place end of spark plug against a suitable ground and crank engine.
5. Check for spark.
SEF575Q
OK or NG
OK©GO TO 7.
NG©Check ignition coil with power transistor and their circuit. Refer to EC-499.
7 CHECK INJECTOR
1. Turn ignition switch ªOFFº.
2. Remove injector assembly.
Refer to EC-41.
Keep fuel hose and all injectors connected to injector gallery.
3. Disconnect all ignition coil harness connectors.
4. Turn ignition switch ªONº.
Make sure fuel does not drip from injector.
OK or NG
OK (Does not drip.)©GO TO 8.
NG (Drips.)©Replace the injector(s) from which fuel is dripping.
8 CHECK INTERMITTENT INCIDENT
Refer to ªTROUBLE DIAGNOSIS FOR INTERMITTENT INCIDENTº, EC-140.
Trouble is fixed.©INSPECTION END
Trouble is not fixed.©Replace warm-up three way catalyst.
GI
MA
EM
LC
FE
AT
TF
PD
AX
SU
BR
ST
RS
BT
HA
SC
EL
IDX
DTC P0420 (RIGHT BANK, -B1), P0430 (LEFT BANK, -B2) THREE WAY
CATALYST FUNCTION
Diagnostic Procedure (Cont'd)
EC-351
Page 887 of 2395

On Board Diagnosis LogicNBEC0218NOTE:
If DTC P0440 is displayed with P1448, perform trouble diagno-
sis for DTC P1448 first. (See EC-573.)
This diagnosis detects leaks in the EVAP purge line using engine
intake manifold vacuum.
If pressure does not increase, the ECM will check for leaks in the
line between the fuel tank and EVAP canister purge volume con-
trol solenoid valve, under the following ªVacuum testº conditions.
The vacuum cut valve bypass valve is opened to clear the line
between the fuel tank and the EVAP canister purge volume control
solenoid valve. The EVAP canister vent control valve will then be
closed to shut the EVAP purge line off. The EVAP canister purge
volume control solenoid valve is opened to depressurize the EVAP
purge line using intake manifold vacuum. After this occurs, the
EVAP canister purge volume control solenoid valve will be closed.
SEF373Z
Malfunction is detected when EVAP control system has a leak,
EVAP control system does not operate properly.
CAUTION:
IUse only a genuine NISSAN fuel filler cap as a replace-
ment. If an incorrect fuel filler cap is used, the MIL may
come on.
IIf the fuel filler cap is not tightened properly, the MIL may
come on.
IUse only a genuine NISSAN rubber tube as a replacement.
Possible CauseNBEC0510IIncorrect fuel tank vacuum relief valve
IIncorrect fuel filler cap used
IFuel filler cap remains open or fails to close.
IForeign matter caught in fuel filler cap.
ILeak is in line between intake manifold and EVAP canister
purge volume control solenoid valve.
IForeign matter caught in EVAP canister vent control valve.
IEVAP canister or fuel tank leaks
IEVAP purge line (pipe and rubber tube) leaks
DTC P0440 EVAP CONTROL SYSTEM (SMALL LEAK) (NEGATIVE PRESSURE)
On Board Diagnosis Logic
EC-352