Page 2220 of 2395
SMA525A
On-vehicle Service
FRONT SUSPENSION PARTSNBSU0005Check front axle and front suspension parts for excessive play,
cracks, wear and other damage.
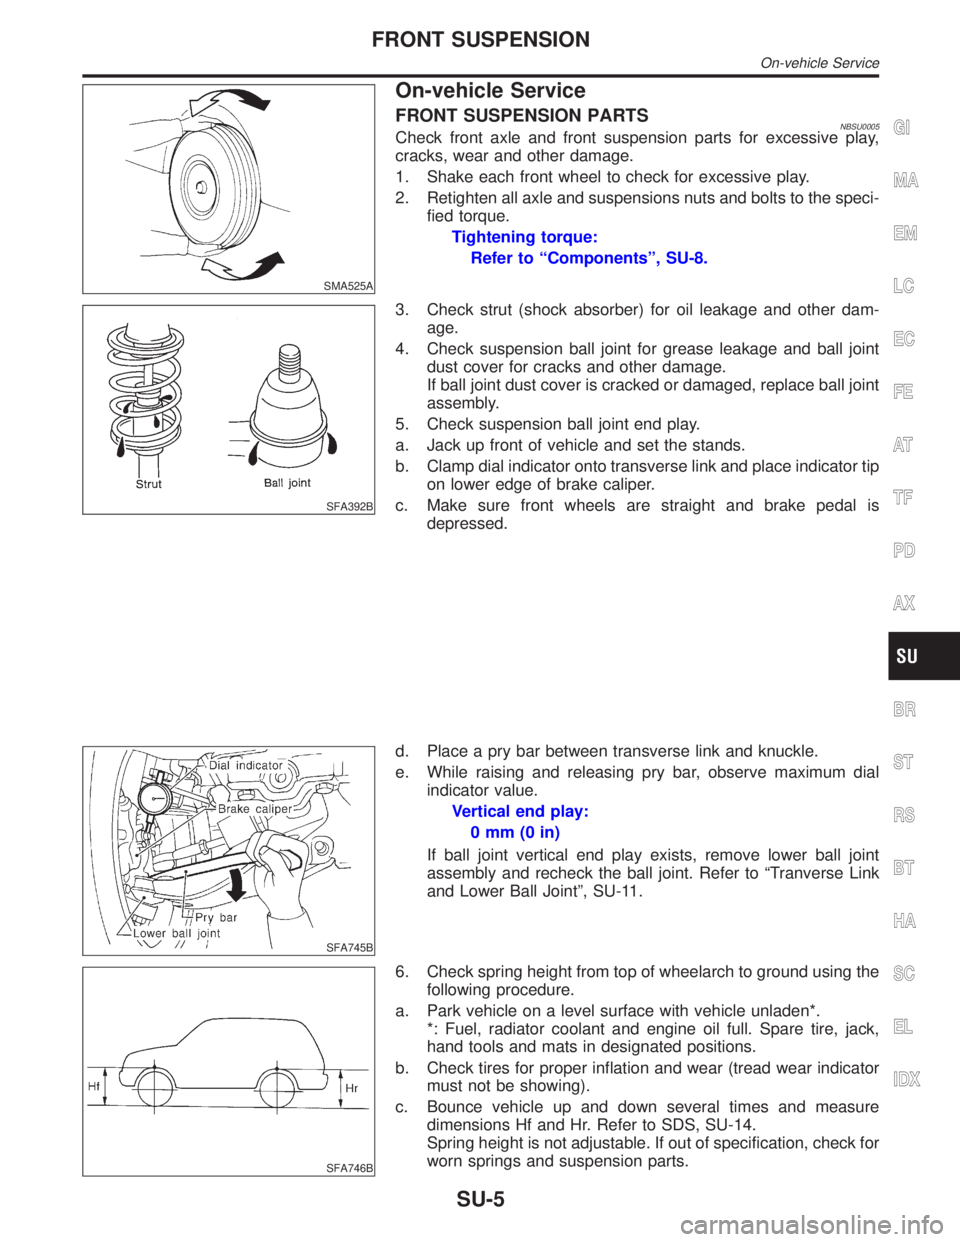
1. Shake each front wheel to check for excessive play.
2. Retighten all axle and suspensions nuts and bolts to the speci-
fied torque.
Tightening torque:
Refer to ªComponentsº, SU-8.
SFA392B
3. Check strut (shock absorber) for oil leakage and other dam-
age.
4. Check suspension ball joint for grease leakage and ball joint
dust cover for cracks and other damage.
If ball joint dust cover is cracked or damaged, replace ball joint
assembly.
5. Check suspension ball joint end play.
a. Jack up front of vehicle and set the stands.
b. Clamp dial indicator onto transverse link and place indicator tip
on lower edge of brake caliper.
c. Make sure front wheels are straight and brake pedal is
depressed.
SFA745B
d. Place a pry bar between transverse link and knuckle.
e. While raising and releasing pry bar, observe maximum dial
indicator value.
Vertical end play:
0mm(0in)
If ball joint vertical end play exists, remove lower ball joint
assembly and recheck the ball joint. Refer to ªTranverse Link
and Lower Ball Jointº, SU-11.
SFA746B
6. Check spring height from top of wheelarch to ground using the
following procedure.
a. Park vehicle on a level surface with vehicle unladen*.
*: Fuel, radiator coolant and engine oil full. Spare tire, jack,
hand tools and mats in designated positions.
b. Check tires for proper inflation and wear (tread wear indicator
must not be showing).
c. Bounce vehicle up and down several times and measure
dimensions Hf and Hr. Refer to SDS, SU-14.
Spring height is not adjustable. If out of specification, check for
worn springs and suspension parts.
GI
MA
EM
LC
EC
FE
AT
TF
PD
AX
BR
ST
RS
BT
HA
SC
EL
IDX
FRONT SUSPENSION
On-vehicle Service
SU-5
Page 2221 of 2395
SFA975B
FRONT WHEEL ALIGNMENTNBSU0006Before checking front wheel alignment, be sure to make a prelimi-
nary inspection (Unladen*).
*: Fuel, radiator coolant and engine oil full. Spare tire, jack, hand
tools and mats in designated positions.
Preliminary InspectionNBSU0006S011. Check tires for wear and improper inflation.
2. Check wheels for deformation, cracks and other damage.
If deformed, remove wheel and check wheel runout.
NOTE:
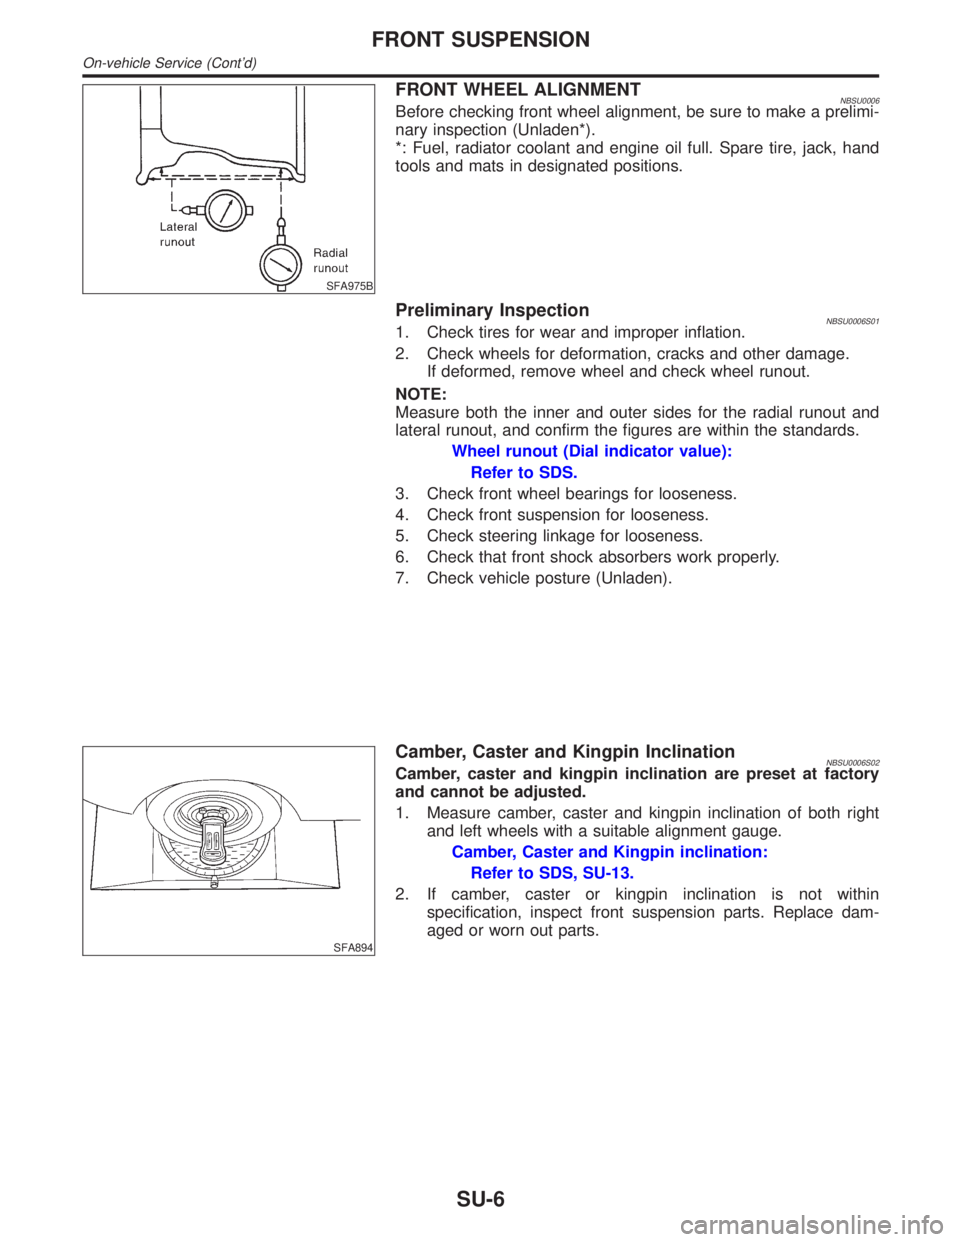
Measure both the inner and outer sides for the radial runout and
lateral runout, and confirm the figures are within the standards.
Wheel runout (Dial indicator value):
Refer to SDS.
3. Check front wheel bearings for looseness.
4. Check front suspension for looseness.
5. Check steering linkage for looseness.
6. Check that front shock absorbers work properly.
7. Check vehicle posture (Unladen).
SFA894
Camber, Caster and Kingpin InclinationNBSU0006S02Camber, caster and kingpin inclination are preset at factory
and cannot be adjusted.
1. Measure camber, caster and kingpin inclination of both right
and left wheels with a suitable alignment gauge.
Camber, Caster and Kingpin inclination:
Refer to SDS, SU-13.
2. If camber, caster or kingpin inclination is not within
specification, inspect front suspension parts. Replace dam-
aged or worn out parts.
FRONT SUSPENSION
On-vehicle Service (Cont'd)
SU-6
Page 2224 of 2395
SFA956A
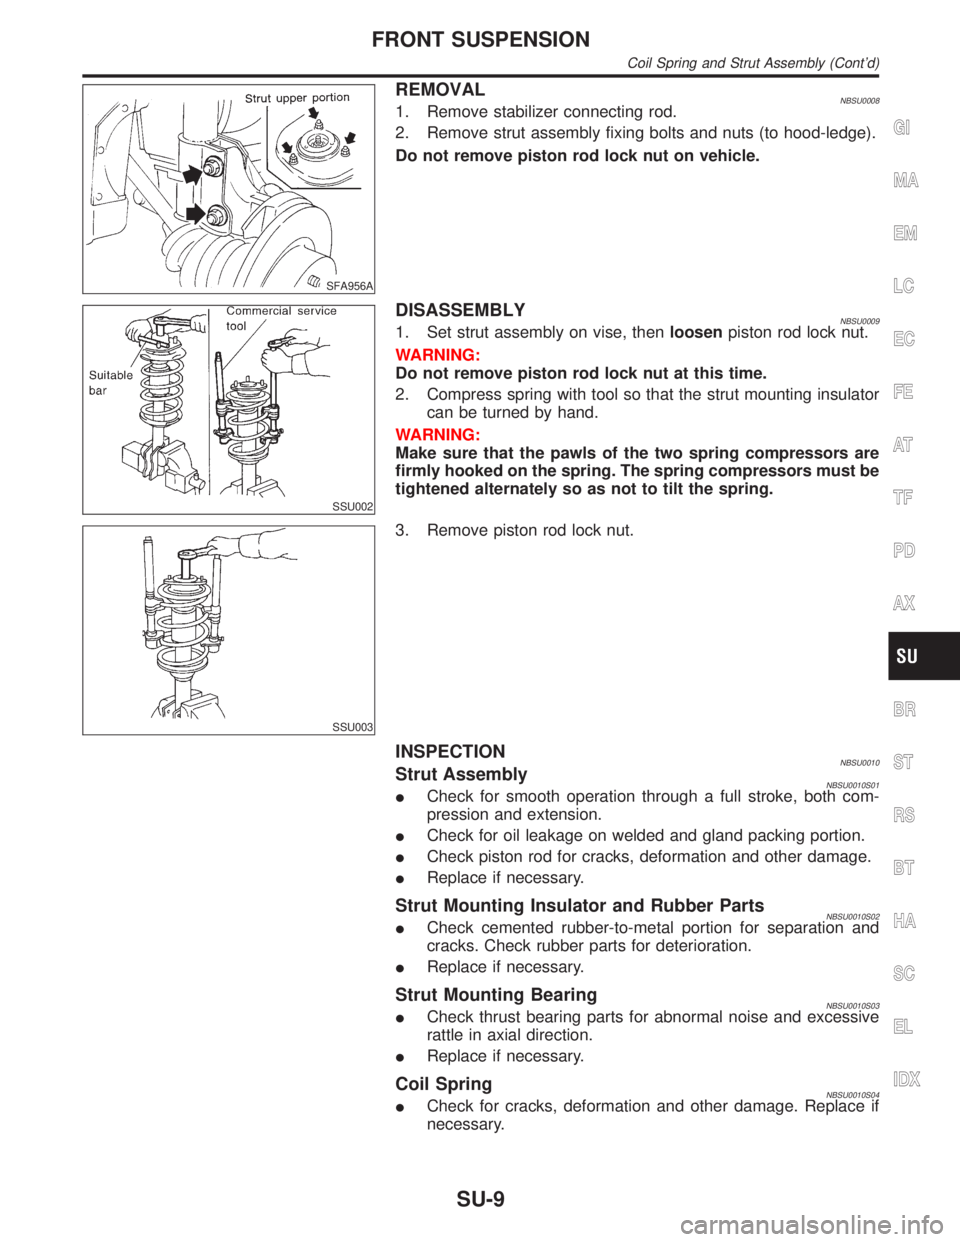
REMOVALNBSU00081. Remove stabilizer connecting rod.
2. Remove strut assembly fixing bolts and nuts (to hood-ledge).
Do not remove piston rod lock nut on vehicle.
SSU002
DISASSEMBLYNBSU00091. Set strut assembly on vise, thenloosenpiston rod lock nut.
WARNING:
Do not remove piston rod lock nut at this time.
2. Compress spring with tool so that the strut mounting insulator
can be turned by hand.
WARNING:
Make sure that the pawls of the two spring compressors are
firmly hooked on the spring. The spring compressors must be
tightened alternately so as not to tilt the spring.
SSU003
3. Remove piston rod lock nut.
INSPECTIONNBSU0010Strut AssemblyNBSU0010S01ICheck for smooth operation through a full stroke, both com-
pression and extension.
ICheck for oil leakage on welded and gland packing portion.
ICheck piston rod for cracks, deformation and other damage.
IReplace if necessary.
Strut Mounting Insulator and Rubber PartsNBSU0010S02ICheck cemented rubber-to-metal portion for separation and
cracks. Check rubber parts for deterioration.
IReplace if necessary.
Strut Mounting BearingNBSU0010S03ICheck thrust bearing parts for abnormal noise and excessive
rattle in axial direction.
IReplace if necessary.
Coil SpringNBSU0010S04ICheck for cracks, deformation and other damage. Replace if
necessary.
GI
MA
EM
LC
EC
FE
AT
TF
PD
AX
BR
ST
RS
BT
HA
SC
EL
IDX
FRONT SUSPENSION
Coil Spring and Strut Assembly (Cont'd)
SU-9
Page 2230 of 2395
SBR686C
Precautions
PRECAUTIONSNBSU0021IWhen installing rubber parts, final tightening must be car-
ried out under unladen condition* with tires on ground.
*Fuel, radiator coolant and engine oil full. Spare tire, jack,
hand tools and mats in designated positions.
IUse flare nut wrench when removing and installing brake
tubes.
IAfter installing removed suspension parts, check wheel
alignment and adjust if necessary.
IAlways torque brake lines when installing.
Preparation
COMMERCIAL SERVICE TOOLSNBSU0023
Tool name Description
1 Flare nut crowfoot
2 Torque wrench
NT360
Removing and installing each brake piping
a: 10 mm (0.39 in)
Noise, Vibration and Harshness (NVH)
Troubleshooting
NBSU0036Refer to ªNoise, Vibration and Harshness (NVH) Troubleshootingº,
ªFRONT SUSPENSIONº, SU-3.
GI
MA
EM
LC
EC
FE
AT
TF
PD
AX
BR
ST
RS
BT
HA
SC
EL
IDX
REAR SUSPENSION
Precautions
SU-15
Page 2231 of 2395
ComponentsNBSU0024
SRA880A
SMA525A
On-vehicle Service
REAR SUSPENSION PARTSNBSU0025Check rear axle and rear suspension parts for excessive play, wear
and damage.
1. Shake each rear wheel to check for excessive play.
2. Retighten all nuts and bolts to the specified torque.
Tightening torque: Refer to ªCoil Spring and Shock
Absorberº, SU-18.
SRA754A
3. Check shock absorber for oil leakage and other damage.
4. Check shock absorber bushing for excessive wear and other
damage.
5. Check wheelarch height. Refer to ªOn-vehicle Serviceº,
ªFRONT SUSPENSIONº, SU-5.
REAR SUSPENSION
Components
SU-16
Page 2234 of 2395
SRA645A
REMOVAL AND INSTALLATIONNBSU0028Refer to ªRemoval and Installationº, ªREAR SUSPENSIONº,
SU-17.
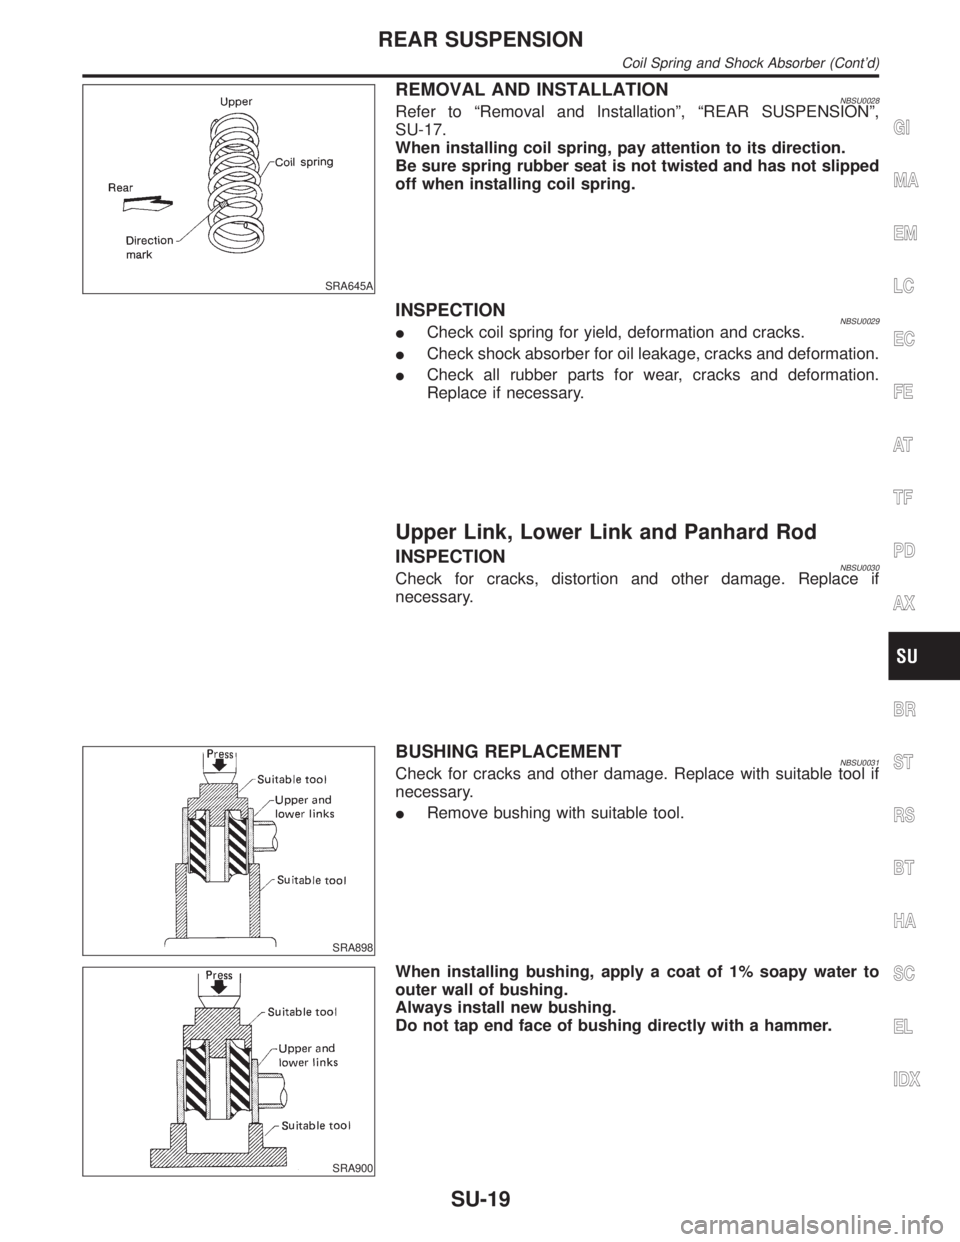
When installing coil spring, pay attention to its direction.
Be sure spring rubber seat is not twisted and has not slipped
off when installing coil spring.
INSPECTIONNBSU0029ICheck coil spring for yield, deformation and cracks.
ICheck shock absorber for oil leakage, cracks and deformation.
ICheck all rubber parts for wear, cracks and deformation.
Replace if necessary.
Upper Link, Lower Link and Panhard Rod
INSPECTIONNBSU0030Check for cracks, distortion and other damage. Replace if
necessary.
SRA898
BUSHING REPLACEMENTNBSU0031Check for cracks and other damage. Replace with suitable tool if
necessary.
IRemove bushing with suitable tool.
SRA900
When installing bushing, apply a coat of 1% soapy water to
outer wall of bushing.
Always install new bushing.
Do not tap end face of bushing directly with a hammer.
GI
MA
EM
LC
EC
FE
AT
TF
PD
AX
BR
ST
RS
BT
HA
SC
EL
IDX
REAR SUSPENSION
Coil Spring and Shock Absorber (Cont'd)
SU-19
Page 2344 of 2395
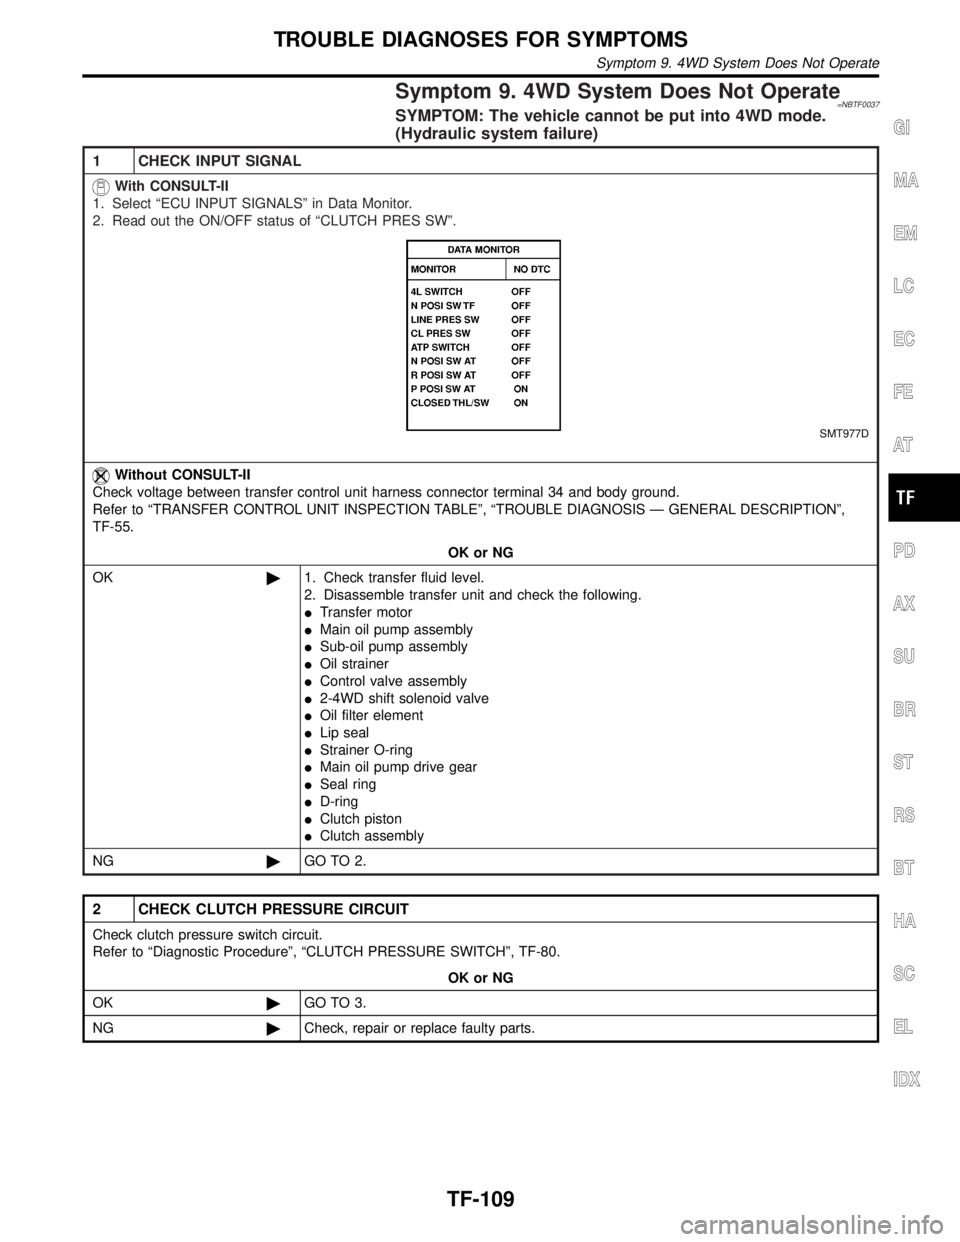
Symptom 9. 4WD System Does Not Operate=NBTF0037SYMPTOM: The vehicle cannot be put into 4WD mode.
(Hydraulic system failure)
1 CHECK INPUT SIGNAL
With CONSULT-II
1. Select ªECU INPUT SIGNALSº in Data Monitor.
2. Read out the ON/OFF status of ªCLUTCH PRES SWº.
SMT977D
Without CONSULT-II
Check voltage between transfer control unit harness connector terminal 34 and body ground.
Refer to ªTRANSFER CONTROL UNIT INSPECTION TABLEº, ªTROUBLE DIAGNOSIS Ð GENERAL DESCRIPTIONº,
TF-55.
OK or NG
OK©1. Check transfer fluid level.
2. Disassemble transfer unit and check the following.
ITransfer motor
IMain oil pump assembly
ISub-oil pump assembly
IOil strainer
IControl valve assembly
I2-4WD shift solenoid valve
IOil filter element
ILip seal
IStrainer O-ring
IMain oil pump drive gear
ISeal ring
ID-ring
IClutch piston
IClutch assembly
NG©GO TO 2.
2 CHECK CLUTCH PRESSURE CIRCUIT
Check clutch pressure switch circuit.
Refer to ªDiagnostic Procedureº, ªCLUTCH PRESSURE SWITCHº, TF-80.
OK or NG
OK©GO TO 3.
NG©Check, repair or replace faulty parts.
GI
MA
EM
LC
EC
FE
AT
PD
AX
SU
BR
ST
RS
BT
HA
SC
EL
IDX
TROUBLE DIAGNOSES FOR SYMPTOMS
Symptom 9. 4WD System Does Not Operate
TF-109
Page 2356 of 2395
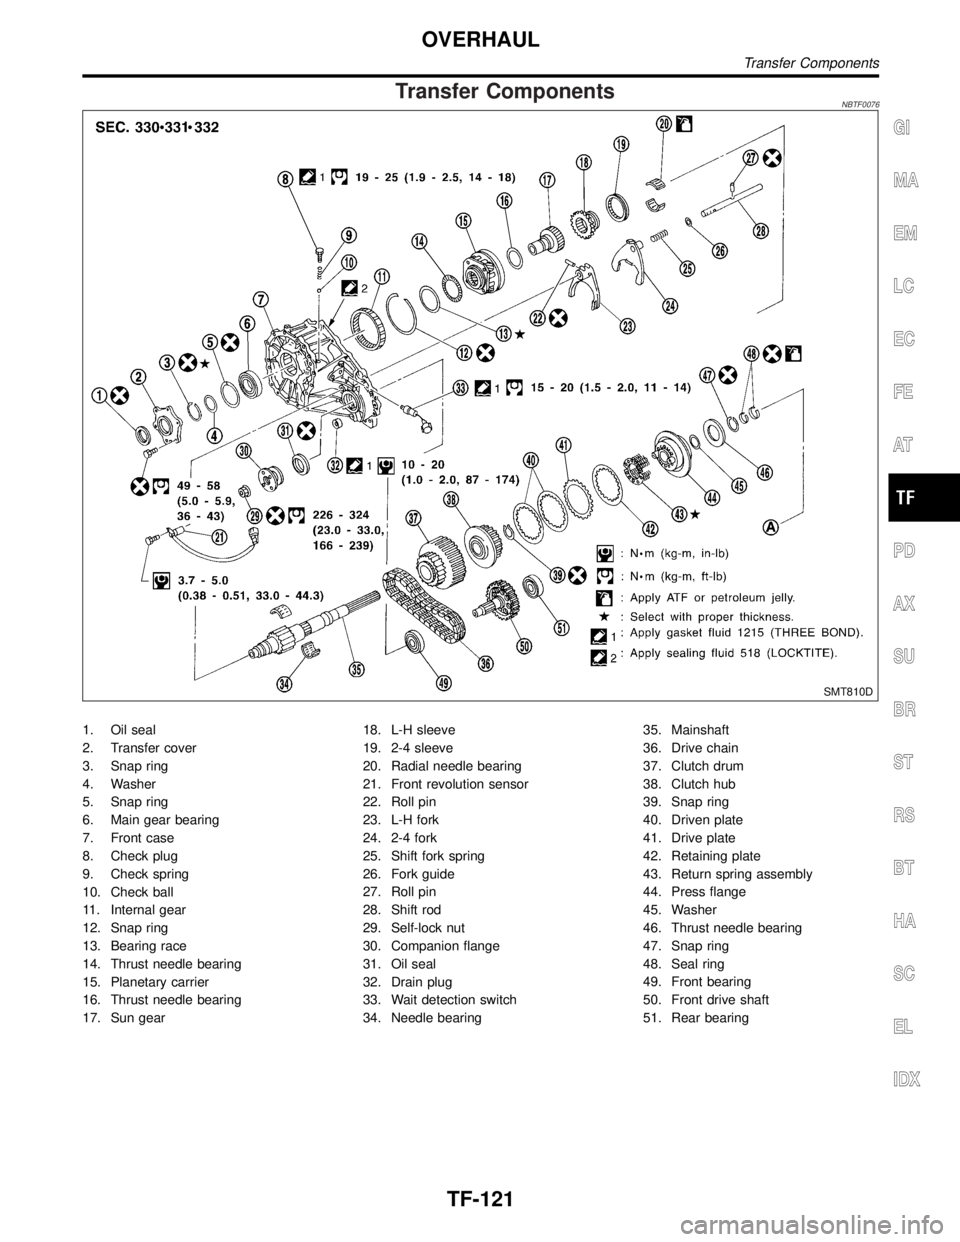
Transfer ComponentsNBTF0076
SMT810D
1. Oil seal
2. Transfer cover
3. Snap ring
4. Washer
5. Snap ring
6. Main gear bearing
7. Front case
8. Check plug
9. Check spring
10. Check ball
11. Internal gear
12. Snap ring
13. Bearing race
14. Thrust needle bearing
15. Planetary carrier
16. Thrust needle bearing
17. Sun gear18. L-H sleeve
19. 2-4 sleeve
20. Radial needle bearing
21. Front revolution sensor
22. Roll pin
23. L-H fork
24. 2-4 fork
25. Shift fork spring
26. Fork guide
27. Roll pin
28. Shift rod
29. Self-lock nut
30. Companion flange
31. Oil seal
32. Drain plug
33. Wait detection switch
34. Needle bearing35. Mainshaft
36. Drive chain
37. Clutch drum
38. Clutch hub
39. Snap ring
40. Driven plate
41. Drive plate
42. Retaining plate
43. Return spring assembly
44. Press flange
45. Washer
46. Thrust needle bearing
47. Snap ring
48. Seal ring
49. Front bearing
50. Front drive shaft
51. Rear bearing
GI
MA
EM
LC
EC
FE
AT
PD
AX
SU
BR
ST
RS
BT
HA
SC
EL
IDX
OVERHAUL
Transfer Components
TF-121