2001 FORD F650 service
[x] Cancel search: servicePage 168 of 240

Adding and replacing engine coolant-Caterpillar 3126 B engine
Refer to the engine operator's manual for additional engine cooling
system information.
FAN CLUTCHES
Your vehicle's cooling system is equipped with a viscous variable speed
fan clutch.
²The fan clutch helps control cooling, increase performance, improve
fuel economy and reduce noise.
²The fan clutch is controlled by bimetallic spring sensors. Do not
tamper with these sensors as this may change their calibration or keep
the fan clutch from operating at all.
Stay clear of the fan/fan area while the engine is running or
possible personal injury may occur.
CHECKING AND ADDING POWER STEERING FLUID
Checking power steering fluid level
Check the power steering fluid level using the following procedure. Refer
to the scheduled maintenance guide for the recommended service
intervals. If adding fluid is necessary, use only MERCONtAT F.
1. Set the parking brake, shift into N
(Neutral) (automatic transmission)
or 1 (First) (manual transmission)
and turn the engine off.
2. Open the hood.
3. Clean the top of the power
steering fluid reservoir.
4. Remove the dipstick from the
reservoir and wipe the dipstick clean.
Maintenance and care
168
Page 169 of 240
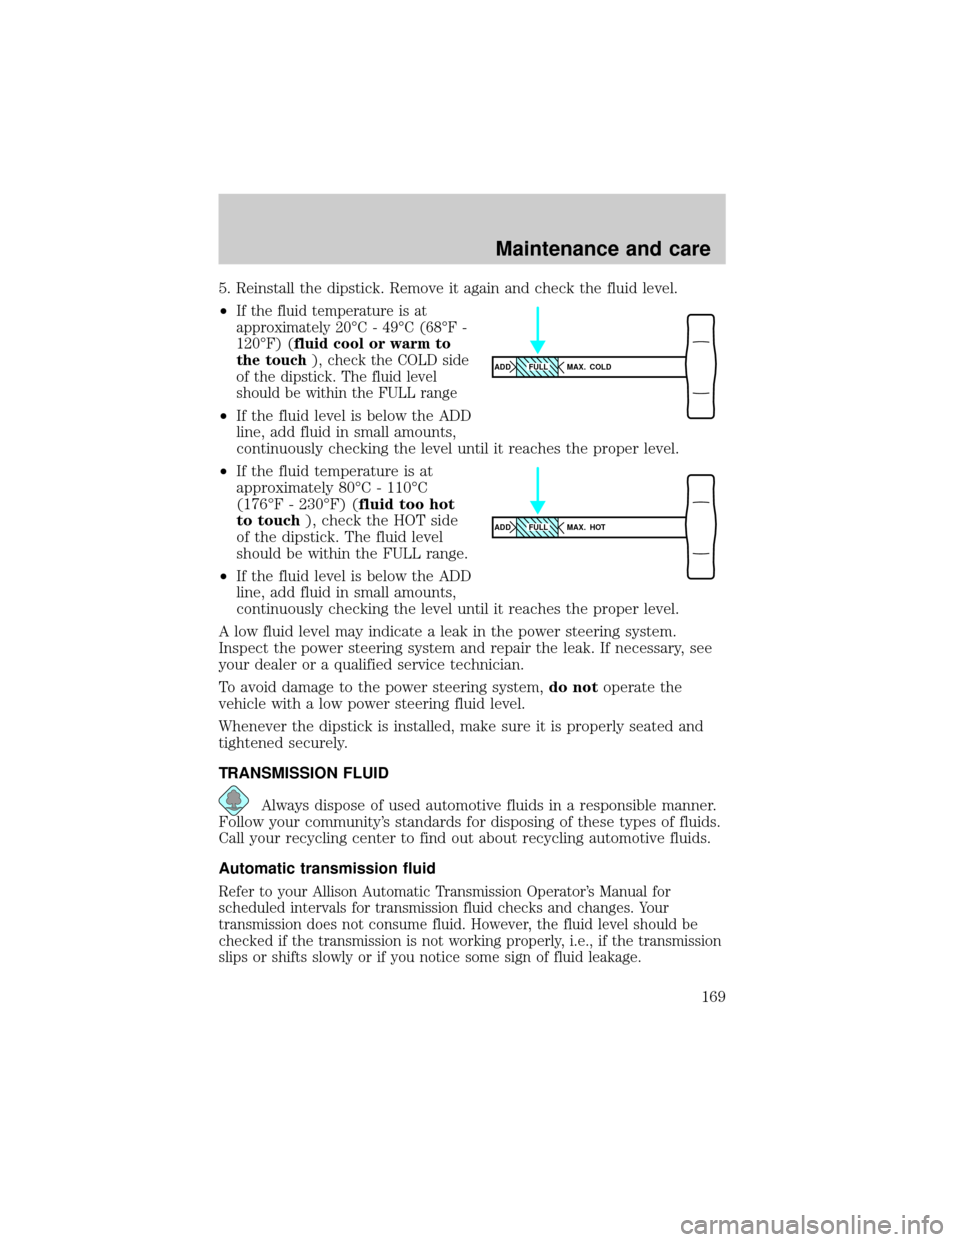
5. Reinstall the dipstick. Remove it again and check the fluid level.
²
If the fluid temperature is at
approximately 20ÉC - 49ÉC (68ÉF -
120ÉF) (fluid cool or warm to
the touch), check the COLD side
of the dipstick. The fluid level
should be within the FULL range
²If the fluid level is below the ADD
line, add fluid in small amounts,
continuously checking the level until it reaches the proper level.
²If the fluid temperature is at
approximately 80ÉC - 110ÉC
(176ÉF - 230ÉF) (fluid too hot
to touch), check the HOT side
of the dipstick. The fluid level
should be within the FULL range.
²If the fluid level is below the ADD
line, add fluid in small amounts,
continuously checking the level until it reaches the proper level.
A low fluid level may indicate a leak in the power steering system.
Inspect the power steering system and repair the leak. If necessary, see
your dealer or a qualified service technician.
To avoid damage to the power steering system,do notoperate the
vehicle with a low power steering fluid level.
Whenever the dipstick is installed, make sure it is properly seated and
tightened securely.
TRANSMISSION FLUID
Always dispose of used automotive fluids in a responsible manner.
Follow your community's standards for disposing of these types of fluids.
Call your recycling center to find out about recycling automotive fluids.
Automatic transmission fluid
Refer to your Allison Automatic Transmission Operator's Manual for
scheduled intervals for transmission fluid checks and changes. Your
transmission does not consume fluid. However, the fluid level should be
checked if the transmission is not working properly, i.e., if the transmission
slips or shifts slowly or if you notice some sign of fluid leakage.
ADD MAX. COLDFULL
ADD MAX. HOTFULL
Maintenance and care
169
Page 170 of 240

Transmission fluid level should be checked by your dealer or a qualified
service technician.
If you must add transmission fluid, make sure the correct type of fluid is
being used. The type of fluid used is indicated in your Allison Automatic
Transmission Operator's Manual.
Use of a non-approved automatic transmission fluid may cause
internal transmission component damage.
Manual transmission fluid
Refer to your scheduled maintenance guide for transmission fluid level
checks and fluid change intervals.
Your manual transmission may be filled with an optional synthetic fluid
which allows the use of extended service intervals. A tag on the filler
plug will identify the use of the synthetic fluid.
Use only fluid that meets Ford specifications (refer toLubricant
specificationsin theCapacities and specificationchapter).
Use of a non-approved transmission fluid may cause internal
transmission component damage.
For location of the transmission filler plug, refer to your transmission
operator's manual orTransmission Refill Capacitiesin theCapacities
and specificationschapter.
Check your transmission fluid level using the following procedure:
1. Park the vehicle on level ground.
2. Set the parking brake and shift into 1 (First) and turn the engine off.
3. Clean any dirt from around the filler plug.
4. Remove the filler plug and inspect the fluid level.
5. The fluid level should be up to the bottom of the filler plug opening.
6. If necessary, add enough fluid through the filler plug opening so that
the fluid level is at the bottom of the opening.
7. Clean and install the filler plug securely.
Drain and refill your transmission fluid using the following procedure:
1. Drain the transmission while the fluid is warm.
2. Park the vehicle on level ground.
3. Set the parking brake and shift into 1 (First) and turn the engine off.
Maintenance and care
170
Page 171 of 240

4. Clean any dirt from around the filler and drain plugs.
5. Remove the filler and drain plugs and drain the fluid into a suitable
container. Dispose all used automotive fluids in a responsible manner
following your local authorized standards.
6. Clean and install the drain plug securely.
7. Add enough fluid through the filler plug opening so that the fluid level
is up to the bottom of the opening.
8. Clean and install the filler plug securely.
REAR AXLE LUBRICANT
Refer to your Scheduled Maintenance Guide for rear axle lubricant level
checks and lubricant change intervals.
Your rear axle may be filled with an optional synthetic lubricant which
allows the use of extended service intervals. A tag on the filler plug will
identify the use of the synthetic lubricant.
Use only a lubricant that meets Ford specifications (refer toLubricant
specificationsin theCapacities and specificationchapter).
Use of a non-approved rear axle lubricant may cause internal axle
component damage.
Check your rear axle lubricant level using the following procedure:
1. Park the vehicle on level ground.
2. Set the parking brake and shift into N (Neutral) (automatic
transmission) or 1 (First) (manual transmission) and turn the engine off.
3. Clean any dirt from around the rear axle filler plug.
4. Remove the filler plug and inspect the lubricant level.
5. The lubricant level should be up to the bottom of the filler plug
opening.
6. If necessary, add enough lubricant through the filler plug opening so
that the lubricant level is at the bottom of the opening.
7. Clean and install the filler plug securely.
Drain and refill your rear axle lubricant using the following procedure:
1. Drain the rear axle while the lubricant is warm.
2. Park the vehicle on level ground.
Maintenance and care
171
Page 173 of 240
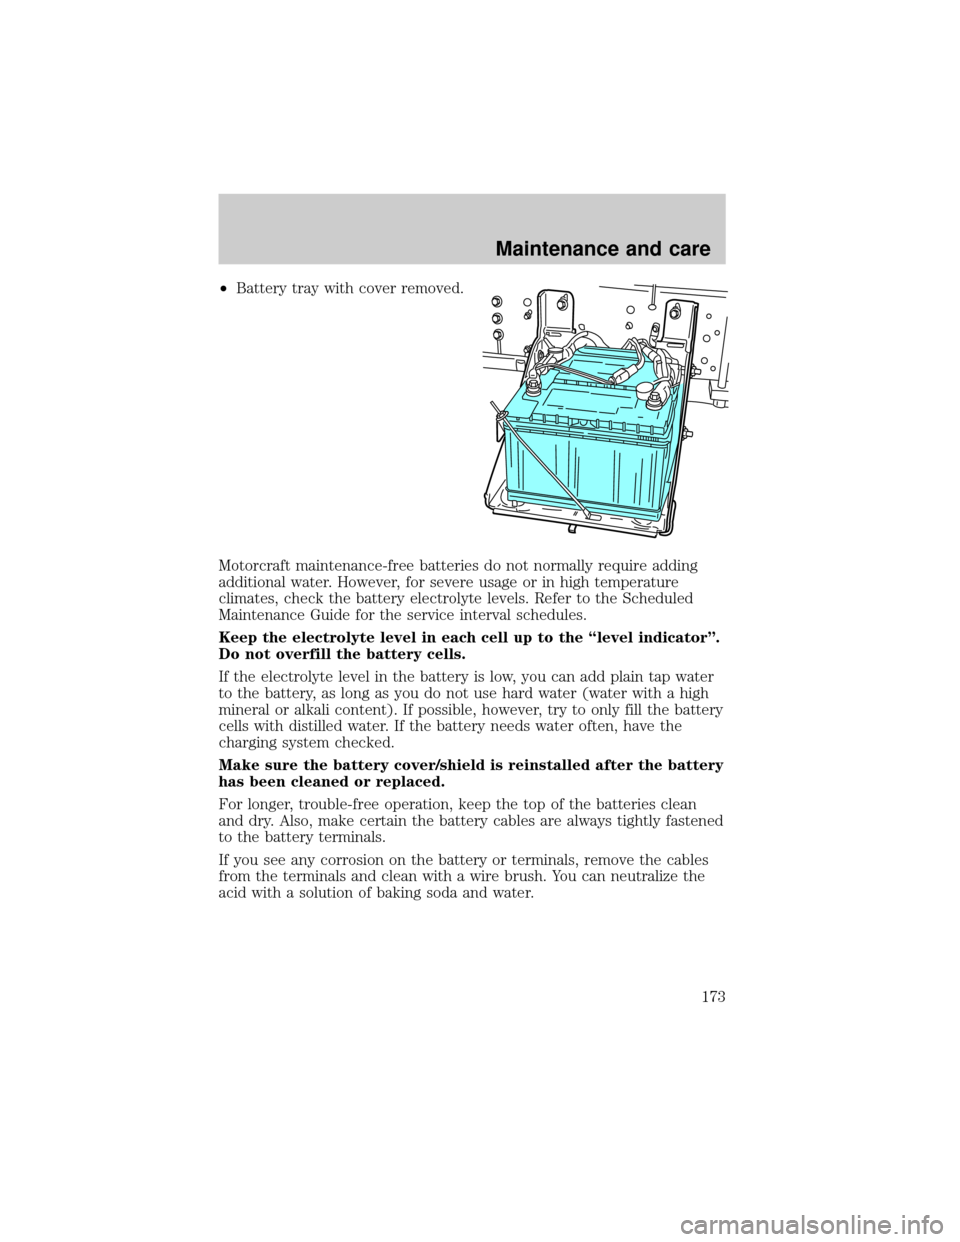
²Battery tray with cover removed.
Motorcraft maintenance-free batteries do not normally require adding
additional water. However, for severe usage or in high temperature
climates, check the battery electrolyte levels. Refer to the Scheduled
Maintenance Guide for the service interval schedules.
Keep the electrolyte level in each cell up to the ªlevel indicatorº.
Do not overfill the battery cells.
If the electrolyte level in the battery is low, you can add plain tap water
to the battery, as long as you do not use hard water (water with a high
mineral or alkali content). If possible, however, try to only fill the battery
cells with distilled water. If the battery needs water often, have the
charging system checked.
Make sure the battery cover/shield is reinstalled after the battery
has been cleaned or replaced.
For longer, trouble-free operation, keep the top of the batteries clean
and dry. Also, make certain the battery cables are always tightly fastened
to the battery terminals.
If you see any corrosion on the battery or terminals, remove the cables
from the terminals and clean with a wire brush. You can neutralize the
acid with a solution of baking soda and water.
Maintenance and care
173
Page 174 of 240
Batteries normally produce explosive gases which can cause
personal injury. Therefore, do not allow flames, sparks or lighted
substances to come near the battery. When working near the battery,
always shield your face and protect your eyes. Always provide proper
ventilation.
When lifting a plastic-cased battery, excessive pressure on the
end walls could cause acid to flow through the vent caps,
resulting in personal injury and/or damage to the vehicle or battery.
Lift the battery with a battery carrier or with your hands on opposite
corners.
Keep batteries out of reach of children. Batteries contain sulfuric
acid. Avoid contact with skin, eyes or clothing. Shield your eyes
when working near the battery to protect against possible splashing of
acid solution. In case of acid contact with skin or eyes, flush
immediately with water for a minimum of 15 minutes and get prompt
medical attention. If acid is swallowed, call a physician immediately.
AIR FILTER
When to service
Your vehicle is equipped with an air filter restriction gauge to determine
when to replace the air filter element. It is not possible to determine the
need for service by visually inspecting the air filter.
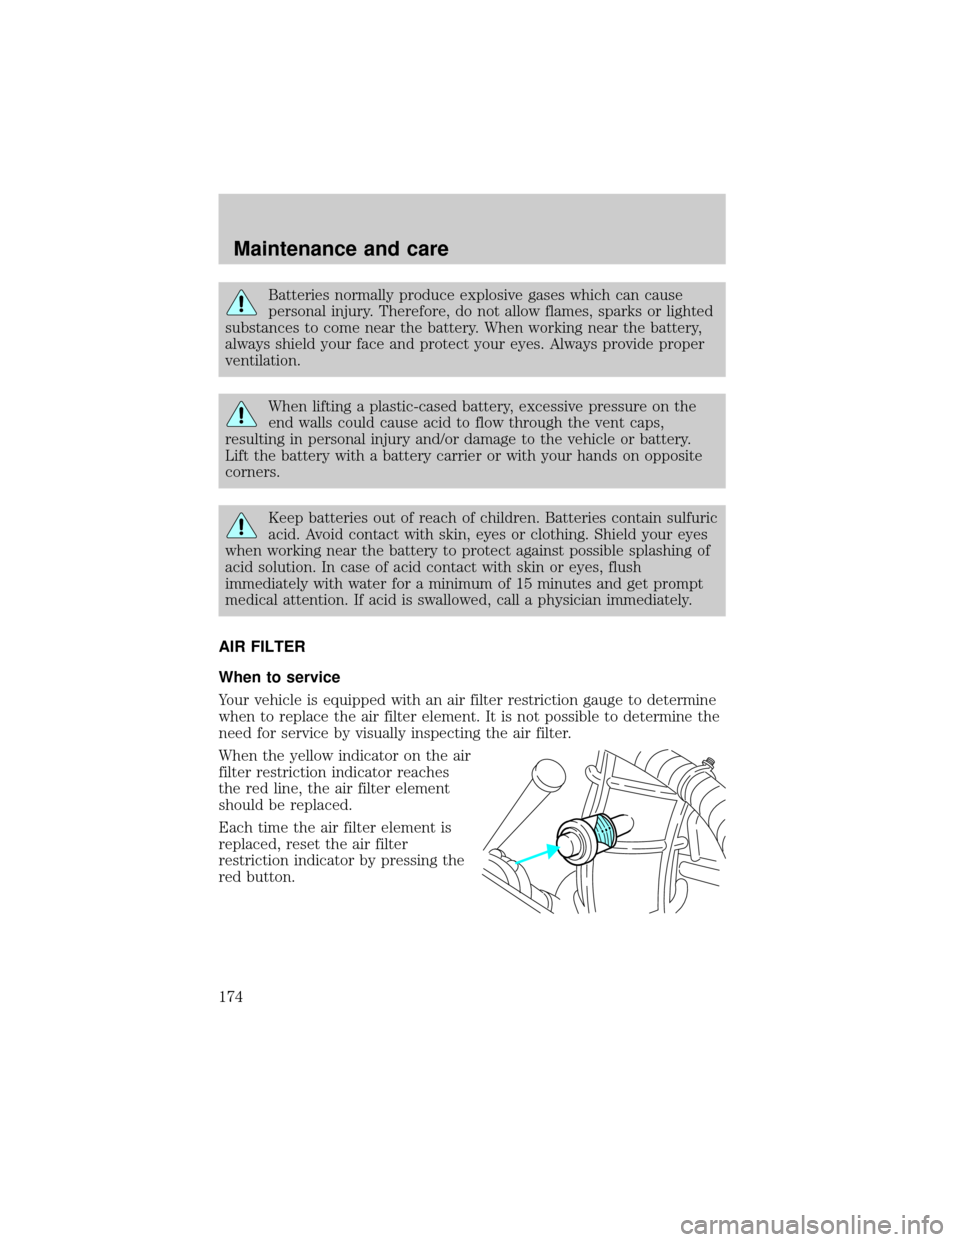
When the yellow indicator on the air
filter restriction indicator reaches
the red line, the air filter element
should be replaced.
Each time the air filter element is
replaced, reset the air filter
restriction indicator by pressing the
red button.
Maintenance and care
174
Page 178 of 240
9. Push in on the cover latches, then turn the latches clockwise 90 degrees.
Make sure that all air filter cover latches are fully engaged.
10. Reset the air filter restriction indicator.
11. Inspect the air induction system for loose fitting, damaged or missing
components and repair as necessary.
WINDSHIELD WIPER BLADES
Check the wiper blades at least twice a year or when they seem less
effective. Substances such as tree sap and some hot wax treatments used
by commercial car washes reduce the effectiveness of wiper blades.
Checking the wiper blades
If the wiper blades do not wipe properly, clean both the windshield and
wiper blades using undiluted windshield wiper solution or a mild
detergent. Rinse thoroughly with clean water. To avoid damaging the
blades, do not use fuel, kerosene, paint thinner or other solvents.
Changing the wiper blades
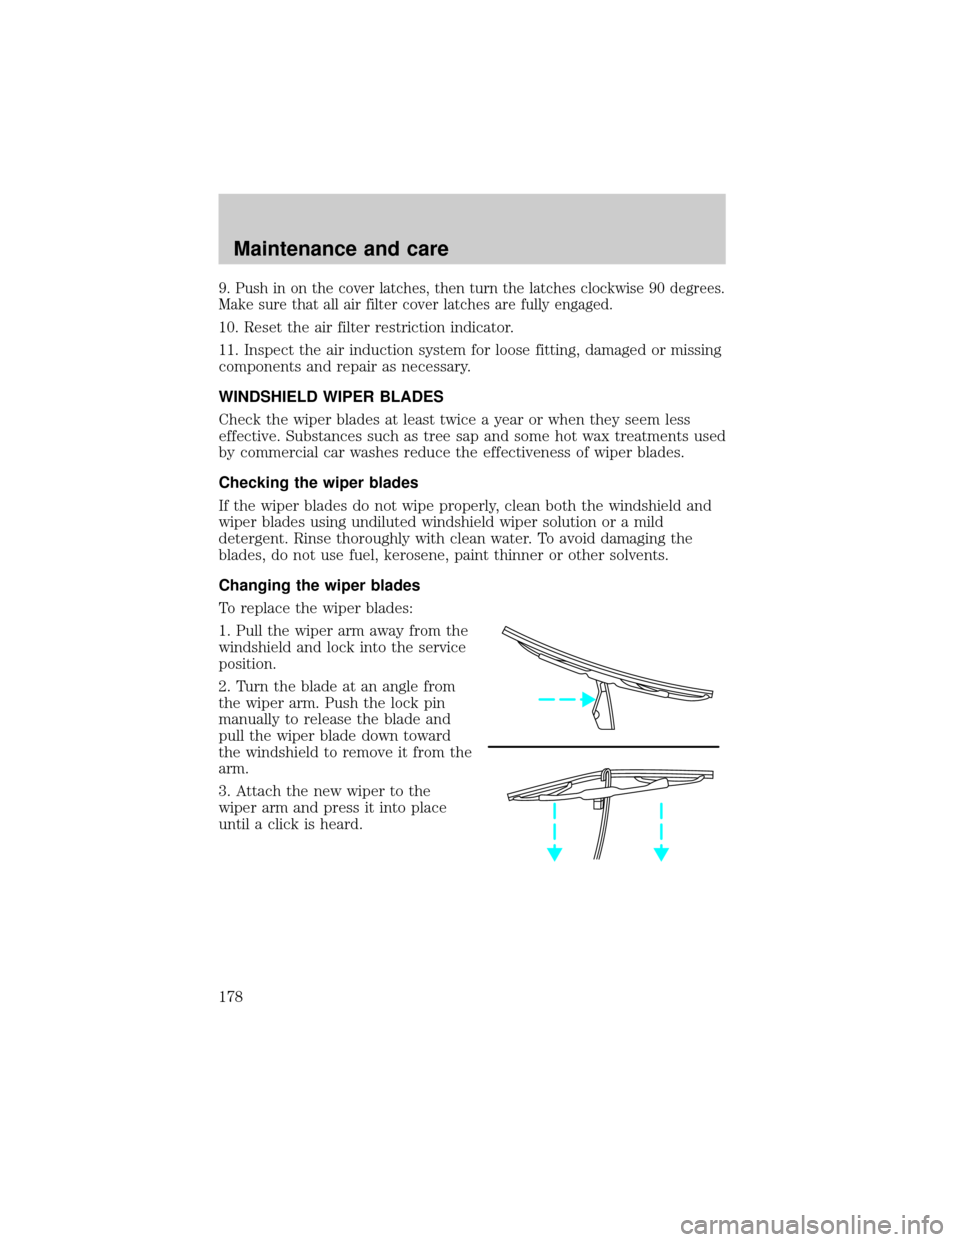
To replace the wiper blades:
1. Pull the wiper arm away from the
windshield and lock into the service
position.
2. Turn the blade at an angle from
the wiper arm. Push the lock pin
manually to release the blade and
pull the wiper blade down toward
the windshield to remove it from the
arm.
3. Attach the new wiper to the
wiper arm and press it into place
until a click is heard.
Maintenance and care
178
Page 181 of 240
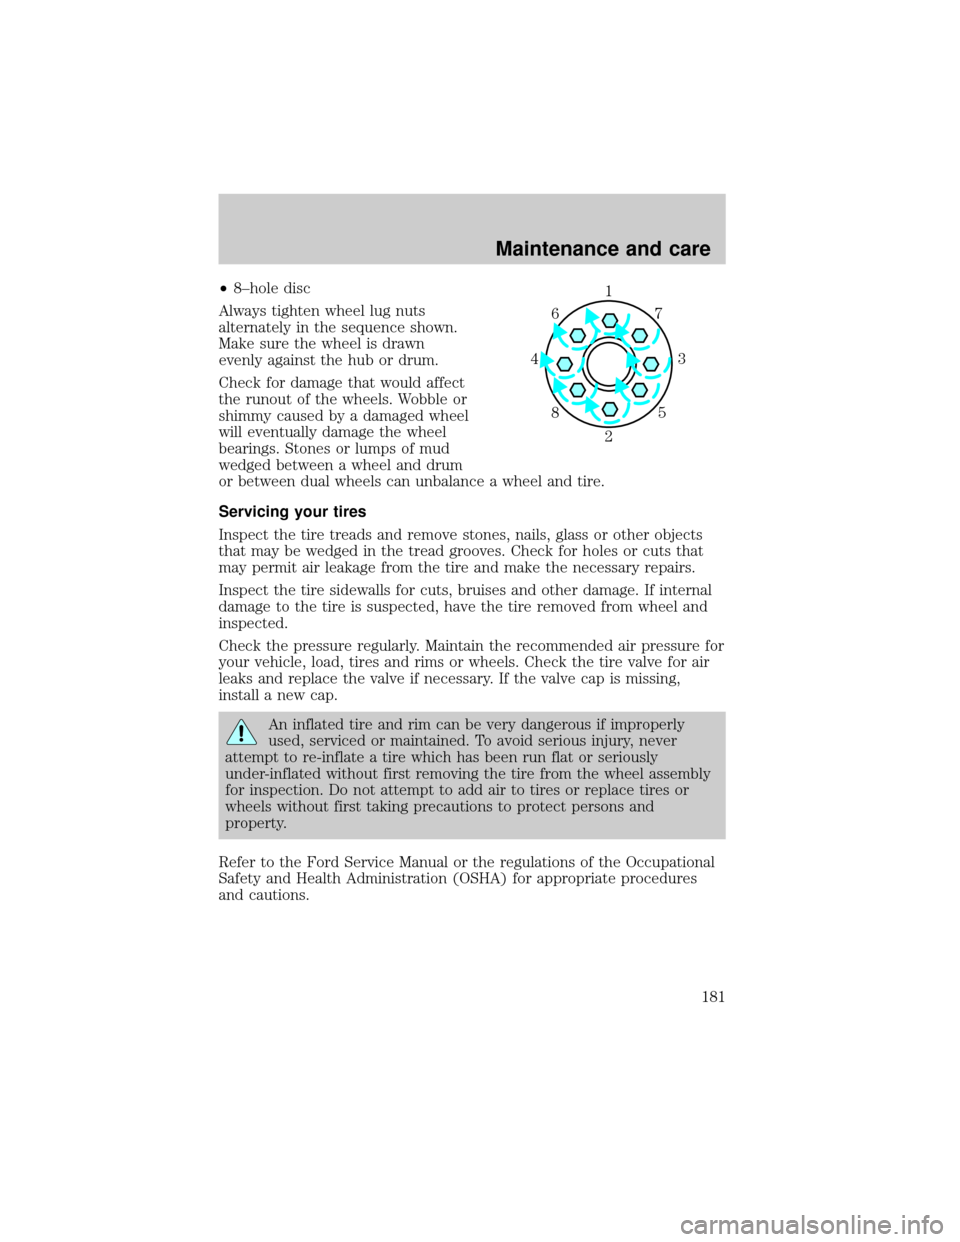
²8±hole disc
Always tighten wheel lug nuts
alternately in the sequence shown.
Make sure the wheel is drawn
evenly against the hub or drum.
Check for damage that would affect
the runout of the wheels. Wobble or
shimmy caused by a damaged wheel
will eventually damage the wheel
bearings. Stones or lumps of mud
wedged between a wheel and drum
or between dual wheels can unbalance a wheel and tire.
Servicing your tires
Inspect the tire treads and remove stones, nails, glass or other objects
that may be wedged in the tread grooves. Check for holes or cuts that
may permit air leakage from the tire and make the necessary repairs.
Inspect the tire sidewalls for cuts, bruises and other damage. If internal
damage to the tire is suspected, have the tire removed from wheel and
inspected.
Check the pressure regularly. Maintain the recommended air pressure for
your vehicle, load, tires and rims or wheels. Check the tire valve for air
leaks and replace the valve if necessary. If the valve cap is missing,
install a new cap.
An inflated tire and rim can be very dangerous if improperly
used, serviced or maintained. To avoid serious injury, never
attempt to re-inflate a tire which has been run flat or seriously
under-inflated without first removing the tire from the wheel assembly
for inspection. Do not attempt to add air to tires or replace tires or
wheels without first taking precautions to protect persons and
property.
Refer to the Ford Service Manual or the regulations of the Occupational
Safety and Health Administration (OSHA) for appropriate procedures
and cautions.
1
3 4
27 6
5 8
Maintenance and care
181