Page 260 of 371
5-7
8. Now connect the black
negative (
-) cable to
the good battery's
negative (
-) terminal.
Don't let the other end
of the negative (
-) cable
touch anything until the
next step. The other
end of the negative (
-)
cable doesn't go to the
dead battery.
Your vehicle has a
remote negative (
-)
terminal, marked
ªGND (
-)º located
near the power
steering fluid reservoir.
Attach the cable to
the remote negative
terminal provided.If the SECURITY light flashes, wait until the light
stops flashing before starting the engine.
9. Now start the vehicle with the good battery and
run the engine for a while.
10. Try to start the vehicle with the dead battery.
If it won't start after a few tries, it probably
needs service.
11. Remove the cables in reverse order (as shown in the
following procedure) to prevent electrical shorting.
Take care that they don't touch each other or any
other metal. Return the red positive (+) remote
terminal cover to its original position.
Page 270 of 371

5-17
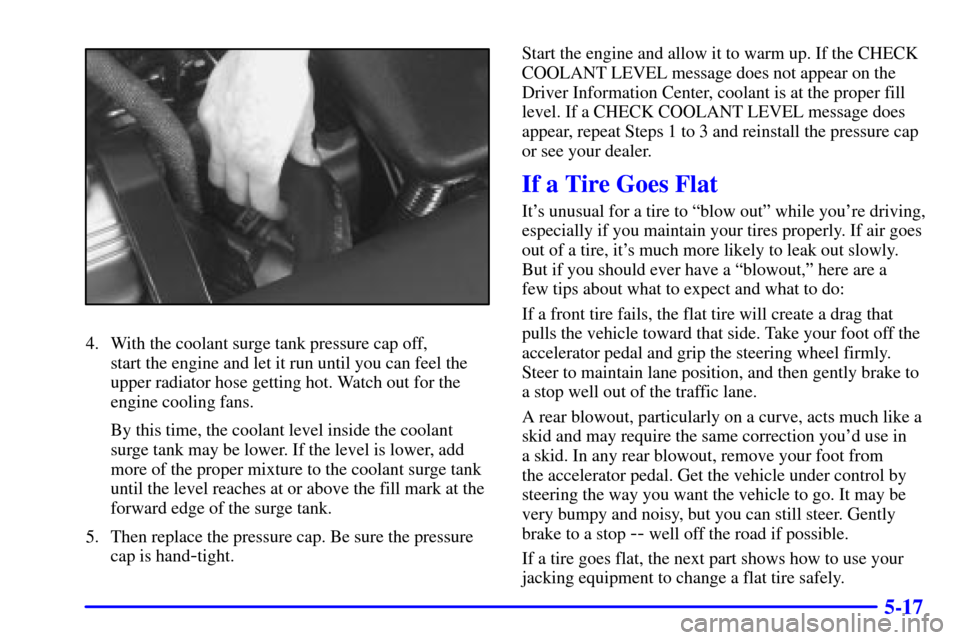
4. With the coolant surge tank pressure cap off,
start the engine and let it run until you can feel the
upper radiator hose getting hot. Watch out for the
engine cooling fans.
By this time, the coolant level inside the coolant
surge tank may be lower. If the level is lower, add
more of the proper mixture to the coolant surge tank
until the level reaches at or above the fill mark at the
forward edge of the surge tank.
5. Then replace the pressure cap. Be sure the pressure
cap is hand
-tight.Start the engine and allow it to warm up. If the CHECK
COOLANT LEVEL message does not appear on the
Driver Information Center, coolant is at the proper fill
level. If a CHECK COOLANT LEVEL message does
appear, repeat Steps 1 to 3 and reinstall the pressure cap
or see your dealer.
If a Tire Goes Flat
It's unusual for a tire to ªblow outº while you're driving,
especially if you maintain your tires properly. If air goes
out of a tire, it's much more likely to leak out slowly.
But if you should ever have a ªblowout,º here are a
few tips about what to expect and what to do:
If a front tire fails, the flat tire will create a drag that
pulls the vehicle toward that side. Take your foot off the
accelerator pedal and grip the steering wheel firmly.
Steer to maintain lane position, and then gently brake to
a stop well out of the traffic lane.
A rear blowout, particularly on a curve, acts much like a
skid and may require the same correction you'd use in
a skid. In any rear blowout, remove your foot from
the accelerator pedal. Get the vehicle under control by
steering the way you want the vehicle to go. It may be
very bumpy and noisy, but you can still steer. Gently
brake to a stop
-- well off the road if possible.
If a tire goes flat, the next part shows how to use your
jacking equipment to change a flat tire safely.
Page 282 of 371

5-29
If You're Stuck: In Sand, Mud,
Ice or Snow
In order to free your vehicle when it is stuck, you will
need to spin the wheels, but you don't want to spin
your wheels too fast. The method known as ªrockingº
can help you get out when you're stuck, but you must
use caution.
CAUTION:
If you let your tires spin at high speed, they can
explode, and you or others could be injured.
And, the transaxle or other parts of the vehicle
can overheat. That could cause an engine
compartment fire or other damage. When you're
stuck, spin the wheels as little as possible. Don't
spin the wheels above 35 mph (55 km/h) as shown
on the speedometer.
NOTICE:
Spinning your wheels can destroy parts of your
vehicle as well as the tires. If you spin the wheels
too fast while shifting your transaxle back and
forth, you can destroy your transaxle.
For information about using tire chains on your vehicle,
see ªTire Chainsº in the Index.
Rocking Your Vehicle To Get It Out
First, turn your steering wheel left and right. That will
clear the area around your front wheels. You should turn
your traction control system off. See ªTraction Control
Systemº in the Index. Then shift back and forth between
REVERSE (R) and a forward gear, spinning the wheels
as little as possible. Release the accelerator pedal while
you shift, and press lightly on the accelerator pedal
when the transaxle is in gear. By slowly spinning your
wheels in the forward and reverse directions, you will
cause a rocking motion that may free your vehicle.
If that doesn't get you out after a few tries, you may
need to be towed out. If you do need to be towed out,
see ªTowing Your Vehicleº in the Index.
Page 293 of 371
6-11 Engine Compartment Overview
When you open the hood, you'll see:
A. Windshield Washer Fluid
B. Power Steering Fluid
C. Engine Oil Fill Location
D. Engine Oil Dipstick LocationE. Brake Master Cylinder
F. Transaxle Dipstick/Fill Location
G. Engine Air Cleaner/Filter
H. Surge Tank/Coolant Fill Location
Before closing the hood, be sure all filler caps are on properly. Then pull the hood down and close it firmly.
Page 310 of 371

6-28
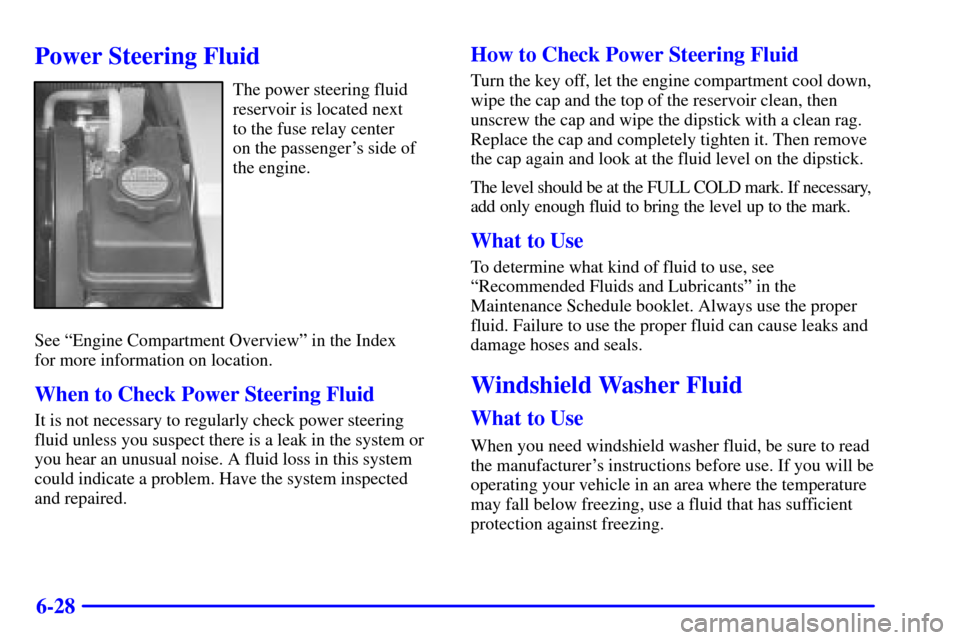
Power Steering Fluid
The power steering fluid
reservoir is located next
to the fuse relay center
on the passenger's side of
the engine.
See ªEngine Compartment Overviewº in the Index
for more information on location.
When to Check Power Steering Fluid
It is not necessary to regularly check power steering
fluid unless you suspect there is a leak in the system or
you hear an unusual noise. A fluid loss in this system
could indicate a problem. Have the system inspected
and repaired.
How to Check Power Steering Fluid
Turn the key off, let the engine compartment cool down,
wipe the cap and the top of the reservoir clean, then
unscrew the cap and wipe the dipstick with a clean rag.
Replace the cap and completely tighten it. Then remove
the cap again and look at the fluid level on the dipstick.
The level should be at the FULL COLD mark. If necessary,
add only enough fluid to bring the level up to the mark.
What to Use
To determine what kind of fluid to use, see
ªRecommended Fluids and Lubricantsº in the
Maintenance Schedule booklet. Always use the proper
fluid. Failure to use the proper fluid can cause leaks and
damage hoses and seals.
Windshield Washer Fluid
What to Use
When you need windshield washer fluid, be sure to read
the manufacturer's instructions before use. If you will be
operating your vehicle in an area where the temperature
may fall below freezing, use a fluid that has sufficient
protection against freezing.
Page 349 of 371

6-67 Fuses and Circuit Breakers
The wiring circuits in your vehicle are protected from
short circuits by a combination of fuses and circuit
breakers. This greatly reduces the chance of fires caused
by electrical problems.
Look at the silver
-colored band inside the fuse. If the
band is broken or melted, replace the fuse. Be sure you
replace a bad fuse with a new one of the identical size
and rating. If a MaxiFuse should blow, see your dealer
for service immediately.
If you ever have a problem on the road and don't have a
spare fuse, you can ªborrowº one that has the same
amperage. Pick some feature of your vehicle that you
can get along without
-- like the radio or cigarette
lighter
-- and use its fuse, if it is the correct amperage.
Replace it as soon as you can.
The MaxiFuses are located in two Bussed Electrical
Centers (BEC), one located near the engine
compartment on the passenger's side and the other
under the rear seat on the driver's side. If a MaxiFuse
should blow, have your vehicle serviced by your
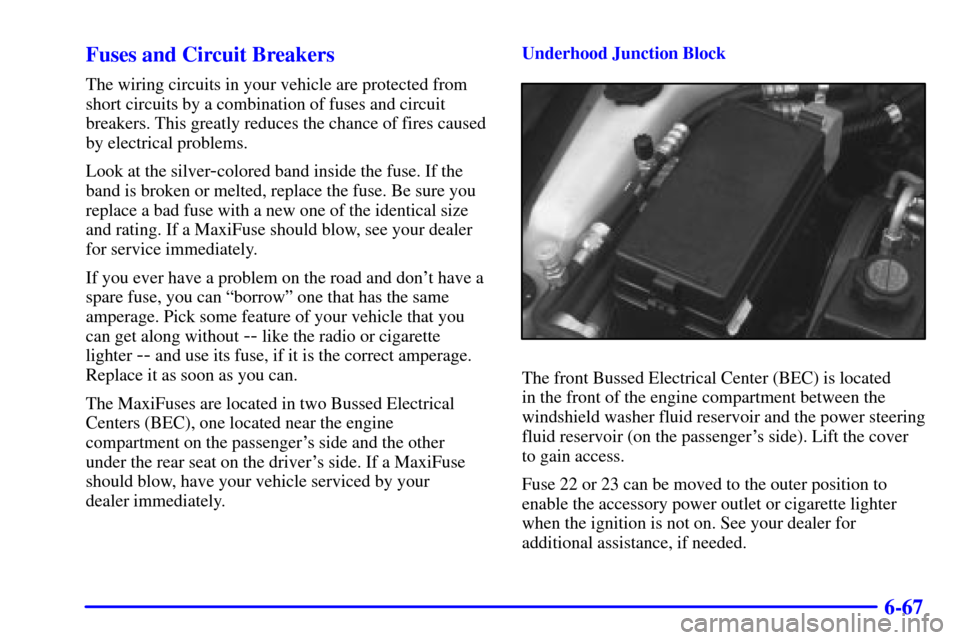
dealer immediately.Underhood Junction Block
The front Bussed Electrical Center (BEC) is located
in the front of the engine compartment between the
windshield washer fluid reservoir and the power steering
fluid reservoir (on the passenger's side). Lift the cover
to gain access.
Fuse 22 or 23 can be moved to the outer position to
enable the accessory power outlet or cigarette lighter
when the ignition is not on. See your dealer for
additional assistance, if needed.
Page 354 of 371
6-72
Rear Underseat Bussed Electrical Center (BEC)
The rear BEC is located under the rear seat on the
driver's side. The rear seat cushion must be removed to
access the BEC. See ªRemoving the Rear Seat Cushionº
in the Index.
Minifuses Usage
1 Fuel Pump
2 Heater, Ventilation,
Air Conditioner Blower
3 Memory Seat, Tilt and
Telescoping Steering
4 Not Used
5 Driver Door Module
Page 355 of 371
6-73
Minifuses Usage
6 Heated Seat Left Rear
7 Power Tilt and
Telescoping Steering
8 Supplemental Inflation Restraint
9 Not Used
10 Lamps Park Right
11 Fuel Tank Ventilation Solenoid
12 Ignition 1
13 Lamps, Parking Left
14 Interior Lamp Dimmer Module
15 Navigation
16 Heated Seat Left Front
17 Export Lighting
18 Rear Door Modules
19 Stoplamps
20 Neutral Safety Back
-up
21 Audio
22 Retained Accessory Power
for SunroofMinifuses Usage
23 Not Used
24 Not Used
25 Passenger Door Module
26 Fuel Door/Trunk Release (Body)
27 Interior Lamps
28 Rear HVAC Blower
29 Ignition Switch
30 Not Used
31 Heated Seat Right Front
32 Continuous Variable Road
Sensing Suspension
33 Heating, Ventilation,
Air Conditioning
34 Ignition 3 Rear
35 Antilock Braking System
36 Turn Signal/Hazard
37 Heated Seat Right Rear
38 Dash Integration Module