Page 65 of 121
OPERATION AND IMPORTANT RIDING POINTS
6-5
6
EAU01171
0 ~ 1,000 km
Avoid operation above 1/3 throttle.
1,000 ~ 1,600 km
Avoid cruising speeds in excess of
1/2 throttle.
EC000056
CAUTION:@ After 1,000 km of operation, be sure
to replace the engine oil, oil filter
and final gear oil. @
1,600 km and beyond
Proceed with normal riding.
EC000049
CAUTION:@ If any engine trouble should occur
during the break-in period, consult a
Yamaha dealer immediately. @
EAU00457
ParkingWhen parking the motorcycle, stop the
engine and remove the ignition key.
Turn the fuel cock to “OFF” whenever
stopping the engine.
EW000058
WARNING
@ The exhaust system is hot. Park the
motorcycle in a place where pedes-
trians or children are not likely to
touch the motorcycle. Do not park
the motorcycle on a slope or soft
ground; the motorcycle may over-
turn. @
E_5jc_Operation.fm Page 5 Saturday, October 16, 1999 1:10 PM
Page 66 of 121

7
PERIODIC MAINTENANCE AND MINOR REPAIR
Tool kit................................................................... 7-1
Periodic maintenance and lubrication ................... 7-3
Cowling and panel removal and installation.......... 7-6
Cowling A.............................................................. 7-6
Cowling B.............................................................. 7-7
Panel C ................................................................. 7-8
Panel D ................................................................. 7-8
Panel E ................................................................. 7-9
Spark plug inspection ......................................... 7-10
Engine oil ............................................................ 7-11
Final gear oil ....................................................... 7-13
Coolant ............................................................... 7-14
Air filters .............................................................. 7-15
Carburetor adjustment ........................................ 7-17
Idle speed adjustment ........................................ 7-17
Throttle cable free play inspection ...................... 7-18
Valve clearance adjustment ................................ 7-18
Tires .................................................................... 7-19
Wheels ................................................................ 7-21
Clutch lever free play adjustment........................ 7-22Front brake lever free play adjustment ............... 7-23
Rear brake pedal height adjustment .................. 7-23
Brake light switch adjustment ............................. 7-24
Checking the front and rear brake pads ............. 7-25
Inspecting the brake fluid level ........................... 7-25
Brake fluid replacement ..................................... 7-26
Brake and shift pedal lubrication ........................ 7-27
Brake and clutch lever lubrication ...................... 7-27
Sidestand lubrication.......................................... 7-28
Front fork inspection ........................................... 7-28
Steering inspection ............................................ 7-29
Battery................................................................ 7-29
Fuse replacement .............................................. 7-31
Headlight bulb replacement ............................... 7-32
Turn signal and tail/brake light bulb
replacement ..................................................... 7-33
License light bulb replacement........................... 7-34
Troubleshooting .................................................. 7-34
Troubleshooting charts ....................................... 7-35
E_5jc_PeriodicTOC.fm Page 1 Saturday, October 16, 1999 1:10 PM
Page 67 of 121

7-1
7
EAU00462
7-PERIODIC MAINTENANCE AND MINOR REPAIR
EAU00464
Periodic inspection, adjustment and lu-
brication will keep your motorcycle in
the safest and most efficient condition
possible. Safety is an obligation of the
motorcycle owner. The maintenance
and lubrication schedule chart should
be considered strictly as a guide to
general maintenance and lubrication
intervals. YOU MUST TAKE INTO
CONSIDERATION THAT WEATHER,
TERRAIN, GEOGRAPHICAL LOCA-
TIONS, AND A VARIETY OF INDIVID-
UAL USES ALL TEND TO DEMAND
THAT EACH OWNER ALTER THIS
TIME SCHEDULE TO SHORTER IN-
TERVALS TO MATCH THE ENVI-RONMENT. The most important points
of motorcycle inspection, adjustment,
and lubrication are explained in the fol-
lowing pages.
EW000060
WARNING
@ If you are not familiar with motor-
cycle service, this work should be
done by a Yamaha dealer. @
EAU01844
Tool kitThe tool kit is located inside the right
saddlebag. The tools provided in the
owner’s tool kit are to assist you in the
performance of periodic maintenance.
However, some other tools such as a
torque wrench are also necessary to
perform the maintenance correctly.
The service information included in this
manual is intended to provide you, the
owner, with the necessary information
for completing some of your own pre-
ventive maintenance and minor re-
pairs.1. Owner’s tool kit
E_5jc_Periodic.fm Page 1 Saturday, October 16, 1999 1:10 PM
Page 68 of 121
PERIODIC MAINTENANCE AND MINOR REPAIR
7-2
7
NOTE:@ If you do not have necessary tools re-
quired during a service operation, take
your motorcycle to a Yamaha dealer for
service. @
EW000063
WARNING
@ Modifications to this motorcycle not
approved by Yamaha may cause
loss of performance, and render it
unsafe for use. Consult a Yamaha
dealer before attempting any chang-
es. @
E_5jc_Periodic.fm Page 2 Saturday, October 16, 1999 1:10 PM
Page 69 of 121
EVERY
6,000 km
or
6 months
(whichever
comes first")
PERIODIC MAINTENANCE AND MINOR REPAIR
7-3
7
EAU00473
PERIODIC MAINTENANCE AND LUBRICATION
CP-01ENO. ITEM CHECKS AND MAINTENANCE JOBSINITIAL
(1,000 km)EVERY
6,000 km
or
6 months
(whichever
comes first)12,000 km
or
12 months
(whichever
comes first)
1
*Fuel line• Check fuel hoses and vacuum hose for cracks or damage.
• Replace if necessary.ÖÖ
2*Fuel filter• Check condition.
• Replace if necessary.Ö
3 Spark plugs• Check condition.
• Clean, regap or replace if necessary.ÖÖÖ
4*Valves• Check valve clearance.
• Adjust if necessary.Every 42,000 km or 42 months
(whichever comes first)
5 Air filter• Clean or replace if necessary.ÖÖ
6*Clutch• Check operation, fluid level and vehicle for fluid leakage.
(See NOTE on page 7-5.)
• Correct accordingly. ÖÖÖ
7*Front brake• Check operation, fluid level and vehicle for fluid leakage.
(See NOTE on page 7-5.)
• Correct accordingly.
• Replace brake pads if necessary.ÖÖÖ
8*Rear brake• Check operation, fluid level and vehicle for fluid leakage.
(See NOTE on page 7-5.)
• Correct accordingly.
• Replace brake pads if necessary.ÖÖÖ
9*Wheels• Check balance, runout and for damage.
• Rebalance or replace if necessary.ÖÖ
10*Tires• Check tread depth and for damage.
• Replace if necessary.
• Check air pressure.
• Correct if necessary.ÖÖ
E_5jc_Periodic.fm Page 3 Saturday, October 16, 1999 1:10 PM
Page 70 of 121

PERIODIC MAINTENANCE AND MINOR REPAIR
7-4
7
11
*Wheel bearings• Check bearing for looseness or damage.
• Replace if necessary. ÖÖ
12*Swingarm• Check swingarm pivoting point for play.
• Correct if necessary.
• Lubricate with molybdenum disulfide grease every 24,000 km or
24 months (whichever comes first).ÖÖ
13*Steering bearings• Check bearing play and steering for roughness.
• Correct accordingly.
• Lubricate with lithium soap base grease every 24,000 km
or 24 months (whichever comes first).ÖÖ
14*Chassis fasteners• Make sure that all nuts, bolts and screws are properly tightened.
• Tighten if necessary.ÖÖ
15 Sidestand• Check operation.
• Lubricate and repair if necessary.ÖÖ
16*Sidestand switch• Check operation.
• Replace if necessary.ÖÖÖ
17*Front fork• Check operation and for oil leakage.
• Correct accordingly.ÖÖ
18*Rear shock absorber
assembly• Check operation and shock absorber for oil leakage.
• Replace shock absorber assembly if necessary. ÖÖ
19*Rear suspension relay
arm and connecting arm
pivoting points• Check operation.
• Lubricate with molybdenum disulfide grease every 24,000 km or
24 months (whichever comes first).ÖÖ
20*Carburetors• Check engine idling speed, synchronization and starter operation.
• Adjust if necessary.ÖÖÖ
21 Engine oil• Check oil level and vehicle for oil leakage.
• Correct if necessary.
• Change. (Warm engine before draining.)ÖÖÖ
22 Engine oil filter cartridge• Replace.ÖÖ NO. ITEM CHECKS AND MAINTENANCE JOBSINITIAL
(1,000 km)EVERY
6,000 km
or
6 months
(whichever
comes first)12,000 km
or
12 months
(whichever
comes first)
E_5jc_Periodic.fm Page 4 Saturday, October 16, 1999 1:10 PM
Page 71 of 121

PERIODIC MAINTENANCE AND MINOR REPAIR
7-5
7
* Since these items require special tools, data and technical skills, they should be serviced by a Yamaha dealer.
EAU02971
NOTE:@ l
The air filter needs more frequent service if you are riding in unusually wet or dusty areas.
l
Hydraulic brake and clutch systems
• After disassembling the master cylinder, caliper or clutch release cylinder, always replace the brake fluid. Check the
brake fluid level of the master cylinder and clutch release cylinder regularly and fill as required.
• Replace the oil seals on the inner parts of the master cylinder, caliper and clutch release cylinder every two years.
• Replace the brake and clutch hoses every four years or if cracked or damaged.
@23
*Cooling system• Check coolant level and vehicle for coolant leakage.
• Correct if necessary.
• Change coolant every 24,000 km or 24 months (whichever comes
first).ÖÖ
24 Final gear oil• Check oil level and vehicle for oil leakage.
• Change oil at initial 1,000 km and thereafter every 24,000 km
or 24 months (whichever comes first).ÖÖÖ NO. ITEM CHECKS AND MAINTENANCE JOBSINITIAL
(1,000 km)EVERY
6,000 km
or
6 months
(whichever
comes first)12,000 km
or
12 months
(whichever
comes first)
E_5jc_Periodic.fm Page 5 Saturday, October 16, 1999 1:10 PM
Page 72 of 121
PERIODIC MAINTENANCE AND MINOR REPAIR
7-6
7
EAU01139
Cowling and panel removal
and installationThe cowlings and panels illustrated
need to be removed to perform some
of the maintenance described in this
chapter. Refer to this section each time
a cowling or panel has to be removed
or reinstalled.
EAU01793
Cowling ATo remove
Remove the cowling screws and the
quick fastener. Then, pull outward on
the area shown.1. Cowling A
2. Screw (´ 2)
3. Quick fastener
1. Screw
E_5jc_Periodic.fm Page 6 Saturday, October 16, 1999 1:10 PM
 1
1 2
2 3
3 4
4 5
5 6
6 7
7 8
8 9
9 10
10 11
11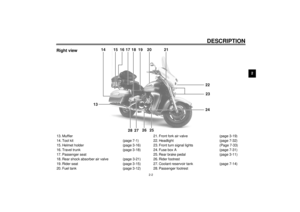 12
12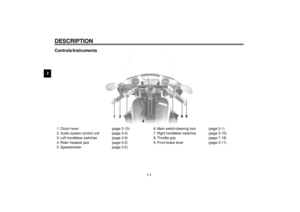 13
13 14
14 15
15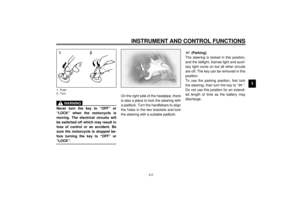 16
16 17
17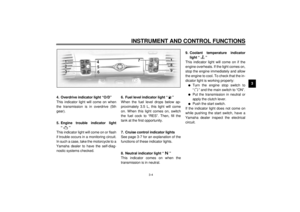 18
18 19
19 20
20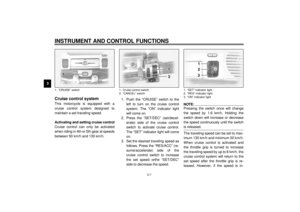 21
21 22
22 23
23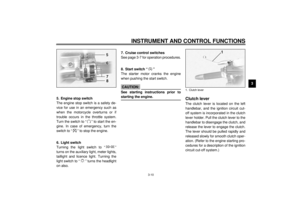 24
24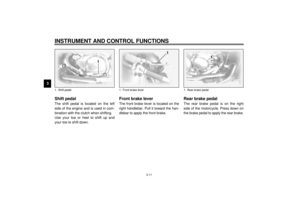 25
25 26
26 27
27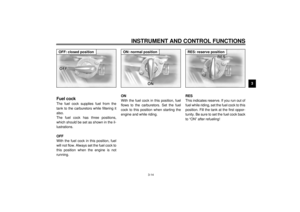 28
28 29
29 30
30 31
31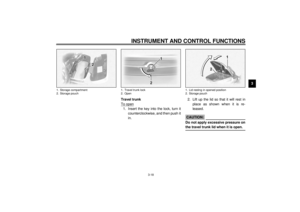 32
32 33
33 34
34 35
35 36
36 37
37 38
38 39
39 40
40 41
41 42
42 43
43 44
44 45
45 46
46 47
47 48
48 49
49 50
50 51
51 52
52 53
53 54
54 55
55 56
56 57
57 58
58 59
59 60
60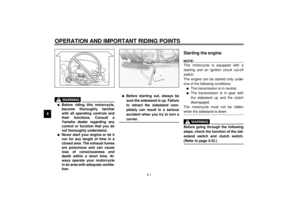 61
61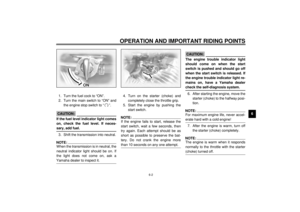 62
62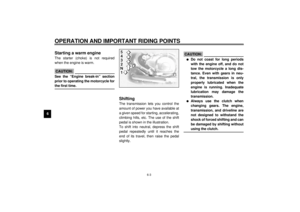 63
63 64
64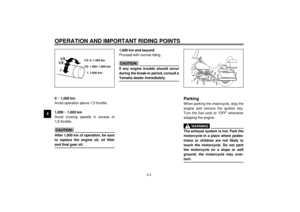 65
65 66
66 67
67 68
68 69
69 70
70 71
71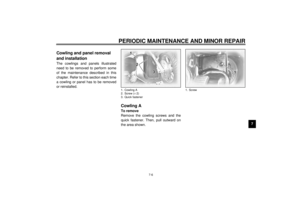 72
72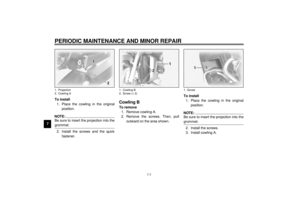 73
73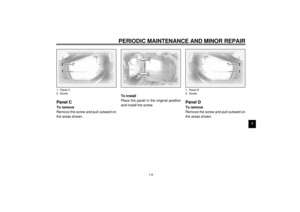 74
74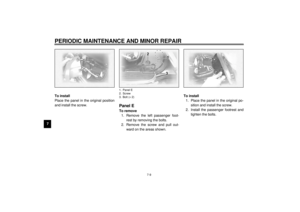 75
75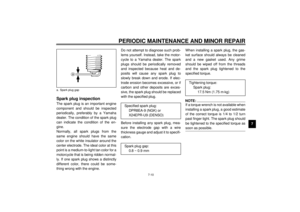 76
76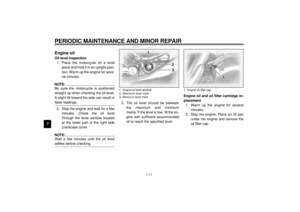 77
77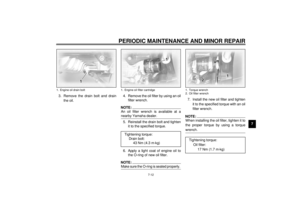 78
78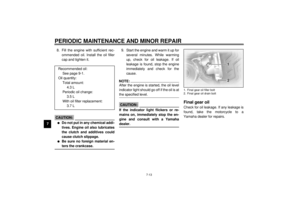 79
79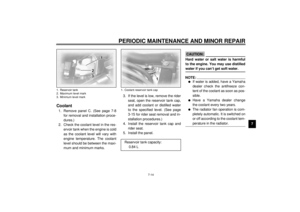 80
80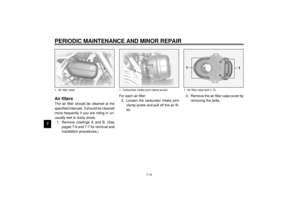 81
81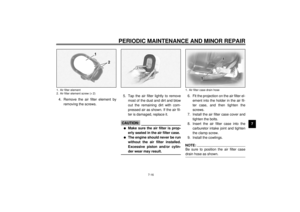 82
82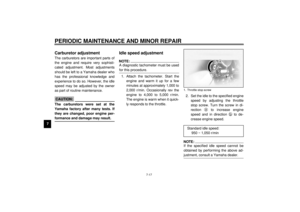 83
83 84
84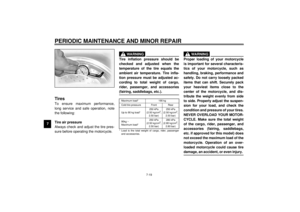 85
85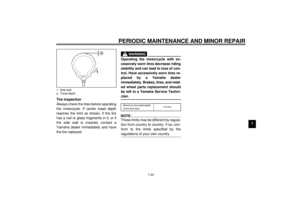 86
86 87
87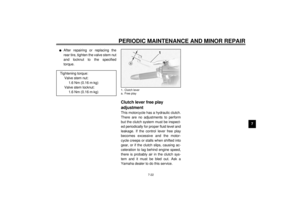 88
88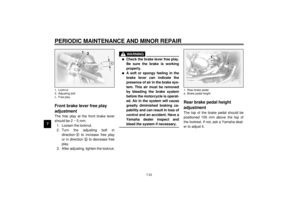 89
89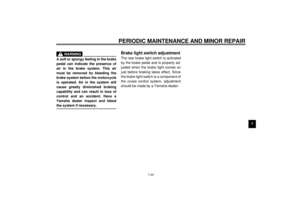 90
90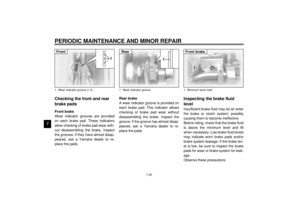 91
91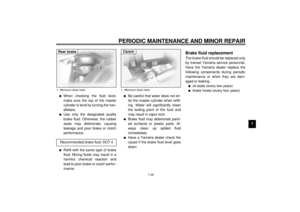 92
92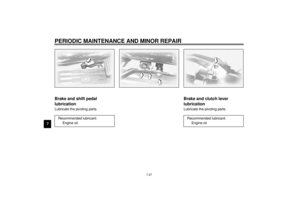 93
93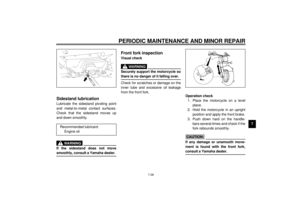 94
94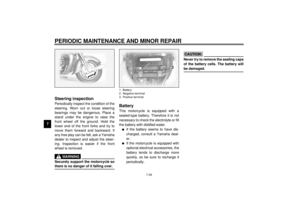 95
95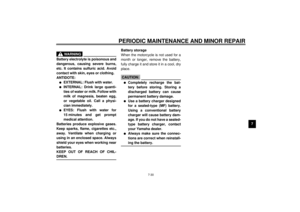 96
96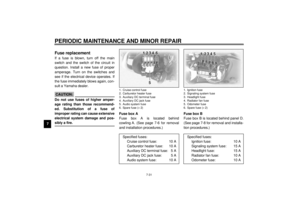 97
97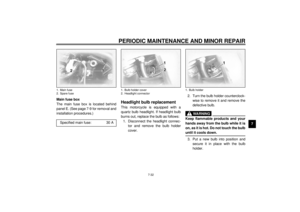 98
98 99
99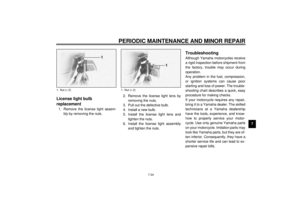 100
100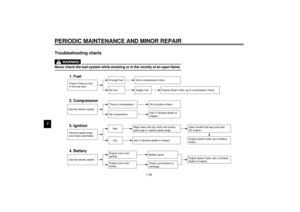 101
101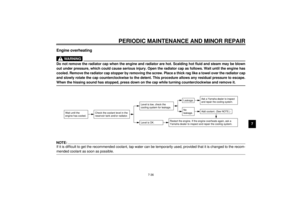 102
102 103
103 104
104 105
105 106
106 107
107 108
108 109
109 110
110 111
111 112
112 113
113 114
114 115
115 116
116 117
117 118
118 119
119 120
120

