Page 89 of 121

PERIODIC MAINTENANCE AND MINOR REPAIR
7-23
7
EAU00696
Front brake lever free play
adjustmentThe free play at the front brake lever
should be 2 ~ 5 mm.
1. Loosen the locknut.
2. Turn the adjusting bolt in
direction
a to increase free play
or in direction
b to decrease free
play.
3. After adjusting, tighten the locknut.
EW000099
WARNING
@ l
Check the brake lever free play.
Be sure the brake is working
properly.
l
A soft or spongy feeling in the
brake lever can indicate the
presence of air in the brake sys-
tem. This air must be removed
by bleeding the brake system
before the motorcycle is operat-
ed. Air in the system will cause
greatly diminished braking ca-
pability and can result in loss of
control and an accident. Have a
Yamaha dealer inspect and
bleed the system if necessary.
@
EAU01746
Rear brake pedal height
adjustmentThe top of the brake pedal should be
positioned 100 mm above the top of
the footrest. If not, ask a Yamaha deal-
er to adjust it.
1. Locknut
2. Adjusting bolt
c. Free play
1. Rear brake pedal
a. Brake pedal height
E_5jc_Periodic.fm Page 23 Saturday, October 16, 1999 1:10 PM
Page 90 of 121
PERIODIC MAINTENANCE AND MINOR REPAIR
7-24
7
EW000109
WARNING
@ A soft or spongy feeling in the brake
pedal can indicate the presence of
air in the brake system. This air
must be removed by bleeding the
brake system before the motorcycle
is operated. Air in the system will
cause greatly diminished braking
capability and can result in loss of
control and an accident. Have a
Yamaha dealer inspect and bleed
the system if necessary. @
EAU01799
Brake light switch adjustmentThe rear brake light switch is activated
by the brake pedal and is properly ad-
justed when the brake light comes on
just before braking takes effect. Since
the brake light switch is a component of
the cruise control system, adjustment
should be made by a Yamaha dealer.
E_5jc_Periodic.fm Page 24 Saturday, October 16, 1999 1:10 PM
Page 91 of 121

PERIODIC MAINTENANCE AND MINOR REPAIR
7-25
7
EAU00721
Checking the front and rear
brake pads
EAU01119
Front brake
Wear indicator grooves are provided
on each brake pad. These indicators
allow checking of brake pad wear with-
out disassembling the brake. Inspect
the grooves. If they have almost disap-
peared, ask a Yamaha dealer to re-
place the pads.
EAU01198
Rear brake
A wear indicator groove is provided on
each brake pad. This indicator allows
checking of brake pad wear without
disassembling the brake. Inspect the
groove. If the groove has almost disap-
peared, ask a Yamaha dealer to re-
place the pads.
EAU01800
Inspecting the brake fluid
levelInsufficient brake fluid may let air enter
the brake or clutch system, possibly
causing them to become ineffective.
Before riding, check that the brake fluid
is above the minimum level and fill
when necessary. Low brake fluid levels
may indicate worn brake pads and/or
brake system leakage. If the brake lev-
el is low, be sure to inspect the brake
pads for wear or brake system for leak-
age.
Observe these precautions:
1. Wear indicator groove (´ 3)Front
1. Wear indicator grooveRear
1. Minimum level markFront brake
E_5jc_Periodic.fm Page 25 Saturday, October 16, 1999 1:10 PM
Page 92 of 121

PERIODIC MAINTENANCE AND MINOR REPAIR
7-26
7
l
When checking the fluid level,
make sure the top of the master
cylinder is level by turning the han-
dlebars.
l
Use only the designated quality
brake fluid. Otherwise, the rubber
seals may deteriorate, causing
leakage and poor brake or clutch
performance.
l
Refill with the same type of brake
fluid. Mixing fluids may result in a
harmful chemical reaction and
lead to poor brake or clutch perfor-
mance.
l
Be careful that water does not en-
ter the master cylinder when refill-
ing. Water will significantly lower
the boiling point of the fluid and
may result in vapor lock.
l
Brake fluid may deteriorate paint-
ed surfaces or plastic parts. Al-
ways clean up spilled fluid
immediately.
l
Have a Yamaha dealer check the
cause if the brake fluid level goes
down.
EAU00742
Brake fluid replacementThe brake fluid should be replaced only
by trained Yamaha service personnel.
Have the Yamaha dealer replace the
following components during periodic
maintenance or when they are dam-
aged or leaking:l
oil seals (every two years)
l
brake hoses (every four years)
1. Minimum level mark
Recommended brake fluid: DOT 4Rear brake
1. Minimum level markClutch
E_5jc_Periodic.fm Page 26 Saturday, October 16, 1999 1:10 PM
Page 93 of 121
PERIODIC MAINTENANCE AND MINOR REPAIR
7-27
7
EAU02984
Brake and shift pedal
lubricationLubricate the pivoting parts.
EAU02985
Brake and clutch lever
lubricationLubricate the pivoting parts.
Recommended lubricant:
Engine oil
Recommended lubricant:
Engine oil
E_5jc_Periodic.fm Page 27 Saturday, October 16, 1999 1:10 PM
Page 94 of 121
PERIODIC MAINTENANCE AND MINOR REPAIR
7-28
7
EAU02986
Sidestand lubricationLubricate the sidestand pivoting point
and metal-to-metal contact surfaces.
Check that the sidestand moves up
and down smoothly.
EW000113
WARNING
@ If the sidestand does not move
smoothly, consult a Yamaha dealer. @
EAU02939
Front fork inspectionVisual check
EW000115
WARNING
@ Securely support the motorcycle so
there is no danger of it falling over. @Check for scratches or damage on the
inner tube and excessive oil leakage
from the front fork.
Operation check
1. Place the motorcycle on a level
place.
2. Hold the motorcycle in an upright
position and apply the front brake.
3. Push down hard on the handle-
bars several times and check if the
fork rebounds smoothly.
EC000098
CAUTION:@ If any damage or unsmooth move-
ment is found with the front fork,
consult a Yamaha dealer. @
Recommended lubricant:
Engine oil
E_5jc_Periodic.fm Page 28 Saturday, October 16, 1999 1:10 PM
Page 95 of 121

PERIODIC MAINTENANCE AND MINOR REPAIR
7-29
7
EAU00794
Steering inspectionPeriodically inspect the condition of the
steering. Worn out or loose steering
bearings may be dangerous. Place a
stand under the engine to raise the
front wheel off the ground. Hold the
lower end of the front forks and try to
move them forward and backward. If
any free play can be felt, ask a Yamaha
dealer to inspect and adjust the steer-
ing. Inspection is easier if the front
wheel is removed.
EW000115
WARNING
@ Securely support the motorcycle so
there is no danger of it falling over. @
EAU00800
BatteryThis motorcycle is equipped with a
sealed-type battery. Therefore it is not
necessary to check the electrolyte or fill
the battery with distilled water.l
If the battery seems to have dis-
charged, consult a Yamaha deal-
er.
l
If the motorcycle is equipped with
optional electrical accessories, the
battery tends to discharge more
quickly, so be sure to recharge it
periodically.
EC000101
CAUTION:@ Never try to remove the sealing caps
of the battery cells. The battery will
be damaged. @
1. Battery
2. Negative terminal
3. Positive terminal
E_5jc_Periodic.fm Page 29 Saturday, October 16, 1999 1:10 PM
Page 96 of 121

PERIODIC MAINTENANCE AND MINOR REPAIR
7-30
7
EW000116
WARNING
@ Battery electrolyte is poisonous and
dangerous, causing severe burns,
etc. It contains sulfuric acid. Avoid
contact with skin, eyes or clothing.
ANTIDOTE:l
EXTERNAL: Flush with water.
l
INTERNAL: Drink large quanti-
ties of water or milk. Follow with
milk of magnesia, beaten egg,
or vegetable oil. Call a physi-
cian immediately.
l
EYES: Flush with water for
15 minutes and get prompt
medical attention.
Batteries produce explosive gases.
Keep sparks, flame, cigarettes etc.,
away. Ventilate when charging or
using in an enclosed space. Always
shield your eyes when working near
batteries.
KEEP OUT OF REACH OF CHIL-
DREN.
@
Battery storage
When the motorcycle is not used for a
month or longer, remove the battery,
fully charge it and store it in a cool, dry
place.
EC000102
CAUTION:@ l
Completely recharge the bat-
tery before storing. Storing a
discharged battery can cause
permanent battery damage.
l
Use a battery charger designed
for a sealed-type (MF) battery.
Using a conventional battery
charger will cause battery dam-
age. If you do not have a sealed-
type battery charger, contact
your Yamaha dealer.
l
Always make sure the connec-
tions are correct when reinstall-
ing the battery.
@
E_5jc_Periodic.fm Page 30 Saturday, October 16, 1999 1:10 PM
 1
1 2
2 3
3 4
4 5
5 6
6 7
7 8
8 9
9 10
10 11
11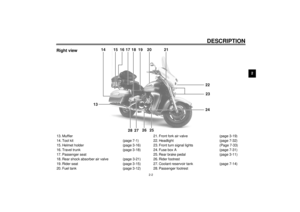 12
12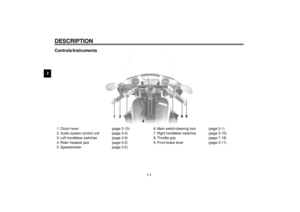 13
13 14
14 15
15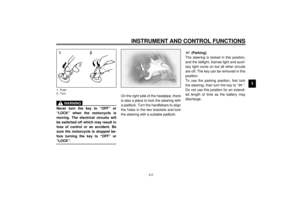 16
16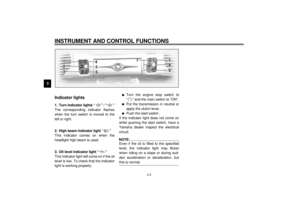 17
17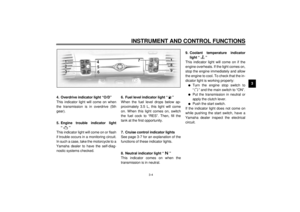 18
18 19
19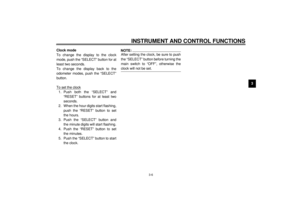 20
20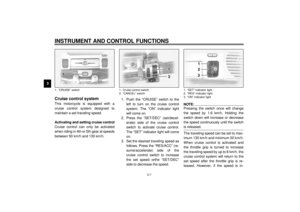 21
21 22
22 23
23 24
24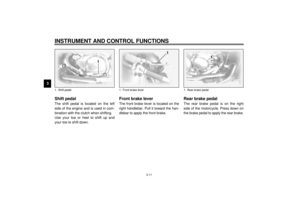 25
25 26
26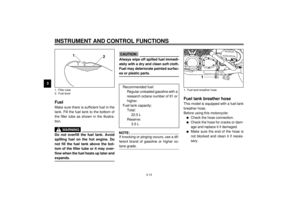 27
27 28
28 29
29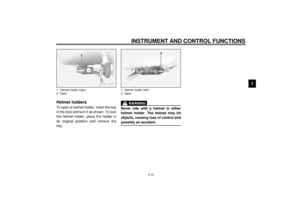 30
30 31
31 32
32 33
33 34
34 35
35 36
36 37
37 38
38 39
39 40
40 41
41 42
42 43
43 44
44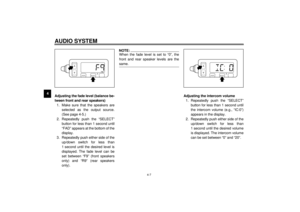 45
45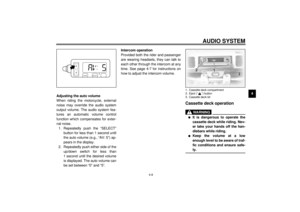 46
46 47
47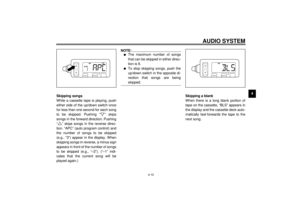 48
48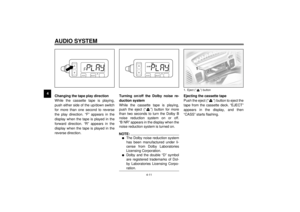 49
49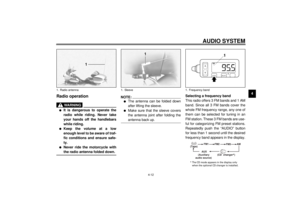 50
50 51
51 52
52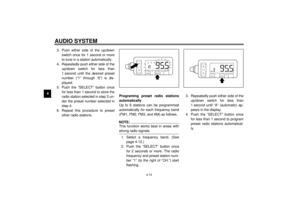 53
53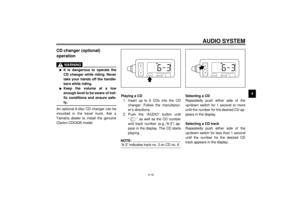 54
54 55
55 56
56 57
57 58
58 59
59 60
60 61
61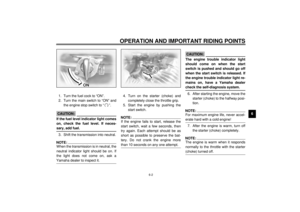 62
62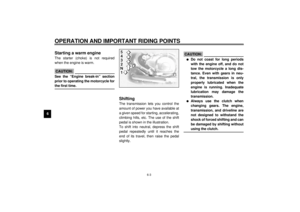 63
63 64
64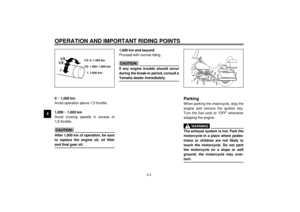 65
65 66
66 67
67 68
68 69
69 70
70 71
71 72
72 73
73 74
74 75
75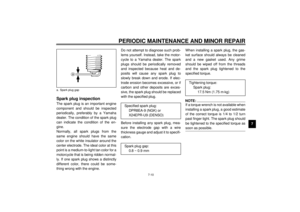 76
76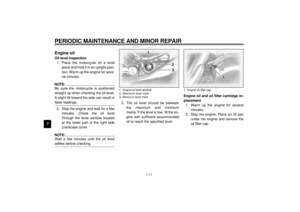 77
77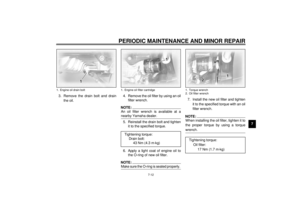 78
78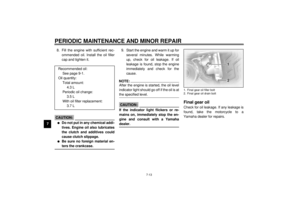 79
79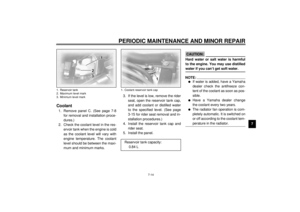 80
80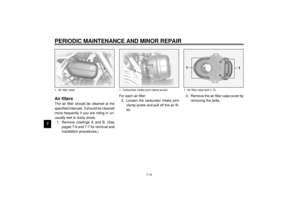 81
81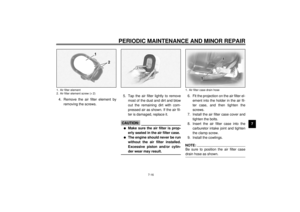 82
82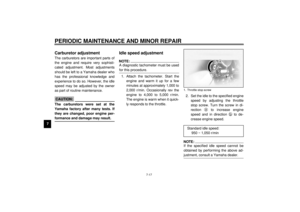 83
83 84
84 85
85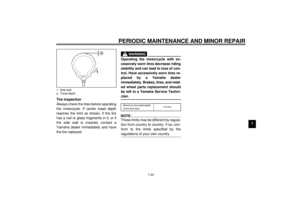 86
86 87
87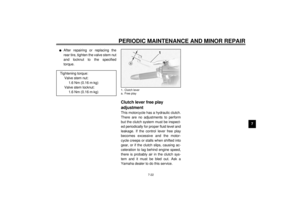 88
88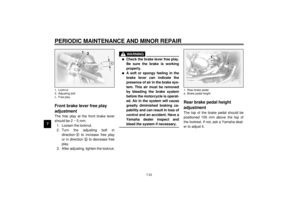 89
89 90
90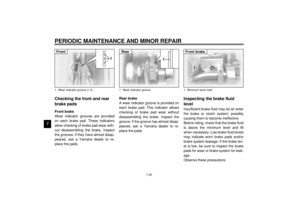 91
91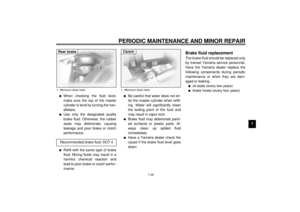 92
92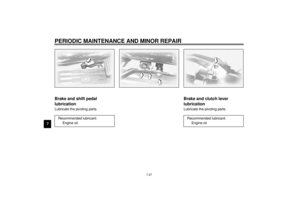 93
93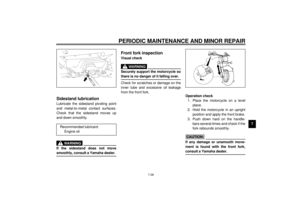 94
94 95
95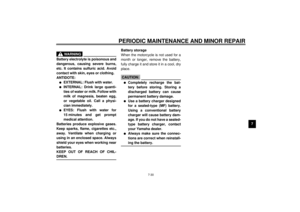 96
96 97
97 98
98 99
99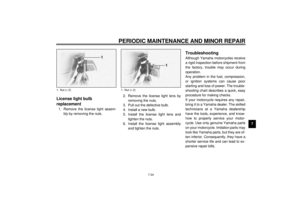 100
100 101
101 102
102 103
103 104
104 105
105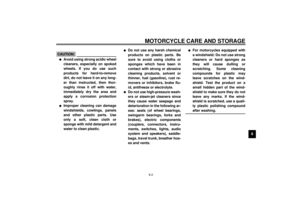 106
106 107
107 108
108 109
109 110
110 111
111 112
112 113
113 114
114 115
115 116
116 117
117 118
118 119
119 120
120

