Page 57 of 91

PERIODIC MAINTENANCE AND MINOR REPAIR
6-15
6
EW000132
WARNING
@ After extensive tests, the tires men-
tioned below have been approved
by Yamaha Motor Co., Ltd. for this
model. No guarantee for handling
characteristics can be given if tire
combinations other than what is ap-
proved are used on this motorcycle.
The front and rear tires should be of
the same manufacture and design.
Always use the tire valves and valve
cores listed below. Be sure to install
the valve caps securely, as these
are important to prevent air pres-
sure leakage. @
CE-41E
CE-42EEAU01230
WheelsTo ensure maximum performance,
long service, and safe operation, note
the following:l
Always inspect the wheels before
a ride. Check for cracks, bends or
warpage of the wheels. If any ab-
normal condition exists in a wheel,
consult a Yamaha dealer. Do not
attempt even small repairs to the
wheel. If a wheel is deformed or
cracked, it must be replaced.
l
Tires and wheels should be bal-
anced whenever either one is
changed or replaced. Failure to
have a wheel balanced can result
in poor performance, adverse han-
dling characteristics and short-
ened tire life.
l
Ride at moderate speeds after
changing a tire since the tire sur-
face must first be broken in for it to
develop its optimal characteristics.
FRONT
Manufacturer Size Type
Dunlop 150/80-16 71H D404F
Type
Tire valve TR412
Valve core #9000A
REAR
Manufacturer Size Type
Dunlop 150/90B15M/C 74H D404
Type
Tire valve PVR59A
Valve core #9000
E_4YP_Periodic.fm Page 15 Wednesday, October 6, 1999 10:05 AM
Page 58 of 91
PERIODIC MAINTENANCE AND MINOR REPAIR
6-16
6
l
After repairing or replacing the
rear tire, tighten the valve stem nut
and locknut to the specified
torque.
EAU00695
Clutch lever free play
adjustmentThis motorcycle has a hydraulic clutch.
There are no adjustments to perform
but the clutch system must be inspect-
ed periodically for proper fluid level and
leakage. If the control lever free play
becomes excessive and the motor-
cycle creeps or stalls when shifted into
gear, or if the clutch slips, causing ac-
celeration to lag behind engine speed,
there is probably air in the clutch sys-
tem and it must be bled out. Ask a
Yamaha dealer to do this service. Tightening torque:
Valve stem nut:
1.6 Nm (0.16 m·kg)
Valve stem locknut:
1.6 Nm (0.16 m·kg)
E_4YP_Periodic.fm Page 16 Wednesday, October 6, 1999 10:05 AM
Page 59 of 91

PERIODIC MAINTENANCE AND MINOR REPAIR
6-17
6
EAU00696
Front brake lever free play
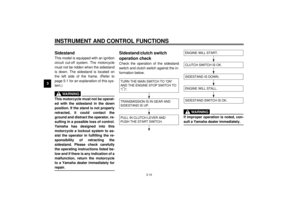
adjustmentThe free play at the front brake lever
should be 2 ~ 5 mm.
1. Loosen the locknut.
2. Turn the adjusting bolt in
direction
a to increase free play
or in direction
b to decrease free
play.
3. After adjusting, tighten the locknut.
EW000099
WARNING
@ l
Check the brake lever free play.
Be sure the brake is working
properly.
l
A soft or spongy feeling in the
brake lever can indicate the
presence of air in the brake sys-
tem. This air must be removed
by bleeding the brake system
before the motorcycle is operat-
ed. Air in the system will cause
greatly diminished braking ca-
pability and can result in loss of
control and an accident. Have a
Yamaha dealer inspect and
bleed the system if necessary.
@
EAU00712
Rear brake pedal height
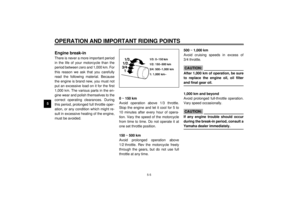
adjustmentThe top of the brake pedal should be
positioned 100 mm below the top of the
footrest. If not, ask a Yamaha dealer to
adjust it.
1. Locknut
2. Adjusting bolt
c. Free play
a. Brake pedal height
E_4YP_Periodic.fm Page 17 Wednesday, October 6, 1999 10:05 AM
Page 60 of 91

PERIODIC MAINTENANCE AND MINOR REPAIR
6-18
6
EW000109
WARNING
@ A soft or spongy feeling in the brake
pedal can indicate the presence of
air in the brake system. This air
must be removed by bleeding the
brake system before the motorcycle
is operated. Air in the system will
cause greatly diminished braking
capability and can result in loss of
control and an accident. Have a
Yamaha dealer inspect and bleed
the system if necessary. @
EAU00713
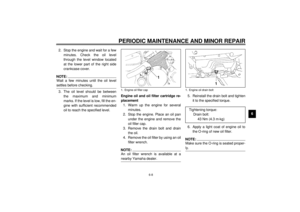
Brake light switch adjustmentThe rear brake light switch is activated
by the brake pedal and is properly ad-
justed when the brake light comes on
just before braking takes effect. To ad-
just the rear brake light switch, hold the
switch body so it does not rotate while
turning the adjusting nut.
Turn the adjusting nut in direction
a to
make the brake light come on earlier.
Turn the adjusting nut in direction
b to
make the brake light come on later.1. Brake light switch
2. Adjusting nut
E_4YP_Periodic.fm Page 18 Wednesday, October 6, 1999 10:05 AM
Page 61 of 91

PERIODIC MAINTENANCE AND MINOR REPAIR
6-19
6
EAU00721
Checking the front and rear
brake pads
EAU01119
Front brake
Wear indicator grooves are provided
on each brake pad. These indicators
allow checking of brake pad wear with-
out disassembling the brake. Inspect
the grooves. If they have almost disap-
peared, ask a Yamaha dealer to re-
place the pads.
EAU01198
Rear brake
A wear indicator groove is provided on
each brake pad. This indicator allows
checking of brake pad wear without
disassembling the brake. Inspect the
groove. If the groove has almost disap-
peared, ask a Yamaha dealer to re-
place the pads.
EAU01800
Inspecting the brake fluid
levelInsufficient brake fluid may let air enter
the brake or clutch system, possibly
causing them to become ineffective.
Before riding, check that the brake fluid
is above the minimum level and fill
when necessary. Low brake fluid levels
may indicate worn brake pads and/or
brake system leakage. If the brake lev-
el is low, be sure to inspect the brake
pads for wear or brake system for leak-
age.
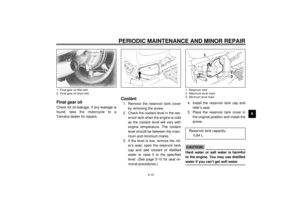
1. Wear indicator groove (´ 2)Front
1. Wear indicator grooveRear
1. Minimum level mark
E_4YP_Periodic.fm Page 19 Wednesday, October 6, 1999 10:05 AM
Page 62 of 91
PERIODIC MAINTENANCE AND MINOR REPAIR
6-20
6 Observe these precautions:
l
When checking the fluid level,
make sure the top of the master
cylinder is level by turning the han-
dlebars.
l
Use only the designated quality
brake fluid. Otherwise, the rubber
seals may deteriorate, causing
leakage and poor brake or clutch
performance.
l
Refill with the same type of brake
fluid. Mixing fluids may result in a
harmful chemical reaction and
lead to poor brake or clutch perfor-
mance.
l
Be careful that water does not en-
ter the master cylinder when refill-
ing. Water will significantly lower
the boiling point of the fluid and
may result in vapor lock.
l
Brake fluid may deteriorate paint-
ed surfaces or plastic parts. Al-
ways clean up spilled fluid
immediately.
l
Have a Yamaha dealer check the
cause if the brake fluid level goes
down.
1. Minimum level mark
Recommended brake fluid: DOT 4
1. Minimum level mark
E_4YP_Periodic.fm Page 20 Wednesday, October 6, 1999 10:05 AM
Page 63 of 91
PERIODIC MAINTENANCE AND MINOR REPAIR
6-21
6
EAU00742
Brake fluid replacementThe brake fluid should be replaced only
by trained Yamaha service personnel.
Have the Yamaha dealer replace the
following components during periodic
maintenance or when they are dam-
aged or leaking:l
oil seals (every two years)
l
brake hoses (every four years)
EAU02984
Brake and shift pedal
lubricationLubricate the pivoting parts.
Recommended lubricant:
Engine oil
E_4YP_Periodic.fm Page 21 Wednesday, October 6, 1999 10:05 AM
Page 64 of 91
PERIODIC MAINTENANCE AND MINOR REPAIR
6-22
6
EAU02985
Brake and clutch lever
lubricationLubricate the pivoting parts.
EAU02986
Sidestand lubricationLubricate the sidestand pivoting point
and metal-to-metal contact surfaces.
Check that the sidestand moves up
and down smoothly.
EW000113
WARNING
@ If the sidestand does not move
smoothly, consult a Yamaha dealer. @
Recommended lubricant:
Engine oil
Recommended lubricant:
Engine oil
E_4YP_Periodic.fm Page 22 Wednesday, October 6, 1999 10:05 AM