AUTOMATIC TRANSAXLECOMPONENT PARTS REMOVAL ±
AX±16
(b) Remove the cover.
7. REMOVE OIL PAN AND GASKET
(a) Remove the 15 bolts.
(b) Remove the oil pan by lifting transaxle case.
NOTICE: Do not turn the transaxle over as this will contami-
nate the valve body with the foreign materials in the bottom
of the oil pan.
(c) Place the transaxle on wooden blocks to prevent damage
to the tube bracket.
8. EXAMINE PARTICLES IN PAN
Remove the magnets and use them to collect any steel
chips. Look carefully at the chips and particles in the oil
pan and on the magnets to anticipate what type of wear
you will find in the transmission:
Steel (magnetic): bearing, gear and plate wear
Brass (non±magnetic): bushing wear
9. DISCONNECT NO.1 AND NO.2 SOLENOID CONNEC-
TORS
10. REMOVE TUBE BRACKET AND OIL STRAINER
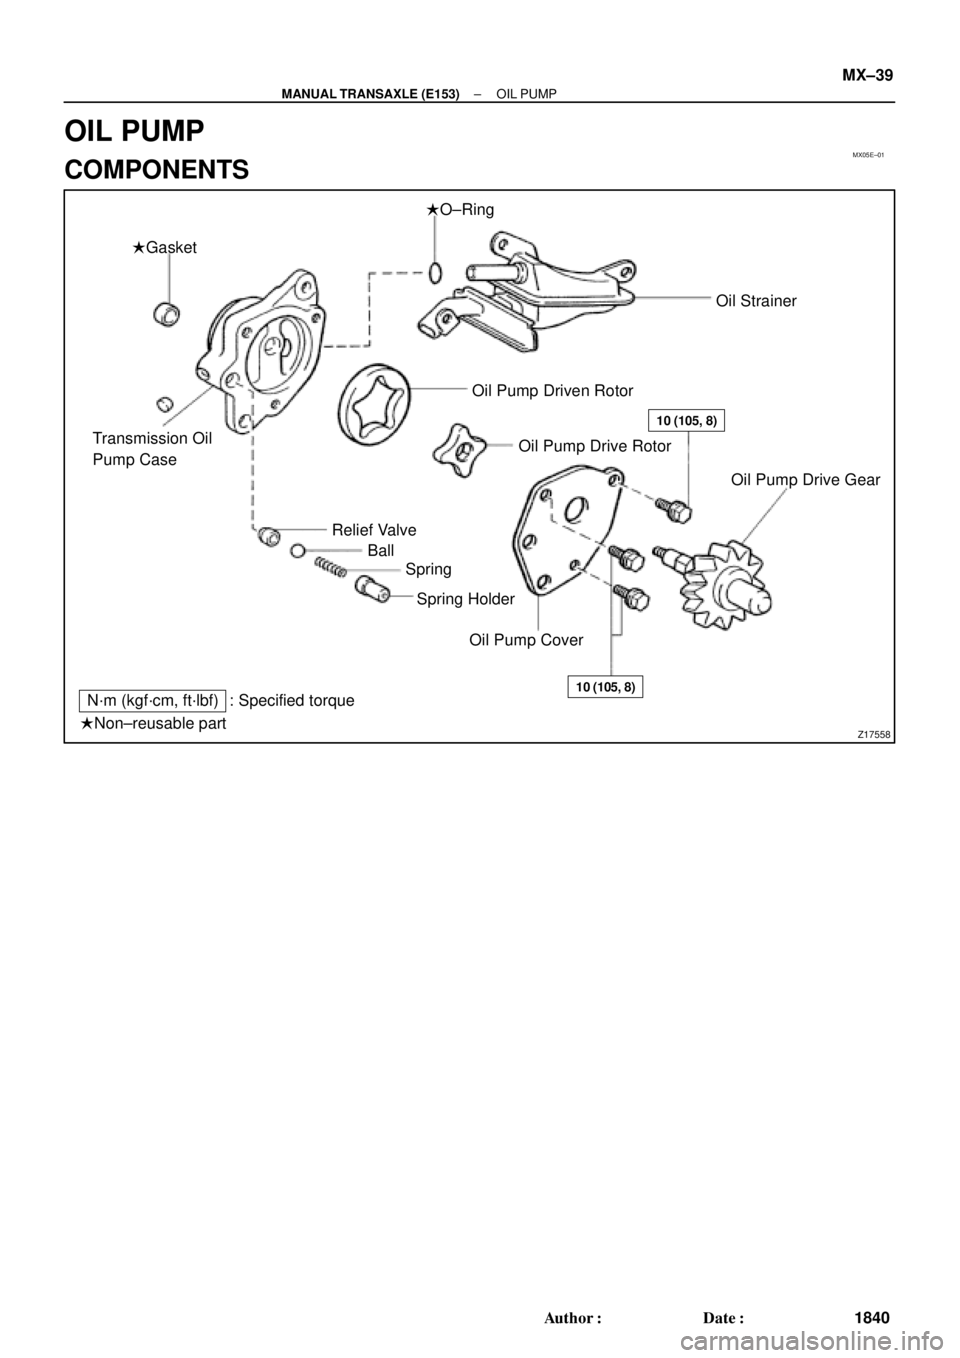
MX05E±01
Z17558
�Gasket�O±Ring
Transmission Oil
Pump Case
Relief Valve
Ball
Spring
Spring Holder
Oil Pump CoverOil Pump Drive Gear Oil Strainer
Oil Pump Driven Rotor
Oil Pump Drive Rotor
10 (105, 8)
10 (105, 8)N´m (kgf´cm, ft´lbf) : Specified torque
�Non±reusable part
± MANUAL TRANSAXLE (E153)OIL PUMP
MX±39
1840 Author�: Date�:
OIL PUMP
COMPONENTS