2000 HONDA ODYSSEY matic
[x] Cancel search: maticPage 8 of 352
Driver an d Passenge r Safet y
This sectio
n gives you important
information about how to protect
yourself and your passengers. It
shows you how to use seat belts
properly. It explains your Supple-
mental Restraint System. And it tells
you how to properly restrain infants
and children in your vehicle.
Important Safety Precautions ..........
6
Your Vehicle'
s Safety Features........
7
Seat
Belts.......................................
.
8
Airbags............................................
9
Seat
s & Seat-Backs......................
10
Head
Restraints..........................
. 10
Door Locks................................... 10
Pre-Drive Safety Checklist......... 11
Protecting Adults............................. 12
1. Close and Lock the Doors...... 12
2. Adjust the Front Seats............ 12 3. Adjust the Seat-Backs............. 13
4. Adjust the Head Restraints.... 14 5. Fasten and Position the Seat
Belts...................................... 15
6. Adjust the Steering Wheel.....
19
7. Maintai
n a Proper Sitting
Position................................. 19
Advice for Pregnant Women...... 20
Additional Safety Precautions.... 20
Protecting Children......................... 22 All Children Must Be
Restrained................................ 22
Children Should Sit in the Back
Seat............................................ 23
The Passenger's Airbag Poses Serious Risks to Children....... 23
If You Must Drive with Several Children.................................... 25
If a Child Requires Close Attention................................... 25 Additional Safety Precautions.... 25
General Guidelines for Using Child Seats................................ 26
Protecting Infants........................ 30
Protecting Small Children.......... 35
Protecting Larger Children........ 39
Using Child Seats with Tethers......................................
43
Additional Informatio
n About Your
Seat Belts.................................. 45
Seat Belt System Components... 45
Lap/Shoulder Belt....................... 45
Seat Belt Maintenance................ 47
Additional Information About Your
SRS............................................
48
SRS Components........................
.
48
How
You
r Airbags Work............ 48
How the Automatic Seat Belt
Tensioners Work..................... 50
How the SRS Indicator Light
Works........................................ 50
SRS Service...................................
51
Additional Safet
y Precautions.... 52
Carbon Monoxide Hazard.............. 53
Safety Labels.................................... 54
Driver an d Passenge r Safet y
Page 10 of 352
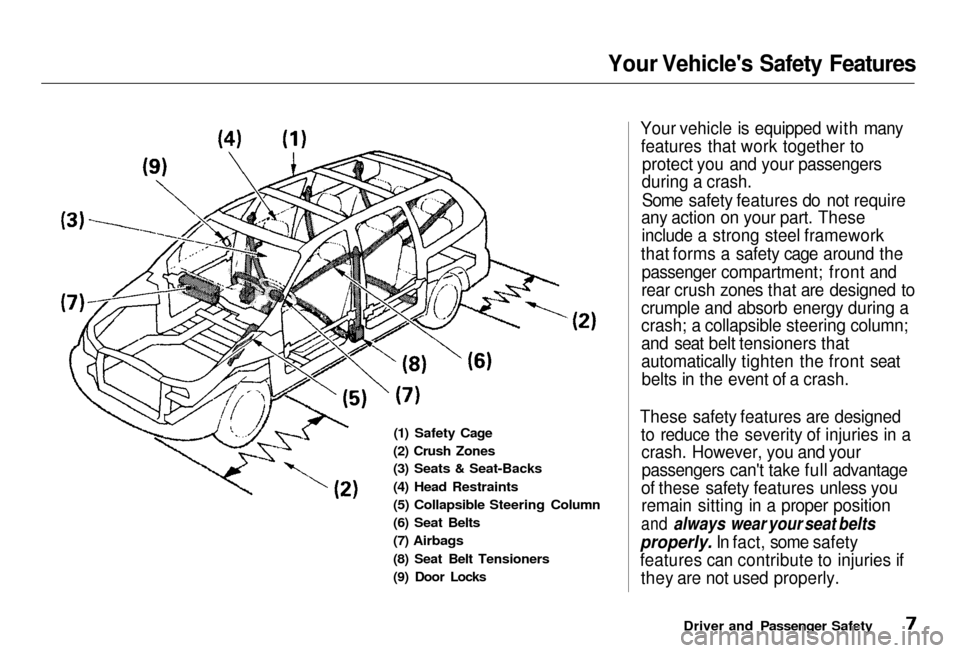
Your Vehicle's Safety Features
(1) Safety Cage
(2) Crush Zones
(3
) Seats & Seat-Backs
(4) Head Restraints
(5)
Collapsible Steering Column
(6) Seat Belts
(7)
Airbags
(8)
Seat Belt Tensioners
(9)
Door Locks
Your vehicle is equipped with many
features that work together to protect
you and your passengers
during a crash.
Some safety features do not require
any action on your part. These
include
a strong steel framework
that
forms a safety cage around the
passenger
compartment; front and
rear crush zones that are designed to
crumple and absorb energy during a
crash;
a collapsible steering column;
and seat belt tensioners that
automatically tighten the front seat belts in the event of a crash.
These safety features are designed to reduce the severity of injuries in acrash.
However, you and your
passengers
can't take full advantage
of these safety features unless you
remain
sitting in a proper position
and always wear your seat belts
properly. I
n fact, some safety
features can contribute to injuries if they
are not used properly.
Driver and Passenger Safety
Page 48 of 352
Additional Informatio n Abou t You r Sea t Belt s
Seat Bel t Syste m Component s
Your seat belt system includes lap/
shoulder belts in all seven seating
positions.
The system also includes alight on the instrument
panel to remind you and your
passengers to fasten your belts. If
the driver's seat belt is not fastened
before the ignition is turned ON (II),
the light will come on and a beeper
will also sound. The beeper will stop after a few seconds, but the light will
stay on until the driver's seat belt is
fastened.
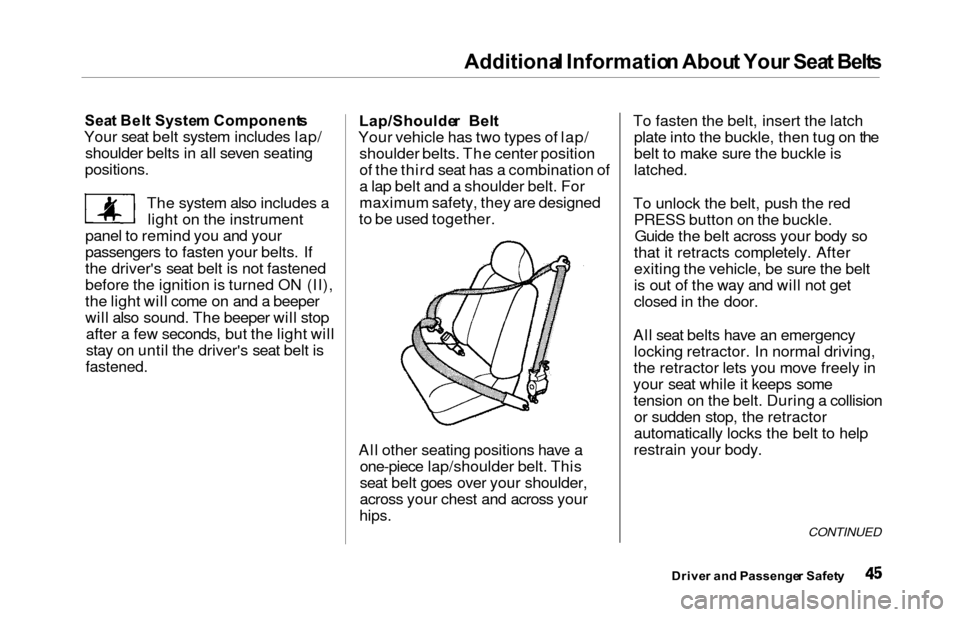
Lap/Shoulde r Bel t
Your vehicle has two types of lap/ shoulder belts. The center position
of the third seat has a combination of
a lap belt and a shoulder belt. For
maximum safety, they are designed
to be used together.
All other seating positions have a one-piece lap/shoulder belt. This
seat belt goes over your shoulder,
across your chest and across your
hips.
To fasten the belt, insert the latchplate into the buckle, then tug on the
belt to make sure the buckle is
latched.
To unlock the belt, push the redPRESS button on the buckle.Guide the belt across your body so
that it retracts completely. After
exiting the vehicle, be sure the belt
is out of the way and will not get
closed in the door.
All seat belts have an emergency locking retractor. In normal driving,
the retractor lets you move freely in
your seat while it keeps some tension on the belt. During a collisionor sudden stop, the retractor
automatically locks the belt to help
restrain your body.
CONTINUED
Drive r an d Passenge r Safet y
Page 51 of 352
Additional Informatio n Abou t You r SR S
SRS Component s
Your Supplemental Restraint System
(SRS) includes:
Two front airbags. The driver'sairbag is stored in the center of
the steering wheel; the front
passenger's airbag is stored in the dashboard. Both are marked "SRS
AIRBAG."
Automatic seat belt tensioners that tighten the front seat beltsduring a moderate to severe
frontal collision.
Sensors that can detect a
moderate to severe frontal
collision.
A sophisticated electronic system that continually monitors and
records information about thesensors, the control unit, the
airbag activators, driver and
passenger seat belt use, and all
related wiring when the ignition is
ON (II).
An indicator light on the
instrument panel that alerts you to
a possible problem with the
system (see page 50 ).
Emergency backup power in case
your vehicle's electrical system is
disconnected in a crash.
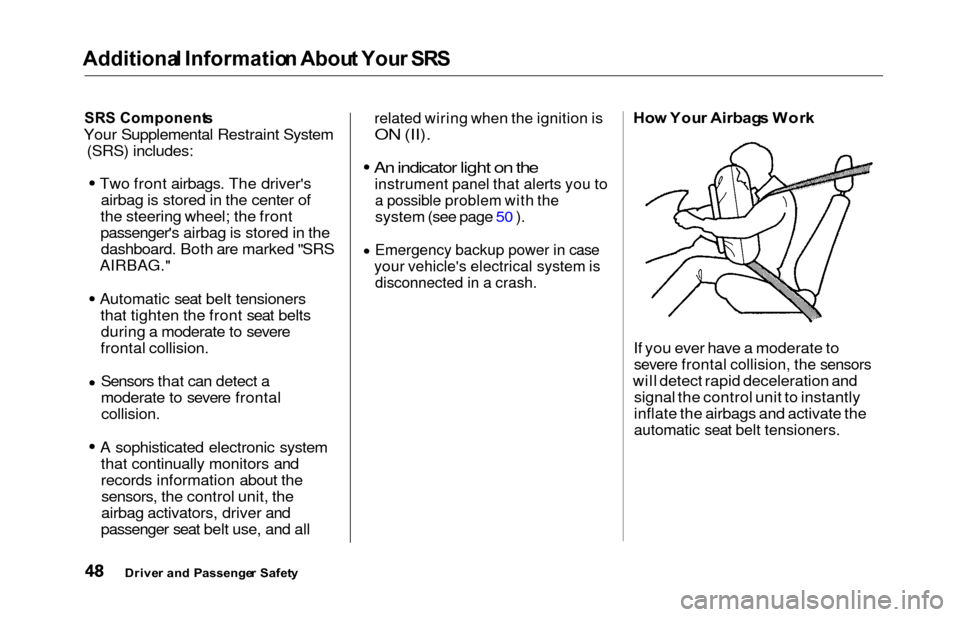
Ho w You r Airbag s Wor k
If you ever have a moderate to
severe frontal collision, the sensors
will detect rapid deceleration and signal the control unit to instantly
inflate the airbags and activate the
automatic seat belt tensioners.
Drive r an d Passenge r Safet y
Page 53 of 352
Additional Informatio n Abou t You r SR S
How th e Automati c Sea t Bel t
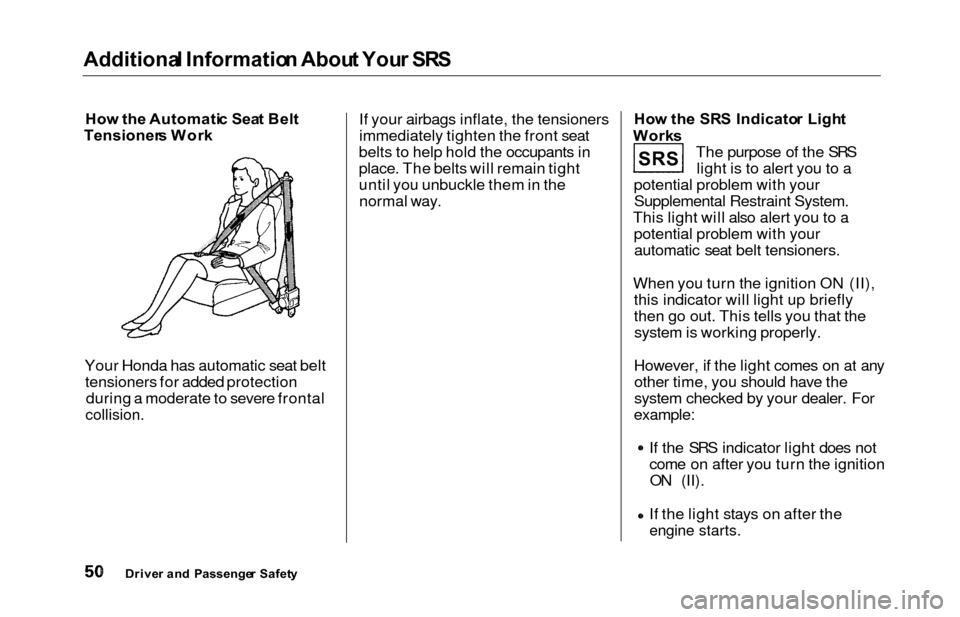
Tensioner s Wor k
Your Honda has automatic seat belt tensioners for added protection during a moderate to severe frontal
collision.
If your airbags inflate, the tensioners
immediately tighten the front seat
belts to help hold the occupants in
place. The belts will remain tight
until you unbuckle them in the
normal way.
Ho w th e SR S Indicato r Ligh t
Work s
The purpose of the SRSlight is to alert you to a
potential problem with your Supplemental Restraint System.
This light will also alert you to a potential problem with yourautomatic seat belt tensioners.
When you turn the ignition ON (II), this indicator will light up briefly
then go out. This tells you that thesystem is working properly.
However, if the light comes on at any other time, you should have the
system checked by your dealer. For
example:
If the SRS indicator light does not
come on after you turn the ignitionON (II).
If the light stays on after the
engine starts.
Drive r an d Passenge r Safet y
S R S
Page 58 of 352

Instrument
s an d Control s
This section gives information about
the controls and displays that
contribute to the daily operation of
your Honda. All the essential
controls are within easy reach.
Control Locations............................
56
Indicator Lights...............................
. 57
Gauges.............................................. 62
Controls Near the Steering
Wheel........................................ 65
Headlights.................................... 66
Automatic Lighting Off
Feature......................................
67
Daytime Runnin
g Lights.............
67
Instrument
Pane
l Brightness.....
67
Turn
Signals................................
.
68
Windshield
Wipers.....................
. 68
Windshield Washers................... 70
Rear Window Wiper and Washer...................................... 70
Hazard Warning........................ 70
Rear Windo
w Defogger.............. 71
Steering Wheel Adjustment....... 72
Steering Wheel Controls................ 73
Cruise Control.............................. 73
Remote Audio Controls .............. 76
Keys and Locks................................ 76
Keys............................................... 76
Immobilizer System..................... 77
Ignition Switch............................. 78
Power Door Locks....................... 79
Remote Transmitter.................... 81
Childproof Door Locks............... 85
Tailgate......................................... 85
Glove Box..................................... 87
Manual Sliding Doors...................... 88
Power Sliding Doors........................ 89
HomeLink Universal Transmitter.................................. 95
Seats.................................................. 99
Passenger Seating....................... 99
Seat Adjustments....................... 100
Driver's Seat Power
Adjustments........................... 102
Armrests..................................... 103
Head Restraints......................... 104
Third Seat Access...................... 105 Moving the Second Row Bucket Seat............................ 106
Removing the Bucket Seats in the Second Row................. 108
Folding the Third Seat.............. 109
Power Windows............................. 112
Mirrors............................................ 115
Parking Brake................................ 116
Digital Clock................................... 117 Center Table................................... 117
Beverage Holder............................ 118
Sunglasses Holder......................... 120
Sun Visor......................................... 121
Vanity Mirror................................. 121 Rear Compartment........................ 122
Center Pocket................................ 122Coin Holder.................................... 122
Storage Box.................................... 123
Coat Hook....................................... 123
Accessory Power Sockets............. 124 Interior Lights................................ 125
Instrument s an d Control s
Page 70 of 352
Control
s Nea r th e Steerin g Whee lAutomatic Lightin g Of f Featur e
On EX model
The Automatic Lighting Off feature
turns off the headlights, parking
lights, taillights, side marker lights,
license plate lights and instrument panel lights within 15 seconds of
removing the key from the ignition switch and closing the driver's door.
This feature activates if you leave
the headlight switch in the or
position, remove the key, open,
then close the driver's door. If you remove the key from the
ignition switch with the headlight switch on, but do not open the door
and get out, the lights will turn off
after 10 minutes. The lights will turn on again when
you unlock or open the driver's door.If you unlock the door, but do notopen it within 15 seconds, the lights
will go off. With the driver's door open, you will hear a lights-on
reminder chime.
Daytim e Runnin g Light s
(Canadia n Models )
With the headlight switch off, the
high beam headlights come on withreduced brightness when you turn
the ignition switch to ON (II) and
release the parking brake. They
remain on until you turn the ignitionoff, even if you set the parking brake.
The headlights revert to normal operation when you turn them on
with the switch. Instrumen
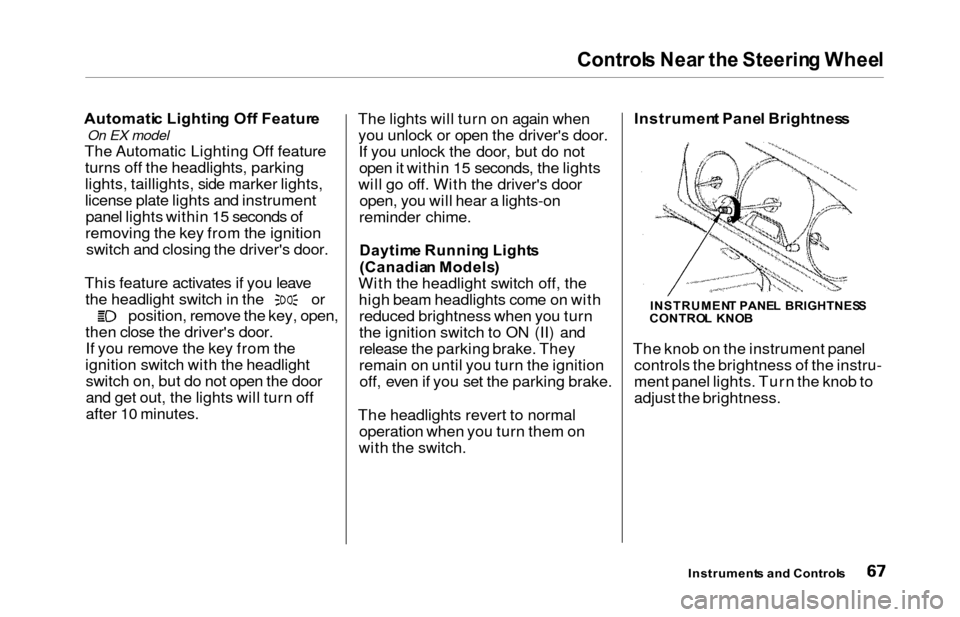
t Pane l Brightnes s
The knob on the instrument panel controls the brightness of the instru-
ment panel lights. Turn the knob to
adjust the brightness.
Instrument s an d Control s
INSTRUMEN T PANE L BRIGHTNES S
CONTRO L KNO B
Page 71 of 352
Controls Nea r th e Steerin g Whee l
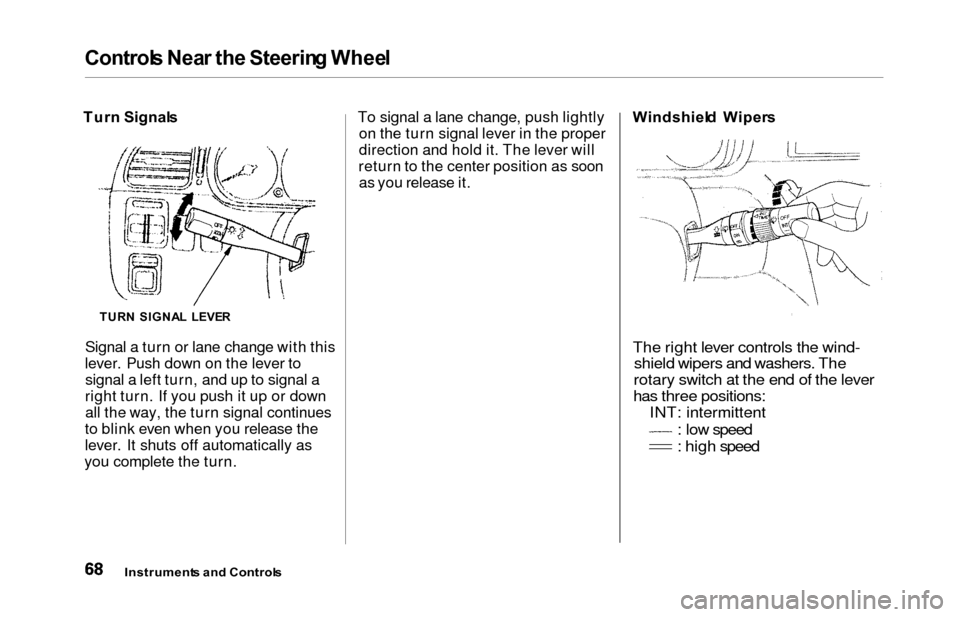
Turn Signal s
Signal a turn or lane change with this
lever. Push down on the lever to signal a left turn, and up to signal a
right turn. If you push it up or down all the way, the turn signal continues
to blink even when you release the
lever. It shuts off automatically as
you complete the turn. To signal a lane change, push lightly
on the turn signal lever in the proper
direction and hold it. The lever will
return to the center position as soon as you release it. Windshiel
d Wiper s
The right lever controls the wind-
shield wipers and washers. The
rotary switch at the end of the lever
has three positions: INT: intermittent
: low speed
: high speed
Instrument s an d Control s
TURN SIGNA L LEVE R