2000 HONDA ODYSSEY stop start
[x] Cancel search: stop startPage 75 of 352
Controls Nea r th e Steerin g Whee l
Steerin g Whee l Adjustmen t
See page 19 for important safety
information about how to properly
position the steering wheel.
Make any steering wheel adjustment
before you start driving.
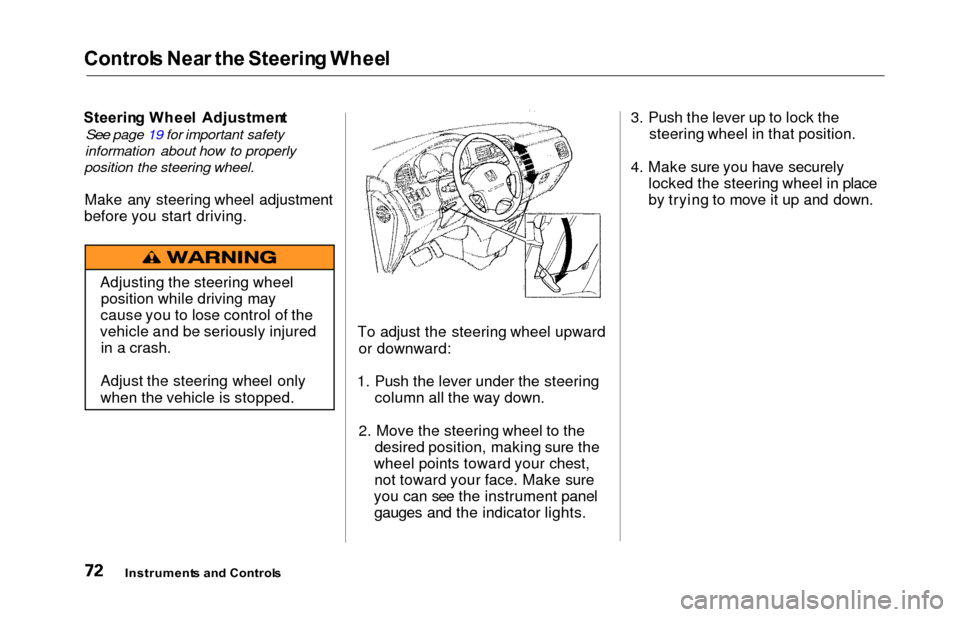
To adjust the steering wheel upwardor downward:
1. Push the lever under the steering column all the way down.
2. Move the steering wheel to the desired position, making sure the
wheel points toward your chest, not toward your face. Make sure
you can see the instrument panel gauges and the indicator lights. 3. Push the lever up to lock the
steering wheel in that position.
4. Make sure you have securely locked the steering wheel in place
by trying to move it up and down.
Instrument s an d Control s
Adjusting the steering wheel
position while driving may
cause you to lose control of the
vehicle and be seriously injured in a crash.
Adjust the steering wheel only
when the vehicle is stopped.
Page 94 of 352
Power Slidin g Door s (E X Model )
To open a door, make sure the door
is unlocked. Then push and release
the bottom of the switch. If you
forget to unlock the door first, you
will hear three beeps. Unlock the door and try again.
To close a sliding door, push and release the top of the appropriate
switch.
To stop the power sliding door'smovement, push either the top or the
bottom of the appropriate switch.
The door will stop, and you will hear three beeps.
To start the door moving again, push the switch again: bottom to open, or
top to close.
Operating the Doors With the
Remote Transmitter
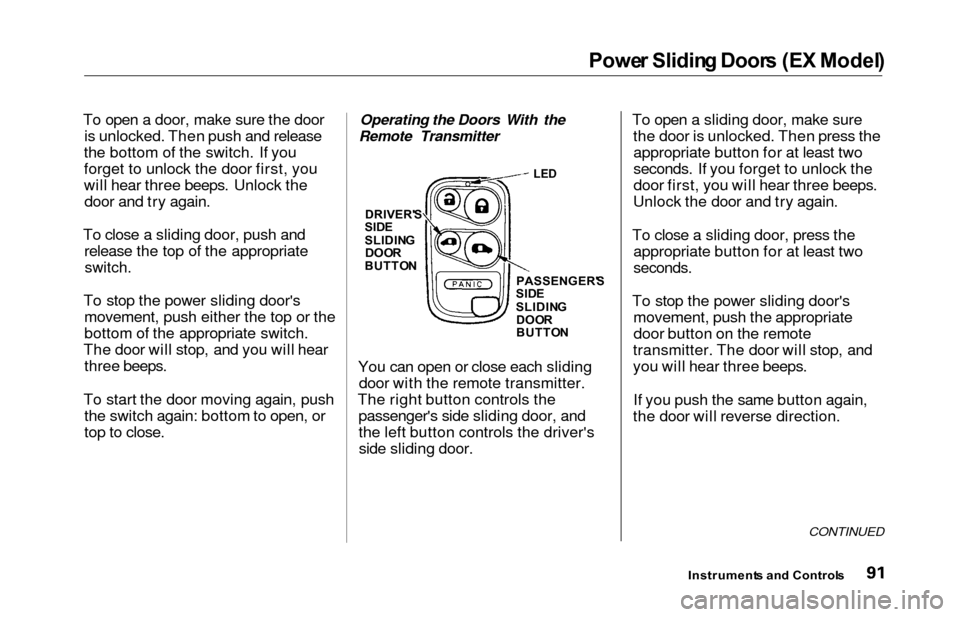
You can open or close each slidingdoor with the remote transmitter.
The right button controls the passenger's side sliding door, and
the left button controls the driver'sside sliding door. To open a sliding door, make sure
the door is unlocked. Then press theappropriate button for at least two
seconds. If you forget to unlock the
door first, you will hear three beeps.
Unlock the door and try again.
To close a sliding door, press the appropriate button for at least two
seconds.
To stop the power sliding door'smovement, push the appropriate
door button on the remote
transmitter. The door will stop, and
you will hear three beeps.
If you push the same button again,
the door will reverse direction.
CONTINUED
Instrument s an d Control s
LED
DRIVER' S
SID E
SLIDIN G
DOORBUTTO N
PASSENGER'S
SID E
SLIDIN G
DOO R
BUTTO N
Page 137 of 352
Heating an d Coolin g
To Cool with A/C
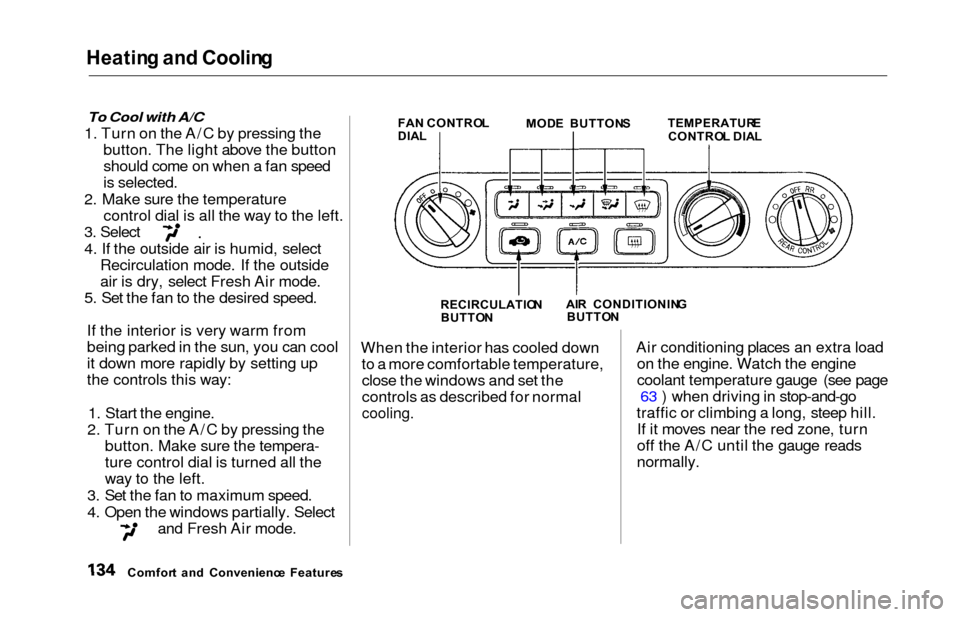
1. Turn on the A/C by pressing the
button. The light above the button
should come on when a fan speed
is selected.
2. Make sure the temperature control dial is all the way to the left.
3. Select
4. If the outside air is humid, selectRecirculation mode. If the outside
air is dry, select Fresh Air mode.
5. Set the fan to the desired speed.
If the interior is very warm from
being parked in the sun, you can cool
it down more rapidly by setting up
the controls this way:
1. Start the engine.
2. Turn on the A/C by pressing the button. Make sure the tempera-
ture control dial is turned all the
way to the left.
3. Set the fan to maximum speed.
4. Open the windows partially. Select
and Fresh Air mode.
FA N CONTRO L
DIA L MOD
E BUTTON S TEMPERATUR ECONTROL DIA L
RECIRCULATIO N
BUTTO N AI
R CONDITIONIN G
BUTTO N
When the interior has cooled down
to a more comfortable temperature,close the windows and set the
controls as described for normal
cooling.
Air conditioning places an extra load on the engine. Watch the engine
coolant temperature gauge (see page 63 ) when driving in stop-and-go
traffic or climbing a long, steep hill. If it moves near the red zone, turn
off the A/C until the gauge reads
normally.
Comfor t an d Convenienc e Feature s
Page 159 of 352
Audio Syste m
Operatin g th e Radi o
The ignition switch must be in
ACCESSORY (I) or ON (II) to operate the audio system. Turn the
system on by pushing the PWR/
VOL knob.
Adjust the volume by turning thePWR/VOL knob.
The band and frequency that the radio was last tuned to is displayed.
To change bands, press the AM/FM button. On the FM band, ST will bedisplayed if the station is broadcast-
ing in stereo. Stereo reproduction on
AM is not available.
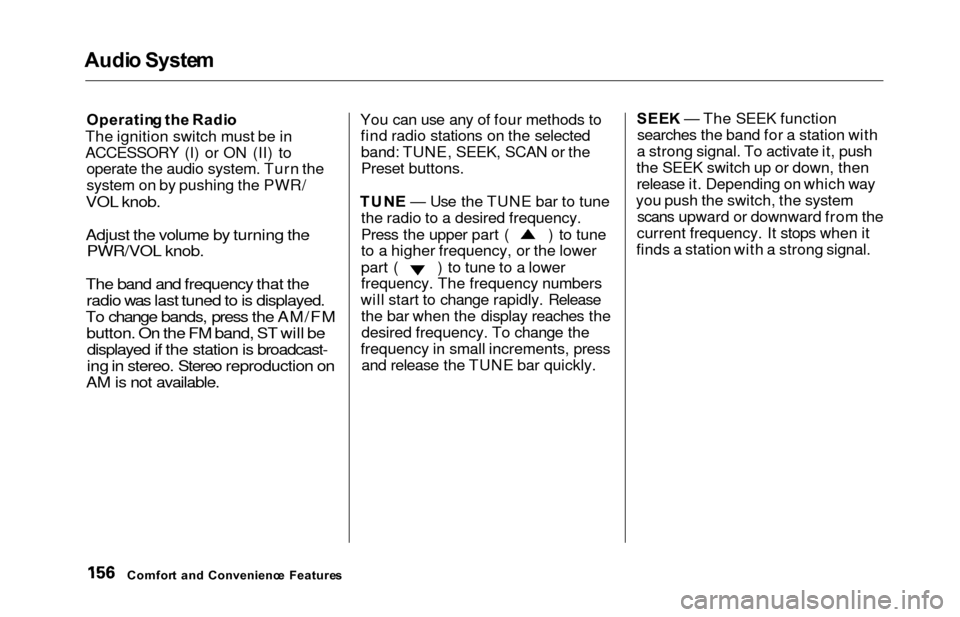
You can use any of four methods to find radio stations on the selectedband: TUNE, SEEK, SCAN or the
Preset buttons.
TUN E — Use the TUNE bar to tune
the radio to a desired frequency.
Press the upper part ( ) to tune
to a higher frequency, or the lower
part ( ) to tune to a lower
frequency. The frequency numbers
will start to change rapidly. Release the bar when the display reaches thedesired frequency. To change the
frequency in small increments, press and release the TUNE bar quickly. SEE
K — The SEEK function
searches the band for a station with
a strong signal. To activate it, push
the SEEK switch up or down, then release it. Depending on which way
you push the switch, the system scans upward or downward from the
current frequency. It stops when it
finds a station with a strong signal.
Comfor t an d Convenienc e Feature s
Page 171 of 352
Audio Syste m
Operatin g th e Radi o
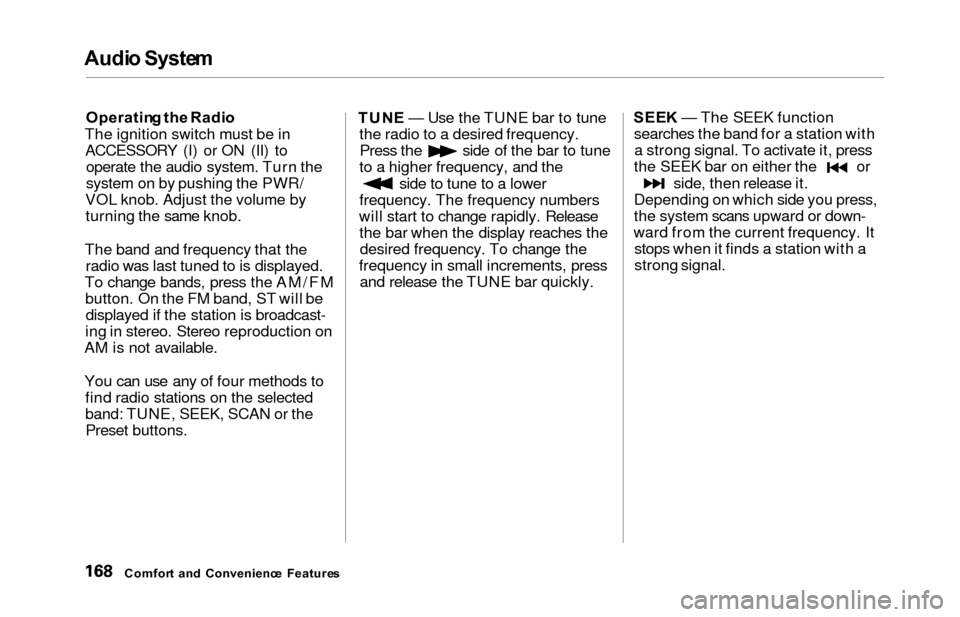
The ignition switch must be in ACCESSORY (I) or ON (II) to operate the audio system. Turn the
system on by pushing the PWR/
VOL knob. Adjust the volume by turning the same knob.
The band and frequency that the radio was last tuned to is displayed.
To change bands, press the AM/FM button. On the FM band, ST will bedisplayed if the station is broadcast-
ing in stereo. Stereo reproduction on
AM is not available.
You can use any of four methods to find radio stations on the selected
band: TUNE, SEEK, SCAN or thePreset buttons. TUN
E — Use the TUNE bar to tune
the radio to a desired frequency.
Press the side of the bar to tune
to a higher frequency, and the
side to tune to a lower
frequency. The frequency numbers
will start to change rapidly. Release the bar when the display reaches thedesired frequency. To change the
frequency in small increments, press and release the TUNE bar quickly. SEE
K — The SEEK function
searches the band for a station with a strong signal. To activate it, press
the SEEK bar on either the or
side, then release it.
Depending on which side you press,
the system scans upward or down-
ward from the current frequency. It stops when it finds a station with a
strong signal.
Comfor t an d Convenienc e Feature s
Page 208 of 352
Automatic Transmissio n
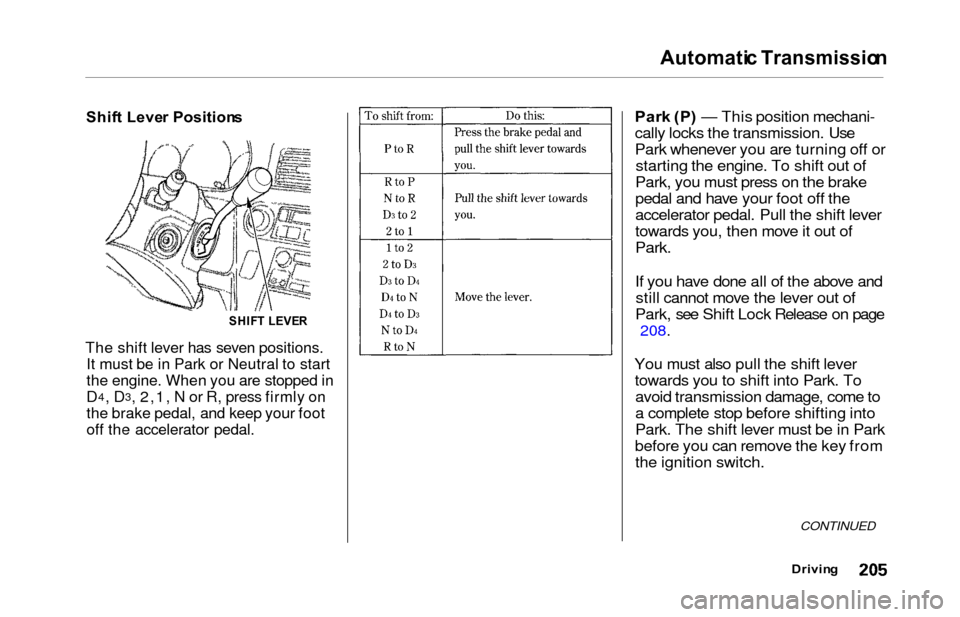
Shift Leve r Position s
The shift lever has seven positions.
It must be in Park or Neutral to start
the engine. When you are stopped in
D4, D3, 2,1, N or R, press firmly on
the brake pedal, and keep your foot
off the accelerator pedal.
Park (P ) — This position mechani-
cally locks the transmission. Use
Park whenever you are turning off or starting the engine. To shift out of
Park, you must press on the brake
pedal and have your foot off the
accelerator pedal. Pull the shift lever
towards you, then move it out of
Park.
If you have done all of the above and still cannot move the lever out of
Park, see Shift Lock Release on page
208.
You must also pull the shift lever towards you to shift into Park. Toavoid transmission damage, come to
a complete stop before shifting into
Park. The shift lever must be in Park
before you can remove the key from the ignition switch.
CONTINUED
Drivin g
SHIFT LEVE R
Page 209 of 352
Automatic Transmissio n
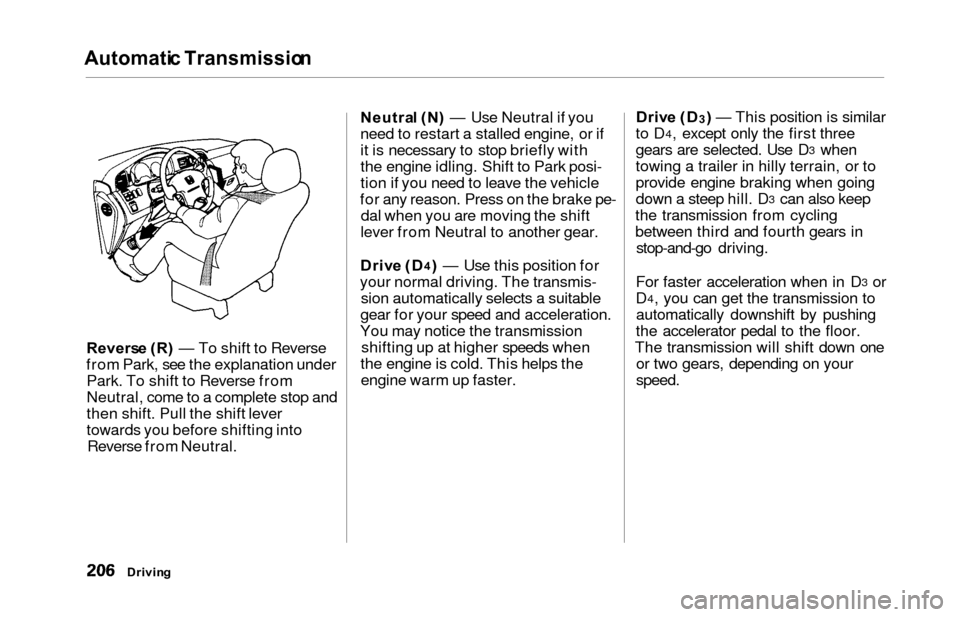
Reverse (R ) — To shift to Reverse
from Park, see the explanation under Park. To shift to Reverse from
Neutral, come to a complete stop and
then shift. Pull the shift lever
towards you before shifting into Reverse from Neutral. Neutra
l (N ) — Use Neutral if you
need to restart a stalled engine, or if
it is necessary to stop briefly with
the engine idling. Shift to Park posi-
tion if you need to leave the vehicle
for any reason. Press on the brake pe- dal when you are moving the shift
lever from Neutral to another gear.
Driv e (D
4) — Use this position for
your normal driving. The transmis- sion automatically selects a suitable
gear for your speed and acceleration.
You may notice the transmission shifting up at higher speeds when
the engine is cold. This helps the engine warm up faster. Driv
e (D
3) — This position is similar
to D4, except only the first three
gears are selected. Use D3 when
towing a trailer in hilly terrain, or to
provide engine braking when going
down a steep hill. D
3 can also keep
the transmission from cycling
between third and fourth gears in stop-and-go driving.
For faster acceleration when in D
3 or
D4, you can get the transmission to
automatically downshift by pushing
the accelerator pedal to the floor.
The transmission will shift down one or two gears, depending on your
speed.
Drivin g
Page 210 of 352

Automatic Transmissio n
Second (2 ) — To shift to Second,
pull the shift lever towards you, then shift to the lower gear. This position
locks the transmission in second
gear. It does not downshift to first
gear when you come to a stop. Second gives you more power when
climbing, and increased engine
braking when going down steep hills. Use second gear when starting outon a slippery surface or in deep snow.
It will help reduce wheelspin.
When driving down hill with a trailer, use the Second position.
Firs t (1 ) — To shift from Second to
First, pull the shift lever towards you,
then shift to the lower gear. With the
lever in this position, the transmis- sion locks in First gear. By upshift-
ing and downshifting through 1, 2,
D
3 and D4, you can operate this
transmission much like a manual
transmission without a clutch pedal. Engin
e Spee d Limite r
If you exceed the maximum speed
for the gear you are in, the engine speed will enter into the tachometer's
red zone. If this occurs, you may feel the engine cut in and out. This is
caused by a limiter in the engine's
computer controls. The engine will
run normally when you reduce the
RPM below the red zone. Shif
t Loc k Releas e
This allows you to move the shift lever out of Park if the normalmethod of pushing on the brake
pedal and pulling the shift lever does not work.
1. Set the Parking brake.
2. Remove the key from the ignition switch.
3. Place a cloth on the edge of the shift lock release slot cover on the
steering column. Remove the
cover by carefully prying on the
edge with a small flat-tipped screwdriver (not included in the
toolkit).
Drivin g
CONTINUED