2000 HONDA ODYSSEY matic
[x] Cancel search: maticPage 77 of 352
Steering Whee l Control s
The cruise control may not hold the
set speed when you are going up and
down hills. If your speed increases
going down a hill, use the brakes to slow down to the desired speed. This
will cancel the cruise control. To resume the set speed, press theRESUME/accel button. The
CRUISE CONTROL light on the
instrument panel comes on.
When climbing a steep hill, the automatic transmission maydownshift to hold the set speed.Changing the Set Speed
You can increase the set cruising speed in any of these ways:
Press and hold the RESUME/
accel button. The vehicle will
accelerate. When you reach thedesired cruising speed, release the
button.
Push on the accelerator pedal. Ac-
celerate to the desired cruising
speed and press the SET/decel
button.
To increase your speed in very small amounts, tap the RESUME/accel button repeatedly. Each time
you do this, your vehicle will speed up about 1 mph (1.6 km/h). You can decrease the set cruising
speed in any of these ways:
Press and hold the SET/decel
button. The vehicle will decelerate. Release the button when you
reach the desired speed.
To slow down in very small amounts, tap the SET/decel
button repeatedly. Each time you do this, your vehicle will slow
down about 1 mph (1.6 km/h).
Tap the brake pedal lightly with your foot. The CRUISE CONTROL light on the instru-
ment panel will go out. When the
vehicle slows to the desired speed, press the SET/decel button. The
vehicle will then maintain the desired speed.
Instrument s an d Control s
Page 84 of 352
Keys an d Lock s
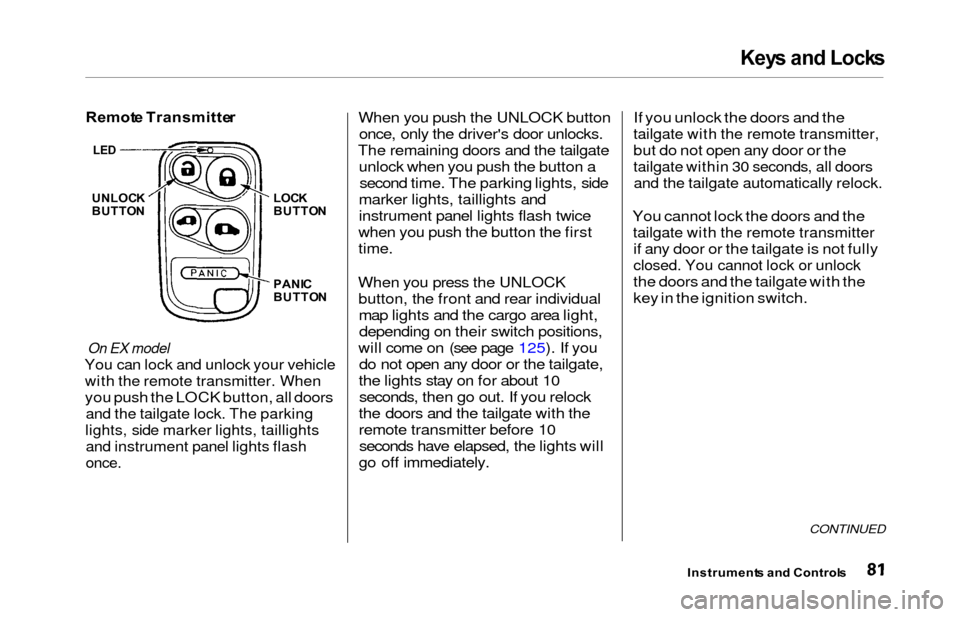
Remot e Transmitte r
On EX model
You can lock and unlock your vehicle
with the remote transmitter. When
you push the LOCK button, all doors
and the tailgate lock. The parking
lights, side marker lights, taillights
and instrument panel lights flash
once.
When you push the UNLOCK button
once, only the driver's door unlocks.
The remaining doors and the tailgate unlock when you push the button asecond time. The parking lights, side
marker lights, taillights and
instrument panel lights flash twice
when you push the button the first
time.
When you press the UNLOCK button, the front and rear individualmap lights and the cargo area light,depending on their switch positions,
will come on (see page 125). If you do not open any door or the tailgate,
the lights stay on for about 10 seconds, then go out. If you relock
the doors and the tailgate with the
remote transmitter before 10 seconds have elapsed, the lights will
go off immediately. If you unlock the doors and the
tailgate with the remote transmitter,
but do not open any door or the
tailgate within 30 seconds, all doors
and the tailgate automatically relock.
You cannot lock the doors and the
tailgate with the remote transmitter
if any door or the tailgate is not fully
closed. You cannot lock or unlock
the doors and the tailgate with the
key in the ignition switch.
CONTINUED
Instrument
s an d Control s
UNLOCK
BUTTO N LOC
K
BUTTO N
PANI C
BUTTO N
LED
Page 88 of 352
Keys an d Lock s
Childproo f Doo r Lock s
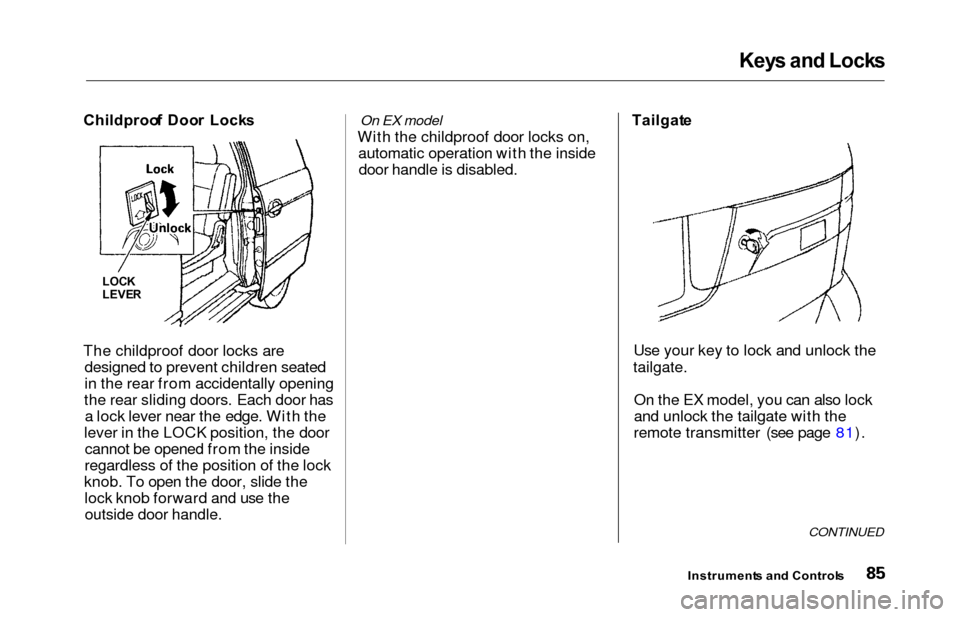
The childproof door locks are designed to prevent children seated
in the rear from accidentally opening
the rear sliding doors. Each door has a lock lever near the edge. With the
lever in the LOCK position, the door cannot be opened from the inside
regardless of the position of the lock
knob. To open the door, slide the lock knob forward and use theoutside door handle.On EX model
With the childproof door locks on, automatic operation with the insidedoor handle is disabled. Tailgat
e
Use your key to lock and unlock the
tailgate.
On the EX model, you can also lock
and unlock the tailgate with the
remote transmitter (see page 81).
CONTINUED
Instrument s an d Control s
LOCK
LEVE R
Page 91 of 352
Manual Slidin g Door s (L X Model )
Your Honda is equipped with dual
sliding doors. Be sure all passengers
are clear of the sliding doors before
closing them.
Opening and Closing the Doors
INSID E
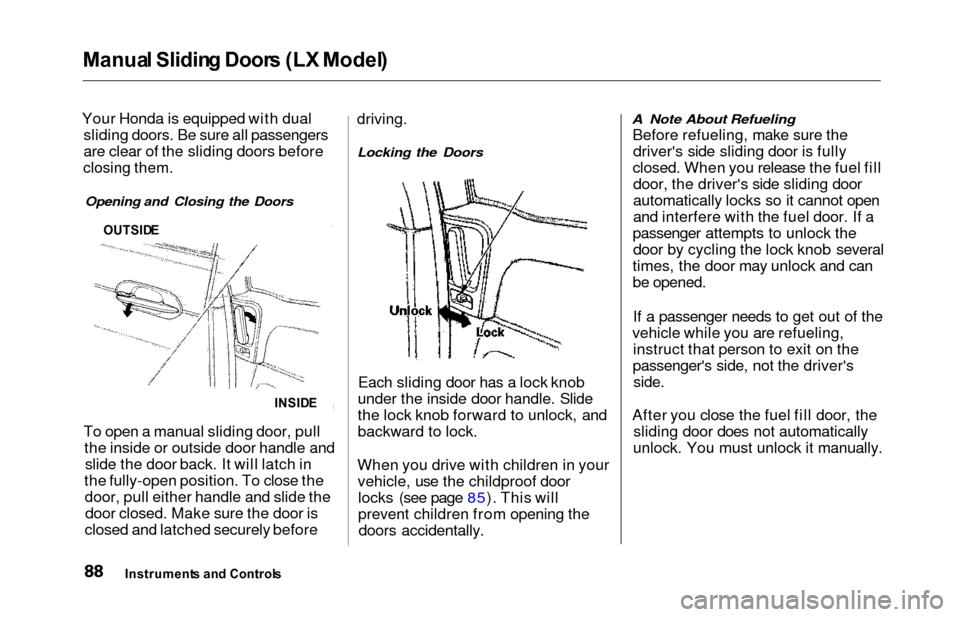
To open a manual sliding door, pull
the inside or outside door handle andslide the door back. It will latch in
the fully-open position. To close the door, pull either handle and slide thedoor closed. Make sure the door is
closed and latched securely before driving.
Locking the Doors
Each sliding door has a lock knob
under the inside door handle. Slide
the lock knob forward to unlock, and
backward to lock.
When you drive with children in your vehicle, use the childproof doorlocks (see page 85). This will
prevent children from opening thedoors accidentally.
A Note About Refueling
Before refueling, make sure thedriver's side sliding door is fully
closed. When you release the fuel fill door, the driver's side sliding door
automatically locks so it cannot open
and interfere with the fuel door. If a
passenger attempts to unlock the door by cycling the lock knob several
times, the door may unlock and can
be opened.
If a passenger needs to get out of the
vehicle while you are refueling, instruct that person to exit on the
passenger's side, not the driver's
side.
After you close the fuel fill door, the sliding door does not automatically
unlock. You must unlock it manually.
Instrument s an d Control s
OUTSIDE
Page 95 of 352
Power Slidin g Door s (E X Model )
Operating the Doors With the Door
Handles
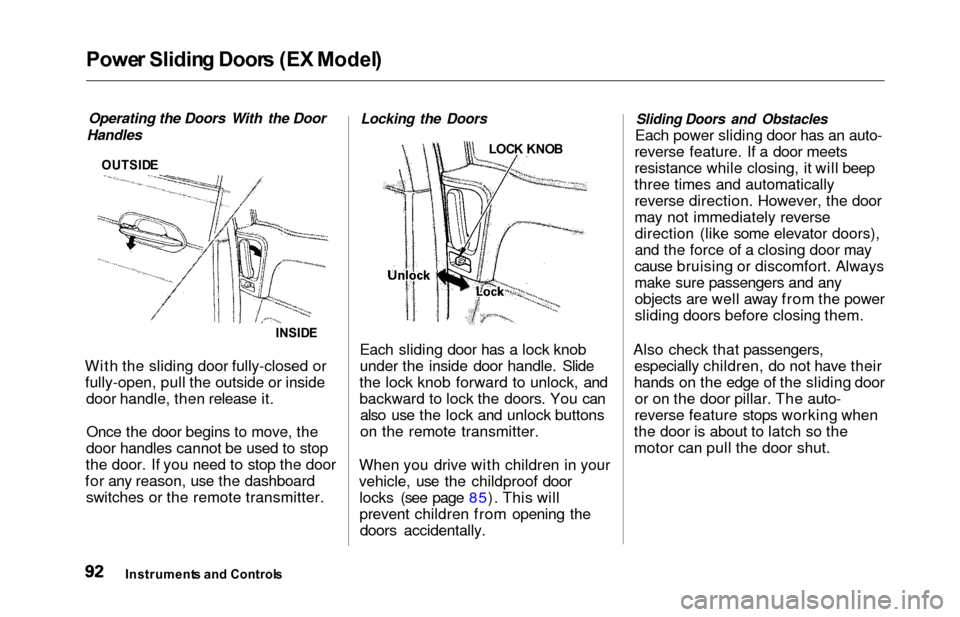
OUTSID E
INSIDE
With the sliding door fully-closed or
fully-open, pull the outside or inside door handle, then release it.
Once the door begins to move, the
door handles cannot be used to stop
the door. If you need to stop the door
for any reason, use the dashboard switches or the remote transmitter.
Locking the Doors
LOC K KNO B
Each sliding door has a lock knob
under the inside door handle. Slide
the lock knob forward to unlock, and
backward to lock the doors. You can also use the lock and unlock buttons
on the remote transmitter.
When you drive with children in your
vehicle, use the childproof door locks (see page 85). This will
prevent children from opening thedoors accidentally.
Sliding Doors and Obstacles
Each power sliding door has an auto-
reverse feature. If a door meets
resistance while closing, it will beep
three times and automatically
reverse direction. However, the door
may not immediately reverse direction (like some elevator doors),
and the force of a closing door may
cause bruising or discomfort. Always
make sure passengers and any objects are well away from the power
sliding doors before closing them.
Also check that passengers, especially children, do not have their
hands on the edge of the sliding door or on the door pillar. The auto-
reverse feature stops working when
the door is about to latch so the
motor can pull the door shut.
Instrument s an d Control s
Page 96 of 352
Power Slidin g Door s (E X Model )
If a person or object is in the way
after the door begins to close, the
door handles cannot be used to stop
the door. To stop the door, use the dashboard switches or the remote
transmitter.
A Note About Refueling
Before refueling, make sure the driver's side sliding door is fully
closed. When you release the fuel fill
door, the driver's side sliding door
automatically locks so it cannot open
and interfere with the fuel door. If a
passenger attempts to unlock the door by cycling the lock knob several
times, the door may unlock and can be opened.
If a passenger needs to get out of the
vehicle while you are refueling, instruct that person to exit on the
passenger's side, not the driver's
side.
After you close the fuel fill door, the sliding door does not automatically
unlock. You must unlock it manually.
Parking Facing Downhill
When parking facing downhill on a steep grade, the power sliding doors
may not open or close as they do
normally.
Make sure the MAIN switch is in
the ON position. This allows the
power assist to keep the doors
from slamming shut.
If the MAIN switch is off, the doorcan slam shut and possibly injure
someone.
Make sure the power sliding doors
are latched in the fully-open
position, then hold the door open
while allowing your passengers to enter or exit the vehicle. Do not
pull the inside or outside door
handle, or the latch will release
and the door will close.
How to Reset the Power Sliding
Doors
If your vehicle's battery is
disconnected or goes dead while asliding door is open, the power
sliding door system needs to be reset.
After reconnecting the battery:
Close each sliding door completely
by hand; or
Move the MAIN switch on the
dashboard to the ON position.
Push and hold the top of each door switch until each sliding door
closes completely.
If the power sliding doors are closed, the system will reset itselfautomatically once the battery has
been reconnected. If the power sliding doors do notoperate properly after resetting,
have your vehicle checked by a Honda dealer.
Instrument s an d Control s
CONTINUED
Page 100 of 352
HomeLink Universa l Transmitte r
rolling code garage door
opener. Test this by pressing
and holding the HomeLink
transmitter button you just
trained. If the red light blinks
for two seconds, then stays on,
you have a rolling code garage
door opener. You may be able
to verify this with the
manufacturer's documentation.
Go to "Training With a Rolling
Code System."
8. Repeat these steps to train the other two transmitter buttons tooperate any other remotely-
controlled devices around your
home (lighting, automatic gate, security system, etc.).
Trainin g Wit h a Rollin g Cod e
Syste m
For security purposes, newer
garage door opening systems use a
"rolling" or variable code.
Information from the remote control and the garage door opener
are needed before the HomeLink
transmitter can operate the garage
door opener. The "Training the
Transmitter" procedure trains the
HomeLink transmitter to the proper garage door opener code. The
following procedure synchronizes the HomeLink transmitter to the
garage door opener so they sendand receive the correct codes.
It may be helpful to have someone assist you with this procedure.
1. Make sure you have properly completed the "Training the
Transmitter" procedure.
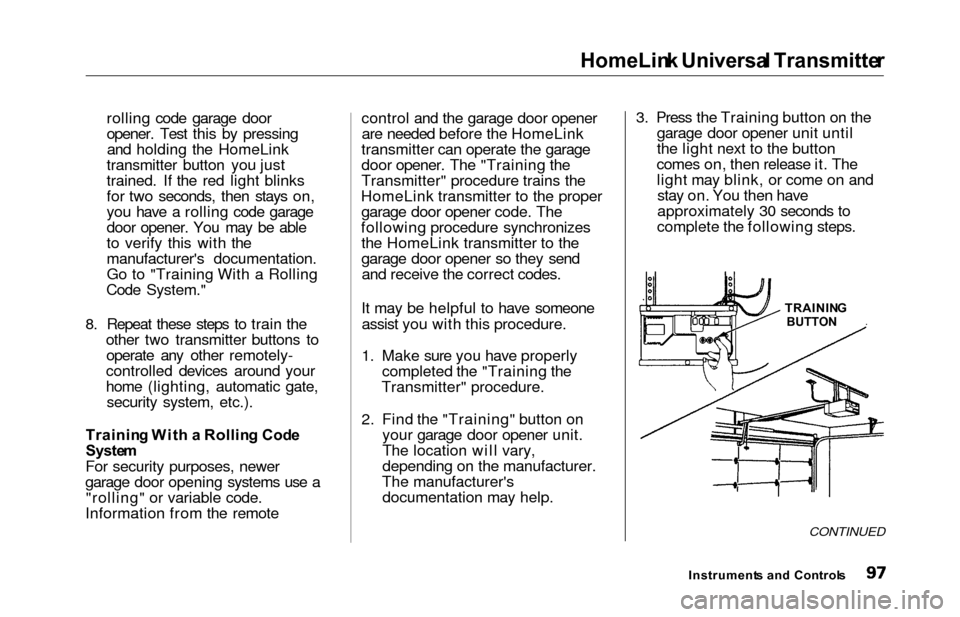
2. Find the "Training" button on your garage door opener unit.
The location will vary,
depending on the manufacturer.
The manufacturer's documentation may help. 3. Press the Training button on the
garage door opener unit until
the light next to the button
comes on, then release it. The light may blink, or come on andstay on. You then have
approximately 30 seconds to
complete the following steps.
CONTINUED
Instrument s an d Control s
TRAININ
G
BUTTON
Page 116 of 352

Power Window s
The master control panel also con-
tains these extra features:
AUT O — To open the driver's
window fully, push the window switch firmly down and release it.
The window automatically goes all the way down. To stop the window
from going all the way down, pull
back on the window switch briefly.
To open the driver's window only partially, push the window switchdown lightly and hold it The window
will stop as soon as you release the
switch.
The AUTO function only works to lower the driver's window. To raise
the window, you must pull back on
the window switch and hold it until
the window reaches the desired
position.
The MAIN switch controls power tothe front passenger's window and
the rear power windows. With thisswitch off, the front passenger's
window cannot be raised or lowered and the rear windows cannot beopened or closed. The MAIN switch
does not affect the driver's window.
Keep the MAIN switch off when you
have children in the vehicle so they do not injure themselves by
operating the windows
unintentionally.
CONTINUED
Instrument s an d Control s
Closing a power window on
someone's hands or fingers can
cause serious injury.
Make sure your passengers are
away from the windows before
closing them.