Page 17 of 280
²Units (English/Metric)
²System Check
²Single/Dual Display Mode
Reset
Press this control to select and reset functions shown in the INFO menu
and SETUP menu.
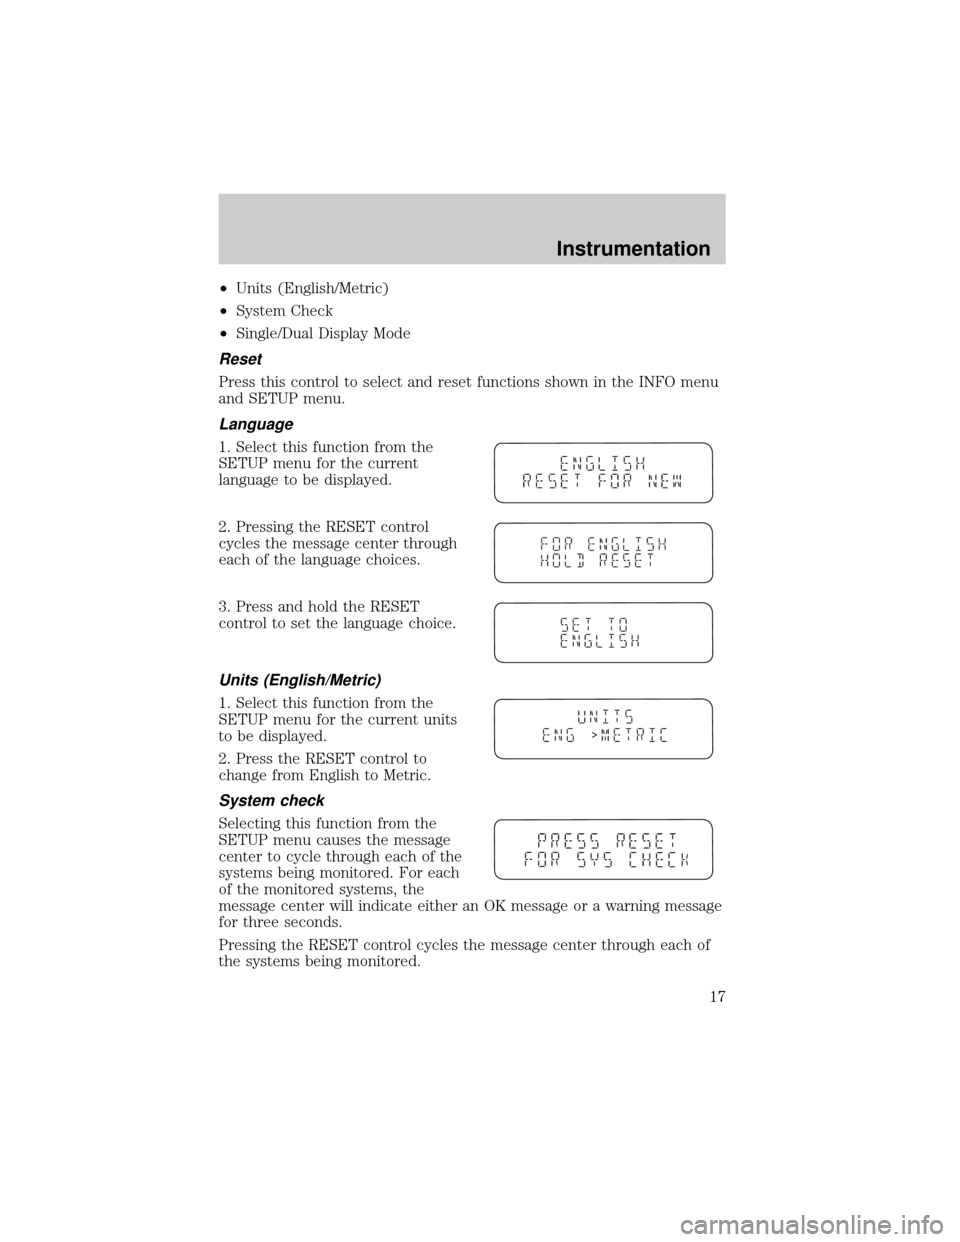
Language
1. Select this function from the
SETUP menu for the current
language to be displayed.
2. Pressing the RESET control
cycles the message center through
each of the language choices.
3. Press and hold the RESET
control to set the language choice.
Units (English/Metric)
1. Select this function from the
SETUP menu for the current units
to be displayed.
2. Press the RESET control to
change from English to Metric.
System check
Selecting this function from the
SETUP menu causes the message
center to cycle through each of the
systems being monitored. For each
of the monitored systems, the
message center will indicate either an OK message or a warning message
for three seconds.
Pressing the RESET control cycles the message center through each of
the systems being monitored.
>
Instrumentation
17
Page 18 of 280

The sequence of the system check report is as follows:
1. oil life in XX%
2. charging system
3. washer fluid level
4. brake fluid level
5. doors closed (driver and passenger side). This message can only be
reset by closing the door(s). If the RESET control is pressed, PLEASE
CLOSE DOOR will be displayed.
6. rear liftgate status
7. exterior lamps (headlamps, front turn, brake, tail and cornering/side
repeater lamp status)
8. traction control (if equipped)
9. fuel level
10. distance to empty
Single/Dual Display Mode
1. Select this function from the
SETUP menu for the current display
mode.
2. Press the RESET control to
change from the Single to the Dual display.
System warnings
System warnings alert you to possible problems or malfunctions in your
vehicle's operating systems.
In the event of a multiple warning situation, the message center will
cycle the display to show all warnings by displaying each one for 4
seconds.
The message center will display the last selected feature if there are no
more warning messages. This allows you to use the full functionality of
the message center after you acknowledge the warning by pressing the
RESET control and clearing the warning message.
Warning messages that have been reset are divided into two categories:
²They will reappear on the display ten minutes from the reset.
²They will not reappear until an ignition OFF-ON cycle has been
completed.
>
Instrumentation
18
Page 19 of 280

This acts as a reminder that these warning conditions still exist within
the vehicle.
Driver's door ajar Warning cannot
be reset
Passenger door ajar
Driver rear door ajar
Passenger rear door ajar
Check charging system Warning returns
after 10 minutes
Transmission overheated
Check transmission
Low fuel level
Liftgate ajar Warning returns
after the ignition
key is turned
from OFF to ON Low brake fluid level
Check tail lamps
Check headlamps
Check rear turn lamps
Check front turn lamps
Check cornering/side repeater lamps (if equipped)
Change oil soon
Oil change required
Check traction control
Low washer fluid
Check turn signal on reminder
DRIVER'S DOOR AJAR.Displayed when the driver's door is not
completely closed.
PASSENGER DOOR AJAR.Displayed when the passenger side door is
not completely closed.
DRIVER'S REAR DOOR AJAR.Displayed when the driver's rear door
is not completely closed.
PASSENGER REAR DOOR AJAR.Displayed when the passenger side
rear door is not completely closed.
LIFTGATE AJAR.Displayed when the liftgate is not completely closed.
CHECK CHARGING SYSTEM.Displayed when the electrical system is
not maintaining proper voltage. If you are operating electrical accessories
when the engine is idling at a low speed, turn off as many of the
Instrumentation
19
Page 20 of 280

electrical loads as soon as possible. If the warning stays on or comes on
when the engine is operating at normal speeds, have the electrical
system checked as soon as possible.
LOW FUEL LEVEL.Displayed as an early reminder of a low fuel condition.
CHECK TRANSMISSION.Indicates the transmission is not operating
properly. If this warning stays on, contact your dealer as soon as possible.
TRANSMISSION OVERHEATED.Indicates the transmission is
overheating. This warning may appear when towing heavy loads or when
driving in a low gear at a high speed for an extended period of time.
Stop the vehicle as soon as safely possible, turn off the engine and let it
cool. Check the transmission fluid and level. Refer toTransmission
fluidin theMaintenance and carechapter. If the warning stays on or
continues to come on, contact your dealer for transmission service as
soon as possible.
CHECK BRAKE LAMPS. Displayed when the brake lamps are
activated and at least one is burned out. Check the lamps as soon as
safely possible and have the burned out lamp replaced. The center
high-mount brakelamp is not monitored.
CHECK HEADLAMPS. Displayed when the headlamps are activated
and at least one is burned out. Check the lamps as soon as safely
possible and have the burned out lamp replaced. Refer toReplacing
headlamp bulbsin theMaintenance and carechapter.
CHECK TAIL LAMPS.Displayed when the tail lamps are activated and
at least one is burned out. Check the lamps as soon as safely possible
and have the burned out lamp replaced.
CHECK FRONT TURN LAMPS.Displayed when the turn signals are
activated and at least one is burned out. Check the lamps as soon as
safely possible and have the burned out lamp replaced.
CHECK REAR TURN LAMPS.Displayed when the turn signals are
activated and at least one is burned out. Check the lamps as soon as
safely possible and have the burned out lamp replaced.
CHECK SIDE REPEATER LAMPS (if equipped).Displayed when
the turn signals are activated and at least one is burned out. Check the
lamps as soon as safely possible and have the burned out lamp replaced.
TURN SIGNAL ON REMINDER.Displayed when the turn signal is
activated and the vehicle is driven more that 0.8 km (1/2 mile).
Instrumentation
20
Page 21 of 280

LOW WASHER FLUID.Indicates the washer fluid reservoir is less than
one quarter full. Check the washer fluid level. Refer toWindshield
washer fluidin theMaintenance and carechapter.
CHECK TRACTION CONTROL (if equipped).Displayed when the
Traction Controlysystem is not operating properly. If this warning stays
on, contact your dealer for service as soon as possible. For further
information, refer toTraction controlyin theDrivingchapter.
CHANGE OIL SOON/OIL CHANGE REQUIRED.Displayed when the
engine oil life remaining is 5 percent or less. When oil life left is between
5% and 0%, the CHANGE OIL SOON message will be displayed. When oil
life left reaches 0%, the OIL CHANGE REQUIRED message will be
displayed.
An oil change is required whenever indicated by the message center.
USE ONLY RECOMMENDED ENGINE OILS.
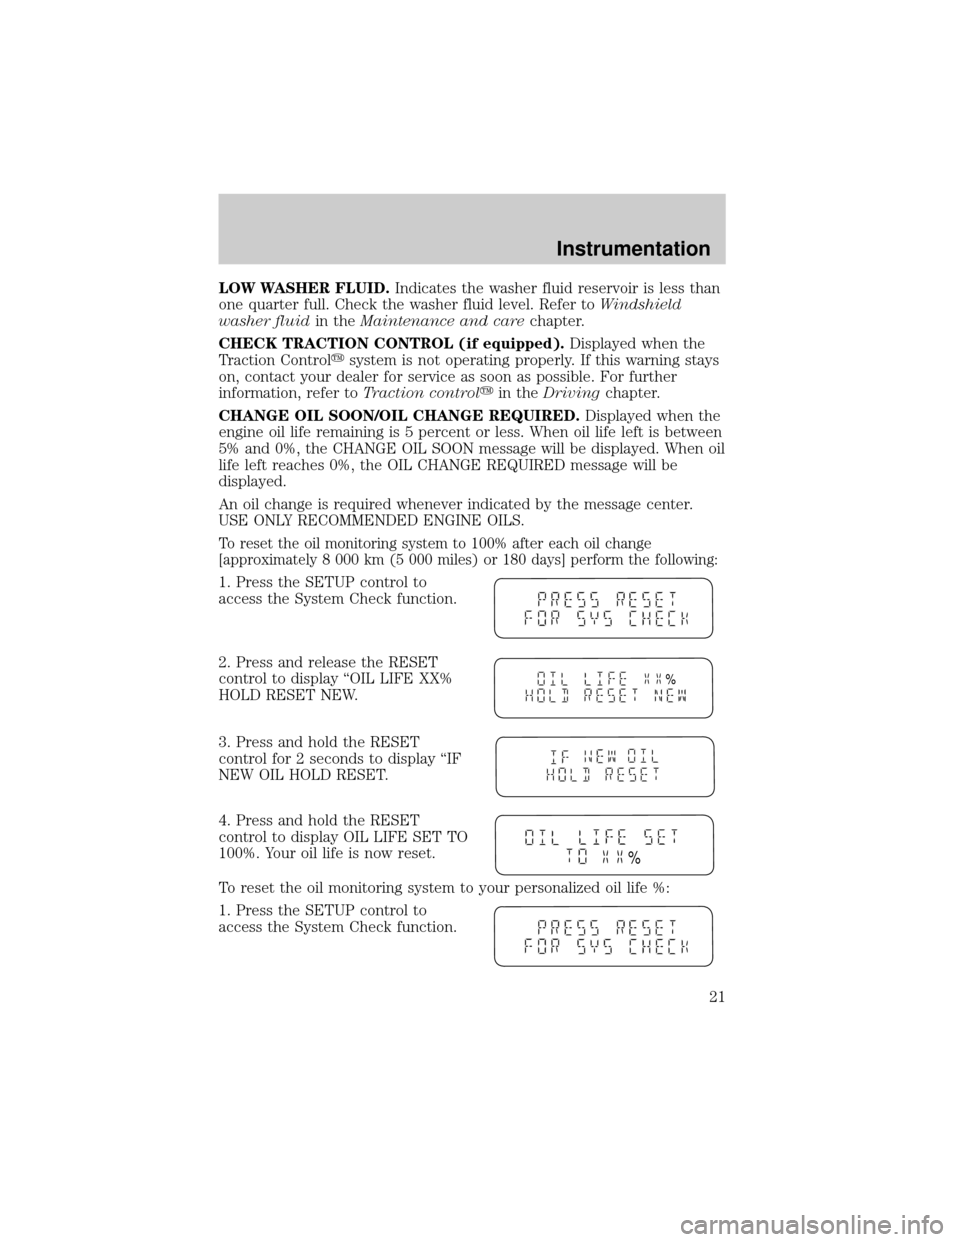
To reset the oil monitoring system to 100% after each oil change
[approximately 8 000 km (5 000 miles) or 180 days] perform the following:
1. Press the SETUP control to
access the System Check function.
2. Press and release the RESET
control to display ªOIL LIFE XX%
HOLD RESET NEW.
3. Press and hold the RESET
control for 2 seconds to display ªIF
NEW OIL HOLD RESET.
4. Press and hold the RESET
control to display OIL LIFE SET TO
100%. Your oil life is now reset.
To reset the oil monitoring system to your personalized oil life %:
1. Press the SETUP control to
access the System Check function.
%
%
Instrumentation
21
Page 22 of 280
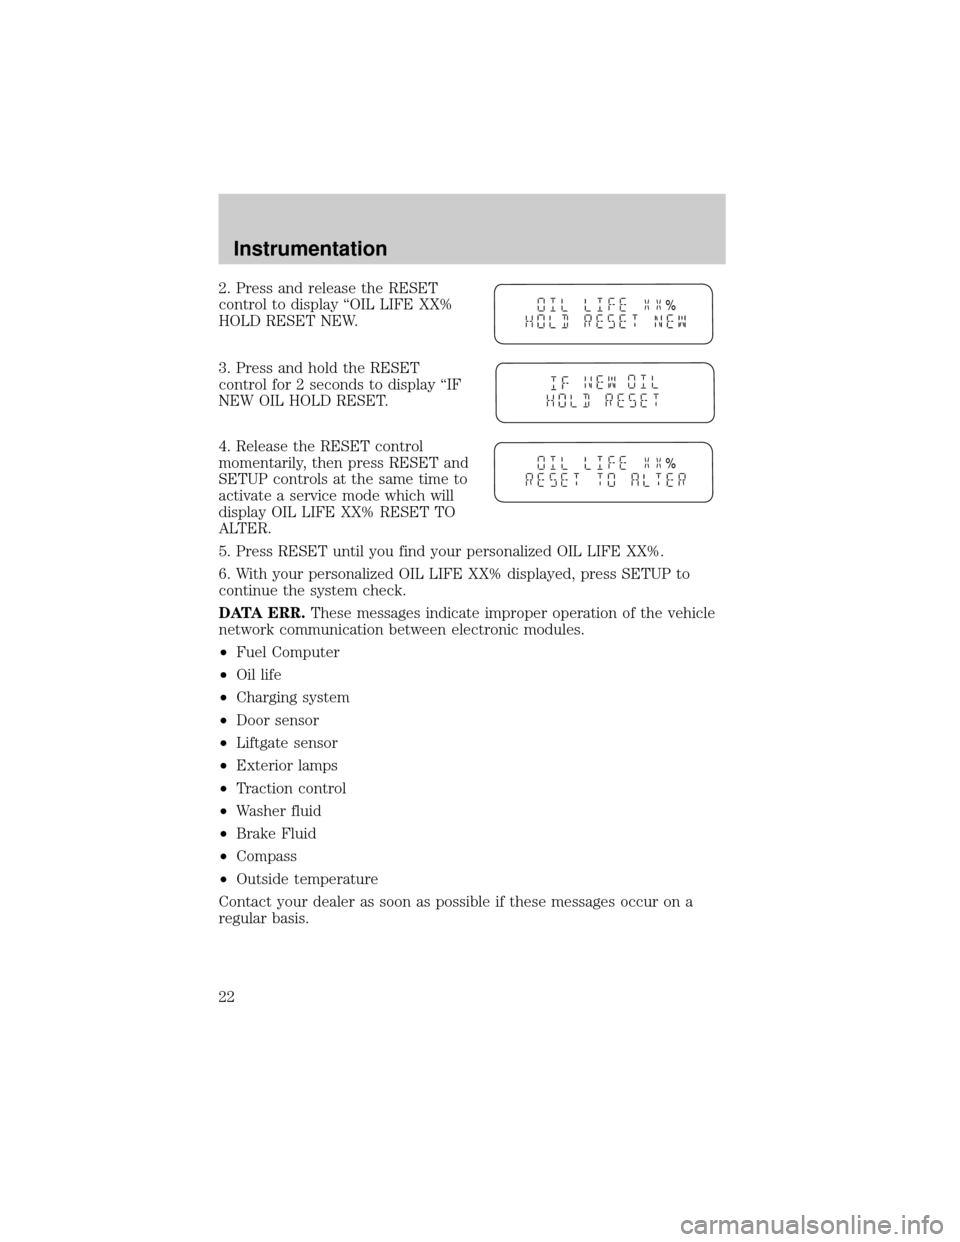
2. Press and release the RESET
control to display ªOIL LIFE XX%
HOLD RESET NEW.
3. Press and hold the RESET
control for 2 seconds to display ªIF
NEW OIL HOLD RESET.
4. Release the RESET control
momentarily, then press RESET and
SETUP controls at the same time to
activate a service mode which will
display OIL LIFE XX% RESET TO
ALTER.
5. Press RESET until you find your personalized OIL LIFE XX%.
6. With your personalized OIL LIFE XX% displayed, press SETUP to
continue the system check.
DATA ERR.These messages indicate improper operation of the vehicle
network communication between electronic modules.
²Fuel Computer
²Oil life
²Charging system
²Door sensor
²Liftgate sensor
²Exterior lamps
²Traction control
²Washer fluid
²Brake Fluid
²Compass
²Outside temperature
Contact your dealer as soon as possible if these messages occur on a
regular basis.
%
%
Instrumentation
22
Page 23 of 280

Compass display (if equipped)
The compass reading may be affected when you drive near large
buildings, bridges, power lines and powerful broadcast antenna. Magnetic
or metallic objects placed in, on or near the vehicle may also affect
compass accuracy.
Usually, when something affects the compass readings, the compass will
correct itself after a few days of operating your vehicle in normal
conditions. If the compass still appears to be inaccurate, a manual
calibration may be necessary. Refer toCompass zone/calibration
adjustment.
Most geographic areas (zones) have a magnetic north compass point that
varies slightly from the northerly direction on maps. This variation is four
degrees between adjacent zones and will become noticeable as the
vehicle crosses multiple zones. A correct zone setting will eliminate this
error. Refer toCompass zone/calibration adjustment.
Compass zone/calibration adjustment
Perform this adjustment in an open area free from steel structures and
high voltage lines.
For optimum calibration, turn off all electrical accessories (heater/air
conditioning, wipers, etc.) and make sure all vehicle doors are shut.
1. Turn ignition to the ON position.
2. Start the engine.
3. Determine your magnetic zone by
referring to the zone map.
4. From Info menu, select the
Compass/Outside Temperature
function.
1
2
3
4
5
6
7891011121314 15
Instrumentation
23
Page 24 of 280

5. Press and hold the RESET
control until the message center
display changes to show the current
zone setting.
6. Release the reset control, then
slowly press down again.
7. Press the SETUP control
repeatedly until the correct zone
setting for your geographic location
is displayed on the message center. To exit the zone setting mode press
and release the RESET control.
8. Press the RESET control to start
the compass calibration function.
9. Slowly drive the vehicle in a
circle (less than 5 km/h [3 mph])
until the CIRCLE SLOWLY TO
CALIBRATE indicator changes to
CALIBRATION COMPLETED. This
will take up to three circles to complete calibration.
10. The compass is now calibrated.
FUEL ECON AVG
Select this function from the INFO
menu to display your average fuel
economy in liters/100 km or
miles/gallon.
If you calculate your average fuel
economy by dividing liters of fuel used by 100 kilometers traveled (miles
traveled by gallons used), your figure may be different than displayed for
the following reasons:
²your vehicle was not perfectly level during fill-up
²differences in the automatic shut-off points on the fuel pumps at
service stations
²variations in top-off procedure from one fill-up to another
²rounding of the displayed values to the nearest 0.1 liter (gallon)
Instrumentation
24