Page 129 of 280

Bucket seats
To remove the seat(s):
Position the seatback in the full down position to make removing the
seat easier.
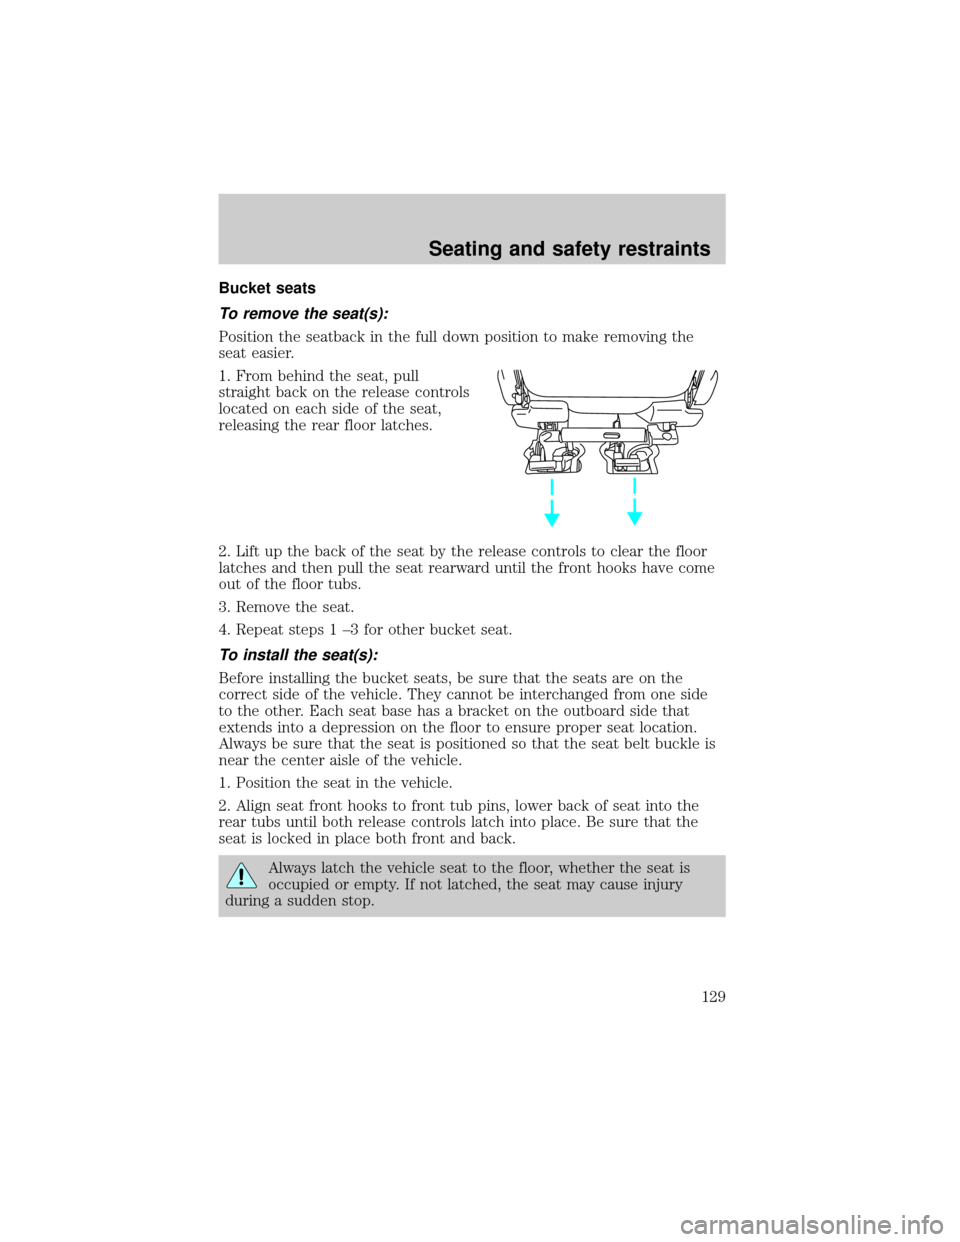
1. From behind the seat, pull
straight back on the release controls
located on each side of the seat,
releasing the rear floor latches.
2. Lift up the back of the seat by the release controls to clear the floor
latches and then pull the seat rearward until the front hooks have come
out of the floor tubs.
3. Remove the seat.
4. Repeat steps 1 ±3 for other bucket seat.
To install the seat(s):
Before installing the bucket seats, be sure that the seats are on the
correct side of the vehicle. They cannot be interchanged from one side
to the other. Each seat base has a bracket on the outboard side that
extends into a depression on the floor to ensure proper seat location.
Always be sure that the seat is positioned so that the seat belt buckle is
near the center aisle of the vehicle.
1. Position the seat in the vehicle.
2. Align seat front hooks to front tub pins, lower back of seat into the
rear tubs until both release controls latch into place. Be sure that the
seat is locked in place both front and back.
Always latch the vehicle seat to the floor, whether the seat is
occupied or empty. If not latched, the seat may cause injury
during a sudden stop.
Seating and safety restraints
129
Page 130 of 280

SAFETY RESTRAINTS
Safety restraints precautions
Always drive and ride with your seatback upright and the lap
belt snug and low across the hips.
To reduce the risk of injury, make sure children sit where they
can be properly restrained.
Never let a passenger hold a child on his or her lap while the
vehicle is moving. The passenger cannot protect the child from
injury in a collision.
All occupants of the vehicle, including the driver, should always
properly wear their safety belts, even when an air bag SRS is
provided.
It is extremely dangerous to ride in a cargo area, inside or
outside of a vehicle. In a collision, people riding in these areas
are more likely to be seriously injured or killed. Do not allow people to
ride in any area of your vehicle that is not equipped with seats and
safety belts. Be sure everyone in your vehicle is in a seat and using a
safety belt properly.
In a rollover crash, an unbelted person is significantly more likely
to die than a person wearing a seat belt.
Each seating position in your vehicle has a specific safety belt
assembly which is made up of one buckle and one tongue that
are designed to be used as a pair. 1) Use the shoulder belt on the
outside shoulder only. Never wear the shoulder belt under the arm.
2) Never swing the safety belt around your neck over the inside
shoulder. 3) Never use a single belt for more than one person.
Seating and safety restraints
130
Page 131 of 280

Always transport children 12 years old and under in the back
seat and always properly use appropriate child restraints.
Combination lap and shoulder belts
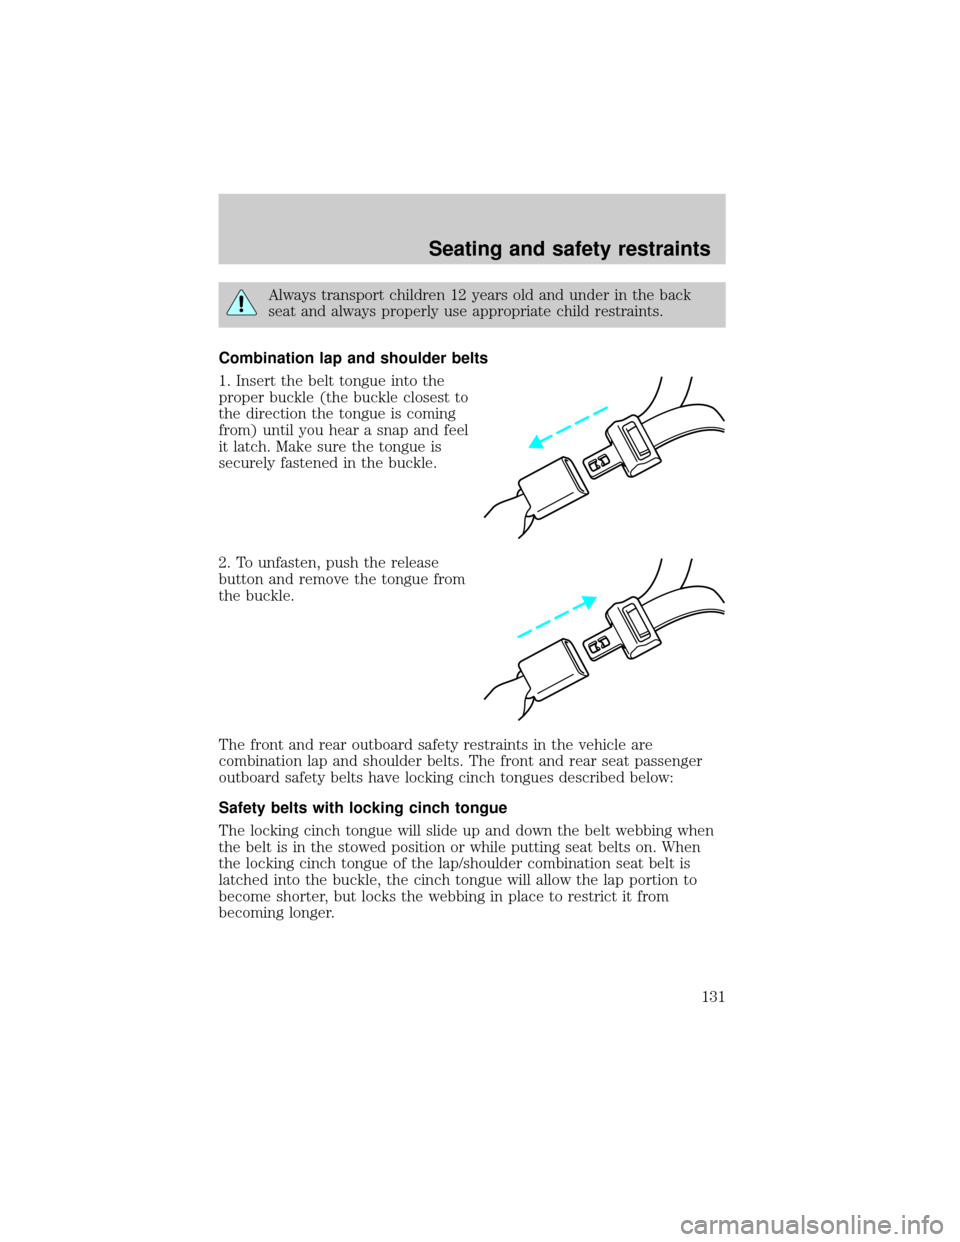
1. Insert the belt tongue into the
proper buckle (the buckle closest to
the direction the tongue is coming
from) until you hear a snap and feel
it latch. Make sure the tongue is
securely fastened in the buckle.
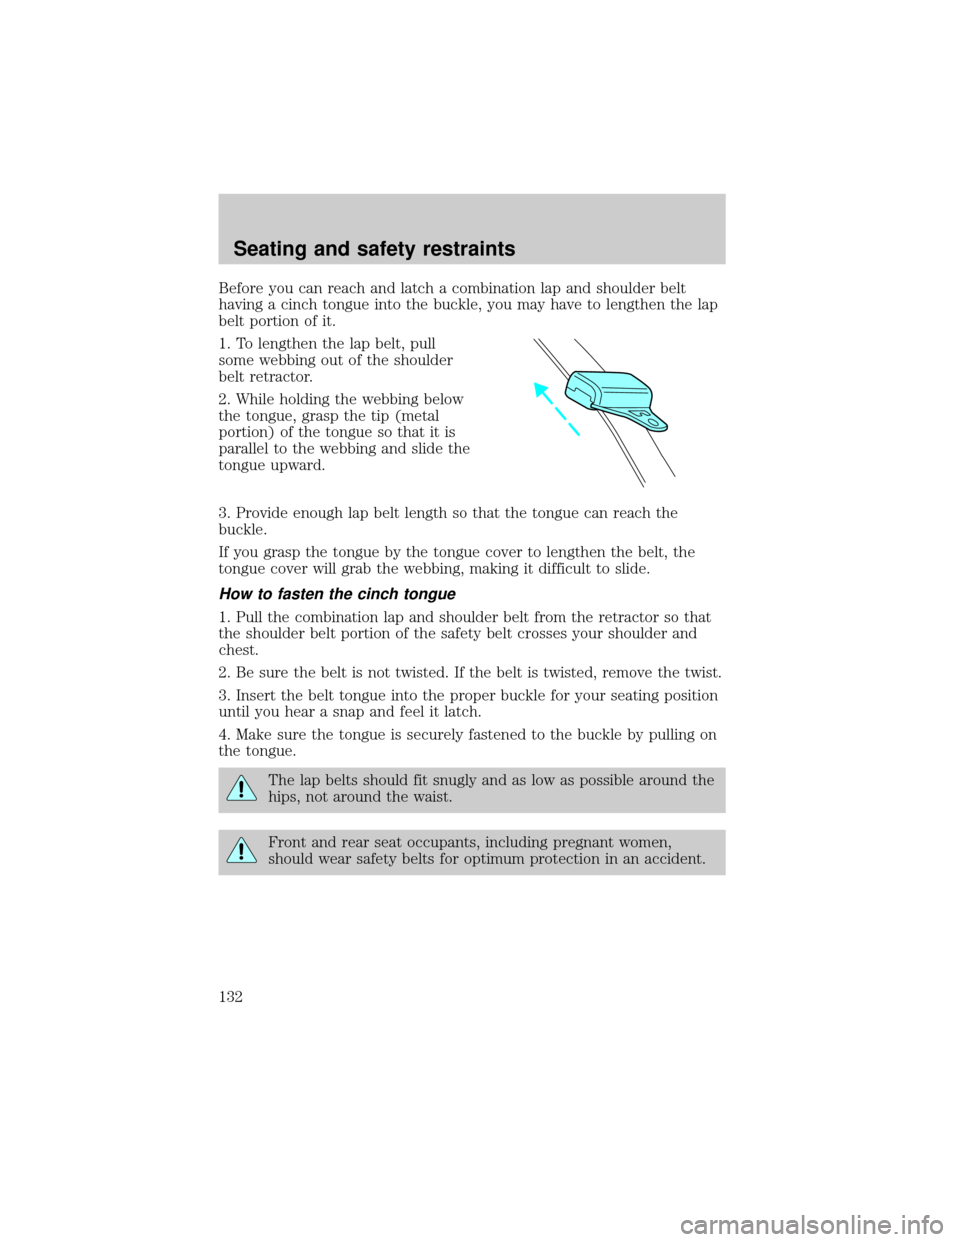
2. To unfasten, push the release
button and remove the tongue from
the buckle.
The front and rear outboard safety restraints in the vehicle are
combination lap and shoulder belts. The front and rear seat passenger
outboard safety belts have locking cinch tongues described below:
Safety belts with locking cinch tongue
The locking cinch tongue will slide up and down the belt webbing when
the belt is in the stowed position or while putting seat belts on. When
the locking cinch tongue of the lap/shoulder combination seat belt is
latched into the buckle, the cinch tongue will allow the lap portion to
become shorter, but locks the webbing in place to restrict it from
becoming longer.
Seating and safety restraints
131
Page 132 of 280

Before you can reach and latch a combination lap and shoulder belt
having a cinch tongue into the buckle, you may have to lengthen the lap
belt portion of it.
1. To lengthen the lap belt, pull
some webbing out of the shoulder
belt retractor.
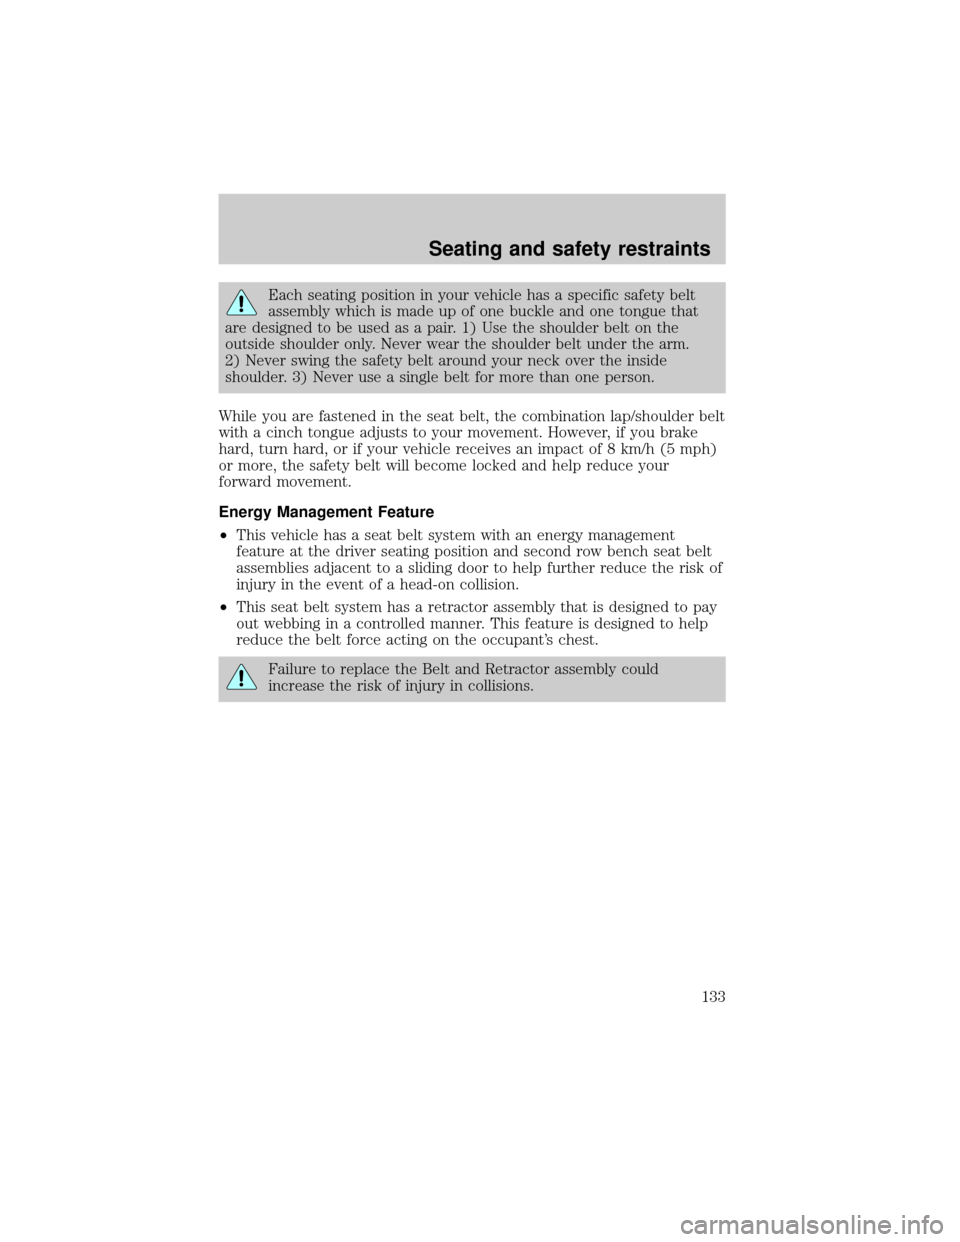
2. While holding the webbing below
the tongue, grasp the tip (metal
portion) of the tongue so that it is
parallel to the webbing and slide the
tongue upward.
3. Provide enough lap belt length so that the tongue can reach the
buckle.
If you grasp the tongue by the tongue cover to lengthen the belt, the
tongue cover will grab the webbing, making it difficult to slide.
How to fasten the cinch tongue
1. Pull the combination lap and shoulder belt from the retractor so that
the shoulder belt portion of the safety belt crosses your shoulder and
chest.
2. Be sure the belt is not twisted. If the belt is twisted, remove the twist.
3. Insert the belt tongue into the proper buckle for your seating position
until you hear a snap and feel it latch.
4. Make sure the tongue is securely fastened to the buckle by pulling on
the tongue.
The lap belts should fit snugly and as low as possible around the
hips, not around the waist.
Front and rear seat occupants, including pregnant women,
should wear safety belts for optimum protection in an accident.
Seating and safety restraints
132
Page 133 of 280

Each seating position in your vehicle has a specific safety belt
assembly which is made up of one buckle and one tongue that
are designed to be used as a pair. 1) Use the shoulder belt on the
outside shoulder only. Never wear the shoulder belt under the arm.
2) Never swing the safety belt around your neck over the inside
shoulder. 3) Never use a single belt for more than one person.
While you are fastened in the seat belt, the combination lap/shoulder belt
with a cinch tongue adjusts to your movement. However, if you brake
hard, turn hard, or if your vehicle receives an impact of 8 km/h (5 mph)
or more, the safety belt will become locked and help reduce your
forward movement.
Energy Management Feature
²This vehicle has a seat belt system with an energy management
feature at the driver seating position and second row bench seat belt
assemblies adjacent to a sliding door to help further reduce the risk of
injury in the event of a head-on collision.
²This seat belt system has a retractor assembly that is designed to pay
out webbing in a controlled manner. This feature is designed to help
reduce the belt force acting on the occupant's chest.
Failure to replace the Belt and Retractor assembly could
increase the risk of injury in collisions.
Seating and safety restraints
133
Page 134 of 280
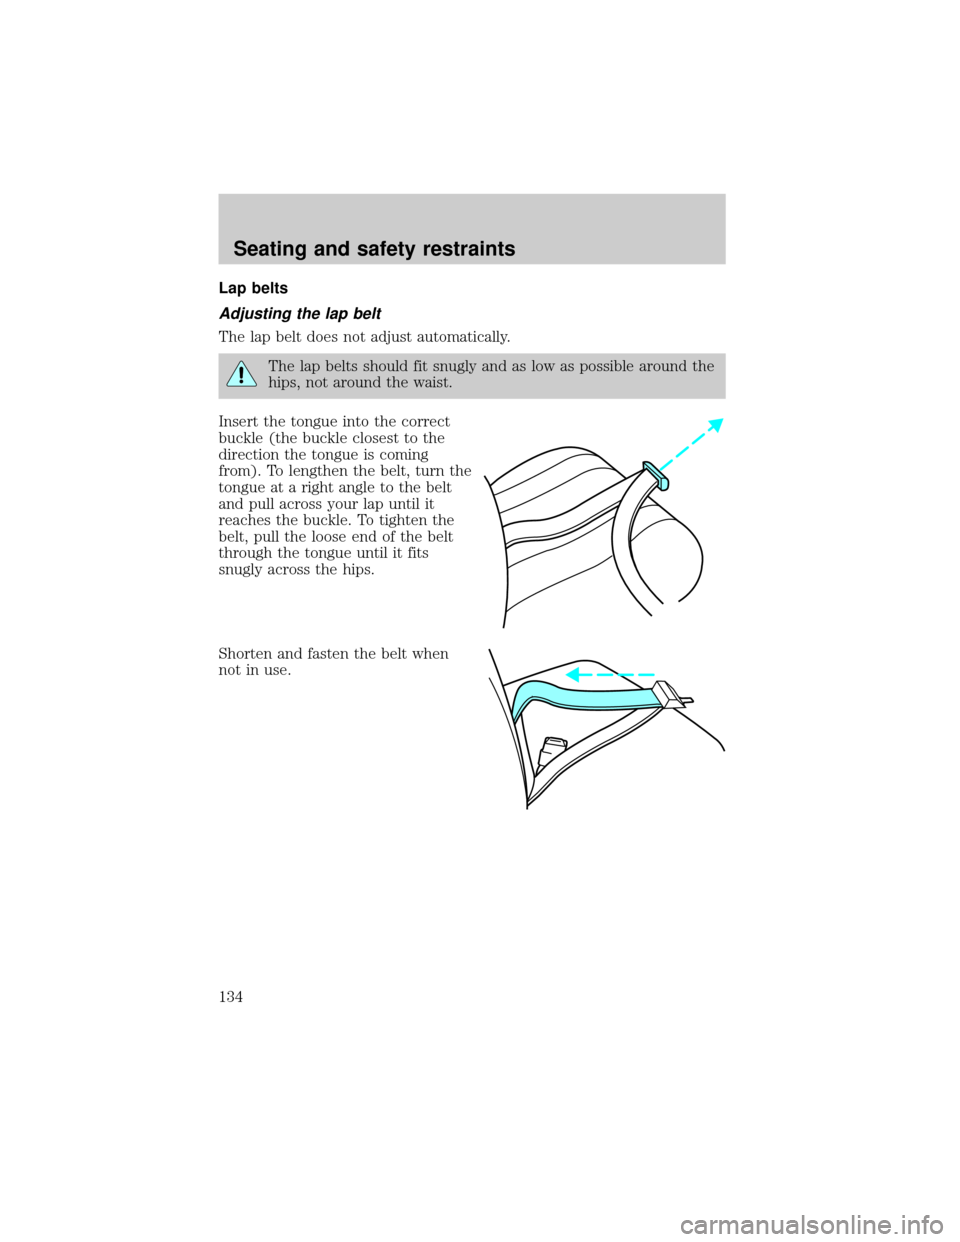
Lap belts
Adjusting the lap belt
The lap belt does not adjust automatically.
The lap belts should fit snugly and as low as possible around the
hips, not around the waist.
Insert the tongue into the correct
buckle (the buckle closest to the
direction the tongue is coming
from). To lengthen the belt, turn the
tongue at a right angle to the belt
and pull across your lap until it
reaches the buckle. To tighten the
belt, pull the loose end of the belt
through the tongue until it fits
snugly across the hips.
Shorten and fasten the belt when
not in use.
Seating and safety restraints
134
Page 135 of 280

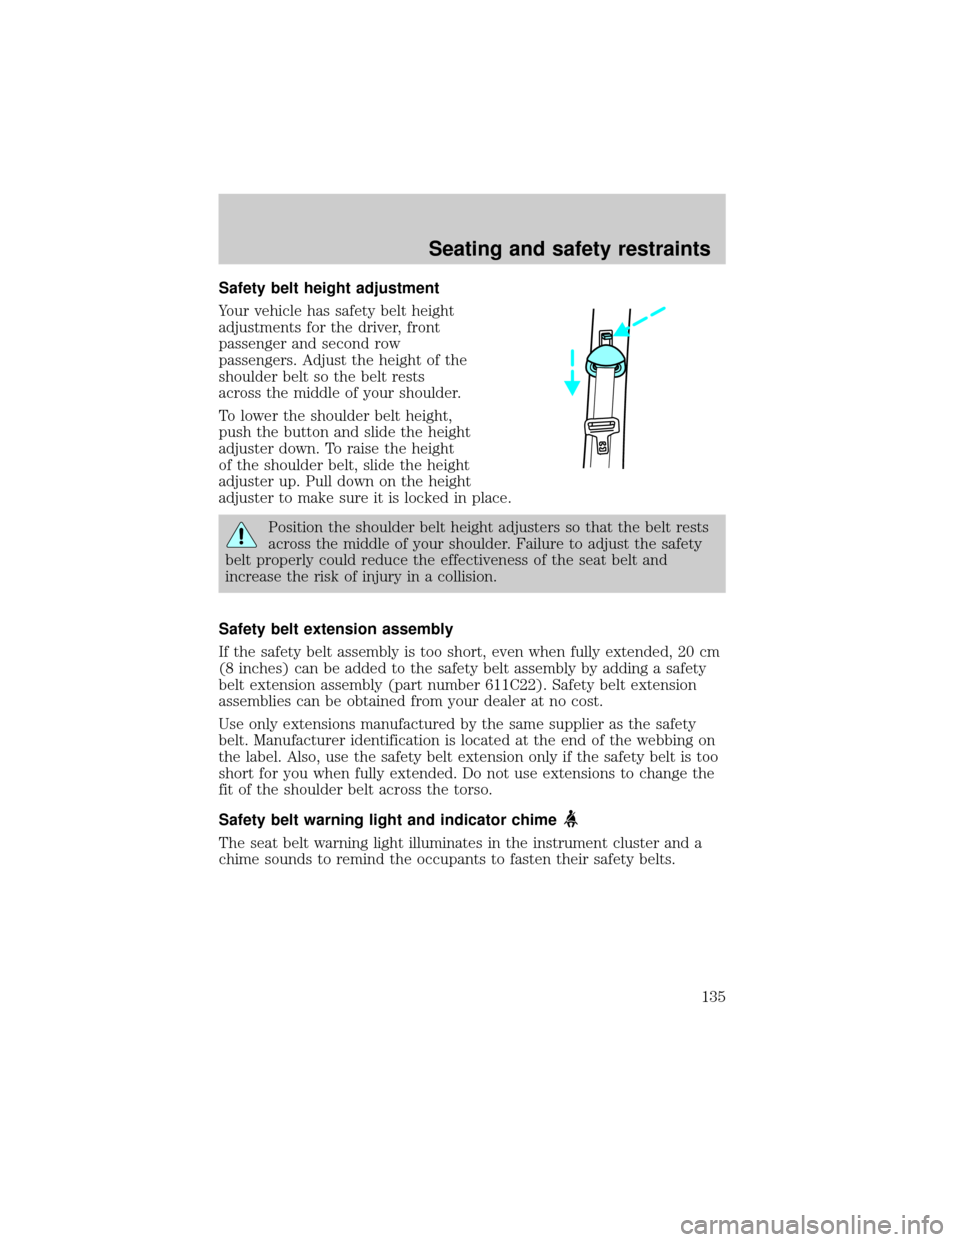
Safety belt height adjustment
Your vehicle has safety belt height
adjustments for the driver, front
passenger and second row
passengers. Adjust the height of the
shoulder belt so the belt rests
across the middle of your shoulder.
To lower the shoulder belt height,
push the button and slide the height
adjuster down. To raise the height
of the shoulder belt, slide the height
adjuster up. Pull down on the height
adjuster to make sure it is locked in place.
Position the shoulder belt height adjusters so that the belt rests
across the middle of your shoulder. Failure to adjust the safety
belt properly could reduce the effectiveness of the seat belt and
increase the risk of injury in a collision.
Safety belt extension assembly
If the safety belt assembly is too short, even when fully extended, 20 cm
(8 inches) can be added to the safety belt assembly by adding a safety
belt extension assembly (part number 611C22). Safety belt extension
assemblies can be obtained from your dealer at no cost.
Use only extensions manufactured by the same supplier as the safety
belt. Manufacturer identification is located at the end of the webbing on
the label. Also, use the safety belt extension only if the safety belt is too
short for you when fully extended. Do not use extensions to change the
fit of the shoulder belt across the torso.
Safety belt warning light and indicator chime
The seat belt warning light illuminates in the instrument cluster and a
chime sounds to remind the occupants to fasten their safety belts.
Seating and safety restraints
135
Page 136 of 280

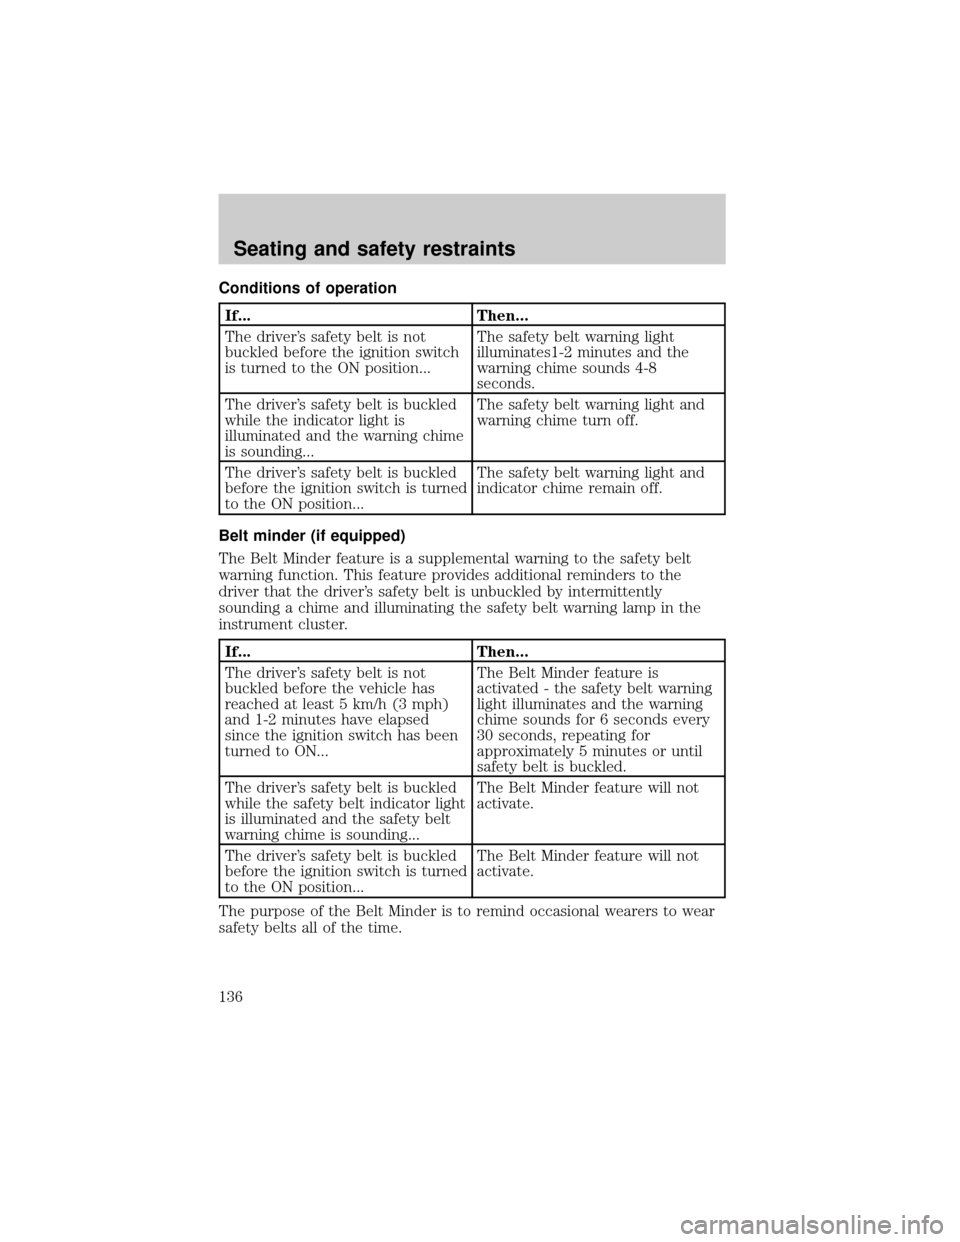
Conditions of operation
If... Then...
The driver's safety belt is not
buckled before the ignition switch
is turned to the ON position...The safety belt warning light
illuminates1-2 minutes and the
warning chime sounds 4-8
seconds.
The driver's safety belt is buckled
while the indicator light is
illuminated and the warning chime
is sounding...The safety belt warning light and
warning chime turn off.
The driver's safety belt is buckled
before the ignition switch is turned
to the ON position...The safety belt warning light and
indicator chime remain off.
Belt minder (if equipped)
The Belt Minder feature is a supplemental warning to the safety belt
warning function. This feature provides additional reminders to the
driver that the driver's safety belt is unbuckled by intermittently
sounding a chime and illuminating the safety belt warning lamp in the
instrument cluster.
If... Then...
The driver's safety belt is not
buckled before the vehicle has
reached at least 5 km/h (3 mph)
and 1-2 minutes have elapsed
since the ignition switch has been
turned to ON...The Belt Minder feature is
activated - the safety belt warning
light illuminates and the warning
chime sounds for 6 seconds every
30 seconds, repeating for
approximately 5 minutes or until
safety belt is buckled.
The driver's safety belt is buckled
while the safety belt indicator light
is illuminated and the safety belt
warning chime is sounding...The Belt Minder feature will not
activate.
The driver's safety belt is buckled
before the ignition switch is turned
to the ON position...The Belt Minder feature will not
activate.
The purpose of the Belt Minder is to remind occasional wearers to wear
safety belts all of the time.
Seating and safety restraints
136