Page 22 of 280

AUTOLAMP CONTROL (IF EQUIPPED)
The autolamp system provides light
sensitive automatic on-off control of
the exterior lights normally
controlled by the headlamp control.
The autolamp system also keeps the
lights on for approximately 20
seconds after the ignition switch is
turned to OFF.
²To turn autolamps on, rotate the
control counterclockwise.
²To turn autolamps off, rotate the control clockwise to OFF.
²Foglamps are not controlled by the autolamps. In order to turn on the
foglamps, you must turn the lamp switch to the
position and
pull toward you for fog.
POWER REAR SLIDER WINDOW (IF EQUIPPED)
²Press the open arrow side of
control to open window.
²Press the closed arrow side of
control to close window.
POWER ADJUSTABLE FOOT PEDALS (IF EQUIPPED)
The accelerator and brake pedal
should only be adjusted when the
vehicle is stopped and the gearshift
lever is in the P(Park) position.
Press and hold the rocker control to
adjust accelerator and brake pedal.
²press the left side of the control to adjust the pedals toward you
²press the right side of the control to adjust the pedals away from you
The adjustment allows for approximately 76mm (3 inches) of maximum
travel.
A
PEDALS
Controls and features
22
Page 28 of 280

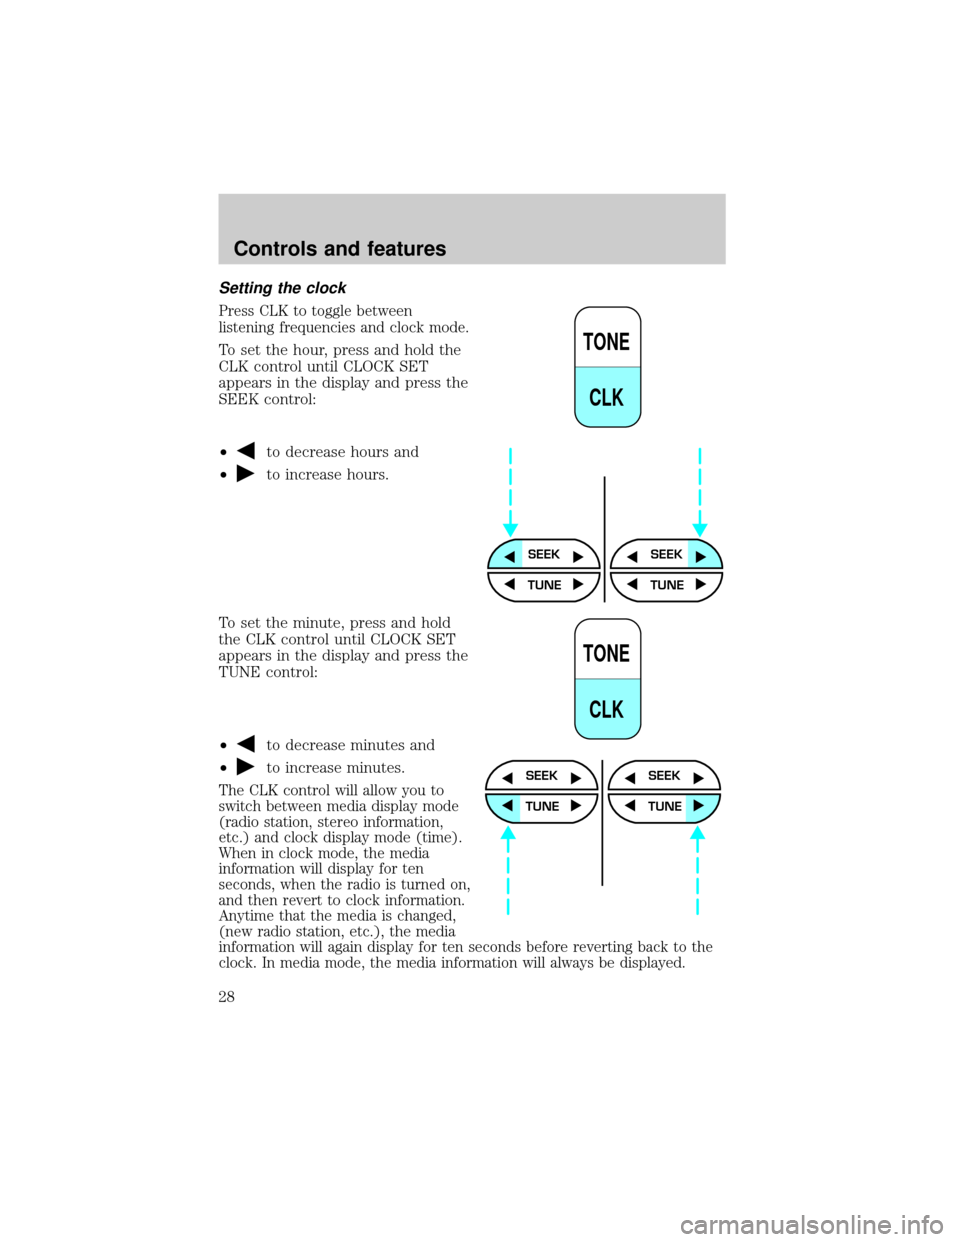
Setting the clock
Press CLK to toggle between
listening frequencies and clock mode.
To set the hour, press and hold the
CLK control until CLOCK SET
appears in the display and press the
SEEK control:
²
to decrease hours and
²
to increase hours.
To set the minute, press and hold
the CLK control until CLOCK SET
appears in the display and press the
TUNE control:
²
to decrease minutes and
²
to increase minutes.
The CLK control will allow you to
switch between media display mode
(radio station, stereo information,
etc.) and clock display mode (time).
When in clock mode, the media
information will display for ten
seconds, when the radio is turned on,
and then revert to clock information.
Anytime that the media is changed,
(new radio station, etc.), the media
information will again display for ten seconds before reverting back to the
clock. In media mode, the media information will always be displayed.
TONE
CLK
SEEKSEEK
TUNE TUNE
TONE
CLK
SEEK
TUNE
SEEK
TUNE
Controls and features
28
Page 34 of 280
DolbyTnoise reduction
Dolbytnoise reduction operates
only in tape mode. Dolbytnoise
reduction reduces the amount of
hiss and static during tape playback.
Press the
control to activate (and deactivate) Dolbytnoise
reduction.
Dolbytnoise reduction is manufactured under license from Dolbyt
Laboratories Licensing Corporation. ªDolbytº and the double-D symbol
are trademarks of Dolby Laboratories Licensing Corporation.
Setting the clock
Press CLK to toggle between
listening frequencies and clock
mode while in radio mode.
To set the hour, press and hold the
CLK control and press the SEEK
control:
²
to decrease hours and
²
to increase hours.
4
TAPE
AMS
CLK
SEEKSEEK
TUNE TUNE
Controls and features
34
Page 35 of 280
To set the minute, press and hold
the CLK control and press the
TUNE control:
²
to decrease minutes and
²
to increase minutes.
The CLK control will allow you to switch between media display mode
(radio station, stereo information, etc.) and clock display mode (time).
When in clock mode, the media information will display for 10 seconds,
when the radio is turned on, and then revert to clock information.
Anytime that the media is changed, (new radio station, etc.), the media
information will again display for 10 seconds before reverting back to the
clock. In media mode, the media information will always be displayed.
TAPE
AMS
CLK
SEEK
TUNE
SEEK
TUNE
Controls and features
35
Page 45 of 280
²Rock
²Soft
²To p 4 0
Show
²With RDS activated, press the
RDS control until SHOW is
displayed.
²Use the SEL control to select
TYPE (the display shows the
program type), NAME (the
display shows the call letters of
the station) or NONE.
Mute mode
Press the control to mute the
playing media. Press the control
again to return to the playing media.
Setting the clock with radio data system (RDS) feature
Press the RDS control until SELECT
HOUR or SELECT MINS is
displayed.
Use the SEL control to manually set
the time.
²Press
to increase
hours/minutes.
²Press
to decrease
hours/minutes.
RDS
SEL
MUTE
RDS
SEL
Controls and features
45
Page 54 of 280
²Use the SEL control to select
TYPE, NAME or NONE.
Mute mode
Press the control to mute the
playing media. Press the control
again to return to the playing media.
Setting the clock
Press the RDS control until SELECT
HOUR or SELECT MINS is
displayed.
Use the SEL control to manually set
the time.
²Press
to increase
hours/minutes.
²Press
to decrease
hours/minutes.
CD changer (if equipped)
The CD changer is in one of the following locations:
²behind the passenger's seat (Regular Cab only)
²in the center console (SuperCab/SuperCrew with Captain's chairs)
²under the rear bench on the driver's side (see instructions below)
(SuperCab with bench seats)
²in the stowage bin on the passenger's side (SuperCrew with bench
seats)
SEL
MUTE
RDS
SEL
Controls and features
54
Page 186 of 280

Location of the spare tire and tools
The spare tire and tools for your vehicle are stowed in the following
locations:
Tool Location
Spare tire Under the vehicle, just forward of
the rear bumper
Jack, lug nut wrench Regular cab: Under the seat on the
passenger side
Super Cab: Under the front or rear
seat on the passenger side
Super Crew cab: In the passenger
side rear storage compartment
Jack handle On top of the radiator support at
the front of the engine
compartment
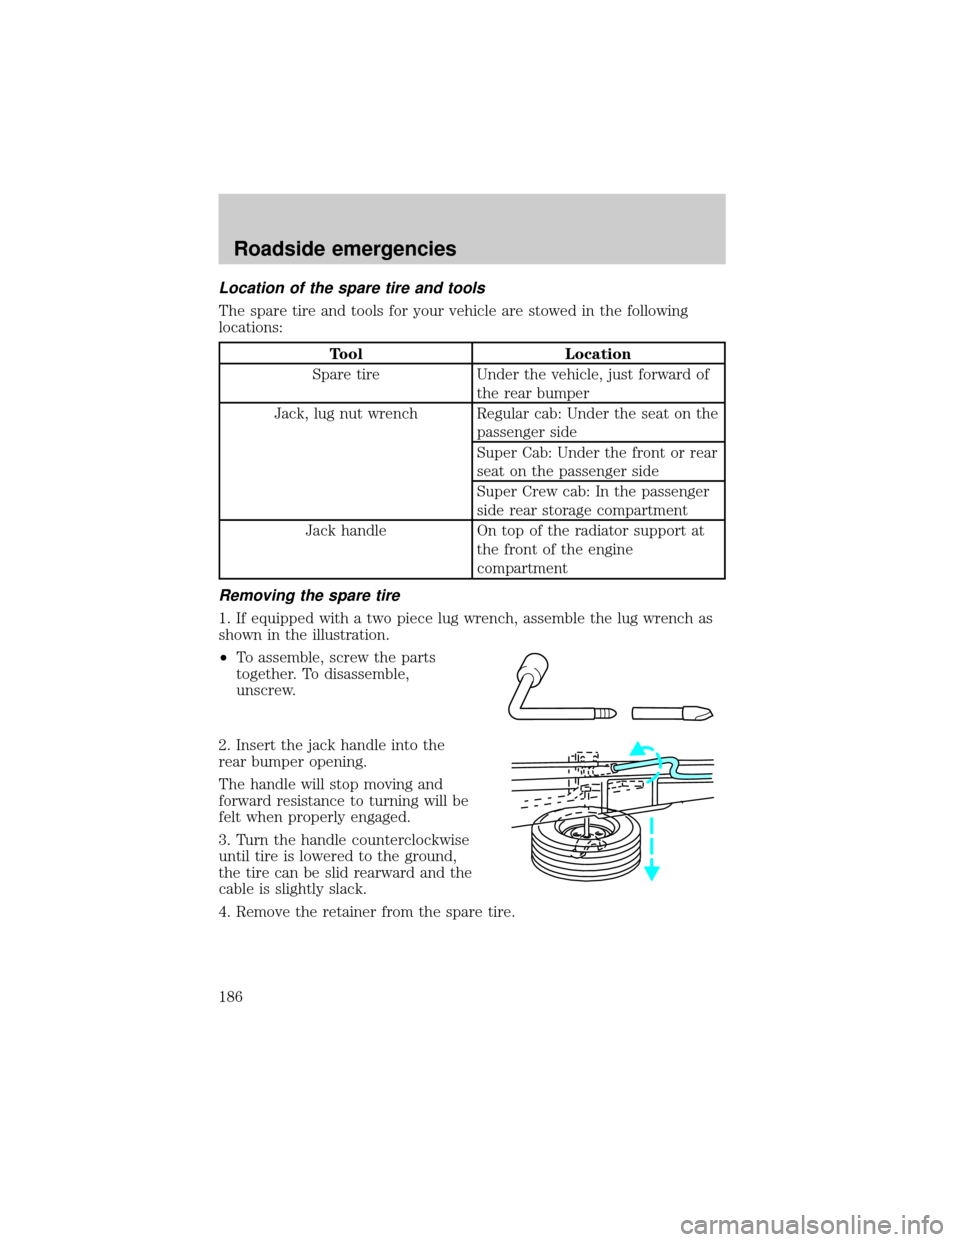
Removing the spare tire
1. If equipped with a two piece lug wrench, assemble the lug wrench as
shown in the illustration.
²To assemble, screw the parts
together. To disassemble,
unscrew.
2. Insert the jack handle into the
rear bumper opening.
The handle will stop moving and
forward resistance to turning will be
felt when properly engaged.
3. Turn the handle counterclockwise
until tire is lowered to the ground,
the tire can be slid rearward and the
cable is slightly slack.
4. Remove the retainer from the spare tire.
Roadside emergencies
186
Page 187 of 280

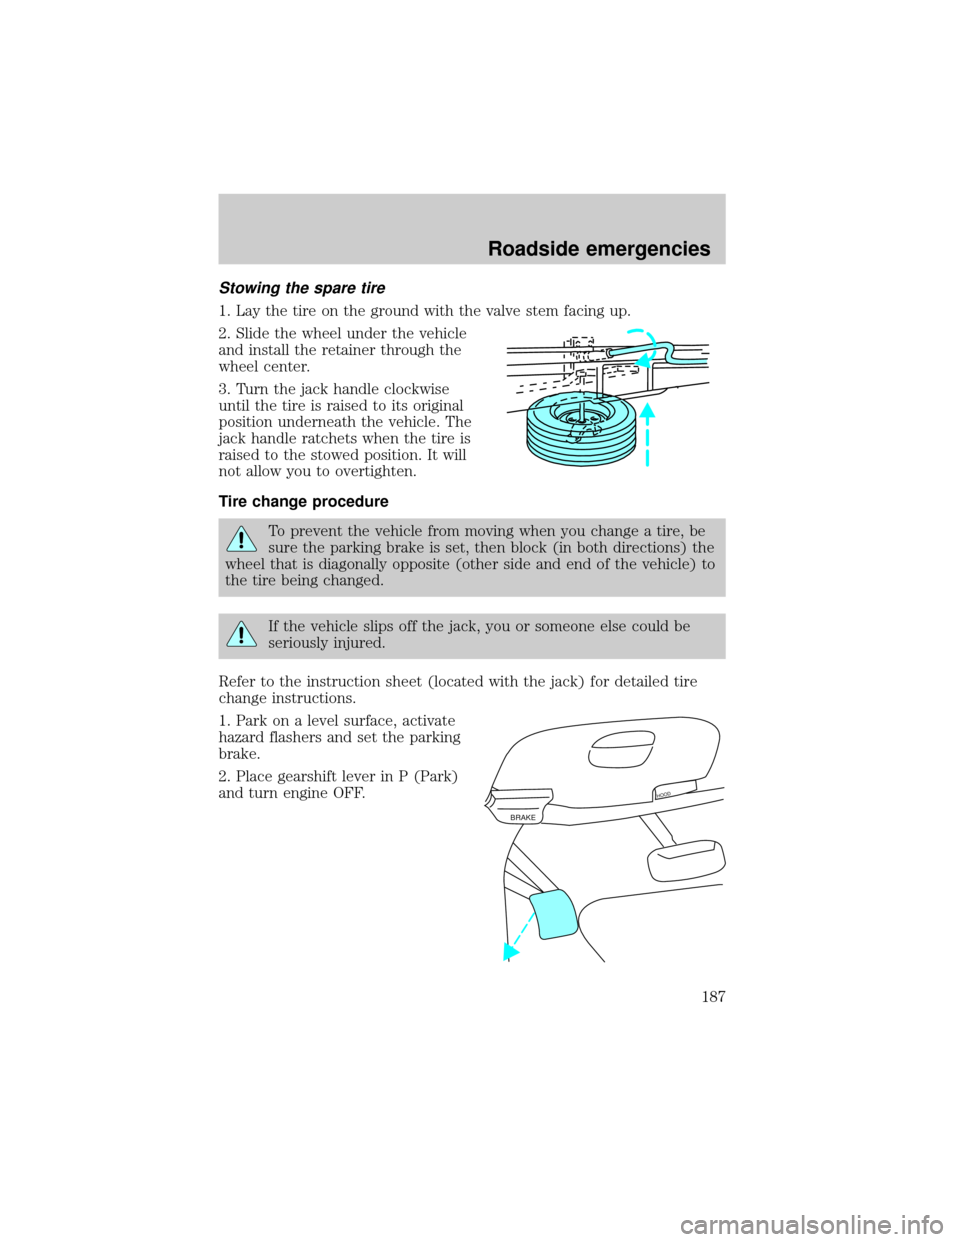
Stowing the spare tire
1. Lay the tire on the ground with the valve stem facing up.
2. Slide the wheel under the vehicle
and install the retainer through the
wheel center.
3. Turn the jack handle clockwise
until the tire is raised to its original
position underneath the vehicle. The
jack handle ratchets when the tire is
raised to the stowed position. It will
not allow you to overtighten.
Tire change procedure
To prevent the vehicle from moving when you change a tire, be
sure the parking brake is set, then block (in both directions) the
wheel that is diagonally opposite (other side and end of the vehicle) to
the tire being changed.
If the vehicle slips off the jack, you or someone else could be
seriously injured.
Refer to the instruction sheet (located with the jack) for detailed tire
change instructions.
1. Park on a level surface, activate
hazard flashers and set the parking
brake.
2. Place gearshift lever in P (Park)
and turn engine OFF.
BRAKE
HOOD
Roadside emergencies
187