2000 FORD F150 remove seats
[x] Cancel search: remove seatsPage 61 of 280

²PANEL & FLOOR-Distributes outside air through the instrument panel
registers and the floor ducts.
²FLOOR-Allows for maximum heating. Distributes outside air through
the floor ducts.
²FLOOR & DEF-Distributes outside air through the floor ducts and the
windshield defroster ducts.
²DEF
-Distributes outside air through the windshield defroster
ducts. It can be used to clear ice or fog from the windshield.
Operating tips
²In humid weather conditions, place the climate control system in
DEF before driving. This will reduce fogging on your windshield. Once
the windshield has been cleared, operate the climate control system as
desired.
²To reduce humidity buildup inside the vehicle in cold weather
conditions, do not drive with the climate control system in the OFF
position.
²Under normal weather conditions, your vehicle's climate control
system should be left in any position other than MAX A/C or OFF
when the vehicle is parked. This allows the vehicle to ªbreatheº
through the outside air inlet duct.
²Under snowy or dirty weather conditions, your vehicle's climate
control system should be left in the OFF position when the vehicle is
parked. This allows the climate control system to be free from
contamination of outside pollutants.
²Don't put objects under the front seat that will interfere with the
airflow to the rear seats (if equipped).
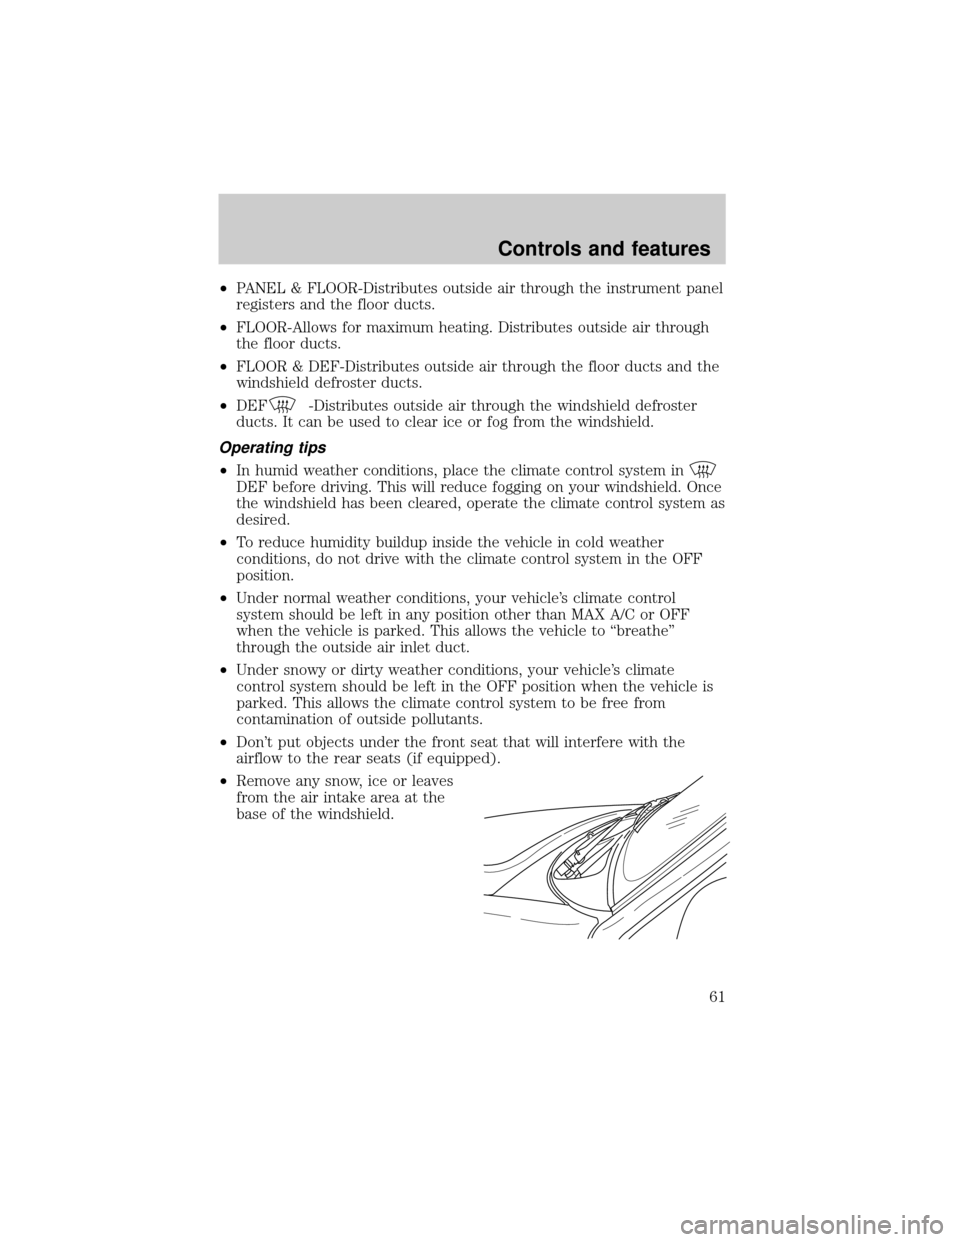
²Remove any snow, ice or leaves
from the air intake area at the
base of the windshield.
Controls and features
61
Page 64 of 280

Operating tips
²In humid weather conditions, place the climate control system in
DEF before driving. This will reduce fogging on your windshield. Once
the windshield has been cleared, operate the climate control system as
desired.
²To reduce humidity buildup inside the vehicle in cold weather
conditions, don't drive with the climate control system in the OFF or
MAX A/C position.
²To reduce humidity buildup inside the vehicle in warm weather
conditions, don't drive with the climate control system in the OFF
position.
²Under normal weather conditions, your vehicle's climate control
system should be left in any position other than MAX A/C or OFF
when the vehicle is parked. This allows the vehicle to ªbreatheº
through the outside air inlet duct.
²Under snowy or dirty weather conditions, your vehicle's climate
control system should be left in the OFF position when the vehicle is
parked. This allows the climate control system to be free from
contamination of outside pollutants.
²If your vehicle has been parked with the windows closed during warm
weather conditions, the air conditioner will perform more efficiently in
cooling the vehicle if driven for two or three minutes with the
windows open. This will force most of the hot, stale air out of the
vehicle. Once the vehicle has been ªaired outº, operate the climate
control system as desired.
²Do not put objects under the front seat that will interfere with the
airflow to the back seats (if equipped).
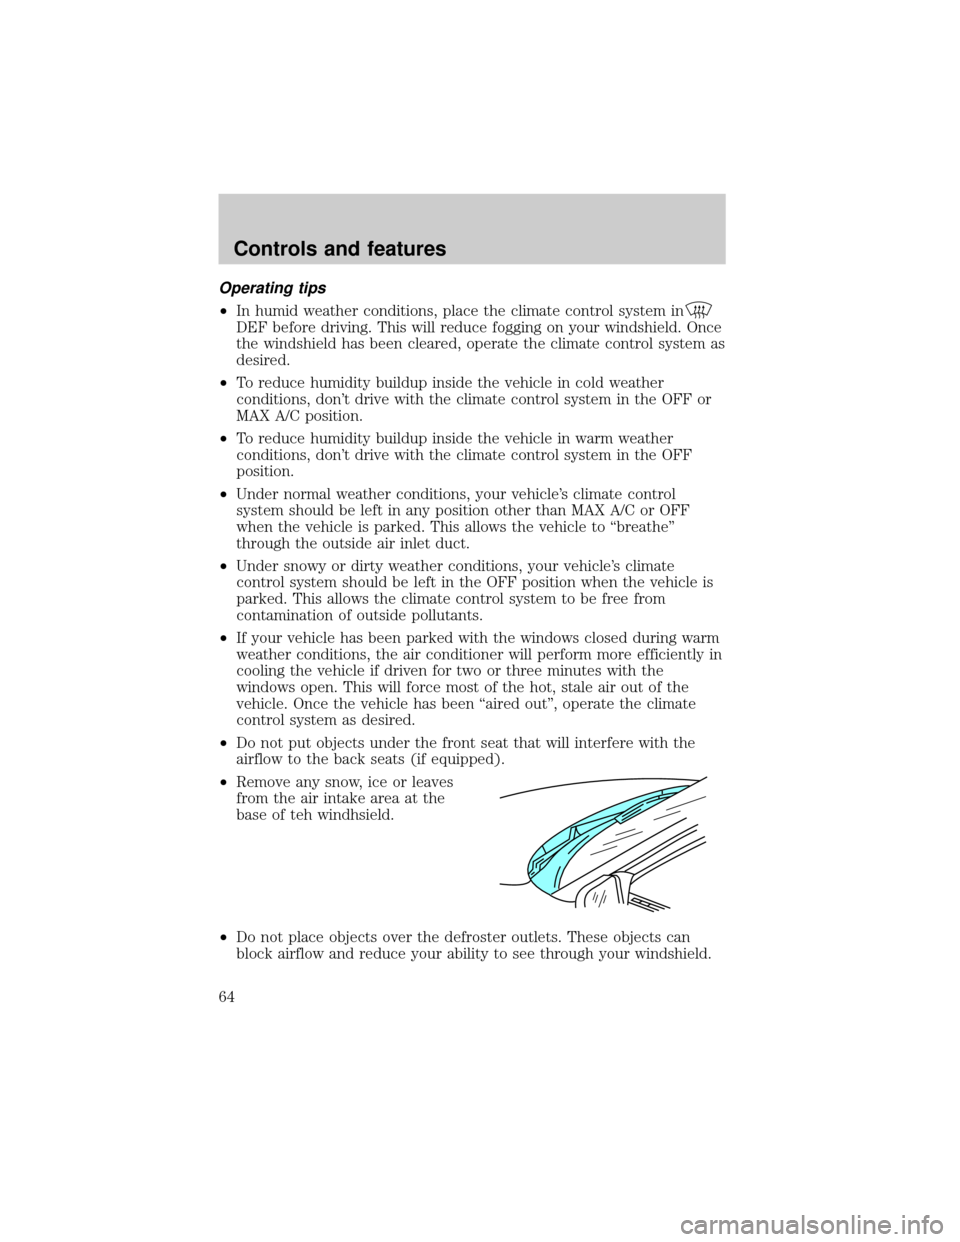
²Remove any snow, ice or leaves
from the air intake area at the
base of teh windhsield.
²Do not place objects over the defroster outlets. These objects can
block airflow and reduce your ability to see through your windshield.
Controls and features
64
Page 104 of 280

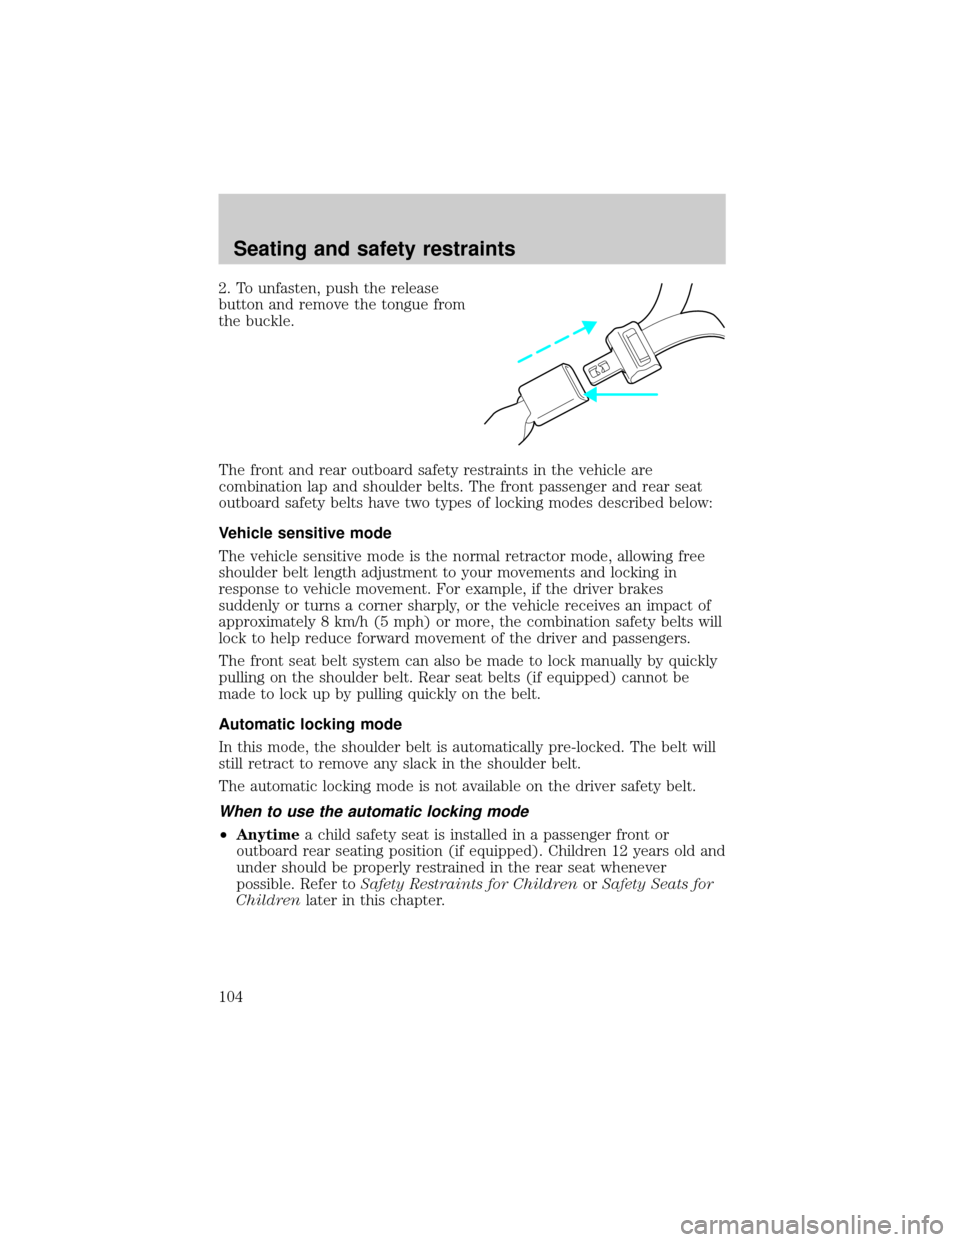
2. To unfasten, push the release
button and remove the tongue from
the buckle.
The front and rear outboard safety restraints in the vehicle are
combination lap and shoulder belts. The front passenger and rear seat
outboard safety belts have two types of locking modes described below:
Vehicle sensitive mode
The vehicle sensitive mode is the normal retractor mode, allowing free
shoulder belt length adjustment to your movements and locking in
response to vehicle movement. For example, if the driver brakes
suddenly or turns a corner sharply, or the vehicle receives an impact of
approximately 8 km/h (5 mph) or more, the combination safety belts will
lock to help reduce forward movement of the driver and passengers.
The front seat belt system can also be made to lock manually by quickly
pulling on the shoulder belt. Rear seat belts (if equipped) cannot be
made to lock up by pulling quickly on the belt.
Automatic locking mode
In this mode, the shoulder belt is automatically pre-locked. The belt will
still retract to remove any slack in the shoulder belt.
The automatic locking mode is not available on the driver safety belt.
When to use the automatic locking mode
²Anytimea child safety seat is installed in a passenger front or
outboard rear seating position (if equipped). Children 12 years old and
under should be properly restrained in the rear seat whenever
possible. Refer toSafety Restraints for ChildrenorSafety Seats for
Childrenlater in this chapter.
Seating and safety restraints
104
Page 127 of 280

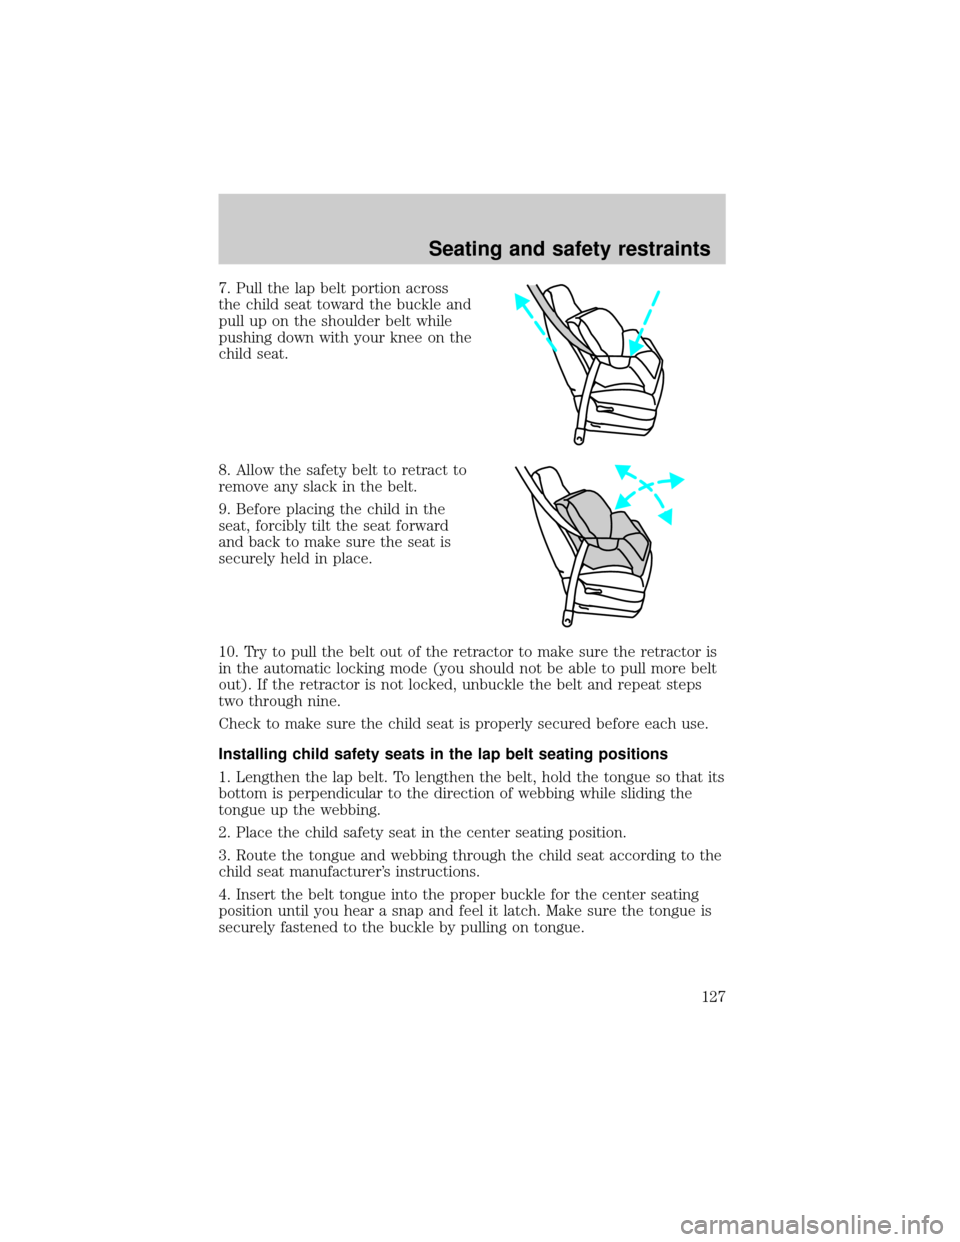
7. Pull the lap belt portion across
the child seat toward the buckle and
pull up on the shoulder belt while
pushing down with your knee on the
child seat.
8. Allow the safety belt to retract to
remove any slack in the belt.
9. Before placing the child in the
seat, forcibly tilt the seat forward
and back to make sure the seat is
securely held in place.
10. Try to pull the belt out of the retractor to make sure the retractor is
in the automatic locking mode (you should not be able to pull more belt
out). If the retractor is not locked, unbuckle the belt and repeat steps
two through nine.
Check to make sure the child seat is properly secured before each use.
Installing child safety seats in the lap belt seating positions
1. Lengthen the lap belt. To lengthen the belt, hold the tongue so that its
bottom is perpendicular to the direction of webbing while sliding the
tongue up the webbing.
2. Place the child safety seat in the center seating position.
3. Route the tongue and webbing through the child seat according to the
child seat manufacturer's instructions.
4. Insert the belt tongue into the proper buckle for the center seating
position until you hear a snap and feel it latch. Make sure the tongue is
securely fastened to the buckle by pulling on tongue.
Seating and safety restraints
127
Page 239 of 280

3. Remove bulb socket from the
parking lamp assembly by turning it
counterclockwise.
4. Pull bulb straight out of socket
and press in the new bulb.
5. Install the bulb socket into the
lamp assembly by turning clockwise.
6. Align top and bottom ribs of
parking lamp assembly with
corresponding slots on front of
vehicle.
7. Push gently until parking lamp
assembly seats (you will hear a
snap).
8. Install screw on lamp assembly.
Replacing tail/brake/turn signal/backup lamp bulbs
The tail/brake/turn signal and
backup lamp bulbs are located in
the tail lamp assembly, one just
below the other. Follow the same
steps to replace either bulb:
1. If equipped, remove tail lamp
covers.
2. Open the liftgate to expose the
lamp assembly screws.
3. Remove the two bolts from the
tail lamp assembly.
4. Carefully pull the lamp assembly
from the tailgate pillar to disengage two hidden snap-in retainers. (Flare
side tail lamps are not equipped with snap-in retainers.)
Maintenance and care
239
Page 246 of 280

Cleaning leather seats (if equipped)
To clean, simply use a soft cloth dampened with water and a mild soap.
Wipe the leather again with a damp cloth to remove soap residue. Dry
with a soft cloth. For tougher soiling concerns, Ford recommends using
the Deluxe Leather Care Kit F8AZ-19G253±AA, which is available from
your Ford Dealer. This mild cleaner and special pad, cleans the leather
and maintains its natural beauty. Follow the instructions on the cleaner
label. Regular cleaning of your leather upholstery helps maintain its
resiliency and color.
Do not use household cleaning products, alcohol solutions,
solvents or cleaners intended for rubber, vinyl or plastics.
Tonneau cover care
To avoid damage to the vinyl tonneau cover, do not use any silicone
based cleaner or conditioner. Do not use stiff bristle brushes or abrasive
materials or cleaners.
Hot waxes applied by commercial car washes can affect the cleanability
of vinyl material.
Using high water pressure or wand-type car washes against the vinyl
cover and tonneau frame rails may cause water leaks and possible seal
damage.
Maintenance and care
246