Page 239 of 365
yellowblue
5-18 How to Add Coolant to the Radiator
NOTICE:
Your engine has a specific radiator fill procedure.
Failure to follow this procedure could cause your
engine to overheat and be severely damaged.
1. You can remove the radiator pressure cap when the
cooling system, including the radiator pressure cap and
upper radiator hose, is no longer hot. Turn the pressure
cap slowly counterclockwise until it first stops.
(Don't press down while turning the pressure cap.)
If you hear a hiss, wait for that to stop. A hiss means
there is still some pressure left.
2. Then keep turning the pressure cap, but now push
down as you turn it. Remove the pressure cap.
Page 240 of 365
yellowblue
5-19
CAUTION:
You can be burned if you spill coolant on hot
engine parts. Coolant contains ethylene glycol
and it will burn if the engine parts are hot
enough. Don't spill coolant on a hot engine.
3. If you have the 3800 V6 engine, remove the 3800 Series
II V6 engine cover shield to access the bleed valve.
A. Clean the area around the engine oil fill tube and
cap before removing. Twist the oil fill tube, with
cap attached, counterclockwise and remove it.
B. Lift the engine cover shield at the front, slide the
catch tab out of the engine bracket and remove
the cover shield.
C. Put the oil fill tube, with cap attached, in the valve
cover oil fill hole until you're ready to replace the
cover shield.
Page 242 of 365
yellowblue
5-21
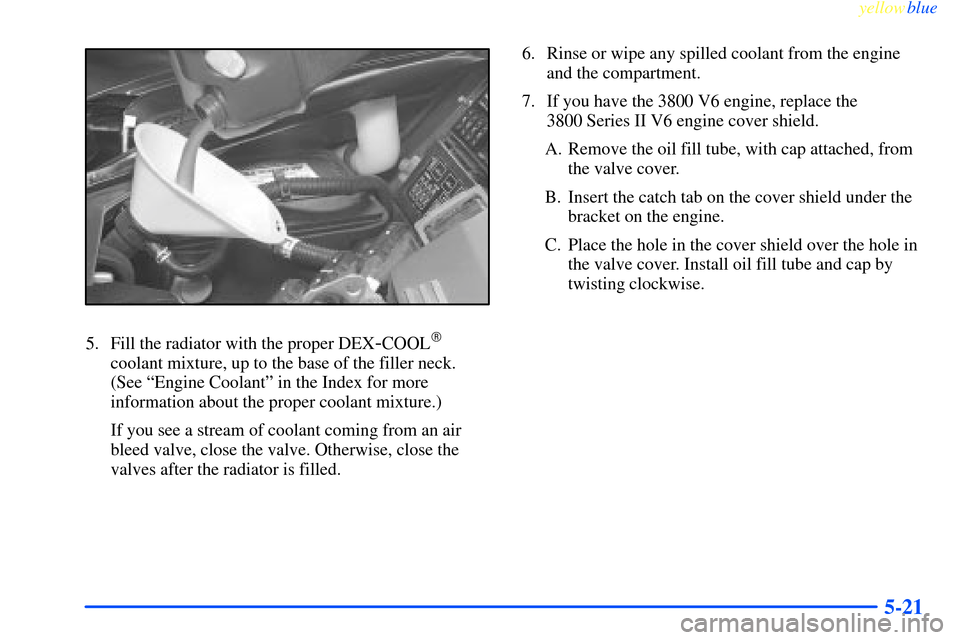
5. Fill the radiator with the proper DEX-COOL�
coolant mixture, up to the base of the filler neck.
(See ªEngine Coolantº in the Index for more
information about the proper coolant mixture.)
If you see a stream of coolant coming from an air
bleed valve, close the valve. Otherwise, close the
valves after the radiator is filled.6. Rinse or wipe any spilled coolant from the engine
and the compartment.
7. If you have the 3800 V6 engine, replace the
3800 Series II V6 engine cover shield.
A. Remove the oil fill tube, with cap attached, from
the valve cover.
B. Insert the catch tab on the cover shield under the
bracket on the engine.
C. Place the hole in the cover shield over the hole in
the valve cover. Install oil fill tube and cap by
twisting clockwise.
Page 245 of 365
yellowblue
5-24
Changing a Flat Tire
If a tire goes flat, avoid further tire and wheel damage
by driving slowly to a level place. Turn on your hazard
warning flashers.
CAUTION:
Changing a tire can cause an injury. The vehicle
can slip off the jack and roll over you or other
people. You and they could be badly injured.
Find a level place to change your tire. To help
prevent the vehicle from moving:
1. Set the parking brake firmly.
2. Put the shift lever in PARK (P).
3. Turn off the engine.
To be even more certain the vehicle won't move,
you can put blocks at the front and rear of the
tire farthest away from the one being changed.
That would be the tire on the other side of the
vehicle, at the opposite end.
The following steps will tell you how to use the jack and
change a tire.
Page 246 of 365
yellowblue
5-25 Removing the Spare Tire and Tools
The equipment you'll need
is in the trunk.
Turn the center nut on the compact spare cover
counterclockwise to remove it.
Remove the compact spare tire. See ªCompact Spare
Tireº later in this section for more information about the
compact spare.
Page 247 of 365
yellowblue
5-26
Turn the nut holding the jack counterclockwise and
remove it. Then remove the jack and wrench.The tools you'll be using include the jack (A) extension
and protector/guide (B) and wheel wrench (C).
If there is a wheel cover, loosen the plastic nut caps with
the wheel wrench. They won't come off. Then, using the
flat end of the wheel wrench, pry along the edge of the
cover until it comes off.
If your vehicle has wheel nut caps, remove them using
the wheel wrench.
Page 248 of 365
yellowblue
5-27 Removing the Flat Tire and Installing
the Spare Tire
1. Using the wheel wrench, loosen all the wheel nuts.
Don't remove them yet.
The diagram shows you where you should place
your jack. Use the bolts (A) as a guide when
positioning the the jack lift head (C) near the rear
edge of the front wheel opening (B). Turn the jack
handle clockwise to raise the jack lift head a
few inches.
For jacking at the vehicle's front location, put jack
lift about 8.5 inches (21.5 cm) from the rear edge of
the front wheel opening in the cutout of the rocker
panel molding.
Page 250 of 365
yellowblue
5-29
2. Raise the vehicle by turning the jack handle
clockwise. Raise the vehicle far enough off the
ground for the spare tire to fit under the vehicle.
Remove all wheel nuts and take off the flat tire.
3. Remove any rust or dirt
from the wheel bolts,
mounting surfaces and
spare wheel.
CAUTION:
Rust or dirt on the wheel, or on the parts to
which it is fastened, can make the wheel nuts
become loose after a time. The wheel could come
off and cause an accident. When you change a
wheel, remove any rust or dirt from the places
where the wheel attaches to the vehicle. In an
emergency, you can use a cloth or a paper towel
to do this; but be sure to use a scraper or wire
brush later, if you need to, to get all the rust or
dirt off.
CAUTION:
Never use oil or grease on studs or nuts. If you
do, the nuts might come loose. Your wheel could
fall off, causing a serious accident.


 extension
and protector/guide (B) and")

