Page 489 of 656

7F-4 DIFFERENTIAL (REAR)
Precaution for Maintenance Service
•When having driven through water, check immediately if
water has entered (if so, oil is cloudy). Water mixed oil must
be changed at once.
•Whenever vehicle is hoisted for any other service work than
oil change, also be sure to check for oil leakage and status of
breather hoses.
Differential Gear Oil Change
1) Before oil change or inspection, be sure to stop engine and
lift up vehicle horizontally.
2) Check oil level and existence of leakage. If leakage is found,
correct its cause.
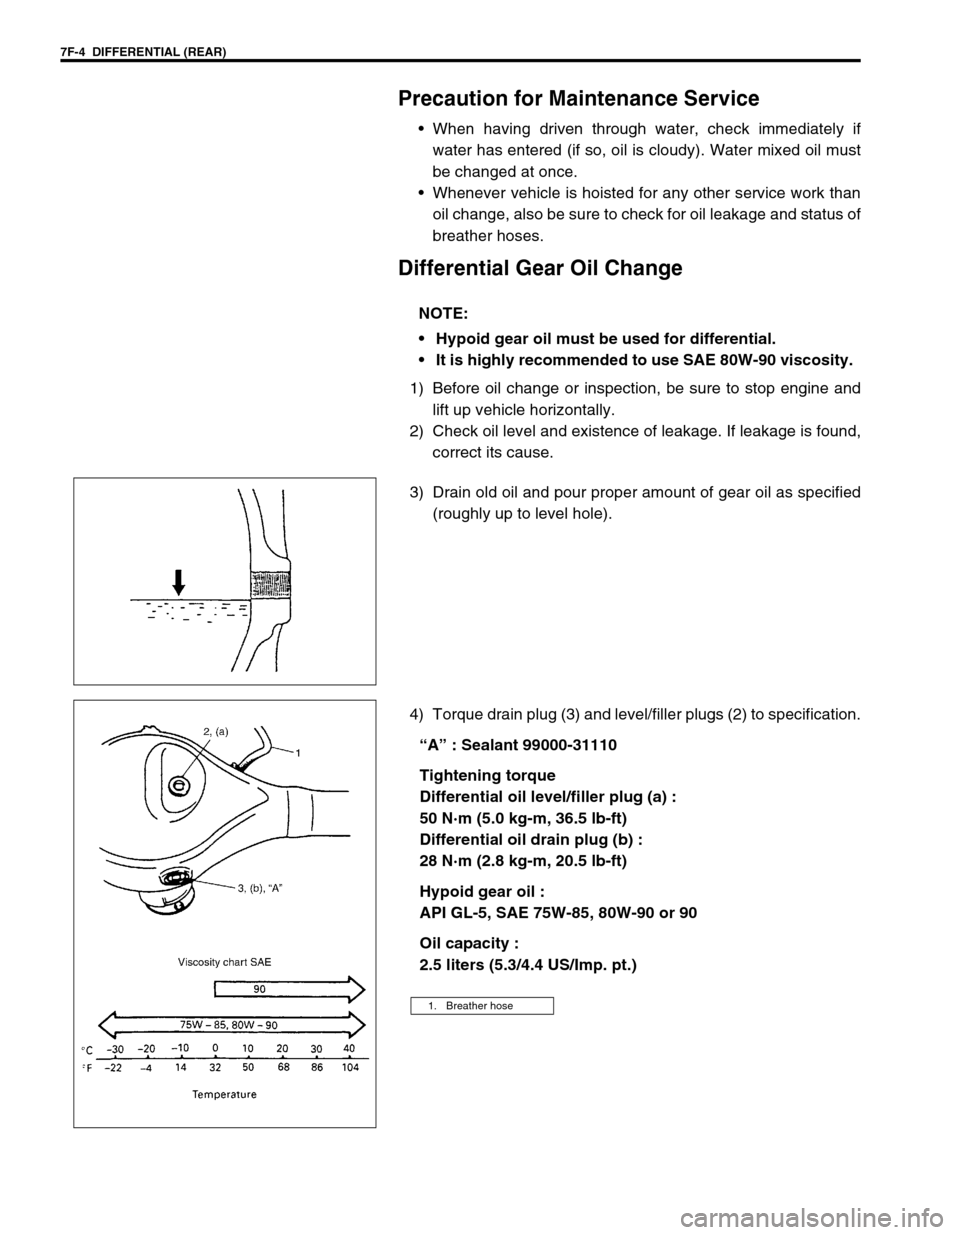
3) Drain old oil and pour proper amount of gear oil as specified
(roughly up to level hole).
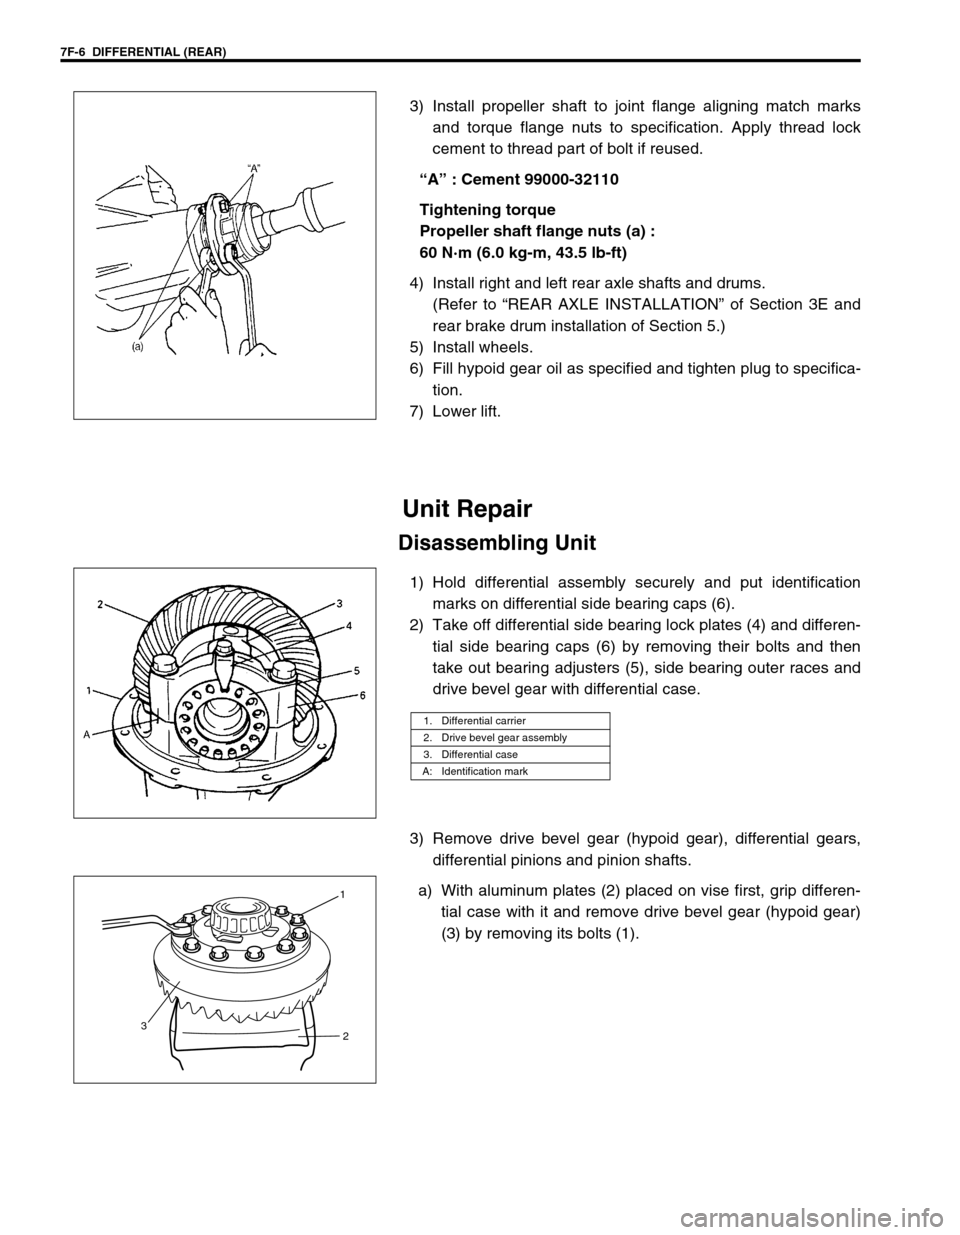
4) Torque drain plug (3) and level/filler plugs (2) to specification.
“A” : Sealant 99000-31110
Tightening torque
Differential oil level/filler plug (a) :
50 N·m (5.0 kg-m, 36.5 lb-ft)
Differential oil drain plug (b) :
28 N·m (2.8 kg-m, 20.5 lb-ft)
Hypoid gear oil :
API GL-5, SAE 75W-85, 80W-90 or 90
Oil capacity :
2.5 liters (5.3/4.4 US/Imp. pt.) NOTE:
Hypoid gear oil must be used for differential.
It is highly recommended to use SAE 80W-90 viscosity.
1. Breather hose
Page 490 of 656
DIFFERENTIAL (REAR) 7F-5
Rear Differential Assembly
Dismounting
1) Lift up vehicle and drain oil from rear differential housing.
2) Remove rear brake drums and pull out right and left rear axle
shafts. (Refer to “REAR AXLE SHAFT REMOVAL” of Section
3E.)
3) Before removing propeller shaft, give match marks (1) on
joint flange and propeller shaft as shown.
4) Remove propeller shaft by removing its flange bolts and
nuts.
5) Remove differential assembly by removing its 8 fastening
bolts (1).
Remounting
1) Clean mating surfaces of rear axle and differential assembly
and apply sealant to axle side evenly.
“A” : Sealant 99000-31110
2) Install differential assembly to axle and fix it with bolts (1)
tightened to specified torque.
Tightening torque
Differential carrier bolts (a) :
55 N·m (5.5 kg-m, 40.0 lb-ft)
Page 491 of 656

7F-6 DIFFERENTIAL (REAR)
3) Install propeller shaft to joint flange aligning match marks
and torque flange nuts to specification. Apply thread lock
cement to thread part of bolt if reused.
“A” : Cement 99000-32110
Tightening torque
Propeller shaft flange nuts (a) :
60 N·m (6.0 kg-m, 43.5 lb-ft)
4) Install right and left rear axle shafts and drums.
(Refer to “REAR AXLE INSTALLATION” of Section 3E and
rear brake drum installation of Section 5.)
5) Install wheels.
6) Fill hypoid gear oil as specified and tighten plug to specifica-
tion.
7) Lower lift.
Unit Repair
Disassembling Unit
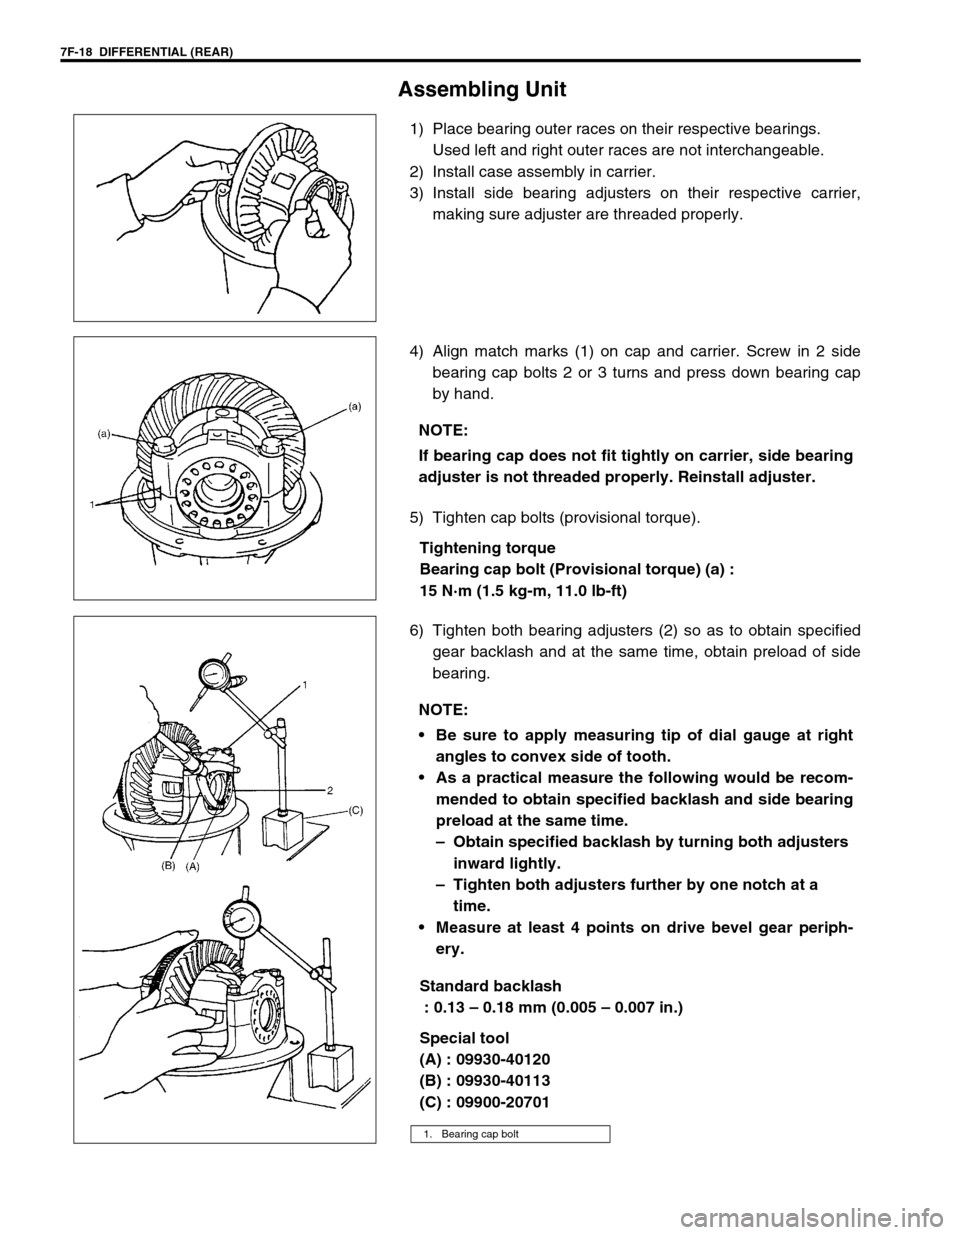
1) Hold differential assembly securely and put identification
marks on differential side bearing caps (6).
2) Take off differential side bearing lock plates (4) and differen-
tial side bearing caps (6) by removing their bolts and then
take out bearing adjusters (5), side bearing outer races and
drive bevel gear with differential case.
3) Remove drive bevel gear (hypoid gear), differential gears,
differential pinions and pinion shafts.
a) With aluminum plates (2) placed on vise first, grip differen-
tial case with it and remove drive bevel gear (hypoid gear)
(3) by removing its bolts (1).
1. Differential carrier
2. Drive bevel gear assembly
3. Differential case
A: Identification mark
1
3
2
Page 496 of 656
DIFFERENTIAL (REAR) 7F-11
4) In the same manner as described in Step 1), install thrust
washer (2), spring washer (1) and differential gear (4).
5) Install differential left case (1) and then tighten screws to
specified torque.
“A” : Cement 99000-32110
Tightening torque
Differential case screw (a) :
9 N·m (0.9 kg-m, 6.5 lb-ft)
6) Clean and degrease mating surface of drive bevel gear
(hypoid gear) (1).
7) Apply thread lock cement to hatched part of drive bevel gear
(1) as shown in the figure.
“A” : Cement 99000-32110
8) Put drive bevel gear (3) on differential case (1) and fasten
them with bolts (2) by tightening them to specified torque.
Use thread lock cement for bolts (2).
“A” : Cement 99000-32110
Tightening torque
Bevel gear bolts (a) : 105 N·m (10.5 kg-m, 76.0 lb-ft)
3. Differential left case
5. Differential pinion
3 Differential right case1
2, (a), “A”
32, (a), “A”
“
A”
1
CAUTION:
Use of any other bolts than that specified is prohibited.1
2, (a), “A”
3
Page 497 of 656
7F-12 DIFFERENTIAL (REAR)
9) Install special tool to differential case assembly and check
that preload is within specification below. If preload exceeds
specified value, check if foreign matter is caught or gear is
damaged.
Special tool
(B) : 09928-06510
Side gear preload
: Max. 2.5 N·m (0.25 kg-m, 1.8 lb-ft)
Differential side bearing
1) Press-fit side bearing (1) with special tool and press.
Special tool
(A) : 09944-66020
2) Hold bearing press-fitted in Step 1) with holder and press-fit
side bearing on the other side.
Special tool
(A) : 09944-66020
(B) : 09951-16060
1. Torque wrench
2. Differential case assembly
3. Aluminum plate
4. Vise
(A)
1
NOTE:
Be sure to use bearing holder for the purpose of protect-
ing lower bearing.
Page 499 of 656
7F-14 DIFFERENTIAL (REAR)
1) Install special tools with bearings and universal joint flange
(2) to differential carrier (1).
Special tool
(E) : 09951-46010
(F) : 09926-78311-002
2) Tighten flange nut (1) so that specified bearing preload is
obtained.
Special tool
(C) : 09922-75222
(F) : 09926-78311-002
Pinion bearing preload
: 0.9 – 1.7 N·m (9.0 – 17.0 kg-cm, 7.8 – 14.7 lb-in.)
Spring measure reading with special tool
: 18N – 34N (1.8 – 3.4 kg, 4.0 – 7.5 lb) NOTE:
This installation requires no spacer or oil seal.
NOTE:
Before taking measurement with spring balance (2) or
torque wrench (3), check for rotation by hand and apply
small amount of differential oil to bearings.
On measuring preload, rotate the drive bevel pinion
about 1 rotation per 2 seconds.
4. Socket with adapter
Page 502 of 656
DIFFERENTIAL (REAR) 7F-17
9) While tightening flange nut gradually with special tool and
power wrench (4 - 10 magnification) (1), set preload of pinion
to specification.
Pinion bearing preload
: 0.9 – 1.7 N·m (9.0 – 17.0 kg-cm, 7.8 – 14.7 lb-in.)
Spring measure reading with special tool
: 16 – 30 N (1.6 – 3.0 kg, 3.5 – 6.6 lb)
Special tool
(C) : 09922-76560
(J) : 09922-66021 NOTE:
Before taking measurement with spring balance (3) or
torque wrench (4), check for smooth rotation by hand.
On measuring preload, rotate the drive bevel pinion
about 1 rotation per 2 seconds.
Be sure to tighten gradually and carefully till specified
starting torque is obtained. Turning back overtightened
flange nuts should be avoided.
2. Socket wrench
Page 503 of 656

7F-18 DIFFERENTIAL (REAR)
Assembling Unit
1) Place bearing outer races on their respective bearings.
Used left and right outer races are not interchangeable.
2) Install case assembly in carrier.
3) Install side bearing adjusters on their respective carrier,
making sure adjuster are threaded properly.
4) Align match marks (1) on cap and carrier. Screw in 2 side
bearing cap bolts 2 or 3 turns and press down bearing cap
by hand.
5) Tighten cap bolts (provisional torque).
Tightening torque
Bearing cap bolt (Provisional torque) (a) :
15 N·m (1.5 kg-m, 11.0 lb-ft)
6) Tighten both bearing adjusters (2) so as to obtain specified
gear backlash and at the same time, obtain preload of side
bearing.
Standard backlash
: 0.13 – 0.18 mm (0.005 – 0.007 in.)
Special tool
(A) : 09930-40120
(B) : 09930-40113
(C) : 09900-20701
NOTE:
If bearing cap does not fit tightly on carrier, side bearing
adjuster is not threaded properly. Reinstall adjuster.
NOTE:
Be sure to apply measuring tip of dial gauge at right
angles to convex side of tooth.
As a practical measure the following would be recom-
mended to obtain specified backlash and side bearing
preload at the same time.
–Obtain specified backlash by turning both adjusters
inward lightly.
–Tighten both adjusters further by one notch at a
time.
Measure at least 4 points on drive bevel gear periph-
ery.
1. Bearing cap bolt