1999 SUZUKI BALENO clock
[x] Cancel search: clockPage 8 of 65

60G-74E
BEFORE DRIVING
72F-03-002E
Central door locking system (if equipped)
You can lock and unlock all the side doors and
simultaneously by using the key in the driver's
door lock or the front passenger's door lock.
60G-03-006E
You can also lock or unlock all the side
doors by depressing the right or left of the
switch ©, respectively.
NOTE:
• Moving the lock knob on each door locks
or unlocks that door only.
• Be sure to hold the door handle up when
you close a locked front door, or the door
will not remain locked.
60G-03-005
Child-Proof Locks (if equipped)
As illustrated, a child-proof lock is provided
for both rear doors. When the lock lever is
down, position ©, the child proof lock is
activated, and when up, in position © the
child-proof lock is deactivated, when the
child-proof lock is activated, the rear door
cannot be opened from the inside even if
the inside door lock is unlocked but can be
opened from the outside.
3-4
BEFORE DRIVING
80G-74E
70F-01-008E
Trunk (Boot) Ud
To unlock the lid, insert the key and turn it
clockwise. You can also unlock the lid by pulling
the release lever located on the outboard side
of the driver's seat.
60G-03-007E
3-5
18
Be sure to place the child-proof lock
in the locked position whenever
children are seated in the rear.
CAUTION
Do not use the key to lift up the lid,
or the key may break off In the lock.
Always make sure that the trunk lid Is
closed and latched securely. Closing
the lid completely helps to prevent
exhaust gases from entering the car.
Do not keep the trunk lid open for a long
time, or the battery will discharge.
Page 15 of 65

60G-74E
STEERING COLUMN CONTROLS
STEERING COLUMN CONTROLS
ignition Switch 4.1
Lighting/Tum Signal Control Lever 4-2
Windscreen Wiper and Washer Lever 4-4
Horn 4.5
Rear Wiper and Washer(lf equipped) 4-5
31
STEERING COLUMN CONTROLS
60G-74E
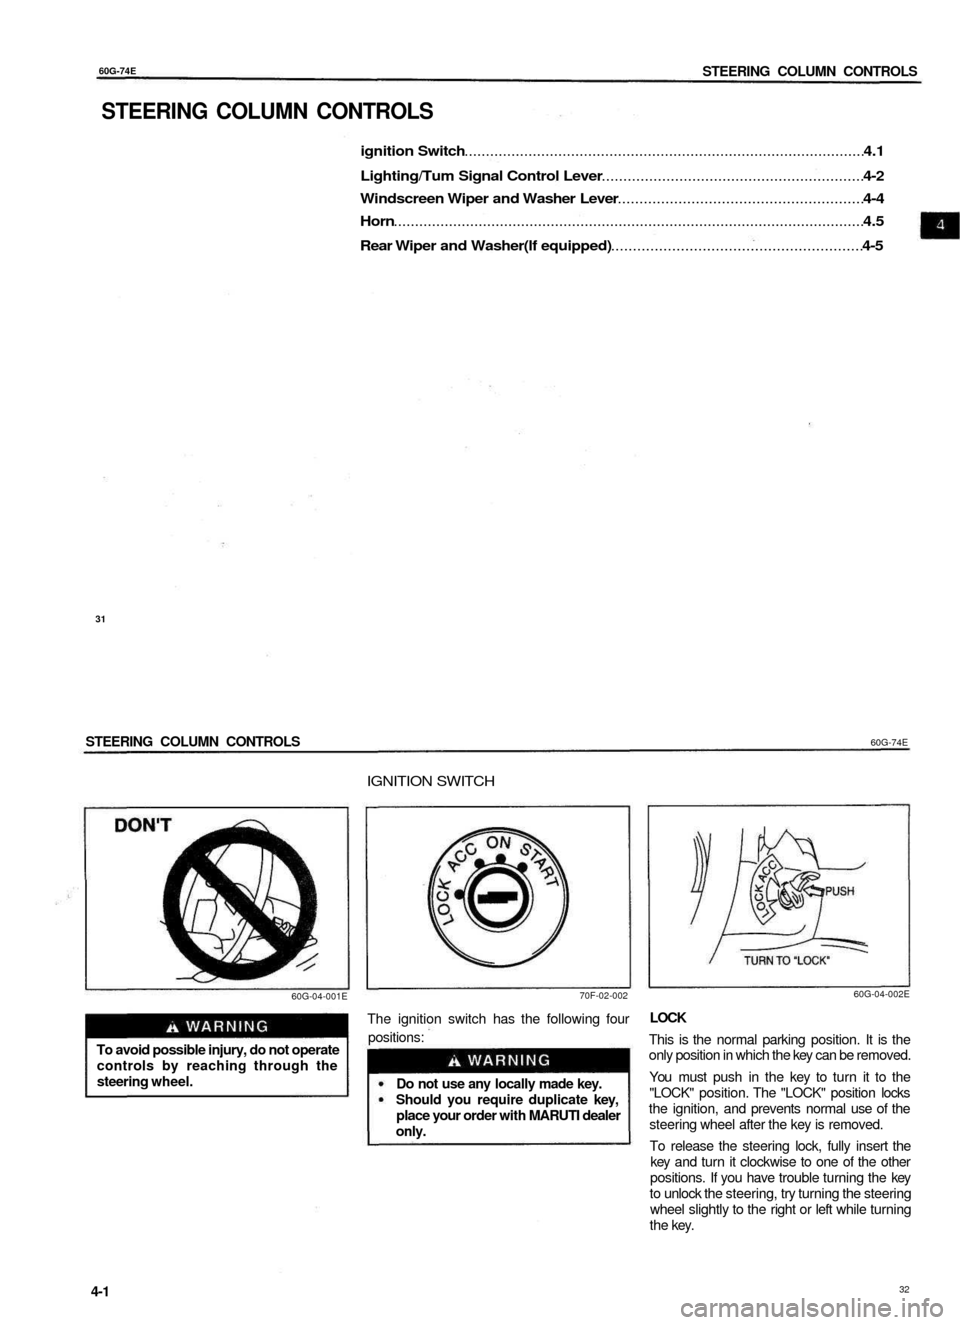
IGNITION SWITCH
60G-04-001E
70F-02-002
To avoid possible injury, do not operate
controls by reaching through the
steering wheel.
The ignition switch has the following four
positions:
Do not use any locally made key.
Should you require duplicate key,
place your order with MARUTI dealer
only.
60G-04-002E
LOCK
This is the normal parking position. It is the
only position in which the key can be removed.
You must push in the key to turn it to the
"LOCK" position. The "LOCK" position locks
the ignition, and prevents normal use of the
steering wheel after the key is removed.
To release the steering lock, fully insert the
key and turn it clockwise to one of the other
positions. If you have trouble turning the key
to unlock the steering, try turning the steering
wheel slightly to the right or left while turning
the key.
4-1
32
Page 16 of 65

6OG-74E
STEERING COLUMN CONTROLS
ACC
Accessories such as the radio can operate,
but the engine is off.
ON
This is the normal operating position. All
electrical systems are on.
START
This is the position for starting the engine using
the starter motor. The key should be released
from this position as soon as the engine starts.
Never remove the ignition key while
the vehicle is moving. The steering
wheel will lock and you will not be
able to steer the vehicle.
Do not leave children alone In a
parked vehicle. Unattended children
could cause accidental movement of
the vehicle, which could result in
severe personal Injury.
Always remove the key when parked
to prevent unintentional operation of
the vehicle and to improve security.
LIGHTING/TURN SIGNAL
CONTROL LEVER
CAUTION
Do not use the starter motor for
more than 15 seconds at a time. If
the engine does not start; wait 15
seconds before trying again. If the
engine does not start after several
attempts, check the fuel and ignition
systems or consult your MARUTI
dealer.
Do not leave the ignition switch in
the "ON" position if the engine is not
running as the battery will
discharge.
60G-04-003
This control lever is located on the outboard
side of the steering column. Operate the lever
as described below.
Lighting Operation
To turn the lights on or off, twist the knob on
the end of the lever. There are three positions:
in the "OFF" position all lights are off; in the
middle position the front parking lights, tail-
lights, registration plate light, and instrument
lights are on, but the headlights are off; in the
third position the headlights come on in
addition to the other lights.
33
4-2
STEERING COLUMN CONTROLS
60G-74E
With the headlights on, push the lever forward
to switch to the high beams (main beams) or
pull the lever toward you to switch to the low
beams. When the high beams (main beams)
are on, a light on the instrument panel will
come on. To flash the high beams (main
beams) pull the lever slightly towards you and
release it.
Lights "On" Reminder (if Equipped)
A buzzer/chime sounds to remind you to turn
off the lights if they are left on when the ignition
key is removed and the driver's door is opened.
Turn Signal Operation
With the ignition switch in the "ON" position,
move the lever up or down to activate the left
or right turn signals.
Normal Turn Signal
Move the lever clockwise until it clicks to signal
a right turn or anticlockwise to signal a left
turn. When the turn is completed, the signal
will cancel and the lever will return to its normal
position.
6OG-04-006
Lane Change Signal
Some times, such as when changing lanes,
the steering wheel is not turned far enough
to cancel the turn signal. For convenience,
you can flash the turn signal by moving the
lever part way and holding it there. The
lever will return to its normal position when
you release it.
4-3
34
60G-04-006
60G-04-005
60G-04-004E
Page 17 of 65

60G-74E
STEERING COLUMN CONTROLS
WINDSCREEN WIPER AND
WASHER LEVER
60G-04-007E
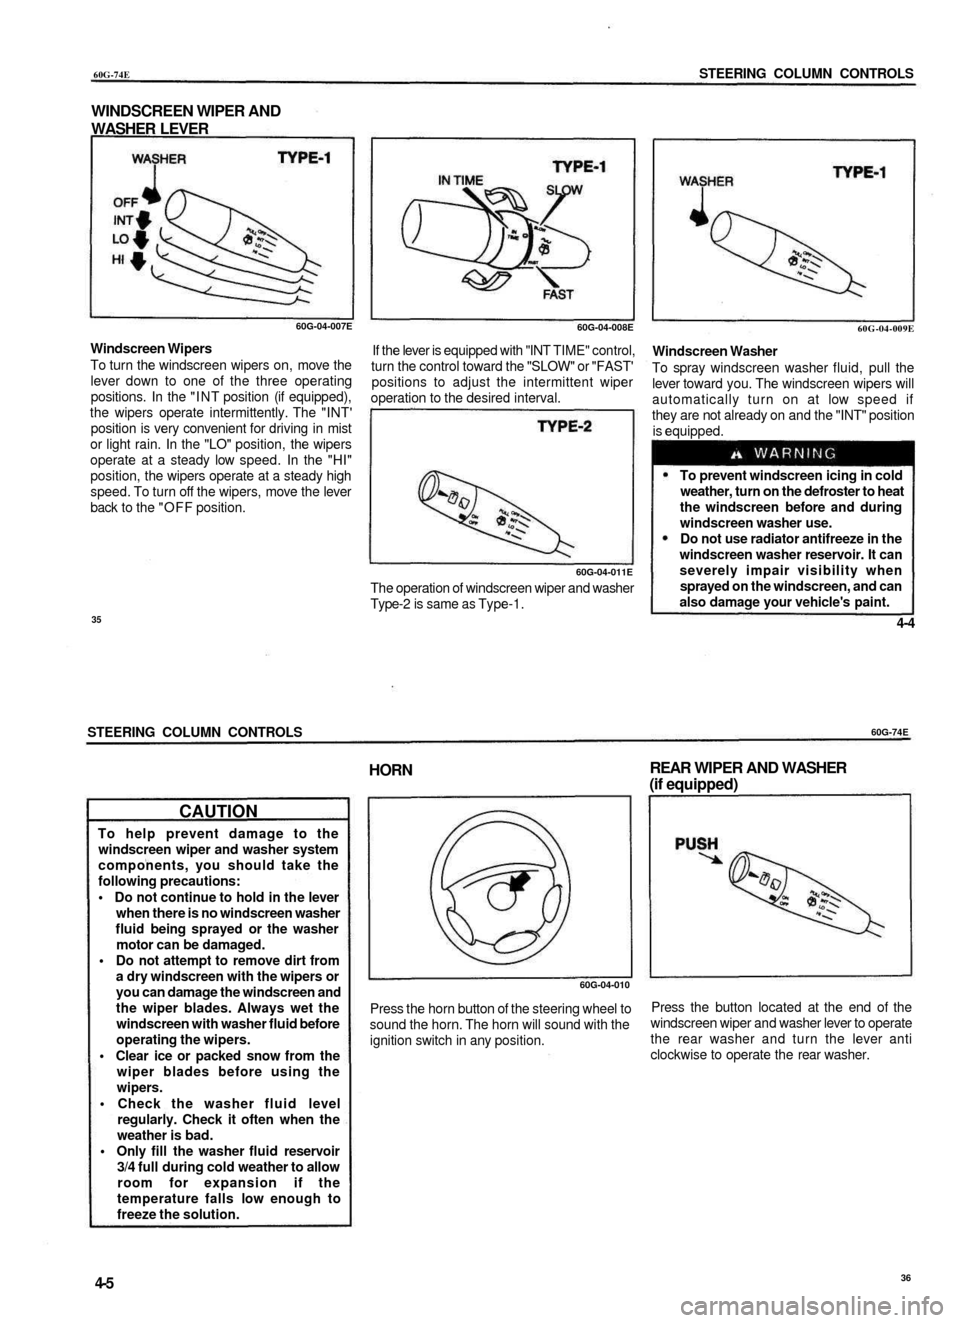
Windscreen Wipers
To turn the windscreen wipers on, move the
lever down to one of the three operating
positions. In the "INT position (if equipped),
the wipers operate intermittently. The "INT'
position is very convenient for driving in mist
or light rain. In the "LO" position, the wipers
operate at a steady low speed. In the "HI"
position, the wipers operate at a steady high
speed. To turn off the wipers, move the lever
back to the "OFF position.
60G-04-008E
If the lever is equipped with "INT TIME" control,
turn the control toward the "SLOW" or "FAST'
positions to adjust the intermittent wiper
operation to the desired interval.
60G-04-011E
The operation of windscreen wiper and washer
Type-2 is same as Type-1.
60G-04-009E
Windscreen Washer
To spray windscreen washer fluid, pull the
lever toward you. The windscreen wipers will
automatically turn on at low speed if
they are not already on and the "INT" position
is equipped.
To prevent windscreen icing in cold
weather, turn on the defroster to heat
the windscreen before and during
windscreen washer use.
Do not use radiator antifreeze in the
windscreen washer reservoir. It can
severely impair visibility when
sprayed on the windscreen, and can
also damage your vehicle's paint.
35
4-4
STEERING COLUMN CONTROLS
60G-74E
CAUTION
To help prevent damage to the
windscreen wiper and washer system
components, you should take the
following precautions:
• Do not continue to hold in the lever
when there is no windscreen washer
fluid being sprayed or the washer
motor can be damaged.
• Do not attempt to remove dirt from
a dry windscreen with the wipers or
you can damage the windscreen and
the wiper blades. Always wet the
windscreen with washer fluid before
operating the wipers.
• Clear ice or packed snow from the
wiper blades before using the
wipers.
• Check the washer fluid level
regularly. Check it often when the
weather is bad.
• Only fill the washer fluid reservoir
3/4 full during cold weather to allow
room for expansion if the
temperature falls low enough to
freeze the solution.
HORN
REAR WIPER AND WASHER
(if equipped)
60G-04-010
Press the horn button of the steering wheel to
sound the horn. The horn will sound with the
ignition switch in any position.
Press the button located at the end of the
windscreen wiper and washer lever to operate
the rear washer and turn the lever anti
clockwise to operate the rear washer.
4-5
36
Page 22 of 65

60G-74E
INSTRUMENT PANEL
ASHTRAY
GLOVE BOX
60G-05-010
843-05-011E
Front Ashtray
To remove the front panel ashtray for cleaning,
push down on the metal plate, and pull the
ashtray completely out of its holder.
Rear Ashtray
To remove the rear ashtray, push down on the
tongue and pull the ashtray out of its holder.
Make sure tobacco is fully extinguished
before closing the ashtray. Never throw
waste in the ashtray: it could create a
fire hazard.
60G-05-011
To open the glove box, pull the latch lever.
To close it, push the lid until It latches securely.
If a lock is equipped on the latch lever, lock
the glove box by inserting the key and turning
it clockwise and unlock the glove box by
turning the key counterclockwise.
Never drive with the glove box lid open.
It could cause injury if an accident
occurs.
45
5-8
INSTRUMENT PANEL
60G-74E
HEATING SYSTEM (if equipped)
The heating system provides heating
demisting, and ventilation.
a. Windscreen defroster
b. Side defroster
c. Side outlet
d. Center outlet
e. Floor outlet
60G-05-012
@
RECIRCULATED AIR FRESH AIR
60G-05-013
5-9
46
Page 28 of 65

OTHER CONTROLS AND EQUIPMENTS
60G-74E
FUEL FILLER CAP
60G-06-002
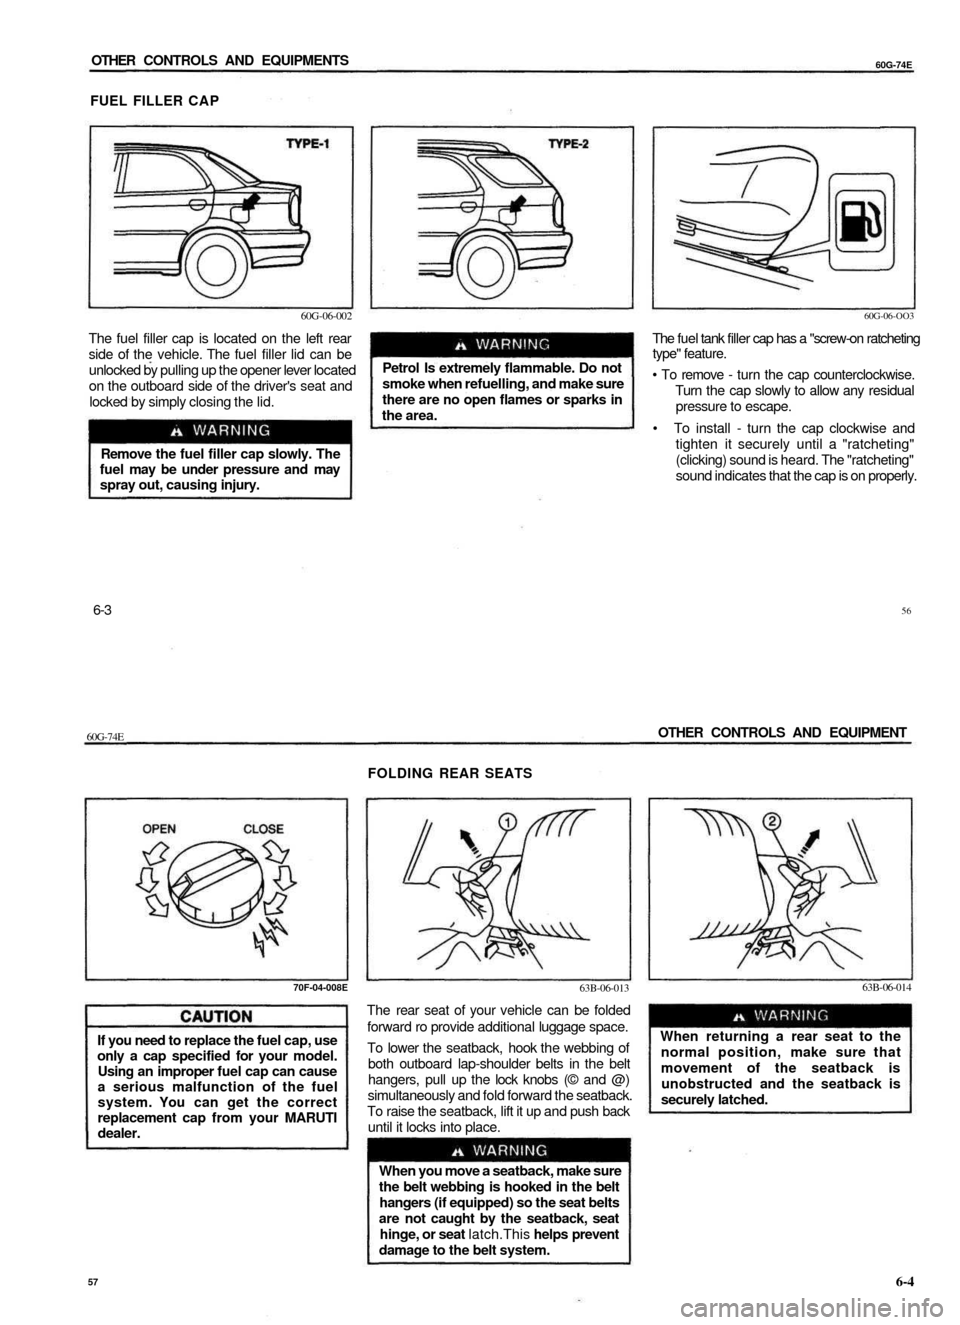
The fuel filler cap is located on the left rear
side of the vehicle. The fuel filler lid can be
unlocked by pulling up the opener lever located
on the outboard side of the driver's seat and
locked by simply closing the lid.
Remove the fuel filler cap slowly. The
fuel may be under pressure and may
spray out, causing injury.
Petrol Is extremely flammable. Do not
smoke when refuelling, and make sure
there are no open flames or sparks in
the area.
60G-06-OO3
The fuel tank filler cap has a "screw-on ratcheting
type" feature.
• To remove - turn the cap counterclockwise.
Turn the cap slowly to allow any residual
pressure to escape.
• To install - turn the cap clockwise and
tighten it securely until a "ratcheting"
(clicking) sound is heard. The "ratcheting"
sound indicates that the cap is on properly.
6-3
56
60G-74E
OTHER CONTROLS AND EQUIPMENT
FOLDING REAR SEATS
70F-04-008E
If you need to replace the fuel cap, use
only a cap specified for your model.
Using an improper fuel cap can cause
a serious malfunction of the fuel
system. You can get the correct
replacement cap from your MARUTI
dealer.
63B-06-013
The rear seat of your vehicle can be folded
forward ro provide additional luggage space.
To lower the seatback, hook the webbing of
both outboard lap-shoulder belts in the belt
hangers, pull up the lock knobs (© and @)
simultaneously and fold forward the seatback.
To raise the seatback, lift it up and push back
until it locks into place.
When you move a seatback, make sure
the belt webbing is hooked in the belt
hangers (if equipped) so the seat belts
are not caught by the seatback, seat
hinge, or seat latch.This helps prevent
damage to the belt system.
63B-06-014
When returning a rear seat to the
normal position, make sure that
movement of the seatback is
unobstructed and the seatback is
securely latched.
57
6-4
Page 30 of 65

OTHER CONTROLS AND EQUIPMENTS
60G-74E
CUP HOLDER (if equipped)
TYRE CHANGING TOOLS
60G-06-007
3)
Continue to lift up the bonnet until it is high
enough to support with the prop rod.
Make sure the bonnet Is fully closed
and latched before driving. If it is not,
it can fly up unexpectedly during
driving, obstructing your view and
resulting in an accident.
60G-06-008
To use the cup holder, pull it out fully. After
using the holder, push it back in.
Do not use the cup holder to hold cups
containing hot liquids, or objects other
than cups. Objects in the cup holder
may be thrown about during a sudden
stop or impact, and could cause
personal injury.
60G-06-009
The jack, wheel wrench and jack crank are
stowed in the luggage compartment behind
the rear seat.
To remove the jack, turn its shaft
counterclockwise and pull the jack out of the
storage bracket. To stow the jack, place it in
the storage bracket and turn the shaft
clockwise until the jack is securely held in
place.
6-7
60
60G-74E
OTHER CONTROLS AND EQUIPMENT
LUGGAGE COMPARTMENT TRIM TRUNK (BOOT) LIGHT (if equipped)
Luggage or other cargo placed in the luggage
compartment are hidden from view by a
luggage compartment trim.
Do not carry items on top of the
luggage compartment trim, even if they
are small and light. Objects on top of
the trim could be thrown about In an
accident, causing injury, or could
obstruct the driver's rear view.
60G-06-010
6OG-O6-O11
The jack should be used only to change
wheels. It is important to read the
jacking Instructions in the
EMERGENCY SERVICE section of this
manual before attempting to use the
jack.
When you open the trunk (boot) lid, the trunk
(boot) light comes on and remains on as
long as you keep the lid open.
Do not leave the boot (trunk) lid open
for a long time, or the battery will
discharge.
After using the jack, jack crank and
wheel wrench, be sure to stow them
securely or they can cause injury if an
accident occurs.
61
6-8
Page 31 of 65

OTHER CONTROLS AND EQUIPMENTS
60G-74E
FRONT SEAT BACK POCKET
(if equipped)
REAR SPOILER WITH STOP LAMP
Other Controls (if equipped)
63B-06-022
This pocket is provided for holding light and
soft things such as gloves, newspapers or
magazines.
Do not put hard or breakable objects
In the pocket. If an accident occurs,
objects such as bottles, cans etc. can
injure the occupants in the rear seat.
60G-50-002E
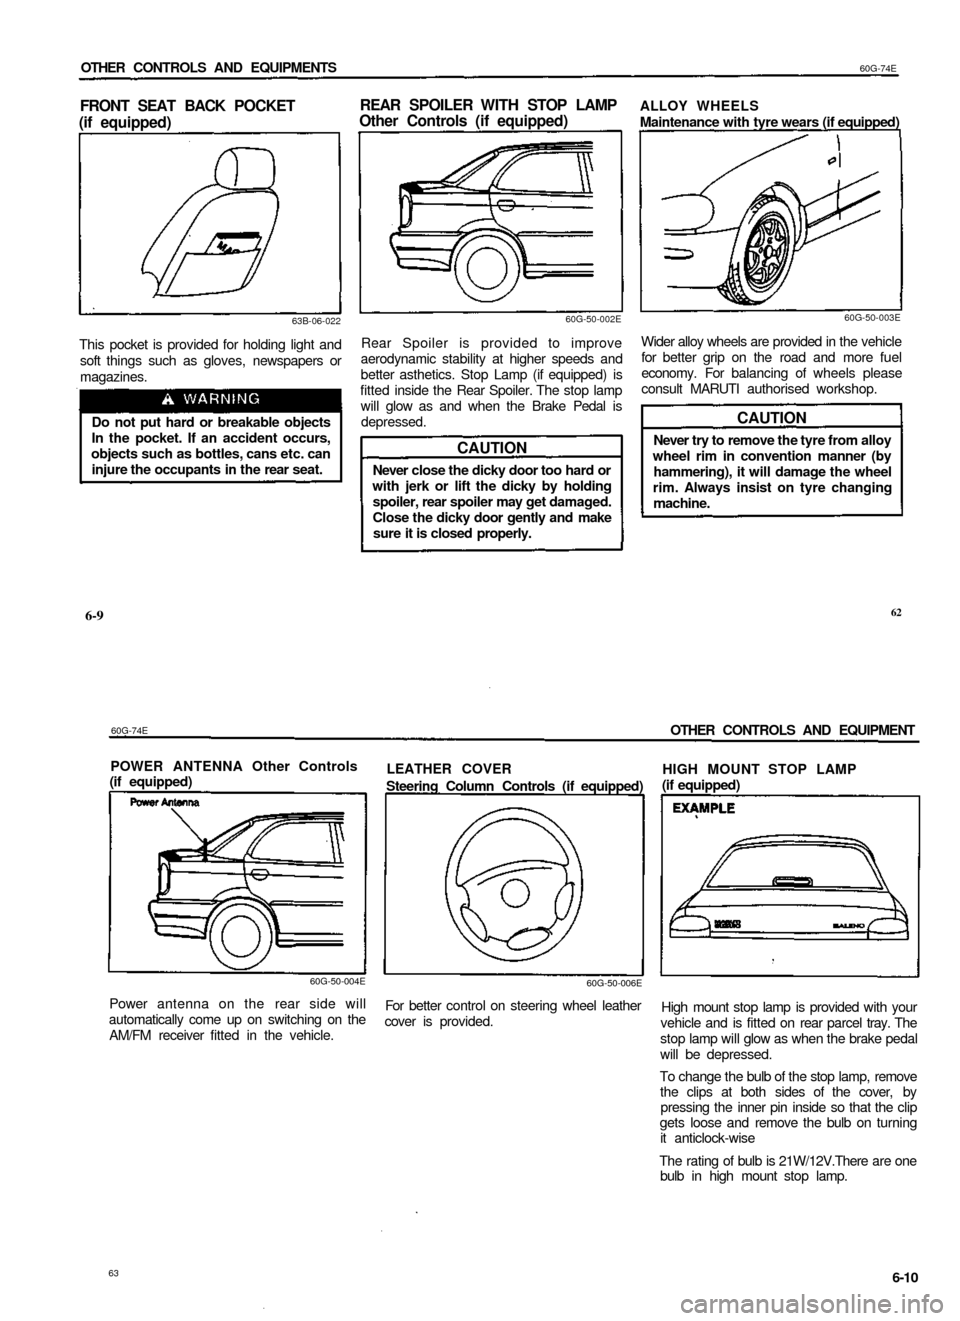
Rear Spoiler is provided to improve
aerodynamic stability at higher speeds and
better asthetics. Stop Lamp (if equipped) is
fitted inside the Rear Spoiler. The stop lamp
will glow as and when the Brake Pedal is
depressed.
CAUTION
Never close the dicky door too hard or
with jerk or lift the dicky by holding
spoiler, rear spoiler may get damaged.
Close the dicky door gently and make
sure it is closed properly.
ALLOY WHEELS
Maintenance with tyre wears (if equipped)
60G-50-003E
Wider alloy wheels are provided in the vehicle
for better grip on the road and more fuel
economy. For balancing of wheels please
consult MARUTI authorised workshop.
CAUTION
Never try to remove the tyre from alloy
wheel rim in convention manner (by
hammering), it will damage the wheel
rim. Always insist on tyre changing
machine.
6-9
62
60G-74E
OTHER CONTROLS AND EQUIPMENT
POWER ANTENNA Other Controls
(if equipped)
LEATHER COVER
Steering Column Controls (if equipped)
60G-50-004E
60G-50-006E
Power antenna on the rear side will
automatically come up on switching on the
AM/FM receiver fitted in the vehicle.
For better control on steering wheel leather
cover is provided.
HIGH MOUNT STOP LAMP
(if equipped)
High mount stop lamp is provided with your
vehicle and is fitted on rear parcel tray. The
stop lamp will glow as when the brake pedal
will be depressed.
To change the bulb of the stop lamp, remove
the clips at both sides of the cover, by
pressing the inner pin inside so that the clip
gets loose and remove the bulb on turning
it anticlock-wise
The rating of bulb is 21W/12V.There are one
bulb in high mount stop lamp.
63
6-10