Page 2171 of 2267

Precautions
lWhen installing each rubber part, final tightening must
be carried out under unladen condition* with tires on
ground.
*: Fuel, radiator coolant and engine oil full. Spare tire,
jack, hand tools and mats in designated positions.
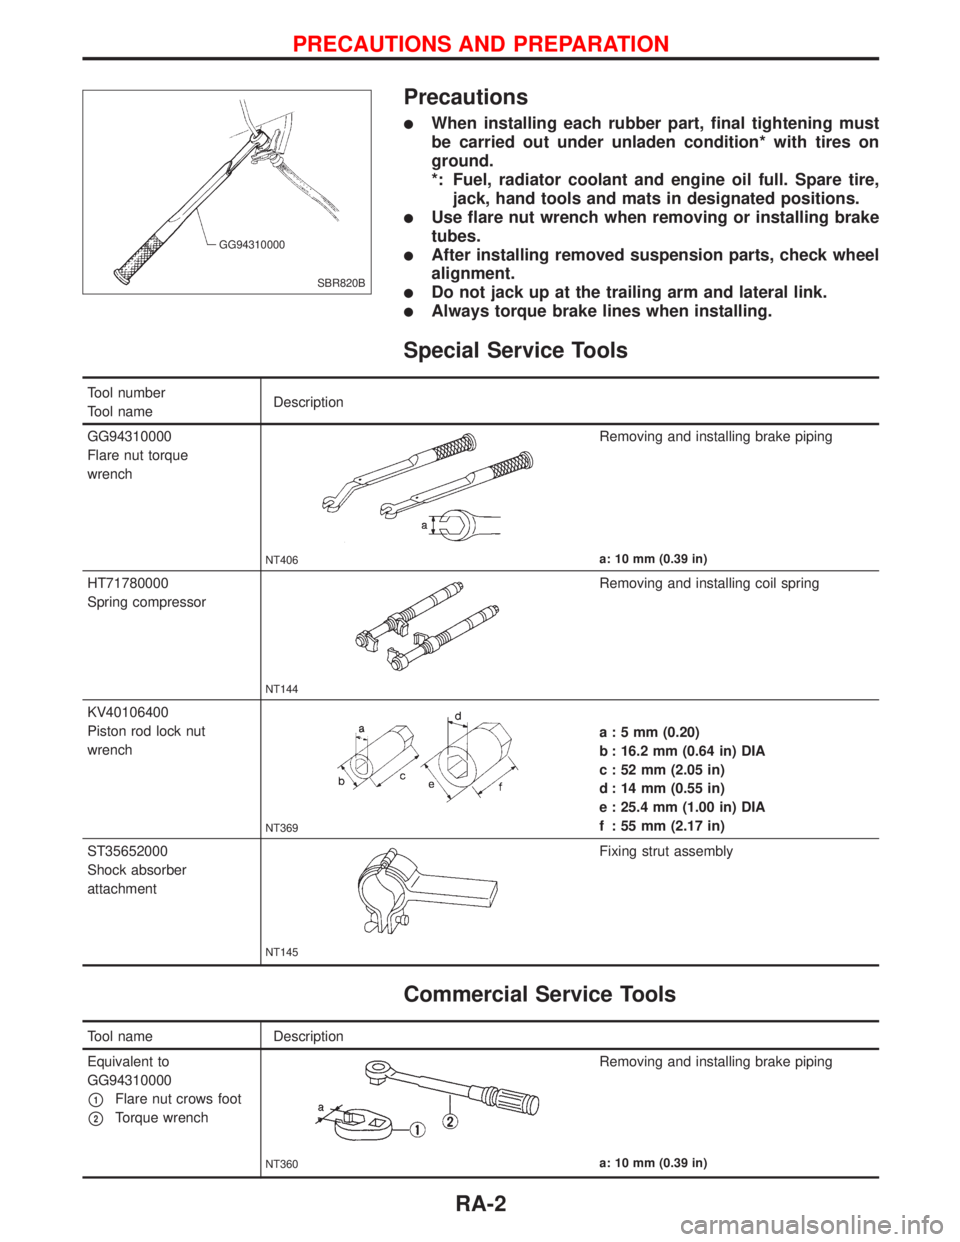
lUse flare nut wrench when removing or installing brake
tubes.
lAfter installing removed suspension parts, check wheel
alignment.
lDo not jack up at the trailing arm and lateral link.
lAlways torque brake lines when installing.
Special Service Tools
Tool number
Tool nameDescription
GG94310000
Flare nut torque
wrench
NT406
Removing and installing brake piping
a: 10 mm (0.39 in)
HT71780000
Spring compressor
NT144
Removing and installing coil spring
KV40106400
Piston rod lock nut
wrench
NT369
a : 5 mm (0.20)
b : 16.2 mm (0.64 in) DIA
c : 52 mm (2.05 in)
d : 14 mm (0.55 in)
e : 25.4 mm (1.00 in) DIA
f : 55 mm (2.17 in)
ST35652000
Shock absorber
attachment
NT145
Fixing strut assembly
Commercial Service Tools
Tool name Description
Equivalent to
GG94310000
p1Flare nut crows foot
p2Torque wrench
NT360
Removing and installing brake piping
a: 10 mm (0.39 in)
SBR820B GG94310000
PRECAUTIONS AND PREPARATION
RA-2
Page 2175 of 2267

Rear Wheel Alignment
PRELIMINARY INSPECTION
Make following checks. Adjust, repair or replace if necessary.
lCheck tires for wear and for improper inflation.
lCheck rear wheel bearings for excessive play.
lCheck wheels for deformation, cracks and other damage. If
deformed, remove tire and check wheel runout.
Wheel runout: Refer to SDS in FA section.
lCheck that rear shock absorber functions correctly.
lCheck rear axle and rear suspension parts for excessive
play.
lCheck vehicle posture (Unladen*).
*: Fuel, radiator and engine oil full. Spare tire, jack, hand
tools and mats in designated positions.
CAMBER
Camber is preset at factory and cannot be adjusted.
Camber:
Refer to SDS (RA-14).
lIf the camber is not within specification, inspect and replace
any damaged or worn rear suspension parts.
TOE-IN
Toe-in is preset at factory and cannot be adjusted.
Measure toe-in using following procedure. If out of
specification, inspect and replace any damaged or worn rear
suspension parts.
WARNING:
lAlways perform following procedure on a flat surface.
lMake sure that no person is in front of the vehicle before
pushing it.
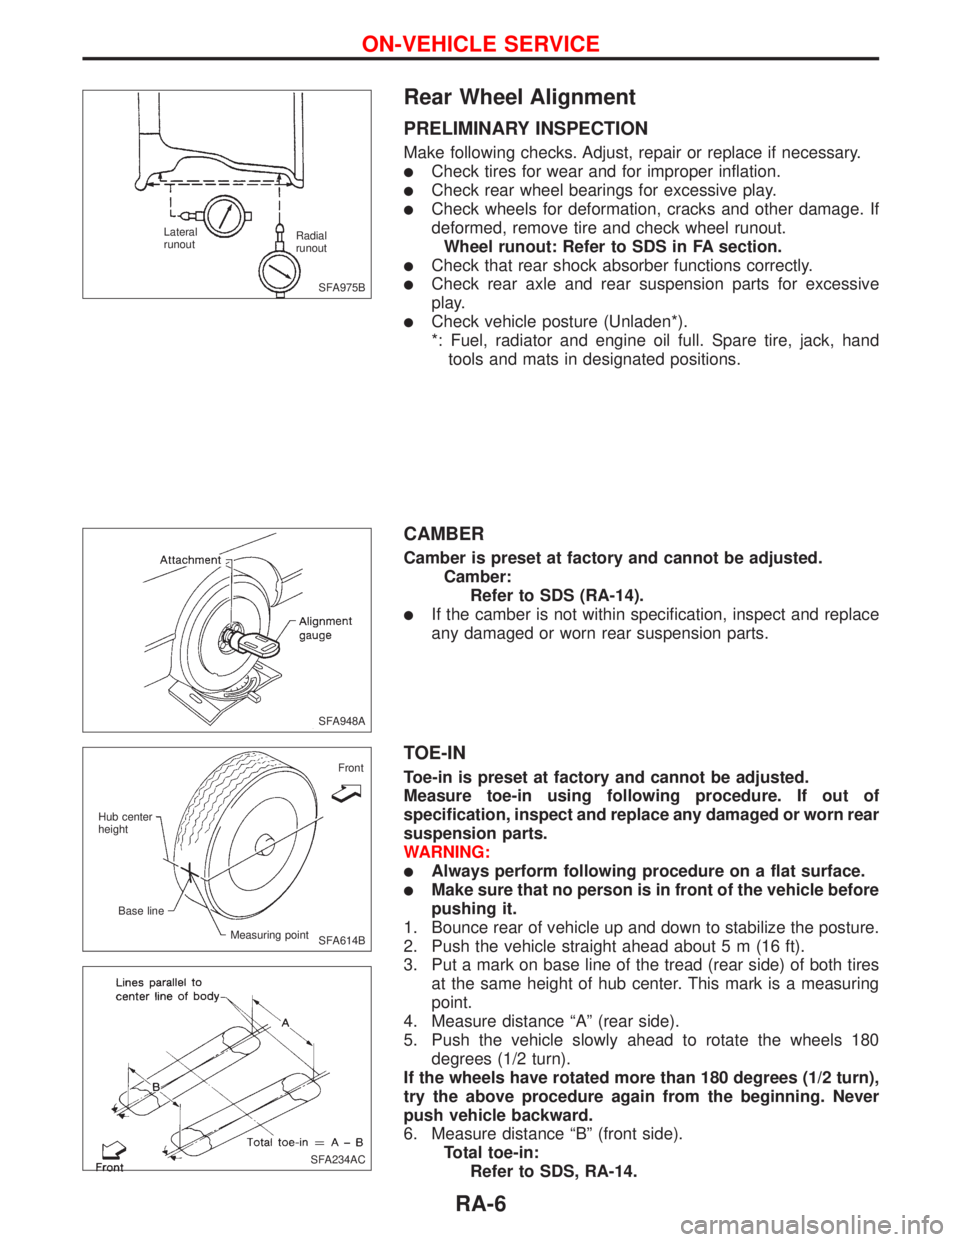
1. Bounce rear of vehicle up and down to stabilize the posture.
2. Push the vehicle straight ahead about 5 m (16 ft).
3. Put a mark on base line of the tread (rear side) of both tires
at the same height of hub center. This mark is a measuring
point.
4. Measure distance ªAº (rear side).
5. Push the vehicle slowly ahead to rotate the wheels 180
degrees (1/2 turn).
If the wheels have rotated more than 180 degrees (1/2 turn),
try the above procedure again from the beginning. Never
push vehicle backward.
6. Measure distance ªBº (front side).
Total toe-in:
Refer to SDS, RA-14.
SFA975B Radial
runout Lateral
runout
SFA948A
SFA614BFront
Hub center
height
Base line
Measuring point
SFA234AC
ON-VEHICLE SERVICE
RA-6
Page 2183 of 2267
General Specifications
Suspension type Multi-link beam suspension
Shock absorber type Double-acting hydraulic
Stabilizer Standard equipment
Inspection and Adjustment
WHEEL ALIGNMENT (Unladen*)
Camber Minimum þ2É9¢(þ2.15É)
Degree minute
(Decimal degree)Nominal þ1É24¢(þ1.4É)
Maximum þ0É39¢(þ0.65É)
Total toe-in Minimum þ1.8 (þ0.07)
Distance (AþB)
mm (in)Nominal 2.2 (0.09)
Maximum 6.2 (0.24)
Angle (left plus right) Minimum þ0É11¢24²(þ0.19É)
Degree minute
(Decimal degree)Nominal 0É12¢36²(0.21É)
Maximum 0É36¢36²(0.61É)
*: Fuel, radiator coolant and engine oil full. Spare tire, jack,
hand tools and mats in designated positions.
WHEEL BEARING
Wheel bearing axial end play
mm (in)0.0 (0.00)
Wheel bearing lock nut tighten-
ing torque
N´m (kg-m, ft-lb)187 - 255
(19 - 26, 138 - 188)
SERVICE DATA AND SPECIFICATIONS (SDS)
RA-14