1999 FORD F150 light
[x] Cancel search: lightPage 187 of 232
cells with distilled water. If the battery needs water often, have the
charging system checked.
If your battery has a cover/shield, make sure it is reinstalled
after the battery has been cleaned or replaced.
For longer, trouble-free operation, keep the top of the battery clean and
dry. Also, make certain the battery cables are always tightly fastened to
the battery terminals.
If you see any corrosion on the battery or terminals, remove the cables
from the terminals and clean with a wire brush. You can neutralize the
acid with a solution of baking soda and water.
Batteries normally produce explosive gases which can cause
personal injury. Therefore, do not allow flames, sparks or lighted
substances to come near the battery. When working near the battery,
always shield your face and protect your eyes. Always provide proper
ventilation.
When lifting a plastic-cased battery, excessive pressure on the
end walls could cause acid to flow through the vent caps,
resulting in personal injury and/or damage to the vehicle or battery.
Lift the battery with a battery carrier or with your hands on opposite
corners.
Keep batteries out of reach of children. Batteries contain sulfuric
acid. Avoid contact with skin, eyes or clothing. Shield your eyes
when working near the battery to protect against possible splashing of
acid solution. In case of acid contact with skin or eyes, flush
immediately with water for a minimum of 15 minutes and get prompt
medical attention. If acid is swallowed, call a physician immediately.
Because your vehicle's engine is also electronically controlled by a
computer, some control conditions are maintained by power from the
battery. When the battery is disconnected or a new battery is installed,
the engine must relearn its idle and fuel trim strategy for optimum
driveability and performance. To begin this process:
1. Set your parking brake.
Maintenance and care
187
Page 197 of 232
Octane recommendations
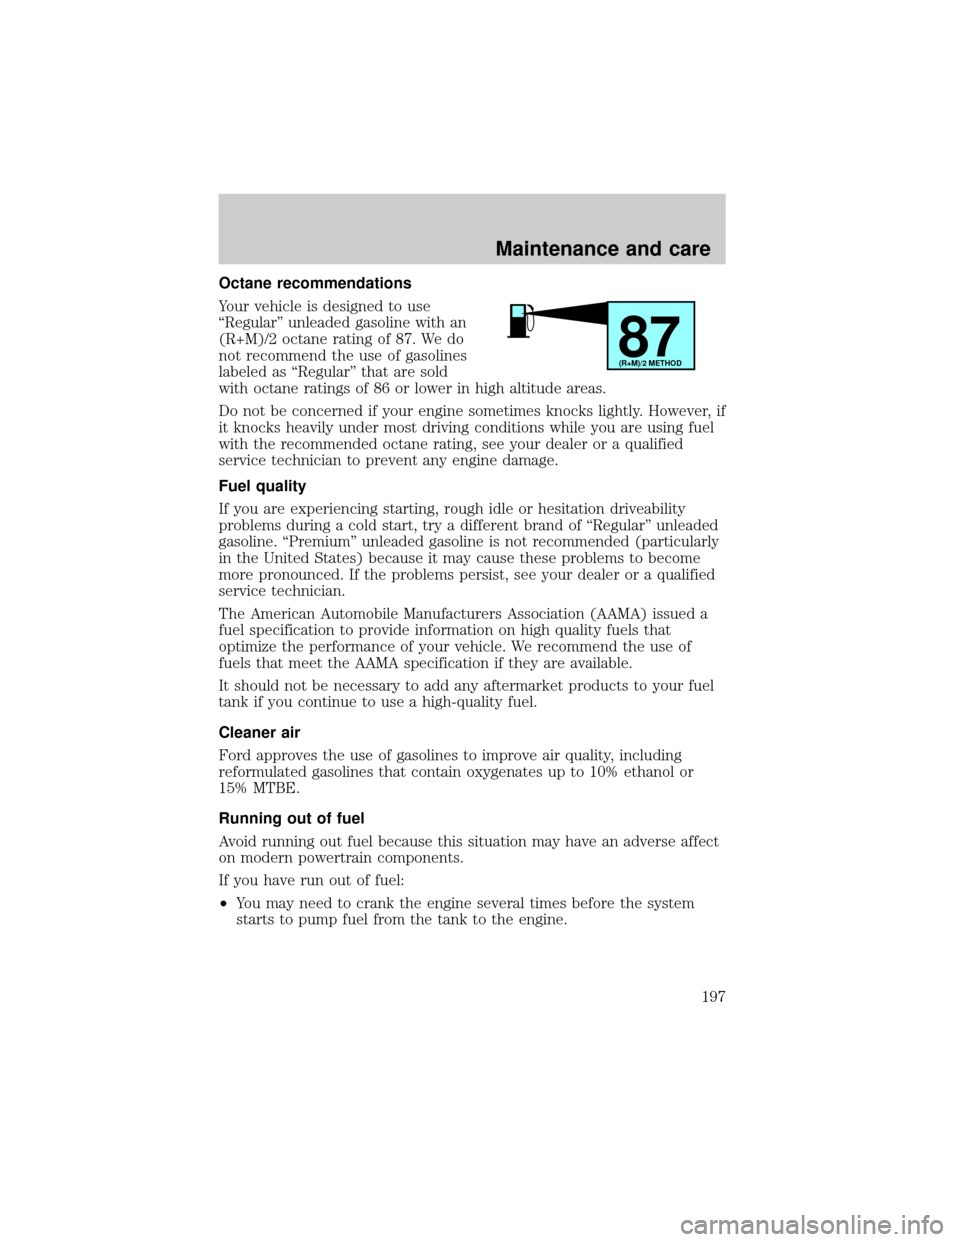
Your vehicle is designed to use
ªRegularº unleaded gasoline with an
(R+M)/2 octane rating of 87. We do
not recommend the use of gasolines
labeled as ªRegularº that are sold
with octane ratings of 86 or lower in high altitude areas.
Do not be concerned if your engine sometimes knocks lightly. However, if
it knocks heavily under most driving conditions while you are using fuel
with the recommended octane rating, see your dealer or a qualified
service technician to prevent any engine damage.
Fuel quality
If you are experiencing starting, rough idle or hesitation driveability
problems during a cold start, try a different brand of ªRegularº unleaded
gasoline. ªPremiumº unleaded gasoline is not recommended (particularly
in the United States) because it may cause these problems to become
more pronounced. If the problems persist, see your dealer or a qualified
service technician.
The American Automobile Manufacturers Association (AAMA) issued a
fuel specification to provide information on high quality fuels that
optimize the performance of your vehicle. We recommend the use of
fuels that meet the AAMA specification if they are available.
It should not be necessary to add any aftermarket products to your fuel
tank if you continue to use a high-quality fuel.
Cleaner air
Ford approves the use of gasolines to improve air quality, including
reformulated gasolines that contain oxygenates up to 10% ethanol or
15% MTBE.
Running out of fuel
Avoid running out fuel because this situation may have an adverse affect
on modern powertrain components.
If you have run out of fuel:
²You may need to crank the engine several times before the system
starts to pump fuel from the tank to the engine.
87(R+M)/2 METHOD
Maintenance and care
197
Page 198 of 232
²Your ªService Engine Soonº light may come on. For more information
on the ªService Engine Soonº light, refer to theInstrumentation
chapter.
Fuel Filler Cap
Your fuel tank filler cap has an indexed design with a one-eighth turn
on/off feature.
When fueling your vehicle:
1. Turn the engine off.
2. Carefully turn the filler cap counterclockwise 1/8 of a turn until it
stops.
3. Pull to remove the cap from the fuel filler pipe.
4. To install the cap, align the tabs on the cap with the notches on the
filler pipe.
5. Turn the filler cap clockwise 1/8 of a turn until it stops.
If the ªService Engine Soon/Check Engineº indicator comes on and stays
on when you start the engine, the fuel filler cap may not be properly
installed. Turn off the engine, remove the fuel filler cap and reinstall it
being careful to align the cap properly.
If you must replace the fuel filler cap, replace it with a genuine
Ford or Motorcraft part. The customer warranty may be void for
any damage to the fuel tank or fuel system if a genuine Ford or
Motorcraft fuel filler cap is not used.
The fuel system may be under pressure. If the fuel filler cap is
venting vapor or if you hear a hissing sound, wait until it stops
before completely removing the fuel filler cap. Otherwise, fuel may
spray out and injure you or others.
If you do not use the proper fuel filler cap, the pressure in the
fuel tank can damage the fuel system or cause it to work
improperly in a collision.
Fuel Filter
Your vehicle is equipped with a fuel filter that is mounted on the
underbody.
Maintenance and care
198
Page 201 of 232
![FORD F150 1999 10.G Owners Manual ²Drive at reasonable speeds (traveling at 105 km /h [65 mph] uses 15%
more fuel than traveling at 88 km/h [55 mph]).
²Revving the engine before turning it off may reduce fuel economy.
²Use of the a FORD F150 1999 10.G Owners Manual ²Drive at reasonable speeds (traveling at 105 km /h [65 mph] uses 15%
more fuel than traveling at 88 km/h [55 mph]).
²Revving the engine before turning it off may reduce fuel economy.
²Use of the a](/manual-img/11/5018/w960_5018-200.png)
²Drive at reasonable speeds (traveling at 105 km /h [65 mph] uses 15%
more fuel than traveling at 88 km/h [55 mph]).
²Revving the engine before turning it off may reduce fuel economy.
²Use of the air conditioner or defroster may reduce fuel economy.
²Use of speed control (if equipped) may improve fuel economy. Speed
control can help maintain a constant speed and reduce speed changes.
You may want to turn off the speed control in hilly terrain as
unnecessary shifting between third and fourth gears may occur and
could result in reduced fuel economy.
²Warming up a vehicle on cold mornings is not required and may
reduce fuel economy.
²Resting your foot on the brake pedal while driving may reduce fuel
economy.
²Combine errands and minimize stop-and-go driving.
Maintenance
²Keep tires properly inflated and use only recommended size.
²Operating a vehicle with the wheels out of alignment will reduce fuel
economy.
²Use recommended engine oil. Refer toLubricant Specifications.
²Perform all regularly scheduled maintenance items. Follow the
recommended maintenance schedule and owner maintenance checks
found in your vehicle Scheduled Maintenance Guide.
Conditions
²Heavily loading a vehicle or towing a trailer may reduce fuel economy
at any speed.
²Carrying unnecessary weight may reduce fuel economy (approximately
2 km/h [1 mpg] is lost for every 180 kg [400 lb] of weight carried).
²Adding certain accessories to your vehicle (for example bug
deflectors, rollover/light bars, running boards, ski/luggage racks) may
reduce fuel economy.
²To maximize the fuel economy, drive with the tonneau cover installed
(if equipped).
²Use of fuel blended with alcohol may lower fuel economy.
Maintenance and care
201
Page 203 of 232
Do not park, idle, or drive your vehicle in dry grass or other dry
ground cover. The emission system heats up the engine
compartment and exhaust system, which can start a fire.
Illumination of the charging system warning light,Check Engine
indicator light or the temperature warning light, fluid leaks, strange
odors, smoke or loss of oil pressure, could indicate that the emission
control system is not working properly.
Exhaust leaks may result in entry of harmful and potentially
lethal fumes into the passenger compartment.
Do not make any unauthorized changes to your vehicle or engine. By law,
vehicle owners and anyone who manufactures, repairs, services, sells, leases,
trades vehicles, or supervises a fleet of vehicles are not permitted to
intentionally remove an emission control device or prevent it from working.
Information about your vehicle's emission system is on the Vehicle Emission
Control Information Decal located on or near the engine. This decal
identifies engine displacement and gives some tune up specifications.
Please consult your ªWarranty Guideº for complete emission warranty
information.
Readiness for Inspection/Maintenance (I/M) testing
In some localities, it may be a legal requirement to pass an I/M test of the
on-board diagnostic (OBD-II) system. If your ªCheck Engine/Service Engine
Soonº light is on, refer to the description in theWarning Lights and
Chimessection of theInstrumentationchapter. Your vehicle may not pass
the I/M test with the ªCheck Engine/Service Engine Soonº light on.
If the vehicle's powertrain system or its battery has just been serviced,
the OBD-II system is reset to a ªnot ready for I/M testº condition. To
ready the OBD-II system for I/M testing, a minimum of 30 minutes of city
and highway driving is necessary as described below:
²First, at least 10 minutes of driving on an expressway or highway.
²Next, at least 20 minutes driving in stop-and-go, city-type traffic with
at least four idle periods.
Allow the vehicle to sit for at least eight hours without starting the
engine. Then, start the engine and complete the above driving cycle. The
engine must warm up to its normal operating temperature. Once started,
do not turn off the engine until the above driving cycle is complete.
Maintenance and care
203
Page 208 of 232
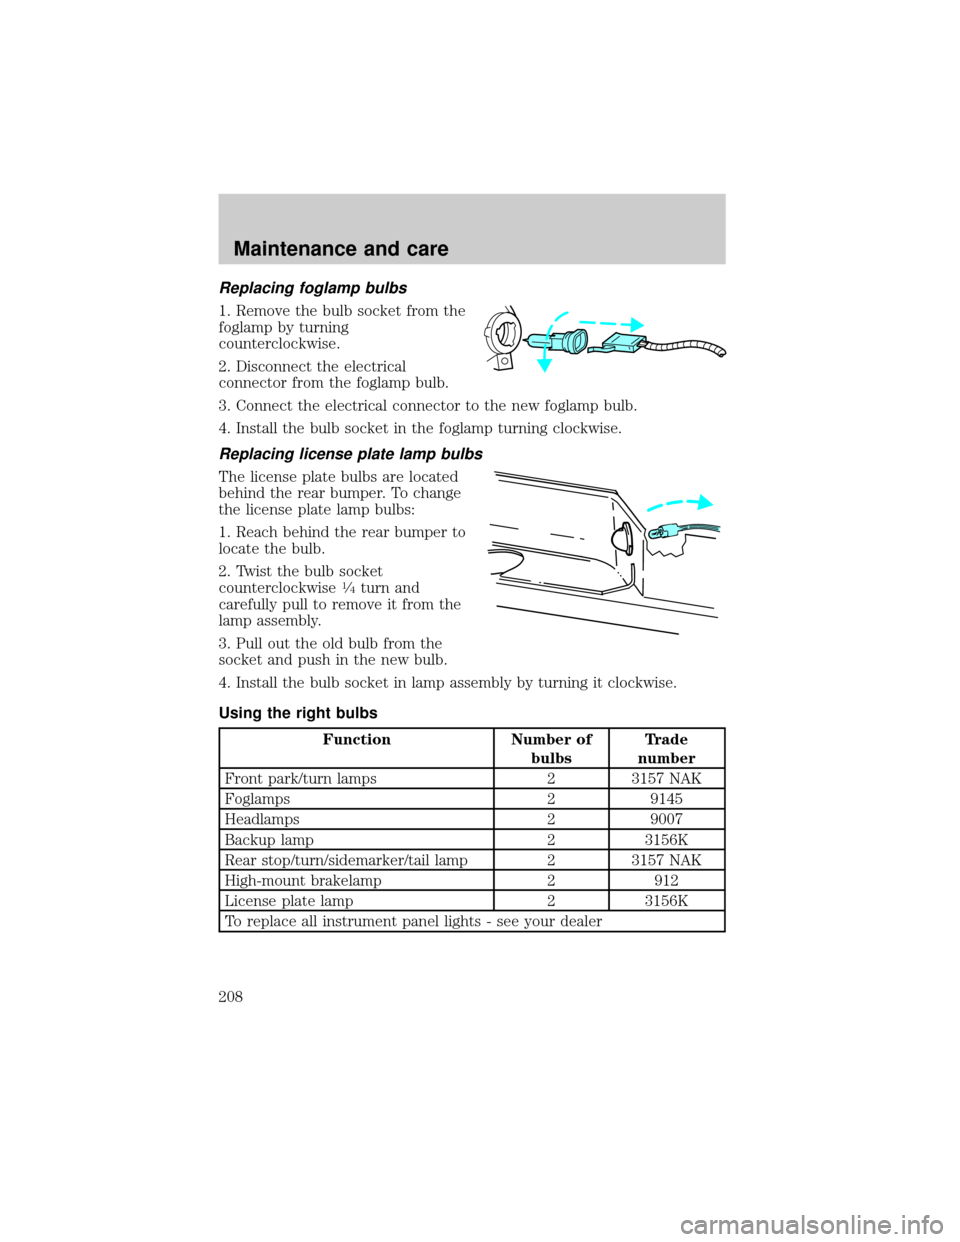
Replacing foglamp bulbs
1. Remove the bulb socket from the
foglamp by turning
counterclockwise.
2. Disconnect the electrical
connector from the foglamp bulb.
3. Connect the electrical connector to the new foglamp bulb.
4. Install the bulb socket in the foglamp turning clockwise.
Replacing license plate lamp bulbs
The license plate bulbs are located
behind the rear bumper. To change
the license plate lamp bulbs:
1. Reach behind the rear bumper to
locate the bulb.
2. Twist the bulb socket
counterclockwise
1¤4turn and
carefully pull to remove it from the
lamp assembly.
3. Pull out the old bulb from the
socket and push in the new bulb.
4. Install the bulb socket in lamp assembly by turning it clockwise.
Using the right bulbs
Function Number of
bulbsTrade
number
Front park/turn lamps 2 3157 NAK
Foglamps 2 9145
Headlamps 2 9007
Backup lamp 2 3156K
Rear stop/turn/sidemarker/tail lamp 2 3157 NAK
High-mount brakelamp 2 912
License plate lamp 2 3156K
To replace all instrument panel lights - see your dealer
Maintenance and care
208
Page 209 of 232
AIMING THE HEADLAMPS
The alignment of your headlamps should be checked by a qualified
service technician if:
²Oncoming motorists frequently signal you to deactivate your high
beams, and your high beams are not activated.
²The headlamps do not seem to provide enough light for clear night
vision.
²The headlamp beams are pointed substantially away from a slightly
down and to the right position.
CLEANING AND CARING FOR YOUR VEHICLE
Refer to the ªCustomer Assistance Guideº for a list of Ford-approved
cleaners, polishes and waxes.
Washing your vehicle
Wash your vehicle regularly with
cold or lukewarm water. Never use
strong detergents or soap. If your
vehicle is particularly dirty, use a
quality car wash detergent. Always
use a clean sponge, washing glove
or similar device and plenty of water
for best results. To avoid spots,
avoid washing when the hood is still
warm, immediately after or during
exposure to strong sunlight.
During winter months, it is especially important to wash the vehicle on a
regular basis. Large quantities of dirt and road salt are difficult to
remove and also cause damage to the vehicle.
Remove any exterior accessories, such as antennas, before entering a car
wash. If you have wax applied to the vehicle at a commercial car wash, it
is recommended that you clean the wiper blades and windshield as
described inCleaning the wiper blades and windshield.
After washing, apply the brakes several times to dry them.
Maintenance and care
209
Page 211 of 232
Cleaning the engine
Engines are more efficient when they are clean because grease and dirt
buildup keep the engine warmer than normal. When washing:
²Take care when using a power washer to clean the engine. The high
pressure fluid could penetrate the sealed parts and cause damage.
²Do not spray with cold water to avoid cracking the engine block or
other engine components.
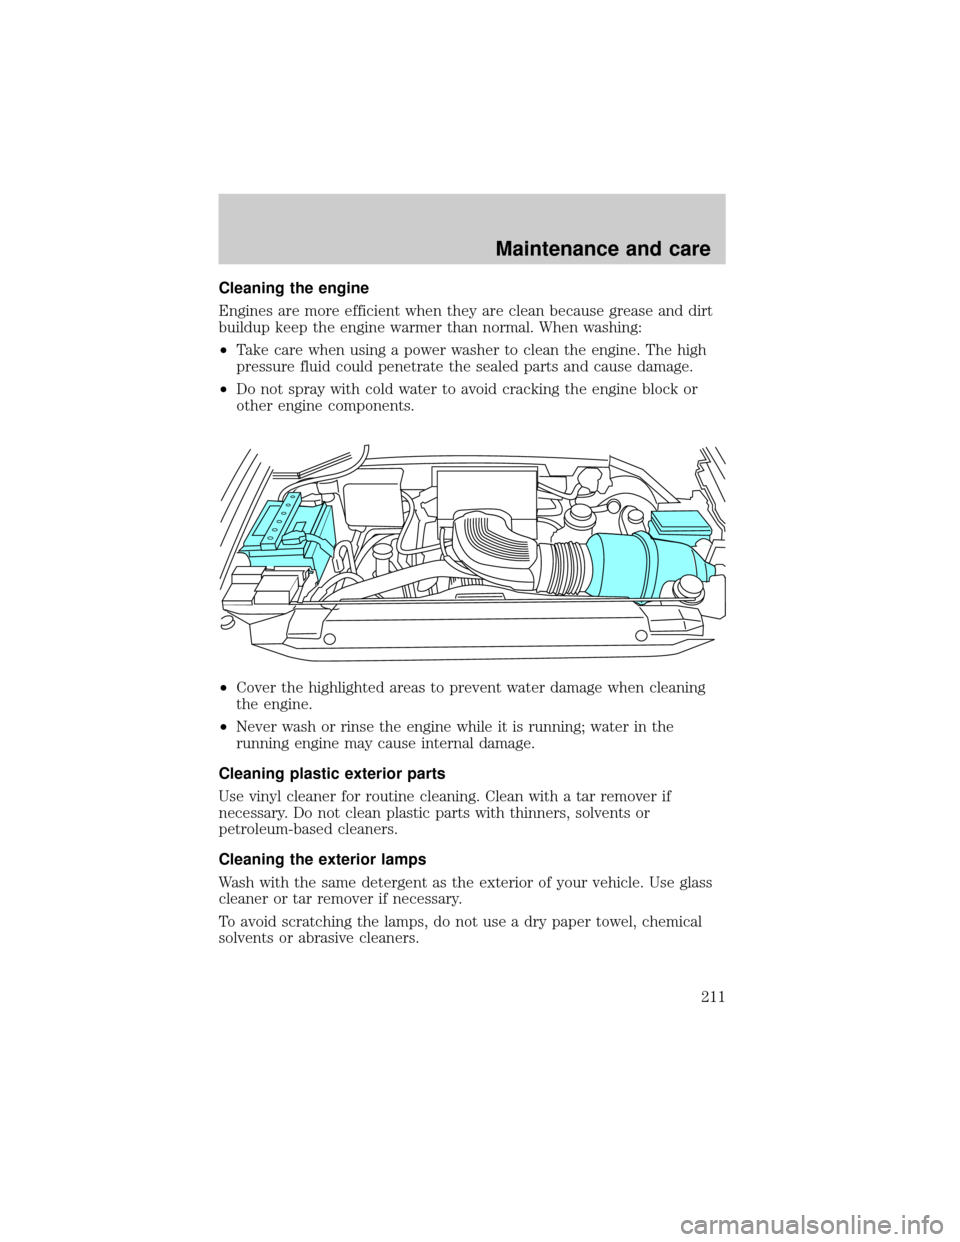
²Cover the highlighted areas to prevent water damage when cleaning
the engine.
²Never wash or rinse the engine while it is running; water in the
running engine may cause internal damage.
Cleaning plastic exterior parts
Use vinyl cleaner for routine cleaning. Clean with a tar remover if
necessary. Do not clean plastic parts with thinners, solvents or
petroleum-based cleaners.
Cleaning the exterior lamps
Wash with the same detergent as the exterior of your vehicle. Use glass
cleaner or tar remover if necessary.
To avoid scratching the lamps, do not use a dry paper towel, chemical
solvents or abrasive cleaners.
Maintenance and care
211