1999 FORD F150 light
[x] Cancel search: lightPage 55 of 232

²Do not expose tapes to direct sunlight, high humidity, extreme heat or
extreme cold. Allow tapes that may have been exposed to extreme
temperatures to reach a moderate temperature before playing.
²Tighten very loose tapes by inserting a finger or pencil into the hole
and turning the hub.
²Remove loose labels before inserting tapes.
²Do not leave tapes in the cassette player for a long time when not
being played.
Radio frequency information
The Federal Communications Commission (FCC) and the Canadian Radio
and Telecommunications Commission(CRTC) establish the frequencies
AM and FM stations may use for their broadcasts. Allowable frequencies
are:
AM 530, 540±1600, 1610 kHz
FM 87.9, 88.1±107.1, 107.9 MHz
Not all frequencies are used in a given area.
Radio reception factors
Three factors can affect radio reception:
²Distance/strength.The further an FM signal travels, the weaker it is.
The listenable range of the average FM station is approximately 40 km
(24 miles). This range can be affected by ªsignal modulation.º Signal
modulation is a process radio stations use to increase their
strength/volume relative to other stations.
²Terrain.Hills, mountains and tall buildings between your vehicle's
antenna and the radio station signal can cause FM reception problems.
Static can be caused on AM stations by power lines, electric fences,
traffic lights and thunderstorms. Moving away from an interfering
structure (out of its ªshadowº) returns your reception to normal.
²Station overload.Weak signals are sometimes captured by stronger
signals when you pass a broadcast tower. A stronger signal may
temporarily overtake a weaker signal and play while the weak station
frequency is displayed.
The audio system automatically switches to single channel reception if it
will improve the reception of a station normally received in stereo.
Controls and features
55
Page 59 of 232

²MAX A/C-Uses recirculated air to cool the vehicle. MAX A/C is noisier
than A/C but more economical and will cool the inside of the vehicle
faster. Airflow will be from the instrument panel registers. This mode
can also be used to prevent undesirable odors from entering the
vehicle.
²A/C-Uses outside air to cool the vehicle. It is quieter than MAX A/C
but not as economical. Airflow will be from the instrument panel
registers.
²PANEL-Distributes outside air through the instrument panel registers.
However, the air will not be cooled below the outside temperature
because the air conditioning does not operate in this mode.
²OFF-Outside air is shut out and the fan will not operate. For short
periods of time only, use this mode to prevent undesirable odors from
entering the vehicle.
²PANEL & FLOOR-Distributes outside air through the instrument panel
registers and the floor ducts. Heating and air conditioning capabilities
are provided in this mode. For added customer comfort, when the
temperature control knob is anywhere in between the full hot and full
cold positions, the air distributed through the floor ducts will be
slightly warmer than the air sent to the instrument panel registers.
²FLOOR-Allows for maximum heating by distributing outside air
through the floor ducts. However, the air will not be cooled below the
outside temperature because the air conditioning does not operate in
this mode.
²FLR & DEF-Distributes outside air through the windshield defroster
ducts and the floor ducts. Heating and air conditioning capabilities are
provided in this mode. For added customer comfort, the air
distributed through the floor ducts will be slightly warmer than the air
sent to the windshield defroster ducts. If the temperature is about
10ÉC (50ÉF) or higher, the air conditioner will automatically
dehumidify the air to prevent fogging.
²DEF
-Distributes outside air through the windshield defroster
ducts. It can be used to clear ice or fog from the windshield. If the
temperature is about 10ÉC (50ÉF) or higher, the air conditioner will
automatically dehumidify the air to prevent fogging.
Controls and features
59
Page 61 of 232

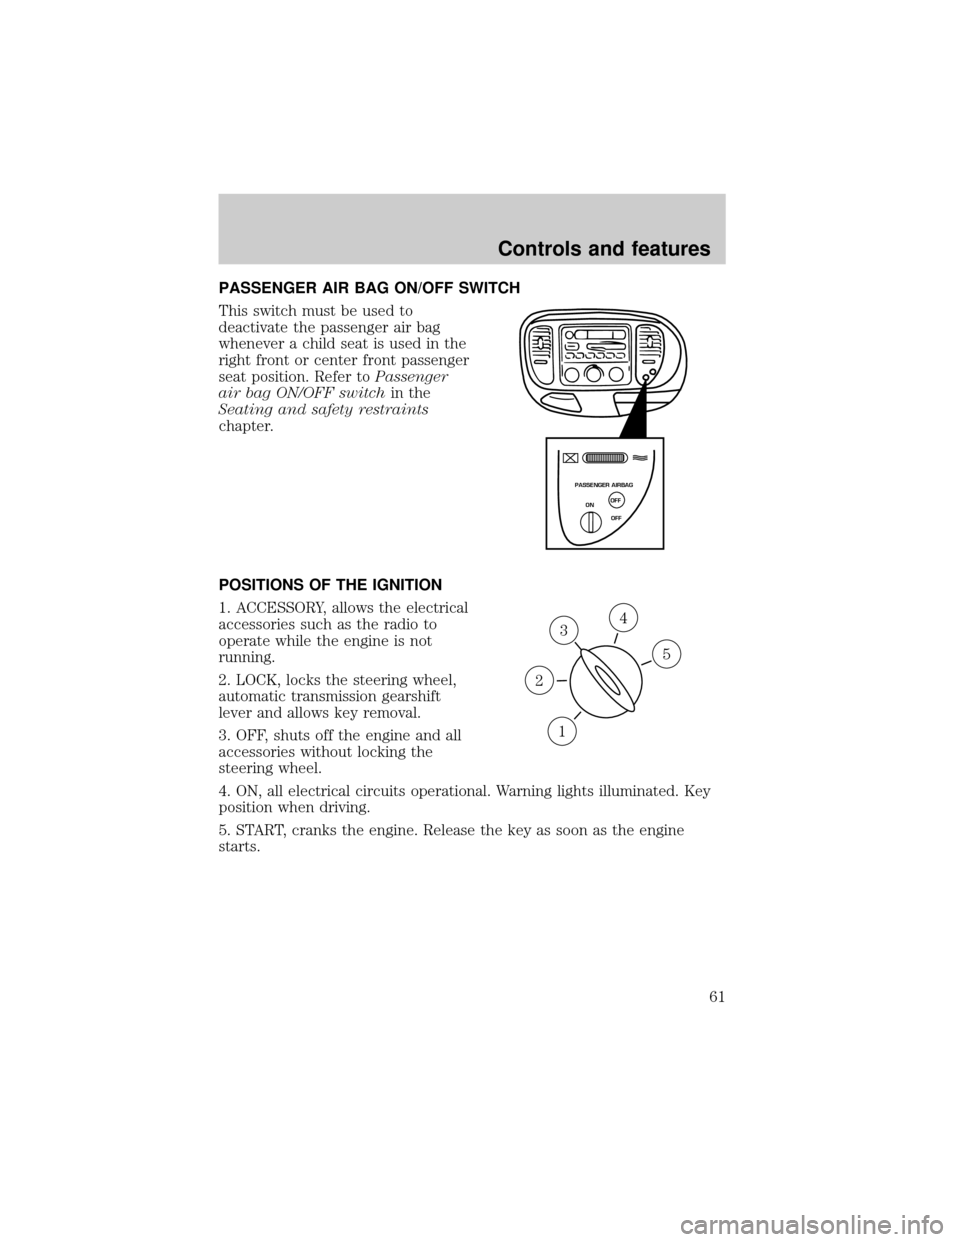
PASSENGER AIR BAG ON/OFF SWITCH
This switch must be used to
deactivate the passenger air bag
whenever a child seat is used in the
right front or center front passenger
seat position. Refer toPassenger
air bag ON/OFF switchin the
Seating and safety restraints
chapter.
POSITIONS OF THE IGNITION
1. ACCESSORY, allows the electrical
accessories such as the radio to
operate while the engine is not
running.
2. LOCK, locks the steering wheel,
automatic transmission gearshift
lever and allows key removal.
3. OFF, shuts off the engine and all
accessories without locking the
steering wheel.
4. ON, all electrical circuits operational. Warning lights illuminated. Key
position when driving.
5. START, cranks the engine. Release the key as soon as the engine
starts.
PASSENGER AIRBAG
ON
OFF OFF
3
1
2
5
4
Controls and features
61
Page 68 of 232

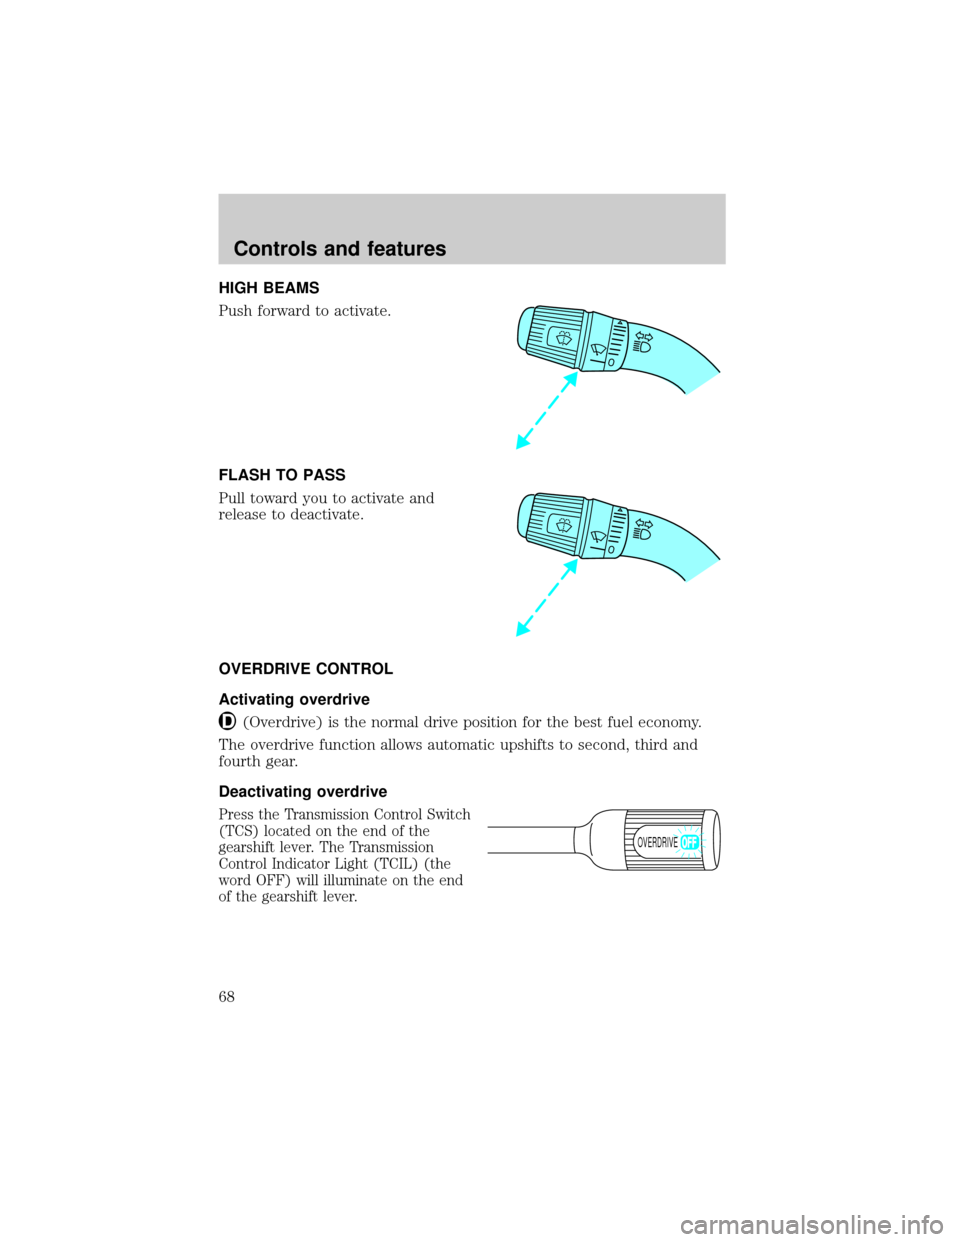
HIGH BEAMS
Push forward to activate.
FLASH TO PASS
Pull toward you to activate and
release to deactivate.
OVERDRIVE CONTROL
Activating overdrive
(Overdrive) is the normal drive position for the best fuel economy.
The overdrive function allows automatic upshifts to second, third and
fourth gear.
Deactivating overdrive
Press the Transmission Control Switch
(TCS) located on the end of the
gearshift lever. The Transmission
Control Indicator Light (TCIL) (the
word OFF) will illuminate on the end
of the gearshift lever.
OVERDRIVE
Controls and features
68
Page 77 of 232

your vehicle. Each time you start your vehicle, the SecuriLockykey is
read by the SecuriLockypassive anti-theft system. If the SecuriLocky
key identification code matches the code stored in the SecuriLocky
passive anti-theft system, the vehicle's engine is allowed to start. If the
SecuriLockykey identification code does not match the code stored in
the system or if a SecuriLockykey is not detected (vehicle theft
situation), the vehicle's engine will not operate.
The SecuriLockypassive anti-theft system is not compatible with
aftermarket remote start systems. Use of these systems may result in
vehicle starting problems and a loss of security protection. Large metallic
objects or devices such as the Mobil Speedpassyon the same key ring
as your SecuriLockykey may cause vehicle starting problems. These
objects and devices cannot damage the SecuriLockykey, but can cause
a momentary problem if they are too close to the key when starting the
engine. If a problem occurs. turn ignition off and restart the engine with
all other objects on the key ring held away from the SecuriLocky
ignition key.
Spare SecuriLockykeys can be purchased from your dealership and
programmed to your SecuriLockypassive anti-theft system. Refer to
Programming spare SecuriLockykeysfor more information.
If one or both of your SecuriLockykeys are lost or stolen and you want
to ensure the lost or stolen key will not operate your vehicle, bring your
vehicle and all available SecuriLockykeys to your dealership for
reinitialization.
Theft indicator
The theft indicator on top of the instrument panel will operate as
follows:
²When the ignition is OFF, the theft indicator will flash briefly every 2
seconds to indicate the SecuriLockysystem is protecting your
vehicle.
²When the ignition is turned to ON or START, the theft indicator will
light for 3 seconds and then go out. If the theft indicator stays on for
an extended period of time or flashes rapidly, have the system
serviced by your dealership or a qualified technician.
Programming spare SecuriLockYkeys
Spare SecuriLockykeys can be purchased from your dealership and
programmed to your SecuriLockyanti-theft system (up to a total of 8
Controls and features
77
Page 78 of 232

keys). Your dealership can program your new SecuriLockykey(s) to
your vehicle or you can do it yourself using the following simple
procedure. To program a new SecuriLockykey yourself, you will need
two previously programmed SecuriLockykeys (keys that already
operate your vehicle's engine). If two previously programmed
SecuriLockykeys are not available (one or both of your original keys
were lost or stolen), you must bring your vehicle to your dealership to
have the spare SecuriLockykey(s) programmed.
Procedure to program spare SecuriLockYkeys to your vehicle
New SecuriLockykeys must have the correct mechanical key cut for
your vehicle.
Conventional (non-SecuriLocky) keyscannotbe programmed to your
vehicle.
You will need to have two previously programmed SecuriLockykeys and
the new unprogrammed SecuriLockykey readily accessible for timely
implementation of each step in the procedure. Please read and
understand the entire procedure before you begin.
1. Insert the first previously programmed SecuriLockykey into the
ignition and turn the ignition from OFF to RUN (maintain ignition in
RUN for at least one second).
2. Turn ignition to OFF and remove the first SecuriLockykey from the
ignition.
3. Within five seconds of turning the ignition to OFF, insert the second
previously programmed SecuriLockykey into the ignition and turn the
ignition from OFF to RUN (maintain ignition in RUN for at least one
second but no more than 5 seconds).
4. Turn the ignition to OFF and remove the second SecuriLockykey
from the ignition.
5. Within 10 seconds of turning the ignition to OFF, insert the
unprogrammed SecuriLockykey (new key/valet key) into the ignition
and turn the ignition from OFF to RUN (maintain ignition in RUN for at
least one second). This step will program your new SecuriLockykey.
6. To program additional SecuriLockykey(s), repeat this procedure from
step 1.
If the programming procedure was successful, the new SecuriLocky
key(s) will start the vehicle's engine. The theft indicator (located on the
instrument panel) will light for three seconds and then go out.
Controls and features
78
Page 83 of 232

Illuminated entry
The illuminated entry system will turn on the interior lights when the
remote transmitter unlock control is pressed.
The illuminated entry system will turn off the interior lights if the
ignition switch is turned to the RUN position, or if the remote
transmitter lock control is pressed, or after 25 seconds of illumination.
The inside lights will not turn off if:
²they have been turned on with the dimmer control or
²any door is open.
The battery save feature will turn off the interior lights 45 minutes after
the last door is closed, even if the dimmer control is on.
Controls and features
83
Page 93 of 232

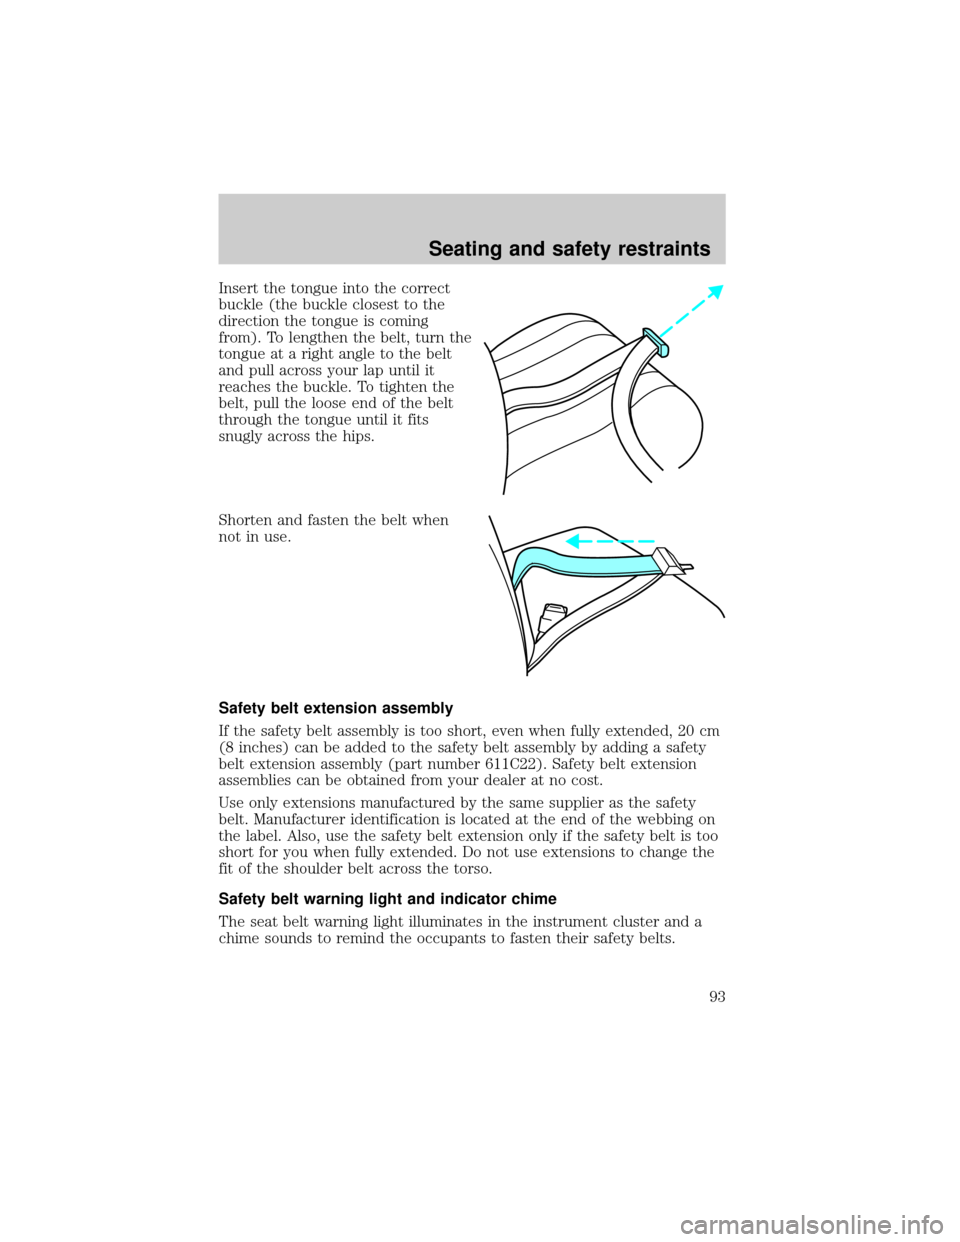
Insert the tongue into the correct
buckle (the buckle closest to the
direction the tongue is coming
from). To lengthen the belt, turn the
tongue at a right angle to the belt
and pull across your lap until it
reaches the buckle. To tighten the
belt, pull the loose end of the belt
through the tongue until it fits
snugly across the hips.
Shorten and fasten the belt when
not in use.
Safety belt extension assembly
If the safety belt assembly is too short, even when fully extended, 20 cm
(8 inches) can be added to the safety belt assembly by adding a safety
belt extension assembly (part number 611C22). Safety belt extension
assemblies can be obtained from your dealer at no cost.
Use only extensions manufactured by the same supplier as the safety
belt. Manufacturer identification is located at the end of the webbing on
the label. Also, use the safety belt extension only if the safety belt is too
short for you when fully extended. Do not use extensions to change the
fit of the shoulder belt across the torso.
Safety belt warning light and indicator chime
The seat belt warning light illuminates in the instrument cluster and a
chime sounds to remind the occupants to fasten their safety belts.
Seating and safety restraints
93