Page 146 of 328
yellowblue
4-22
The exit speed is usually posted.
Reduce your speed according to your speedometer, not
to your sense of motion. After driving for any distance
at higher speeds, you may tend to think you are going
slower than you actually are.
Before Leaving on a Long Trip
Make sure you're ready. Try to be well rested. If you
must start when you're not fresh
-- such as after a day's
work
-- don't plan to make too many miles that first part
of the journey. Wear comfortable clothing and shoes you
can easily drive in.
Is your vehicle ready for a long trip? If you keep it
serviced and maintained, it's ready to go. If it needs
service, have it done before starting out. Of course,
you'll find experienced and able service experts in
Chevrolet dealerships all across North America. They'll
be ready and willing to help if you need it.Here are some things you can check before a trip:
�Windshield Washer Fluid: Is the reservoir full? Are
all windows clean inside and outside?
�Wiper Blades: Are they in good shape?
�Fuel, Engine Oil, Other Fluids: Have you checked
all levels?
�Lamps: Are they all working? Are the lenses clean?
�Tires: They are vitally important to a safe,
trouble-free trip. Is the tread good enough for
long
-distance driving? Are the tires all inflated to the
recommended pressure?
�Weather Forecasts: What's the weather outlook
along your route? Should you delay your trip a short
time to avoid a major storm system?
�Maps: Do you have up
-to-date maps?
Page 173 of 328
yellowblue
5-13 How to Add Coolant to the Coolant
Recovery Tank
If you haven't found a problem yet, but the coolant level
isn't at the FULL mark, add a 50/50 mixture of clean,
drinkable water and a proper coolant at the coolant
recovery tank. (See ªEngine Coolantº in the Index for
more information about the proper coolant mixture.)
CAUTION:
Adding only plain water to your cooling system
can be dangerous. Plain water, or some other
liquid like alcohol, can boil before the proper
coolant mixture will. Your vehicle's coolant
warning system is set for the proper coolant
mixture. With plain water or the wrong mixture,
your engine could get too hot but you wouldn't
get the overheat warning. Your engine could
catch fire and you or others could be burned. Use
a 50/50 mixture of clean, drinkable water and a
proper coolant.
NOTICE:
In cold weather, water can freeze and crack the
engine, radiator, heater core and other parts.
Use the recommended coolant and the proper
coolant mixture.
Page 193 of 328
6-
yellowblue
6-1
Section 6 Service and Appearance Care
Here you will find information about the care of your vehicle. This section begins with service and fuel information,
and then it shows how to check important fluid and lubricant levels. There is also technical information about your
vehicle, and a part devoted to its appearance care.
6
-2 Service
6
-3 Fuel
6
-5 Fuels in Foreign Countries
6
-5 Filling Your Tank
6
-8 Filling a Portable Fuel Container
6
-8 Checking Things Under the Hood
6
-13 Engine Oil
6
-17 Engine Air Cleaner/Filter
6
-20 Automatic Transaxle Fluid
6
-23 Manual Transaxle Fluid
6
-24 Clutch Adjustment
6
-24 Radiator Pressure Cap
6
-25 Thermostat
6
-25 Engine Coolant
6
-27 Power Steering Fluid
6
-28 Windshield Washer Fluid6
-29 Brakes
6
-33 Low Maintenance Battery
6
-34 Bulb Replacement
6
-35 Headlamp Aiming
6
-40 Tires
6
-48 Appearance Care
6
-48 Cleaning the Inside of Your Vehicle
6
-50 Care of the Safety Belts
6
-52 Cleaning the Outside of Your Vehicle
6
-54 Underbody Maintenance
6
-56 Vehicle Identification Number (VIN)
6
-57 Electrical System
6
-60 Replacement Bulbs
6
-60 Capacities and Specifications
6
-61 Air Conditioning Refrigerants
6
-61 Normal Maintenance Replacement Parts
Page 205 of 328
yellowblue
6-13
Engine Oil
If the engine oil pressure
light on the instrument
panel comes on, it means
you need to check your
engine oil level right away.
For more information, see ªEngine Oil Pressure Lightº
in the Index. You should check your engine oil level
regularly; this is an added reminder.
It's a good idea to check your engine oil every time you
get fuel. In order to get an accurate reading, the oil must
be warm and the vehicle must be on level ground.
The engine oil dipstick is
located next to the air
cleaner. The dipstick handle
is a yellow loop.
Turn off the engine and give the oil several minutes to
drain back into the oil pan. If you don't, the oil dipstick
might not show the actual level.
Page 206 of 328
yellowblue
6-14 Checking Engine Oil
Pull out the dipstick and
clean it with a paper towel
or cloth, then push it back in
all the way. Remove it
again, keeping the tip down,
and check the level.
When to Add Engine Oil
If the oil is at or below the upper mark, then you'll need
to add at least one quart of oil. But you must use the
right kind. This part explains what kind of oil to use. For
crankcase capacity, see ªCapacities and Specificationsº
in the Index.
NOTICE:
Don't add too much oil. If your engine has so
much oil that the oil level gets above the upper
mark that shows the proper operating range,
your engine could be damaged.
The engine oil fill cap is
located at the center of the
engine compartment.
Be sure to fill it enough to put the level somewhere in
the proper operating range. Push the dipstick all the way
back in when you're through.
Page 212 of 328
yellowblue
6-20
Automatic Transaxle Fluid
When to Check and Change
A good time to check your automatic transaxle fluid
level is when the engine oil is changed.
Change both the fluid and filter every 50,000 miles
(83 000 km) if the vehicle is mainly driven under one or
more of these conditions:
�In heavy city traffic where the outside temperature
regularly reaches 90�F (32�C) or higher.
�In hilly or mountainous terrain.
�Uses such as found in taxi, police or delivery service.
If you do not use your vehicle under any of these
conditions, the fluid and filter do not require changing.
See ªScheduled Maintenance Servicesº in the Index.
How to Check
Because this operation can be a little difficult, you
may choose to have this done at the dealership
service department.
If you do it yourself, be sure to follow all the
instructions here, or you could get a false reading on
the dipstick.
NOTICE:
Too much or too little fluid can damage your
transaxle. Too much can mean that some of the
fluid could come out and fall on hot engine parts
or exhaust system parts, starting a fire. Be sure to
get an accurate reading if you check your
transaxle fluid.
Page 215 of 328
yellowblue
6-23
Manual Transaxle Fluid
When to Check and Change
A good time to have it checked is when the engine oil is
changed. Refer to the Maintenance Schedule to
determine when to change your transaxle fluid. See
ªScheduled Maintenance Servicesº in the Index.
How to Check
Because this operation can be a little difficult, you may
choose to have this done at your Chevrolet dealership
Service Department.
If you do it yourself, be sure to follow all the
instructions here, or you could get a false reading.
NOTICE:
Too much or too little fluid can damage your
transaxle. Too much can mean that some of the
fluid could come out and fall on hot engine parts
or exhaust system parts, starting a fire. Be sure to
get an accurate reading if you check your
transaxle fluid.
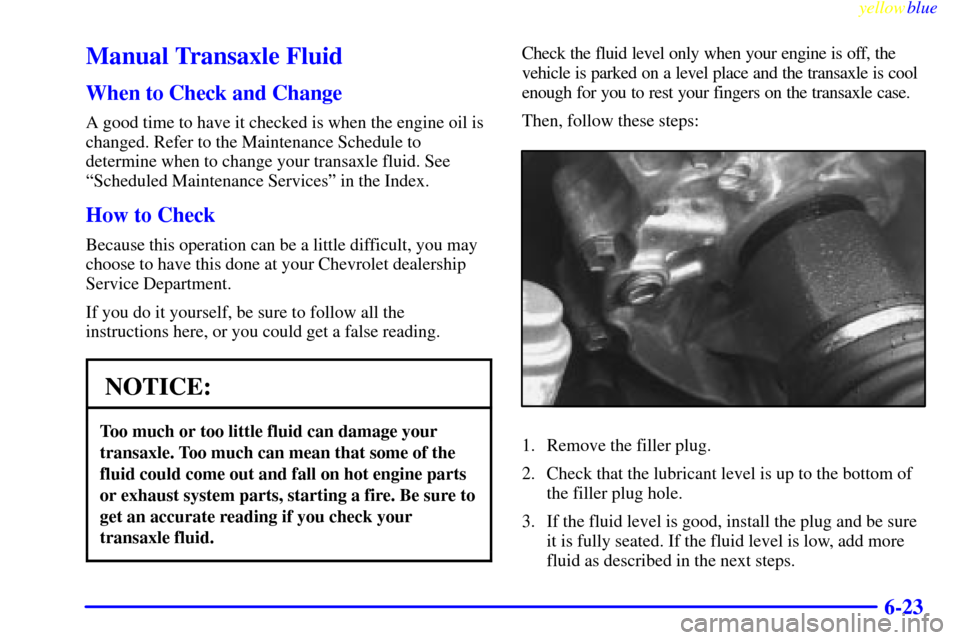
Check the fluid level only when your engine is off, the
vehicle is parked on a level place and the transaxle is cool
enough for you to rest your fingers on the transaxle case.
Then, follow these steps:
1. Remove the filler plug.
2. Check that the lubricant level is up to the bottom of
the filler plug hole.
3. If the fluid level is good, install the plug and be sure
it is fully seated. If the fluid level is low, add more
fluid as described in the next steps.
Page 253 of 328

yellowblue
6-61
*When changing the oil filter, additional oil may be
needed. Recheck the oil level after filling. See ªEngine
Oilº in the Index.
**Recheck the fluid level after filling. See ªAutomatic
Transaxle Fluidº or ªManual Transaxle Fluidº in
the Index.
Engine Specifications
Type
VIN Engine Code 6 L3. . . . . . . . . . . . . . . . . . . . . . .
VIN Engine Code 2 L4. . . . . . . . . . . . . . . . . . . . . . .
Firing Order
VIN Engine Code 6 1
-3-2 . . . . . . . . . . . . . . . . . . . . .
VIN Engine Code 2 1
-3-4-2 . . . . . . . . . . . . . . . . . . .
Horsepower
VIN Engine Code 6 55 hp @ 5700 rpm. . . . . . . . . .
VIN Engine Code 2 79 hp @ 6000 rpm. . . . . . . . . .
Fuel DeliveryFuel Injection . . . . . . . . . . . . . . . . . . .
Piston Displacement
VIN Engine Code 6 61 CID (1.0L). . . . . . . . . . . . . .
VIN Engine Code 2 79 CID (1.3L). . . . . . . . . . . . . .
Valve ArrangementIn
-Head . . . . . . . . . . . . . . . . . . .
Air Conditioning Refrigerants
Not all air conditioning refrigerants are the same.
If the air conditioning system in your vehicle needs
refrigerant, be sure the proper refrigerant is used.
If you're not sure, ask your dealer.
See the refrigerant charge label under the hood for
information regarding refrigerant capacity.
Normal Maintenance
Replacement Parts
Air Cleaner Filter AC Type A1203C. . . . . . . . . . . . . .
Battery 26R
-50S . . . . . . . . . . . . . . . . . . . . . . . . . . . . .
Engine Oil Filter AC Type PF53. . . . . . . . . . . . . . . .
Fuel Filter GM Part No. 96068664 or equivalent. . . . .
PCV Valve GM Part No. 96051849. . . . . . . . . . . . . . .
Radiator Pressure Cap 13 psi (90 kPa). . . . . . . . . . . .
Spark Plugs
1.0L L3 Engine AC Type R42XLS. . . . . . . . . . . . . . .
0.039 to 0.045 inch gap (1.0 to 1.1 mm)
1.3L L4 Engine NGK Type BKR6E11. . . . . . . . . . . .
0.039 to 0.045 inch gap (1.0 to 1.1 mm)
1.3L L4 Engine Denso Type K20PR
-U11 . . . . . . . . .
0.039 to 0.045 inch gap (1.0 to 1.1 mm)