Page 171 of 328
yellowblue
5-11
Cooling System
When you decide it's safe to lift the hood, here's what
you'll see:
1. Coolant Recovery Tank
2. Radiator Pressure Cap
3. Electric Engine Cooling Fan
CAUTION:
An electric engine cooling fan under the hood can
start up even when the engine is not running and
can injure you. Keep hands, clothing and tools
away from any underhood electric fan.
If the coolant inside the coolant recovery tank is boiling,
don't do anything else until it cools down.
Page 175 of 328
yellowblue
5-15
CAUTION:
Steam and scalding liquids from a hot cooling
system can blow out and burn you badly. They
are under pressure, and if you turn the radiator
pressure cap
-- even a little -- they can come out
at high speed. Never turn the cap when the
cooling system, including the radiator pressure
cap, is hot. Wait for the cooling system and
radiator pressure cap to cool if you ever have to
turn the pressure cap.
Page 176 of 328
yellowblue
5-16 How to Add Coolant to the Radiator
1. You can remove the radiator pressure cap when the
cooling system, including the radiator pressure cap
and upper radiator hose, is no longer hot. Turn the
pressure cap slowly counterclockwise until it first
stops. (Don't press down while turning the
pressure cap.)
If you hear a hiss, wait for that to stop. A hiss means
there is still some pressure left.
2. Then keep turning the pressure cap, but now push
down as you turn it. Remove the pressure cap.
Page 177 of 328
yellowblue
5-17
3. Fill the radiator with the proper coolant mixture, up
to the base of the filler neck. (See ªEngine Coolantº
in the Index for more information about the proper
coolant mixture.)
4. Then fill the coolant recovery tank to the
FULL mark.
5. Put the cap back on the coolant recovery tank, but
leave the radiator pressure cap off.6. Start the engine and let it run until you can feel the
upper radiator hose getting hot. Watch out for the
engine cooling fan.
7. By this time, the coolant level inside the radiator
filler neck may be lower. If the level is lower, add
more of the proper coolant mixture through the filler
neck until the level reaches the base of the
filler neck.
Page 193 of 328

6-
yellowblue
6-1
Section 6 Service and Appearance Care
Here you will find information about the care of your vehicle. This section begins with service and fuel information,
and then it shows how to check important fluid and lubricant levels. There is also technical information about your
vehicle, and a part devoted to its appearance care.
6
-2 Service
6
-3 Fuel
6
-5 Fuels in Foreign Countries
6
-5 Filling Your Tank
6
-8 Filling a Portable Fuel Container
6
-8 Checking Things Under the Hood
6
-13 Engine Oil
6
-17 Engine Air Cleaner/Filter
6
-20 Automatic Transaxle Fluid
6
-23 Manual Transaxle Fluid
6
-24 Clutch Adjustment
6
-24 Radiator Pressure Cap
6
-25 Thermostat
6
-25 Engine Coolant
6
-27 Power Steering Fluid
6
-28 Windshield Washer Fluid6
-29 Brakes
6
-33 Low Maintenance Battery
6
-34 Bulb Replacement
6
-35 Headlamp Aiming
6
-40 Tires
6
-48 Appearance Care
6
-48 Cleaning the Inside of Your Vehicle
6
-50 Care of the Safety Belts
6
-52 Cleaning the Outside of Your Vehicle
6
-54 Underbody Maintenance
6
-56 Vehicle Identification Number (VIN)
6
-57 Electrical System
6
-60 Replacement Bulbs
6
-60 Capacities and Specifications
6
-61 Air Conditioning Refrigerants
6
-61 Normal Maintenance Replacement Parts
Page 203 of 328
yellowblue
6-11 1.0L L3 Engine
When you lift the hood, you'll see these items:
A. Hood Prop
B. Engine Oil Dipstick
C. Engine Air Cleaner/Filter
D. Engine Oil Fill CapE. Radiator Pressure Cap
F. Brake Fluid Reservoir
G. Engine Coolant ReservoirH. Battery
I. Main Fuse Box
J. Windshield Washer Reservoir
Page 204 of 328
yellowblue
6-12 1.3L L4 Engine
When you lift the hood, you'll see these items:
A. Hood Prop
B. Power Steering Reservoir
C. Engine Air Cleaner/Filter
D. Engine Oil DipstickE. Engine Oil Fill Cap
F. Electric Engine Cooling Fan
G. Radiator Pressure Cap
H. Brake Fluid ReservoirI. Engine Coolant Reservoir
J. Battery
K. Main Fuse Box
L. Windshield Washer Reservoir
Page 216 of 328

yellowblue
6-24 How to Add Fluid
Here's how to add fluid. Refer to the Maintenance
Schedule to determine what kind of fluid to use. See
ªRecommended Fluids and Lubricantsº in the Index.
1. Remove the filler plug.
2. Add fluid at the filler plug hole. Add only enough
fluid to bring the fluid level up to the bottom of the
filler plug hole.
3. Install the filler plug. Be sure the plug is fully seated.
Clutch Adjustment
The clutch linkage in your vehicle should be checked as
recommended in your Maintenance Schedule. To check,
push the clutch pedal down with your hand until you
feel some resistance to the movement of the pedal. If the
pedal moves freely up to 5/8 to 3/4 of an inch (1.5 to 2.0
cm) or so before you feel resistance to the travel,
adjustment isn't needed.
If there is no free travel or very little (less than 5/8 of an
inch (1.5 cm)), see your dealer for adjustment.
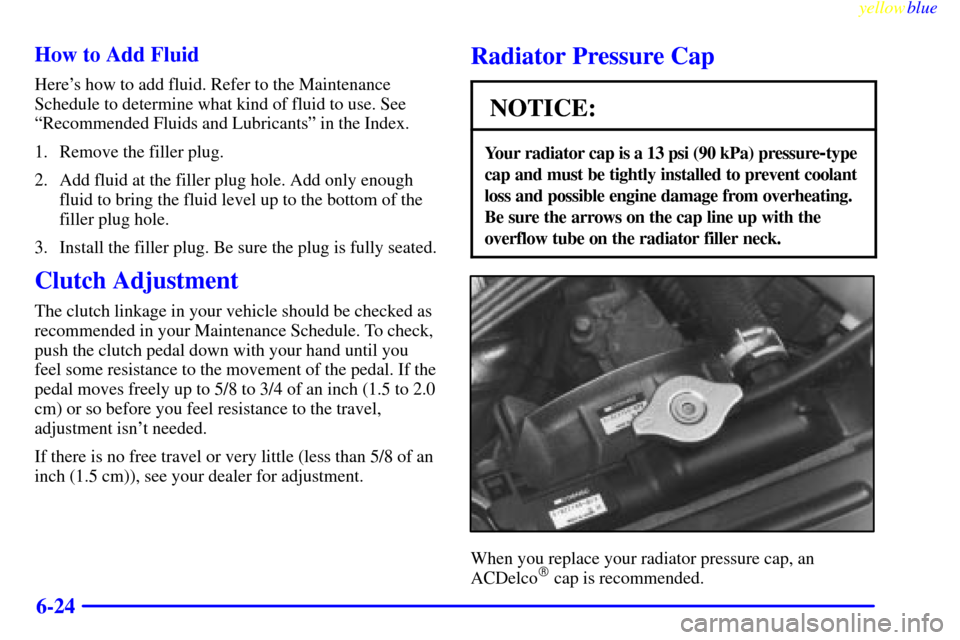
Radiator Pressure Cap
NOTICE:
Your radiator cap is a 13 psi (90 kPa) pressure-type
cap and must be tightly installed to prevent coolant
loss and possible engine damage from overheating.
Be sure the arrows on the cap line up with the
overflow tube on the radiator filler neck.
When you replace your radiator pressure cap, an
ACDelco� cap is recommended.