1998 PONTIAC BONNEVILLE radio controls
[x] Cancel search: radio controlsPage 142 of 395
v
Section 3 Comfort Controls and Audio Systems
In this section, you’ll find out how to operate the comfort control and audio systems offered w\
ith your vehicle. Be
sure to read about the particular systems supplied
with your vehicle.
3-2
3-5
3-6 3-6 3-8
3-8
3-9
3-9
3-9
3-
10
3-11
3-15
Comfort Controls Air Conditioning
Heating Ventilation System Defogging and Defrosting
Rear Window Defogger
Audio Systems Setting
the Clock for AM-FM Stereo
Setting the Clock for All Systems Except
AM-FM Stereo
AM-FM Stereo
AM-FM Stereo with Cassette Tape Player
(If Equipped)
AM-FM Stereo with Cassette Tape Player and
Equalizer (If Equipped) 3-
18
3-21
3-24
3-26
3-27
3-27
3-28
3-29 3-29
3-30
3-30
AM-FM Stereo with Compact Disc Player
(If Equipped)
AM-FM Stereo with Compact Disc Player and
Equalizer (If Equipped)
Theft-Deterrent Feature
Audio Steering Wheel Controls (If Equipped)
Understanding Radio Reception
Tips About Your Audio System
Care of Your Cassette Tape Player
Care
of Your Compact Discs
Care of Your Compact Disc Player
Fixed Mast Antenna
Power Antenna Mast Care
3-1
Page 151 of 395
AM-FM Stereo Finding a Station
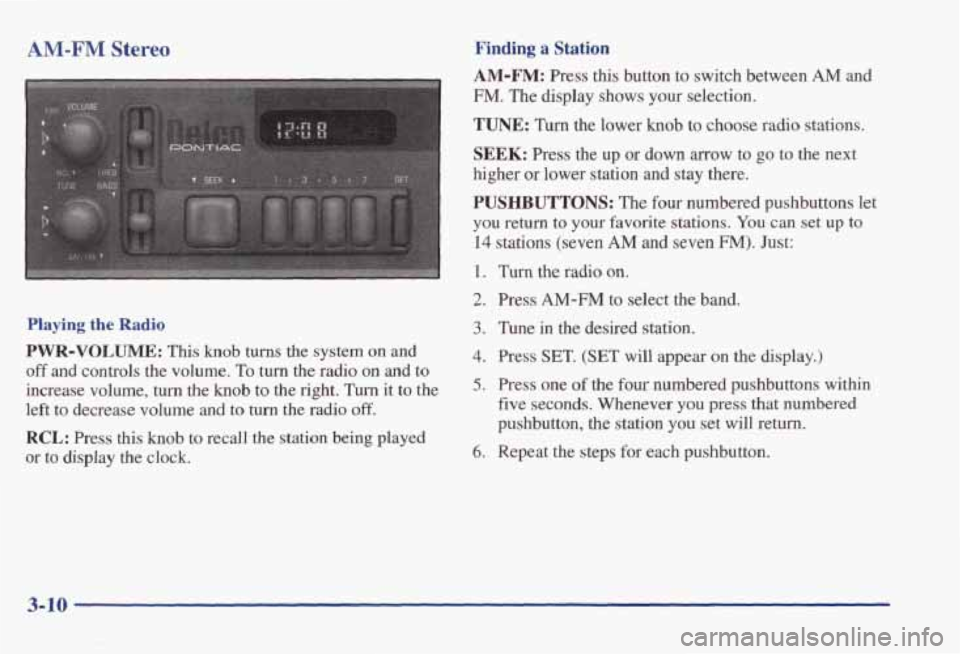
Playing the Radio
PWR-VOLUME: This knob turns the system on and
off and controls the volume. To turn the radio on and to
increase volume,
turn the knob to the right. Turn it to the
left to decrease volume and to
turn the radio off.
RCL: Press this knob to recall the station being played
or to display the clock.
AM-FM: Press this button to switch between AM and
FM. The display shows your selection.
TUNE: Turn the lower knob to choose radio stations.
SEEK: Press the up or down arrow to go to the next
higher or lower station
and stay there.
PUSHBUTTONS: The four numbered pushbuttons let
you return to your favorite stations.
You can set up to
14 stations (seven AM and seven FM). Just:
1. Turn the radio on.
2. Press AM-FM to select the band.
3. Tune in the desired station.
4. Press SET. (SET will appear on the display.)
5. Press one of the four numbered pushbuttons within
five seconds. Whenever
you press that numbered
pushbutton, the station you set will return.
6. Repeat the steps for each pushbutton.
3-10
Page 154 of 395
Playing a Cassette Tape
Your tape player is built to work best with tapes that are
30 to 45 minutes long on each side. Tapes longer than
that are
so thin they may not work well in this player.
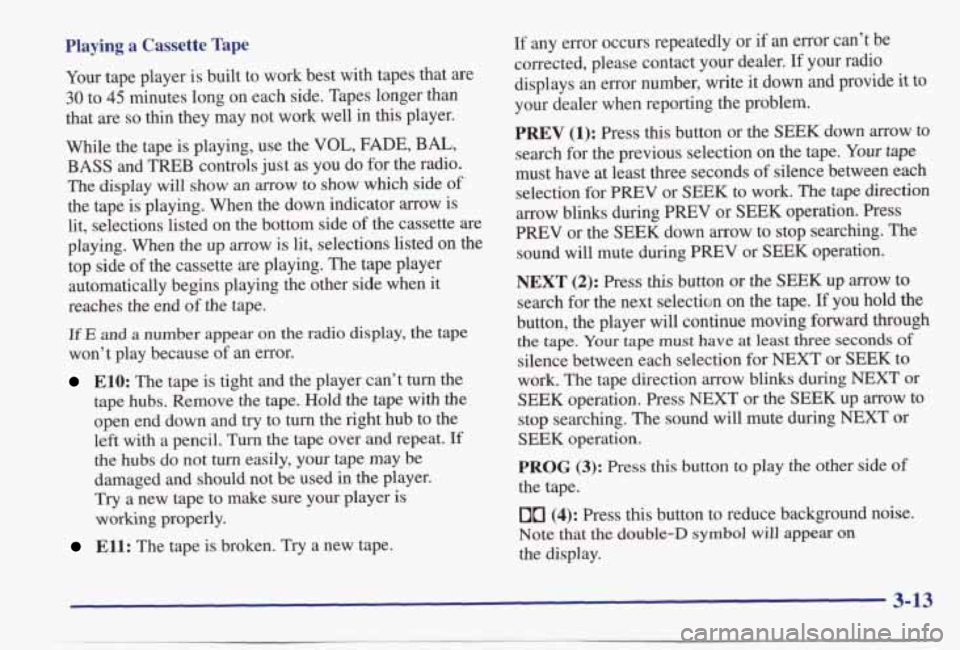
While the tape is playing, use the VOL,
FADE, BAL,
BASS and TREB controls just as you do for the radio.
The display
will show an arrow to show which side of’
the tape is playing. When the down indicator arrow is
lit, selections listed on the bottom side of the cassette are
playing. When the up arrow is lit, selections listed on the
top side of the cassette are playing. The tape player
automatically begins playing the other side when it
reaches the end
of the tape.
If E and a number appear on the radio display, the tape
won’t play because of an error.
E10: The tape is tight and the player can’t turn the
tape
hubs. Remove the tape. Hold the tape with the
open end down and
try to turn the right hub to the
left with a pencil.
Turn the tape over and repeat. If
the hubs do not turn easily, your tape may be
damaged and should not be used in the player.
Try a new tape to make sure your player is
working properly.
Ell: The tape is broken. Try a new tape.
If any error occurs repeatedly or if an error can’t be
corrected, please contact your dealer.
If your radio
displays
an error number, write it down and provide it to
your dealer when reporting the problem.
PREV (1): Press this button or the SEEK down arrow to
search for the previous selection on the tape.
Your tape
must have at least three seconds of silence between each
selection for PREV or
SEEK to work. The tape direction
arrow blinks during PREV or
SEEK operation. Press
PREV or the
SEEK down arrow to stop searching. The
sound
will mute during PREV or SEEK operation.
NEXT (2): Press this button or the SEEK up arrow to
search for the next selection on the tape. If you hold the
button, the player
will continue moving forward through
the tape. Your tape must have at least three seconds of
silence between each selection for NEXT or SEEK to
work. The tape direction
arrow blinks during NEXT or
SEEK operation. Press NEXT or the SEEK up arrow to
stop searching. The sound will mute during
NEXT or
SEEK operation.
PROG (3): Press this button to play the other side of
the tape.
00 (4): Press this button to reduce background noise.
Note
that the double-D symbol will appear on
the display.
3-13
Page 157 of 395
Adjusting the Speakers
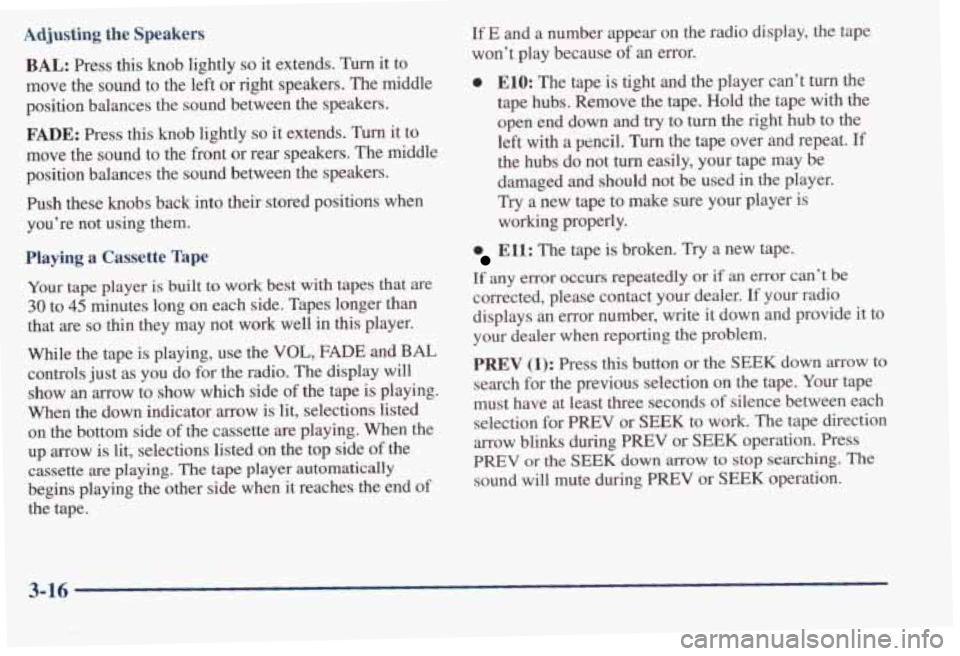
BAL: Press this knob lightly so it extends. Turn it to
move the sound to the left
or right speakers. The middle
position balances the sound between the speakers.
FADE: Press this knob lightly so it extends. Turn it to
move the sound to the front or rear speakers. The middle
position balances the sound between the speakers.
Push these knobs back into their stored positions when you’re not using them.
Playing a Cassette Tape
Your tape player is built to work best with tapes that are
30 to 45 minutes long on each side. Tapes longer than
that are
so thin they may not work well in this player.
While the tape is playing, use the VOL,
FADE and BAL
controls just as you do for the radio. The display will
show an arrow
to show which side of the tape is playing.
When the down indicator arrow is lit, selections listed
on the bottom side of the cassette are playing. When the
up
arrow is lit, selections listed on the top side of the
cassette are playing. The tape player automatically
begins playing the other side when it reaches the end of
the tape.
If E and a number appear on the radio display, the tape
won’t play because of
an error.
0 E10: The tape is tight and the player can’t turn the
tape hubs. Remove the tape. Hold the tape with the
open end down and
try to turn the right hub to the
left with a pencil. Turn the tape over and repeat. If
the hubs do not turn easily, your tape may be
damaged and should not be used in the player.
Try a new tape to make sure your player is
working properly.
Ell: The tape is broken. Try a new tape.
If any error occurs repeatedly or if an error can’t be
corrected, please contact your dealer. If your radio
displays an error number, write it down and provide it to
your dealer when reporting the problem.
PREV (1): Press this button or the SEEK down arrow to
search for the previous selection on the tape. Your tape
must have at least three seconds of silence between each
selection for
PREV or SEEK to work. The tape direction
arrow blinks during PREV or
SEEK operation. Press
PREV or the SEEK down arrow to stop searching. The
sound will mute during PREV
or SEEK operation.
3-16
Page 167 of 395
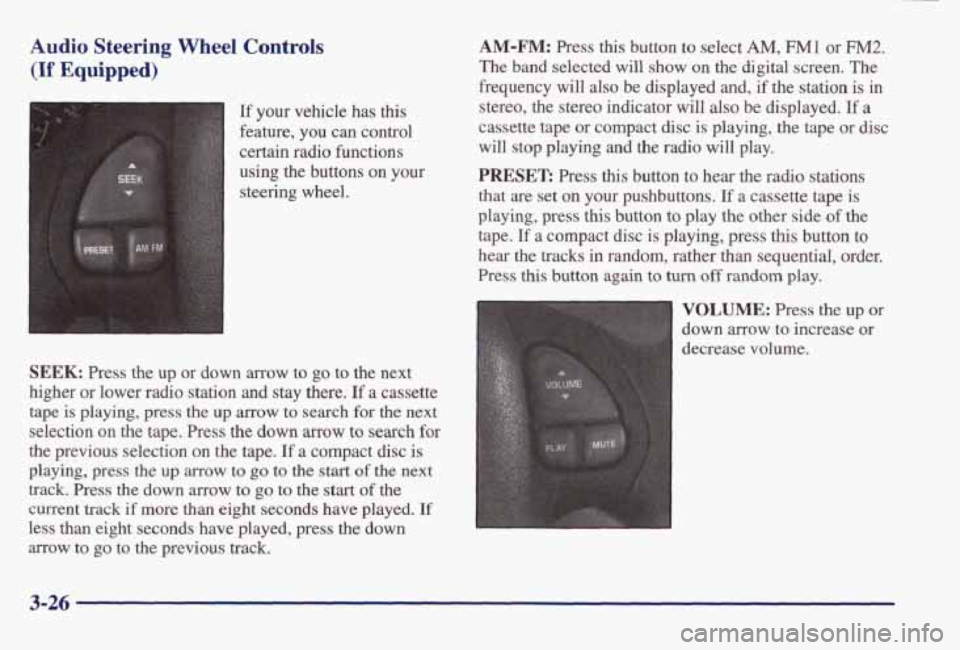
Audio Steering Wheel Controls
(If Equipped)
A
SEEK t
t,
1
[f your vehicle has this
feature, you can control
certain radio functions
using the buttons
on your
steering wheel.
SEEK: Press the up or down arrow to go to the next
higher or lower radio station
and stay there. If a cassette
tape is playing, press the up
arrow to search for the next
selection on the tape. Press the
down arrow to search for
the previous selection on the tape. If a compact disc is
playing, press the up arrow to go to the start of the next
track.
Press the down arrow to go to the start of the
current track
if more than eight seconds have played. If
less than eight seconds have played, press the down
arrow to
go to the previous track.
AM-FM: Press this button to select AM, F"1 or FM2.
The band selected will show on the digital screen. The
frequency will
also be displayed and, if the station is in
stereo, the stereo indicator will also be displayed.
If a
cassette tape or compact disc is playing, the tape or disc
will stop playing and the radio will play.
PRESET: Press this button to hear the radio stations
that are set on
your pushbuttons. If a cassette tape is
playing, press
this button to play the other side of the
tape.
If a compact disc is playing, press this button to
hear the
tracks in random, rather than sequential, order.
Press
this button again to turn off random play.
VOLUME: Press the up or
down arrow to increase or
decrease volume.
3-26
Page 310 of 395
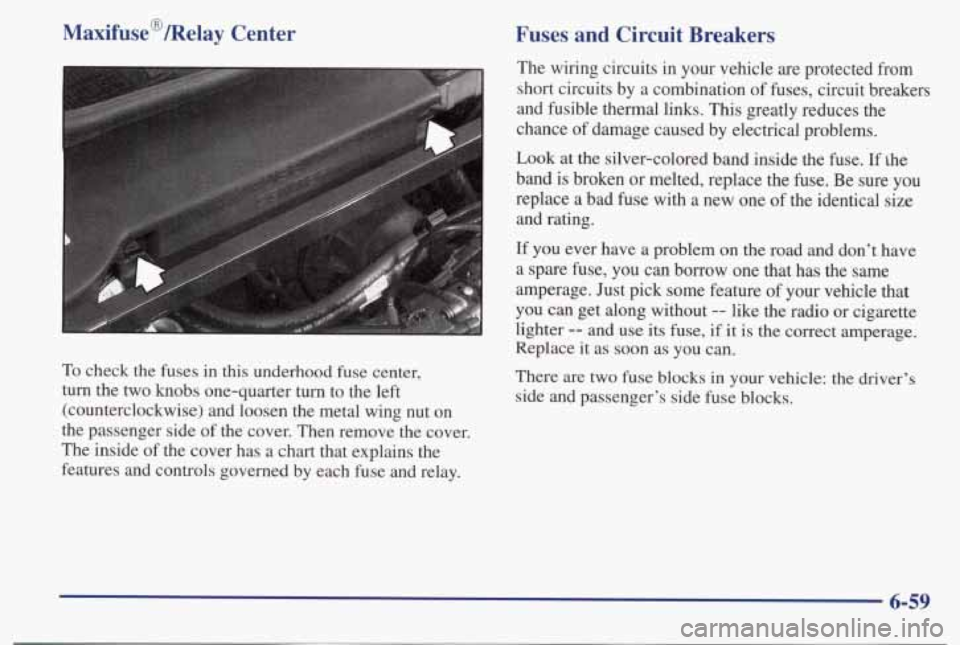
Maxifuse@/Relay Center
To check the fuses in this underhood fuse center,
turn the two
knobs one-quarter turn to the left
(counterclockwise) and loosen the metal wing
nut on
the passenger side of the cover. Then remove the cover.
The inside of the cover has
a chart that explains the
features and controls governed
by each fuse and relay.
Fuses and Circuit Breakers
The wiring circuits in your vehicle are protected from
short circuits by a combination of fuses, circuit breakers
and fusible thermal links. This greatly reduces the
chance
of damage caused by electrical problems.
Look at the silver-colored band inside the fuse. If
the
band is broken or melted, replace the fuse. Be sure you
replace a bad fuse with
a new one of the identical size
and rating.
If you ever have a problem on the road and don't have
a spare fuse,
you can borrow one that has the same
amperage. Just pick some feature
of your vehicle that
you
can get along without -- like the radio or cigarette
lighter
-- and use its fuse, if it is the correct amperage.
Replace
it as soon as you can.
There
are two fuse blocks in your vehicle: the driver's
side and passenger's side fuse blocks.
6-59
Page 381 of 395
Personalization Features ......................... 2- 11
Automatic Door Locks
......................... 2- 11
Delayed Locking
............................. 2- 11
Security
Feedback ............................ 2- 12
Pontiac Cares Information
......................... 8-2
Power Accessorv Outlet
............................. 2-55 d
AntennaMastCare ............................ 3-30
AntennaService
.............................. 7-31
DoorLoc
ks ................................... 2-5
Remote Control Mirror
........................ 2-50
Seat
......................................... 1-2
Seatback Recliner
.............................. 1-3
Steering
.................................... 4-10
Steering Fluid ................................ 6-26
Windows
................................... 2-35
Power, Retained Accessory
....................... 2-21
Power Seat Lumbar Controls
....................... 1-3
Pregnancy, Use
of Safety Belts .................... 1-17
Problems
on the Road ............................ 5-1
Publications, Service and Owner
................... 8-12
Option Fuses
................................ 6-58
Radiator
................................... 5-22
Radiator Pressure Cap
........................... 6-26
RadioReception
................................ 3-27
Radios
................... 3.10.3.11.3.15.3.18. 3.21
Rain. Driving In ................................ 4-17
Reading Lamps
........................... 2.47. 2.48
Door Security Locks
........................... 2-8
Outside Seat
Position .......................... 1-26
Safety Belt Comfort Guides
..................... 1-29
Rear Seat Passengers
.............................. 1-26
Sidemarker Lamp Bulb Replacement
............. 6-35
Storage Compartment ......................... 2-52
'Ih Signal Lamp Bulb Replacement ............. 6-35
Window Defogger
............................. 3-8
Electrochromic Daymight
...................... 2-49
Inside Daymight
............................. 2-48
Reclining Front Seatbacks
......................... 1-3
Recommended Fluids and Lubricants
............... 7-37
Recovery
Tank, Coolant .......................... 5-19
Refrigerants, Air Conditioning .................... 6-65
Keyless
Entry ................................ 2-10
Trunk Release ................................ 2-14
Trunk Release Lockout ........................ 2-15
Keyless
Entry, Instant Alarm .................... 2-11
Keyless Entry, Personalization Features ........... 2-11
Keyless
Entry, Resynchronization ................ 2-11
Keyless
Entry, Security Feedback ................ 2-12
Towing
..................................... 5-13
RearviewMirror ................................ 2-48
Remote
Replacement Bulbs
...................................... 6-64
Parts ....................................... 6-67
Wheel 6-47
....................................
Replacing Safety Belts ............... ....... 1-49
Reporting Safety Defects
......................... 8-10
Restraints Checking
,..,............................... l-49
Child ....................................... l-34
Head ........................................ 1-5
Replacing
Parts After a Crash ................... 1-49
Retained Accessory Power
........................ 2-21
Systemcheck
................................ 7-32
9-8