Page 4334 of 6000

4D2–27 TRANSFER CASE (TOD)
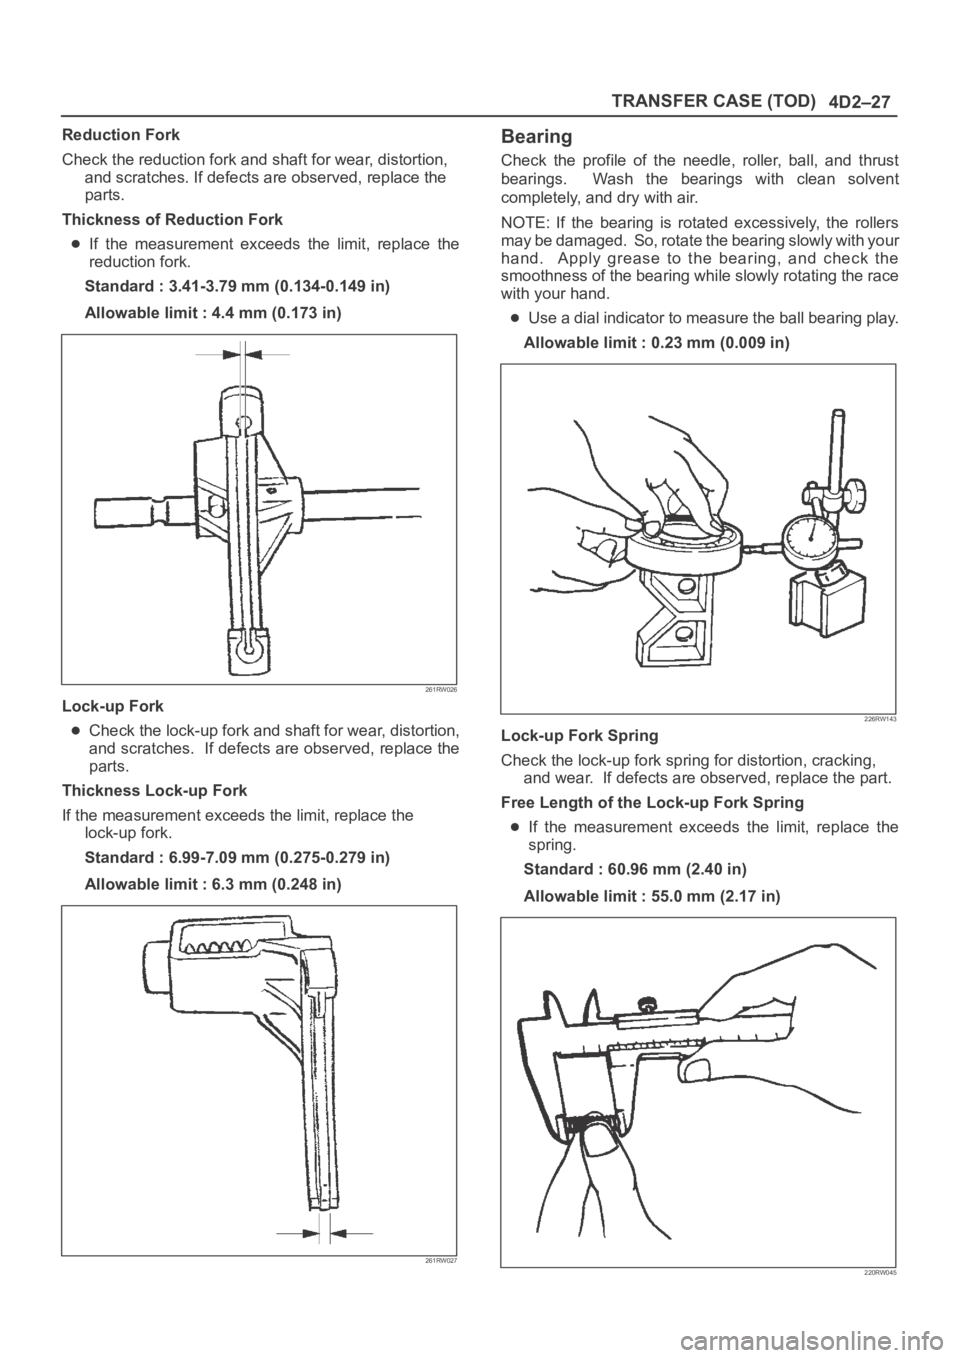
Reduction Fork
Check the reduction fork and shaft for wear, distortion,
and scratches. If defects are observed, replace the
parts.
Thickness of Reduction Fork
If the measurement exceeds the limit, replace the
reduction fork.
Standard : 3.41-3.79 mm (0.134-0.149 in)
Allowable limit : 4.4 mm (0.173 in)
261RW026
Lock-up Fork
Check the lock-up fork and shaft for wear, distortion,
and scratches. If defects are observed, replace the
parts.
Thickness Lock-up Fork
If the measurement exceeds the limit, replace the
lock-up fork.
Standard : 6.99-7.09 mm (0.275-0.279 in)
Allowable limit : 6.3 mm (0.248 in)
261RW027
Bearing
Check the profile of the needle, roller, ball, and thrust
bearings. Wash the bearings with clean solvent
completely, and dry with air.
NOTE: If the bearing is rotated excessively, the rollers
may be damaged. So, rotate the bearing slowly with your
hand. Apply grease to the bearing, and check the
smoothness of the bearing while slowly rotating the race
with your hand.
Use a dial indicator to measure the ball bearing play.
Allowable limit : 0.23 mm (0.009 in)
226RW143
Lock-up Fork Spring
Check the lock-up fork spring for distortion, cracking,
and wear. If defects are observed, replace the part.
Free Length of the Lock-up Fork Spring
If the measurement exceeds the limit, replace the
spring.
Standard : 60.96 mm (2.40 in)
Allowable limit : 55.0 mm (2.17 in)
220RW045
Page 4335 of 6000

4D2–28
TRANSFER CASE (TOD)
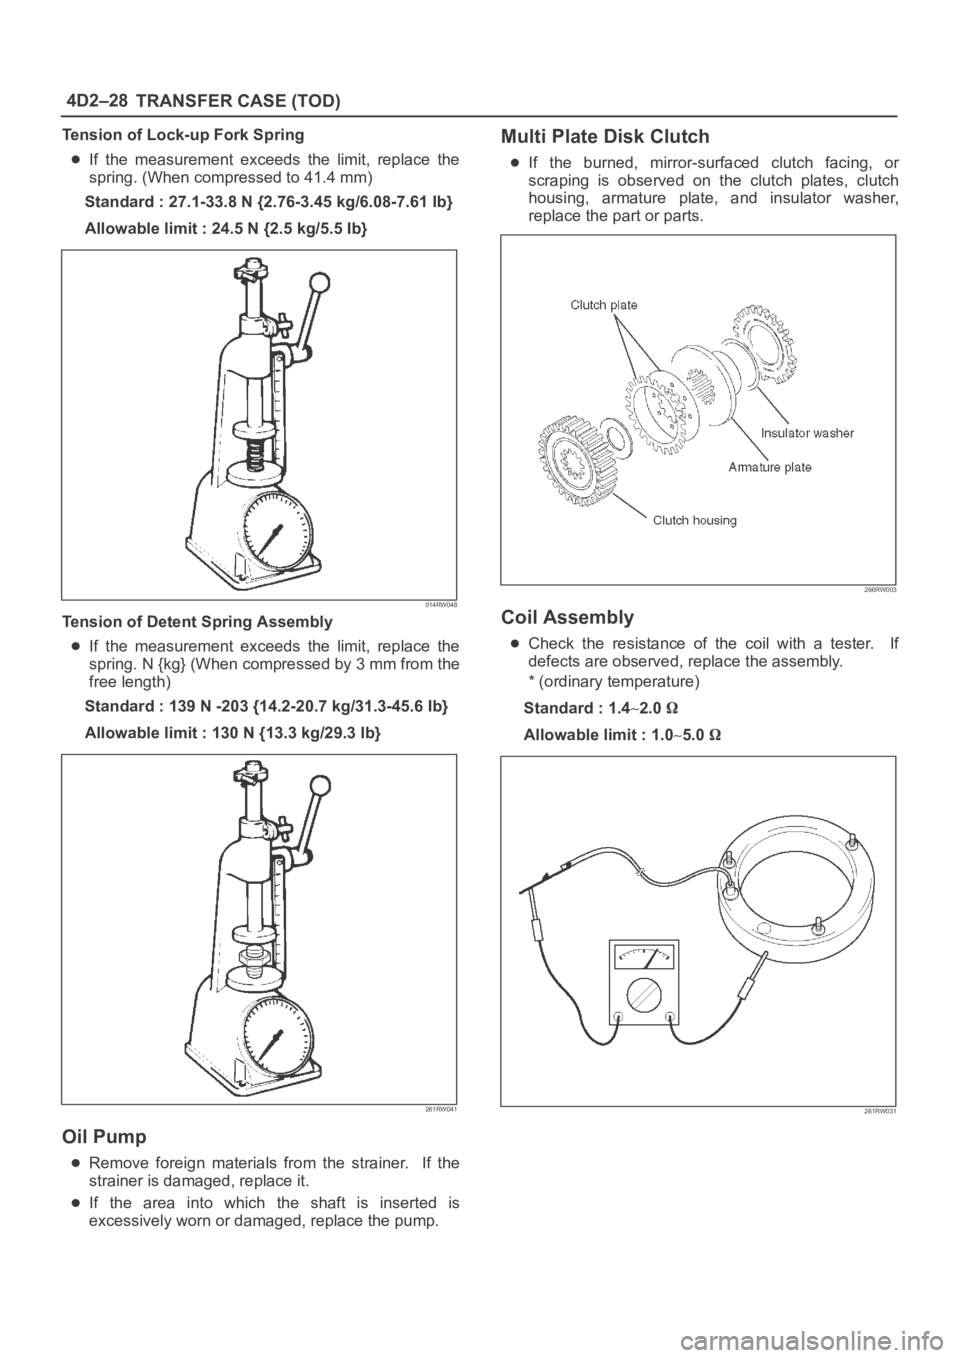
Tension of Lock-up Fork Spring
If the measurement exceeds the limit, replace the
spring. (When compressed to 41.4 mm)
Standard : 27.1-33.8 N {2.76-3.45 kg/6.08-7.61 Ib}
Allowable limit : 24.5 N {2.5 kg/5.5 Ib}
014RW048
Tension of Detent Spring Assembly
If the measurement exceeds the limit, replace the
spring. N {kg} (When compressed by 3 mm from the
free length)
Standard : 139 N -203 {14.2-20.7 kg/31.3-45.6 Ib}
Allowable limit : 130 N {13.3 kg/29.3 Ib}
261RW041
Oil Pump
Remove foreign materials from the strainer. If the
strainer is damaged, replace it.
If the area into which the shaft is inserted is
excessively worn or damaged, replace the pump.
Multi Plate Disk Clutch
If the burned, mirror-surfaced clutch facing, or
scraping is observed on the clutch plates, clutch
housing, armature plate, and insulator washer,
replace the part or parts.
266RW003
Coil Assembly
Check the resistance of the coil with a tester. If
defects are observed, replace the assembly.
* (ordinary temperature)
Standard : 1.4
2.0
Allowable limit : 1.05.0
261RW031
Page 4341 of 6000
4D2–34
TRANSFER CASE (TOD)
Output Shafts and Shift Control Shaft
Disassembled View
261RW010–1
Legend
(1) Transfer Case Assembly
(2) Detent Spring
(3) Front Output Shaft
(4) Reduction Hub
(5) Output Shaft
(6) Reduction Fork Assembly
(7) Lock-up Shaft
(8) Spring Pin
(9) Reduction Fork(10) Cam Assembly
(11) Snap Ring
(12) Washer
(13) Cam
(14) Cam Pilot Block
(15) Shifter Shaft Assembly
(16) Shifter Lever Shaft
(17) Snap Ring
(18) Reduction Lever Assembly
(19) Snap Ring
Reassembly
1. Apply ATF to the inside of the ball bearing for the front
output shaft.
Page 4342 of 6000
4D2–35 TRANSFER CASE (TOD)
2. Mount the front output shaft to the transfer case.
266RW012
3. Install the shifter lever shaft to the transfer case
assembly.
4. Install the snap ring to the shifter lever shaft.
5. Install the reduction lever assembly to the shifter lever
shaft and fix the assembly with the snap ring.
261RW021
6. Install the cam to the cam pilot block.
7. Attach the washer to the cam pilot block and fix the
washer with the snap ring.
261RW029
8. Mount the reduction fork to the lock-up shaft.
9. Install the spring pin to the reduction fork and lock-up
shaft.
261RW020
Page 4343 of 6000
4D2–36
TRANSFER CASE (TOD)
10. Install the reduction fork assembly together with
reduction hub to the transfer case assembly.
261RW019
11. Install the cam assembly and tighten the cam pilot
block set bolts to the specified torque.
Torque : 12 Nꞏm (1.2 kgꞏm/104 lb in)
12. Tighten the detent spring to the specified torque.
Torque : 24 Nꞏm (2.4 kgꞏm/17 lb in)
261RW022
13. Apply ATF to the needle bearing inside the input shaft
assembly.
14. Install the output shaft to the transfer case assembly.
Page 4344 of 6000
4D2–37 TRANSFER CASE (TOD)
Sprocket and Mechanical Lock
Disassembled View
266RW008
Legend
(1) Strainer
(2) Hose
(3) Oil Pump Assembly
(4) Thrust Washer
(5) Mechanical Lock Hub
(6) Lock-up Sleeve(7) Lock-up Fork
(8) Chain
(9) Lower Drive Sprocket
(10) Front Tone Wheel
(11) Drive Sprocket
(12) Sprocket Spacer
Reassembly
1. Connect the hose and strainer to the oil pump
assembly.
2. Install the oil pump assembly to the output shaft and
set the magnet to the strainer position.
3. Install the thrust washer.
4. Install the spring to the lock-up fork.
Page 4345 of 6000
4D2–38
TRANSFER CASE (TOD)
5. Install the lock-up sleeve together with the lock-up
fork to the output shaft and lock-up shaft assembly.
6. Install the spring retainers to the lock-up fork.
261RW018
7. Install the mechanical lock hub.
8. Apply ATF to the chain.
9. Engage the chain to both sprockets.
10. Install the chain and sprocket assembly to both output
shafts.
266RW010
11. Install the front tone wheel and sprocket spacer.
Page 4348 of 6000
4D2–41 TRANSFER CASE (TOD)
Main Data and Specifications
Leading Particulars
Ty p eTransfer case with low range reduction mechanism
2H Rear wheel drive
TOD Electronically controlled torque split four wheel drive
4L Low-speed mechanical lock-up four wheel drive
Control systemFloor direct control
Gear ratioH1.000
L2.480
Oil quantity, Lit1.9
OilAT F D E X R O N-IIE or ATF DEXRON-III
Torque Specifications
E04RW012