1998 OPEL FRONTERA air condition
[x] Cancel search: air conditionPage 2307 of 6000
7A1–62
TRANSMISSION CONTROL SYSTEM (4L30–E)
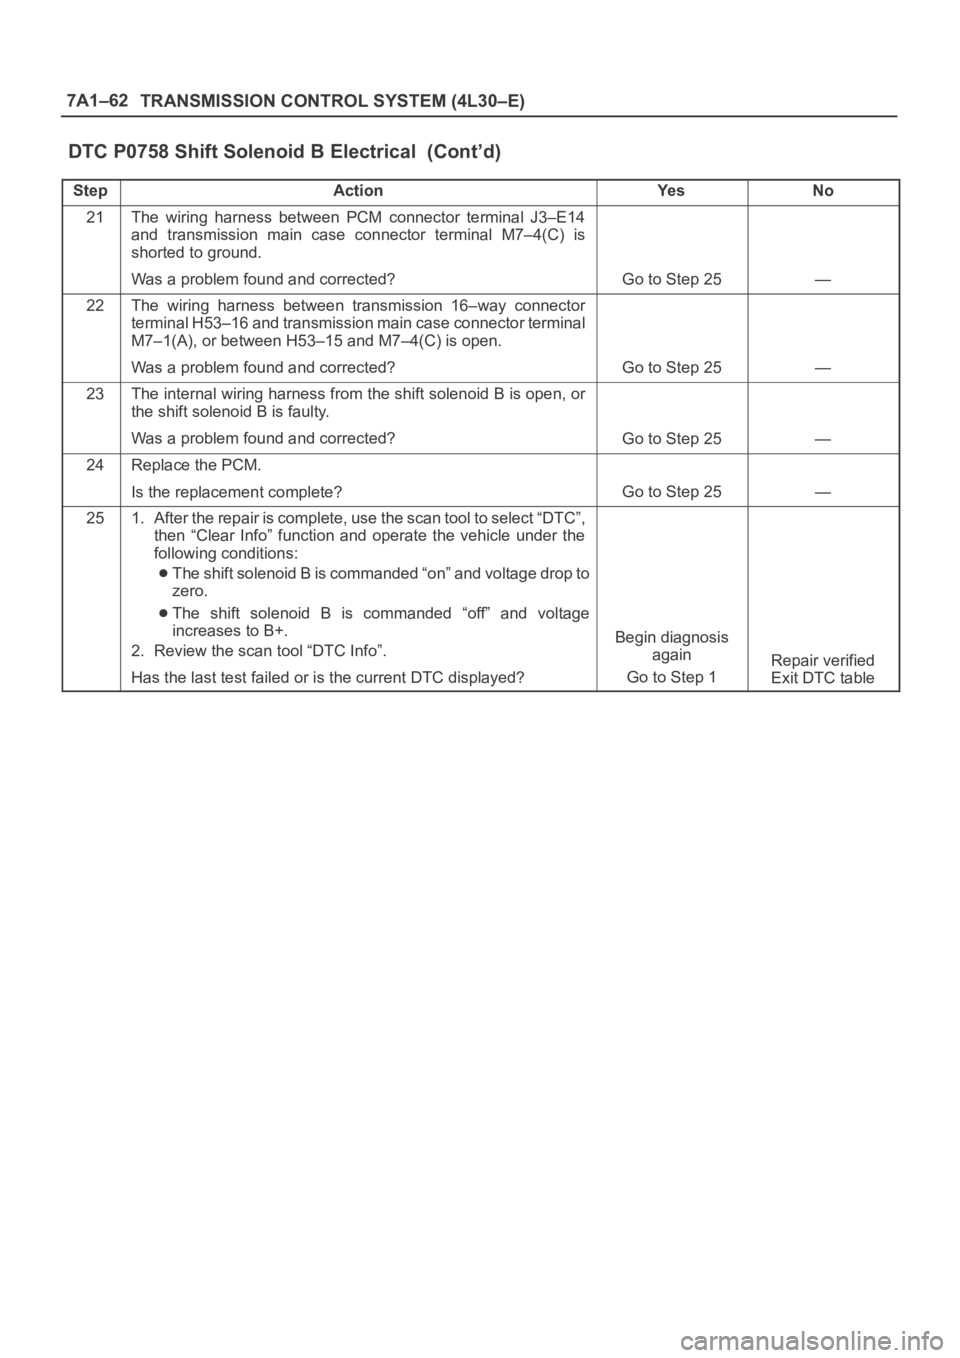
DTC P0758 Shift Solenoid B Electrical (Cont’d)
StepNo Ye s Action
21The wiring harness between PCM connector terminal J3–E14
and transmission main case connector terminal M7–4(C) is
shorted to ground.
Was a problem found and corrected?
Go to Step 25—
22The wiring harness between transmission 16–way connector
terminal H53–16 and transmission main case connector terminal
M7–1(A), or between H53–15 and M7–4(C) is open.
Was a problem found and corrected?
Go to Step 25—
23The internal wiring harness from the shift solenoid B is open, or
the shift solenoid B is faulty.
Was a problem found and corrected?
Go to Step 25—
24Replace the PCM.
Is the replacement complete?
Go to Step 25—
251. After the repair is complete, use the scan tool to select “DTC”,
then “Clear Info” function and operate the vehicle under the
following conditions:
The shift solenoid B is commanded “on” and voltage drop to
zero.
The shift solenoid B is commanded “off” and voltage
increases to B+.
2. Review the scan tool “DTC Info”.
Has the last test failed or is the current DTC displayed?
Begin diagnosis
again
Go to Step 1
Repair verified
Exit DTC table
Page 2308 of 6000
TRANSMISSION CONTROL SYSTEM (4L30–E)7A1–63
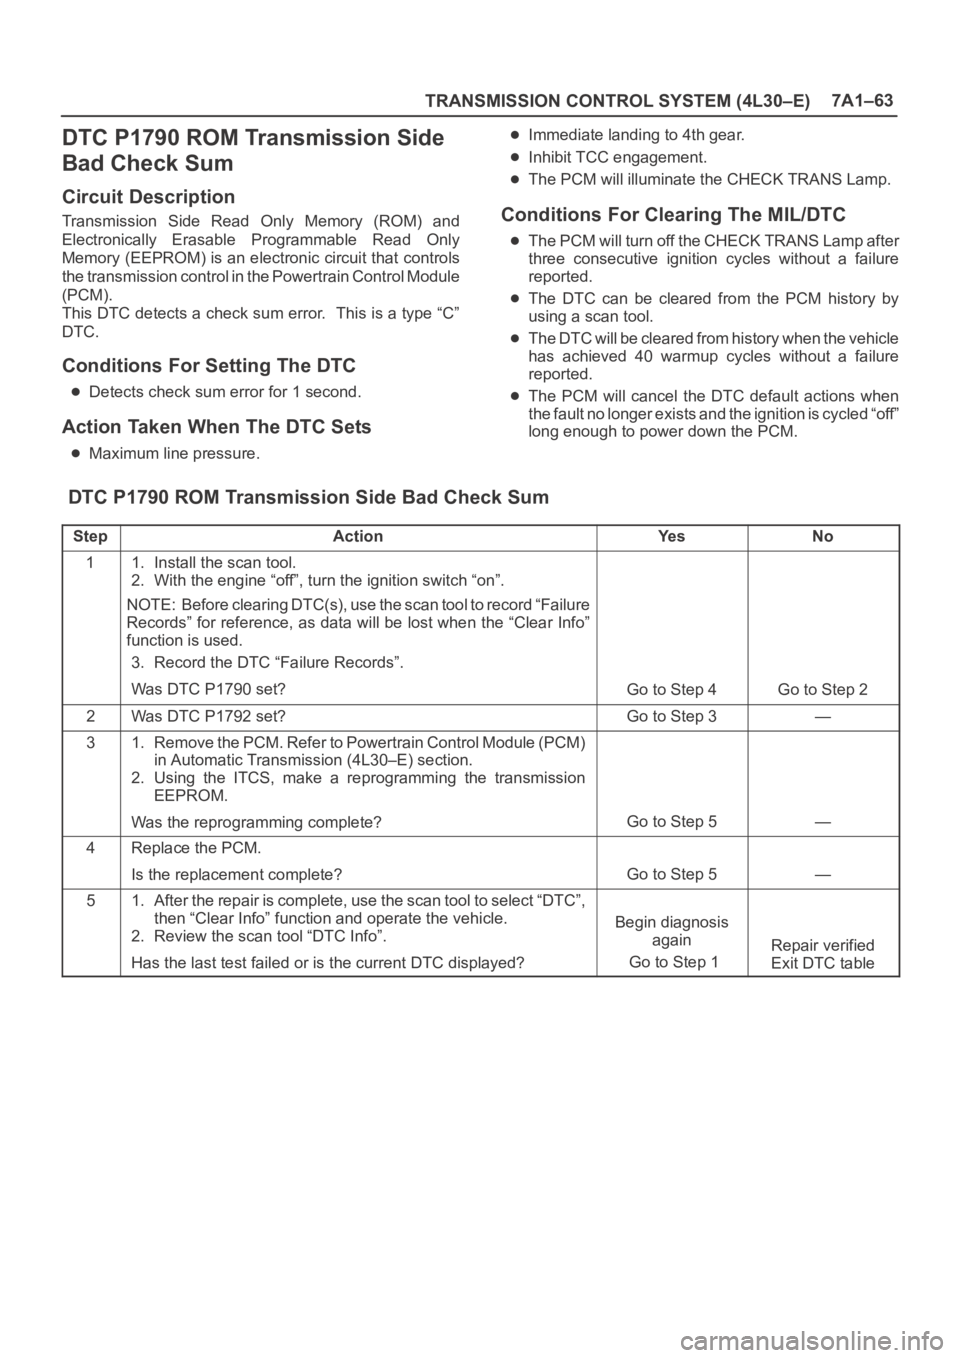
DTC P1790 ROM Transmission Side
Bad Check Sum
Circuit Description
Transmission Side Read Only Memory (ROM) and
Electronically Erasable Programmable Read Only
Memory (EEPROM) is an electronic circuit that controls
the transmission control in the Powertrain Control Module
(PCM).
This DTC detects a check sum error. This is a type “C”
DTC.
Conditions For Setting The DTC
Detects check sum error for 1 second.
Action Taken When The DTC Sets
Maximum line pressure.
Immediate landing to 4th gear.
Inhibit TCC engagement.
The PCM will illuminate the CHECK TRANS Lamp.
Conditions For Clearing The MIL/DTC
The PCM will turn off the CHECK TRANS Lamp after
three consecutive ignition cycles without a failure
reported.
The DTC can be cleared from the PCM history by
using a scan tool.
The DTC will be cleared from history when the vehicle
has achieved 40 warmup cycles without a failure
reported.
The PCM will cancel the DTC default actions when
the fault no longer exists and the ignition is cycled “off”
long enough to power down the PCM.
DTC P1790 ROM Transmission Side Bad Check Sum
StepActionYe sNo
11. Install the scan tool.
2. With the engine “off”, turn the ignition switch “on”.
NOTE: Before clearing DTC(s), use the scan tool to record “Failure
Records” for reference, as data will be lost when the “Clear Info”
function is used.
3. Record the DTC “Failure Records”.
Was DTC P1790 set?
Go to Step 4Go to Step 2
2Was DTC P1792 set?Go to Step 3—
31. Remove the PCM. Refer to Powertrain Control Module (PCM)
in Automatic Transmission (4L30–E) section.
2. Using the ITCS, make a reprogramming the transmission
EEPROM.
Was the reprogramming complete?
Go to Step 5—
4Replace the PCM.
Is the replacement complete?
Go to Step 5—
51. After the repair is complete, use the scan tool to select “DTC”,
then “Clear Info” function and operate the vehicle.
2. Review the scan tool “DTC Info”.
Has the last test failed or is the current DTC displayed?
Begin diagnosis
again
Go to Step 1
Repair verified
Exit DTC table
Page 2309 of 6000
7A1–64
TRANSMISSION CONTROL SYSTEM (4L30–E)
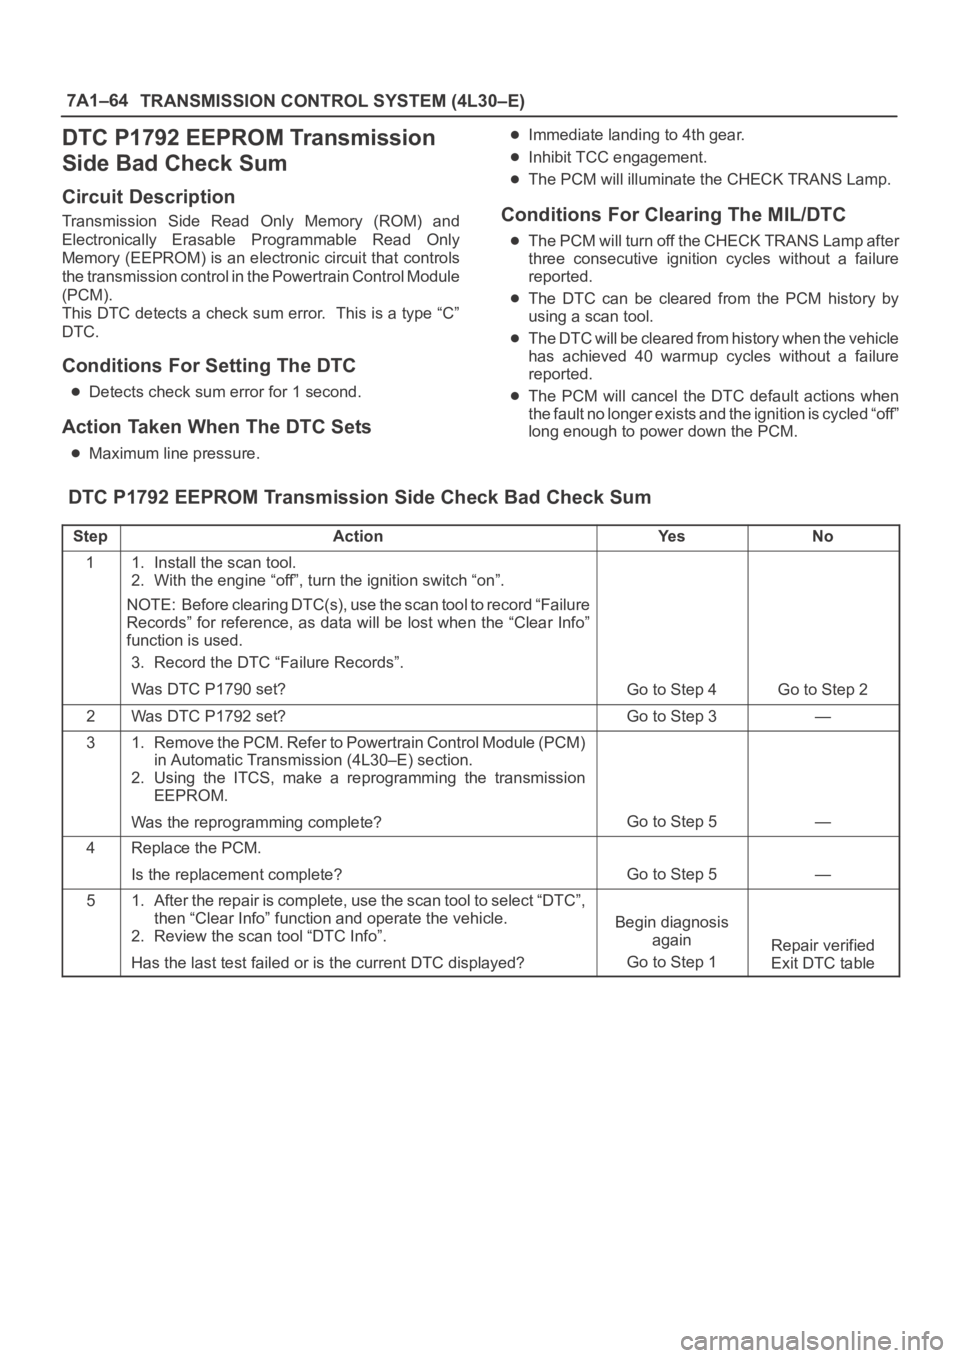
DTC P1792 EEPROM Transmission
Side Bad Check Sum
Circuit Description
Transmission Side Read Only Memory (ROM) and
Electronically Erasable Programmable Read Only
Memory (EEPROM) is an electronic circuit that controls
the transmission control in the Powertrain Control Module
(PCM).
This DTC detects a check sum error. This is a type “C”
DTC.
Conditions For Setting The DTC
Detects check sum error for 1 second.
Action Taken When The DTC Sets
Maximum line pressure.
Immediate landing to 4th gear.
Inhibit TCC engagement.
The PCM will illuminate the CHECK TRANS Lamp.
Conditions For Clearing The MIL/DTC
The PCM will turn off the CHECK TRANS Lamp after
three consecutive ignition cycles without a failure
reported.
The DTC can be cleared from the PCM history by
using a scan tool.
The DTC will be cleared from history when the vehicle
has achieved 40 warmup cycles without a failure
reported.
The PCM will cancel the DTC default actions when
the fault no longer exists and the ignition is cycled “off”
long enough to power down the PCM.
DTC P1792 EEPROM Transmission Side Check Bad Check Sum
StepActionYe sNo
11. Install the scan tool.
2. With the engine “off”, turn the ignition switch “on”.
NOTE: Before clearing DTC(s), use the scan tool to record “Failure
Records” for reference, as data will be lost when the “Clear Info”
function is used.
3. Record the DTC “Failure Records”.
Was DTC P1790 set?
Go to Step 4Go to Step 2
2Was DTC P1792 set?Go to Step 3—
31. Remove the PCM. Refer to Powertrain Control Module (PCM)
in Automatic Transmission (4L30–E) section.
2. Using the ITCS, make a reprogramming the transmission
EEPROM.
Was the reprogramming complete?
Go to Step 5—
4Replace the PCM.
Is the replacement complete?
Go to Step 5—
51. After the repair is complete, use the scan tool to select “DTC”,
then “Clear Info” function and operate the vehicle.
2. Review the scan tool “DTC Info”.
Has the last test failed or is the current DTC displayed?
Begin diagnosis
again
Go to Step 1
Repair verified
Exit DTC table
Page 2311 of 6000
7A1–66
TRANSMISSION CONTROL SYSTEM (4L30–E)
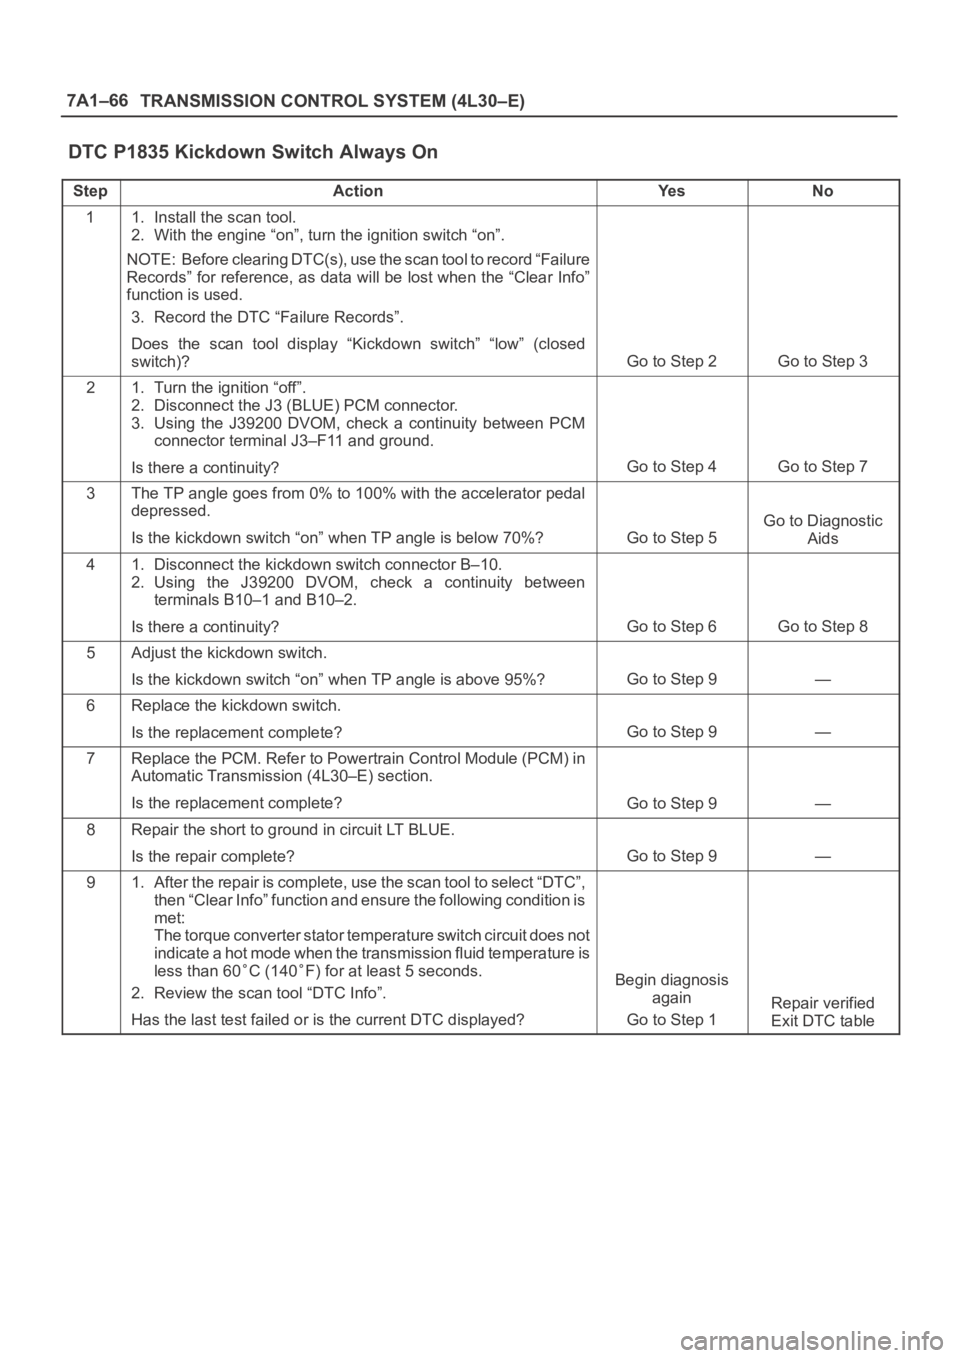
DTC P1835 Kickdown Switch Always On
StepActionYe sNo
11. Install the scan tool.
2. With the engine “on”, turn the ignition switch “on”.
NOTE: Before clearing DTC(s), use the scan tool to record “Failure
Records” for reference, as data will be lost when the “Clear Info”
function is used.
3. Record the DTC “Failure Records”.
Does the scan tool display “Kickdown switch” “low” (closed
switch)?
Go to Step 2Go to Step 3
21. Turn the ignition “off”.
2. Disconnect the J3 (BLUE) PCM connector.
3. Using the J39200 DVOM, check a continuity between PCM
connector terminal J3–F11 and ground.
Is there a continuity?
Go to Step 4Go to Step 7
3The TP angle goes from 0% to 100% with the accelerator pedal
depressed.
Is the kickdown switch “on” when TP angle is below 70%?
Go to Step 5
Go to Diagnostic
Aids
41. Disconnect the kickdown switch connector B–10.
2. Using the J39200 DVOM, check a continuity between
terminals B10–1 and B10–2.
Is there a continuity?
Go to Step 6Go to Step 8
5Adjust the kickdown switch.
Is the kickdown switch “on” when TP angle is above 95%?
Go to Step 9—
6Replace the kickdown switch.
Is the replacement complete?
Go to Step 9—
7Replace the PCM. Refer to Powertrain Control Module (PCM) in
Automatic Transmission (4L30–E) section.
Is the replacement complete?
Go to Step 9—
8Repair the short to ground in circuit LT BLUE.
Is the repair complete?
Go to Step 9—
91. After the repair is complete, use the scan tool to select “DTC”,
then “Clear Info” function and ensure the following condition is
met:
The torque converter stator temperature switch circuit does not
indicate a hot mode when the transmission fluid temperature is
less than 60
C (140F) for at least 5 seconds.
2. Review the scan tool “DTC Info”.
Has the last test failed or is the current DTC displayed?Begin diagnosis
again
Go to Step 1
Repair verified
Exit DTC table
Page 2315 of 6000
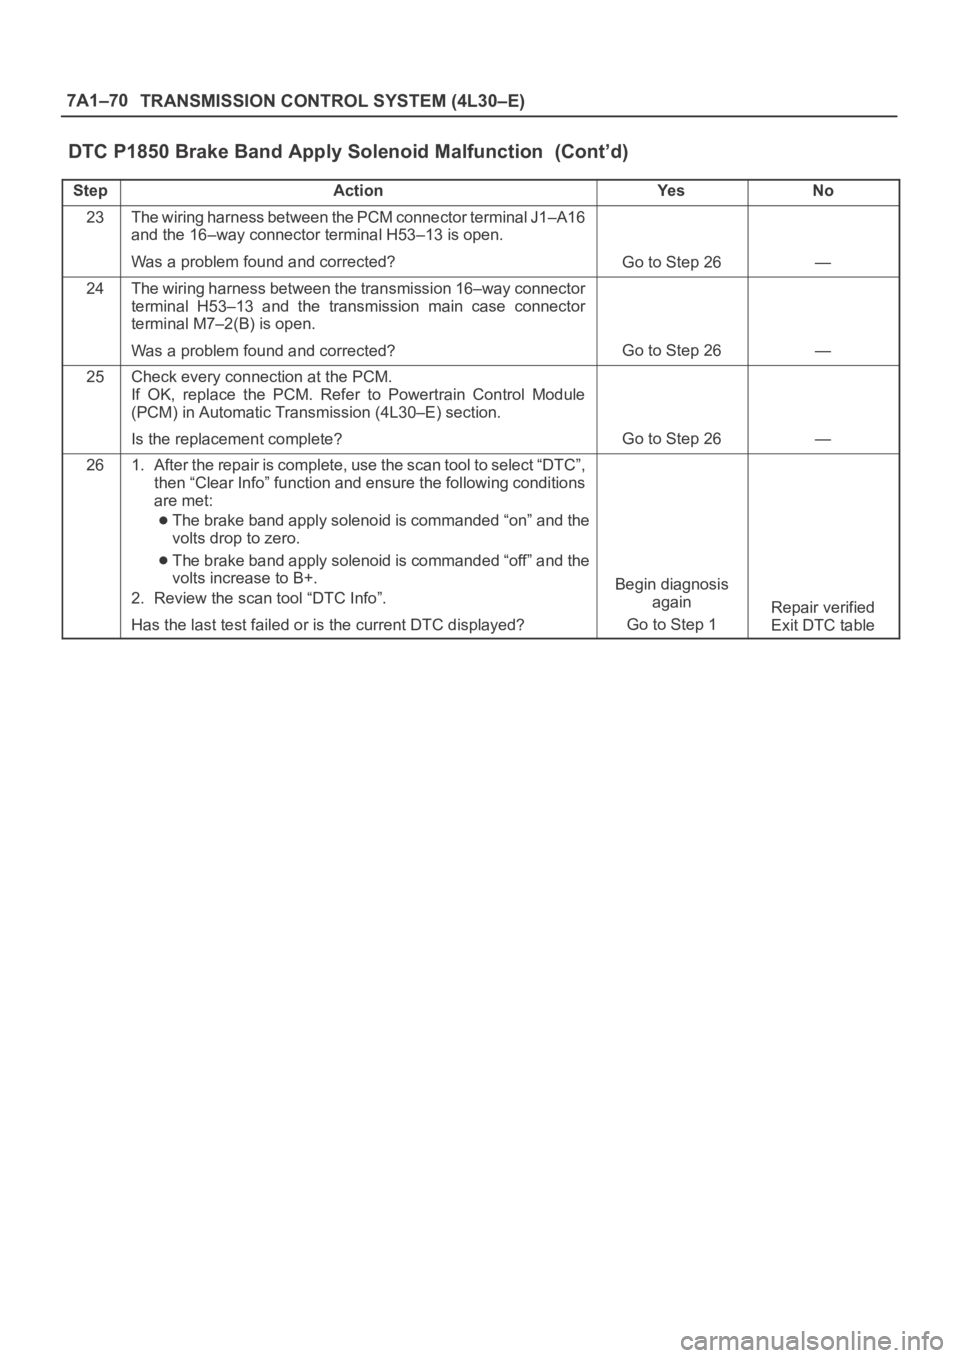
7A1–70
TRANSMISSION CONTROL SYSTEM (4L30–E)
DTC P1850 Brake Band Apply Solenoid Malfunction (Cont’d)
StepNo Ye s Action
23The wiring harness between the PCM connector terminal J1–A16
and the 16–way connector terminal H53–13 is open.
Was a problem found and corrected?
Go to Step 26—
24The wiring harness between the transmission 16–way connector
terminal H53–13 and the transmission main case connector
terminal M7–2(B) is open.
Was a problem found and corrected?
Go to Step 26—
25Check every connection at the PCM.
If OK, replace the PCM. Refer to Powertrain Control Module
(PCM) in Automatic Transmission (4L30–E) section.
Is the replacement complete?
Go to Step 26—
261. After the repair is complete, use the scan tool to select “DTC”,
then “Clear Info” function and ensure the following conditions
are met:
The brake band apply solenoid is commanded “on” and the
volts drop to zero.
The brake band apply solenoid is commanded “off” and the
volts increase to B+.
2. Review the scan tool “DTC Info”.
Has the last test failed or is the current DTC displayed?
Begin diagnosis
again
Go to Step 1
Repair verified
Exit DTC table
Page 2318 of 6000
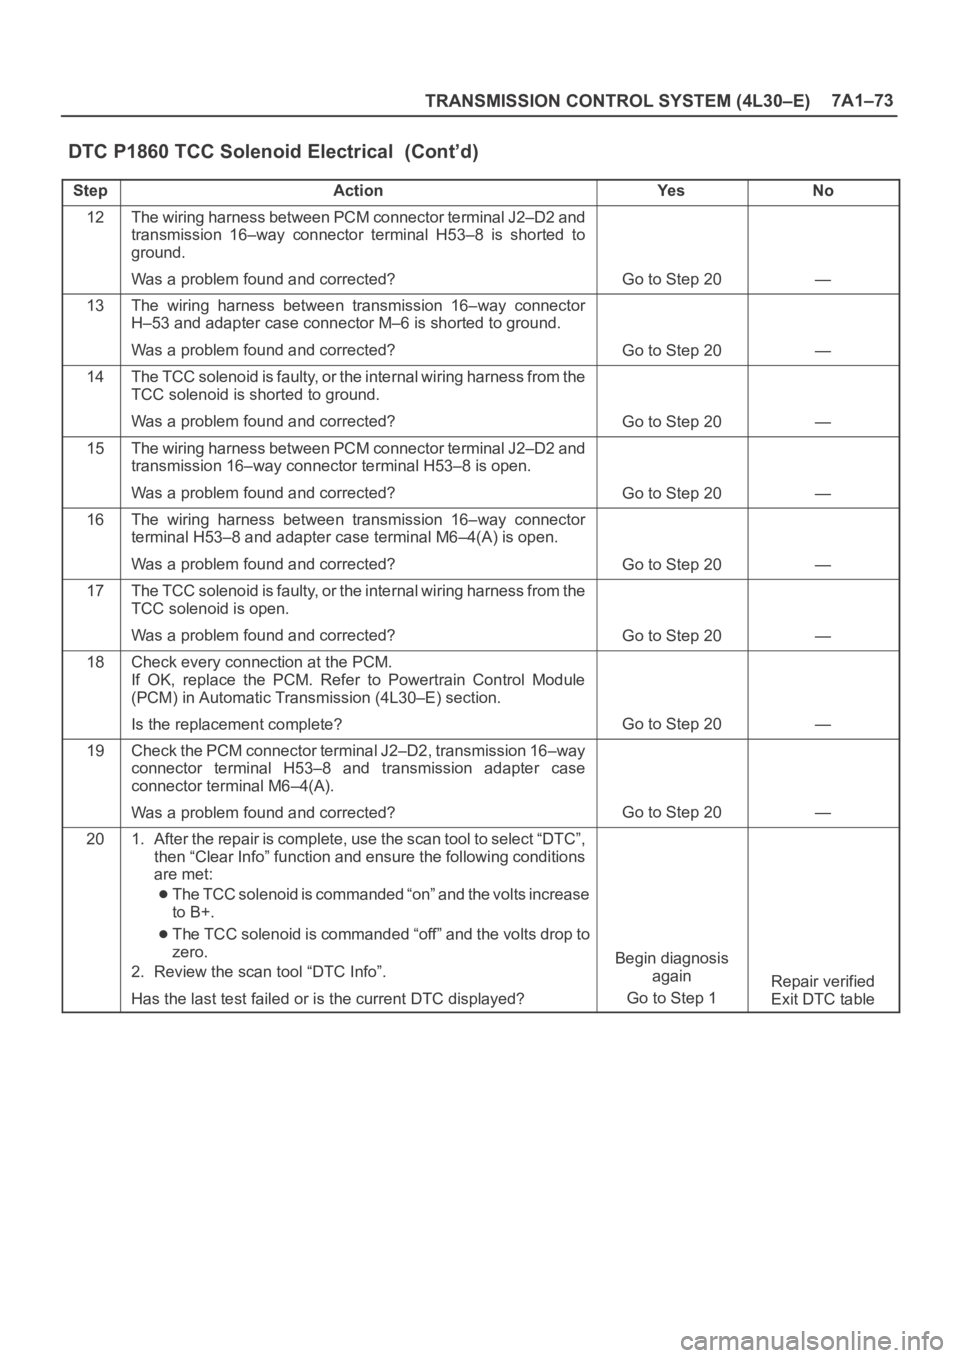
TRANSMISSION CONTROL SYSTEM (4L30–E)7A1–73
DTC P1860 TCC Solenoid Electrical (Cont’d)
StepNo Ye s Action
12The wiring harness between PCM connector terminal J2–D2 and
transmission 16–way connector terminal H53–8 is shorted to
ground.
Was a problem found and corrected?
Go to Step 20—
13The wiring harness between transmission 16–way connector
H–53 and adapter case connector M–6 is shorted to ground.
Was a problem found and corrected?
Go to Step 20—
14The TCC solenoid is faulty, or the internal wiring harness from t h e
TCC solenoid is shorted to ground.
Was a problem found and corrected?
Go to Step 20—
15The wiring harness between PCM connector terminal J2–D2 and
transmission 16–way connector terminal H53–8 is open.
Was a problem found and corrected?
Go to Step 20—
16The wiring harness between transmission 16–way connector
terminal H53–8 and adapter case terminal M6–4(A) is open.
Was a problem found and corrected?
Go to Step 20—
17The TCC solenoid is faulty, or the internal wiring harness from t h e
TCC solenoid is open.
Was a problem found and corrected?
Go to Step 20—
18Check every connection at the PCM.
If OK, replace the PCM. Refer to Powertrain Control Module
(PCM) in Automatic Transmission (4L30–E) section.
Is the replacement complete?
Go to Step 20—
19Check the PCM connector terminal J2–D2, transmission 16–way
connector terminal H53–8 and transmission adapter case
connector terminal M6–4(A).
Was a problem found and corrected?
Go to Step 20—
201. After the repair is complete, use the scan tool to select “DTC”,
then “Clear Info” function and ensure the following conditions
are met:
The TCC solenoid is commanded “on” and the volts increase
to B+.
The TCC solenoid is commanded “off” and the volts drop to
zero.
2. Review the scan tool “DTC Info”.
Has the last test failed or is the current DTC displayed?
Begin diagnosis
again
Go to Step 1
Repair verified
Exit DTC table
Page 2322 of 6000
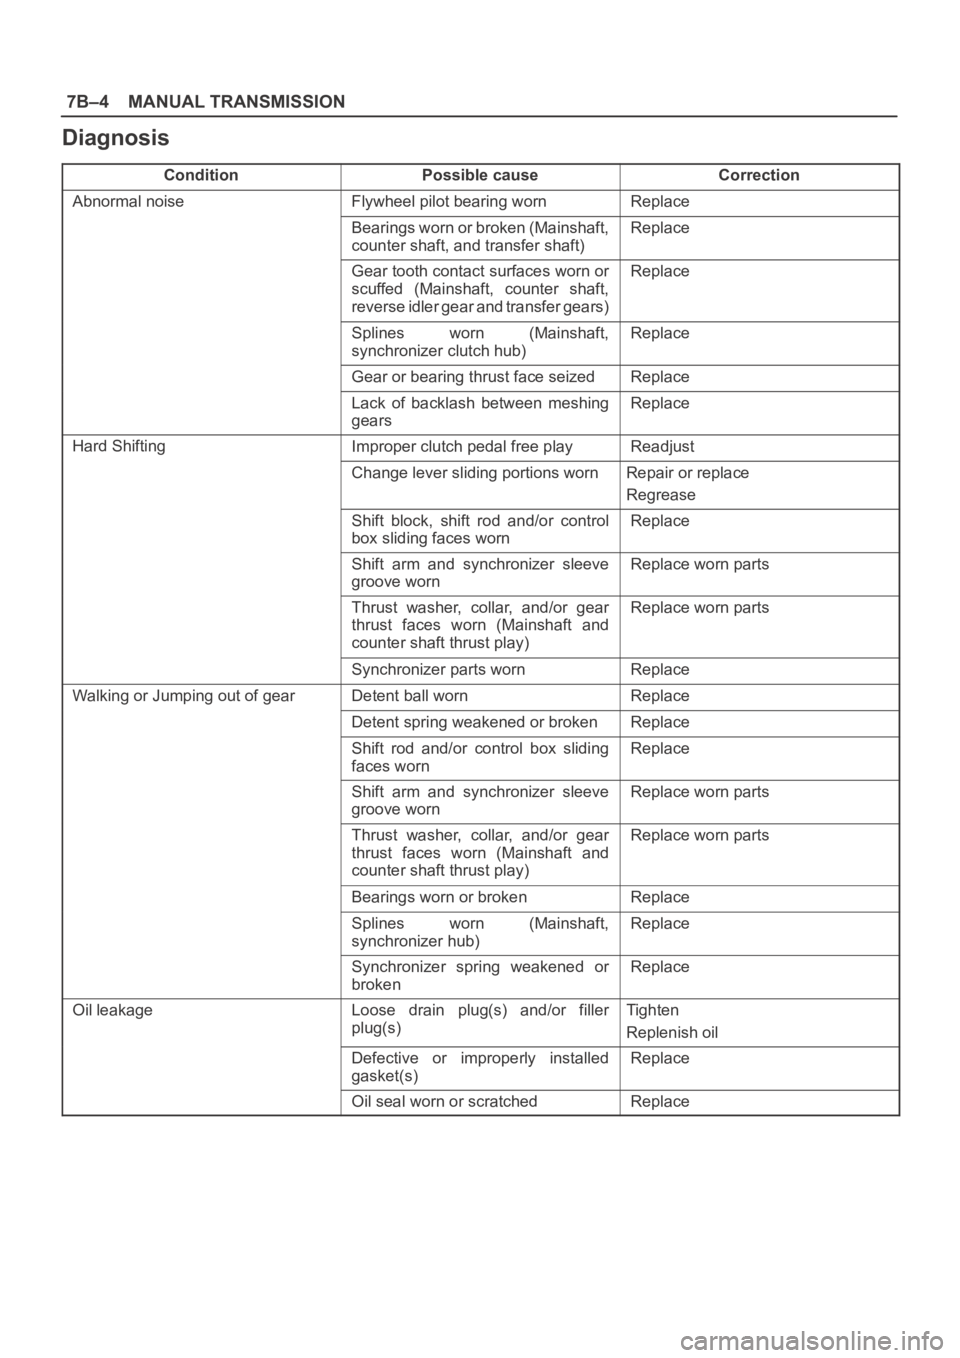
7B–4MANUAL TRANSMISSION
Diagnosis
ConditionPossible causeCorrection
Abnormal noiseFlywheel pilot bearing wornReplace
Bearings worn or broken (Mainshaft,
counter shaft, and transfer shaft)Replace
Gear tooth contact surfaces worn or
scuffed (Mainshaft, counter shaft,
reverse idler gear and transfer gears)Replace
Splines worn (Mainshaft,
synchronizer clutch hub)Replace
Gear or bearing thrust face seizedReplace
Lack of backlash between meshing
gearsReplace
Hard ShiftingImproper clutch pedal free playReadjust
Change lever sliding portions wornRepair or replace
Regrease
Shift block, shift rod and/or control
box sliding faces wornReplace
Shift arm and synchronizer sleeve
groove wornReplace worn parts
Thrust washer, collar, and/or gear
thrust faces worn (Mainshaft and
counter shaft thrust play)Replace worn parts
Synchronizer parts wornReplace
Walking or Jumping out of gearDetent ball wornReplace
Detent spring weakened or brokenReplace
Shift rod and/or control box sliding
faces wornReplace
Shift arm and synchronizer sleeve
groove wornReplace worn parts
Thrust washer, collar, and/or gear
thrust faces worn (Mainshaft and
counter shaft thrust play)Replace worn parts
Bearings worn or brokenReplace
Splines worn (Mainshaft,
synchronizer hub)Replace
Synchronizer spring weakened or
brokenReplace
Oil leakageLoose drain plug(s) and/or filler
plug(s)Tighten
Replenish oil
Defective or improperly installed
gasket(s)Replace
Oil seal worn or scratchedReplace
Page 2517 of 6000
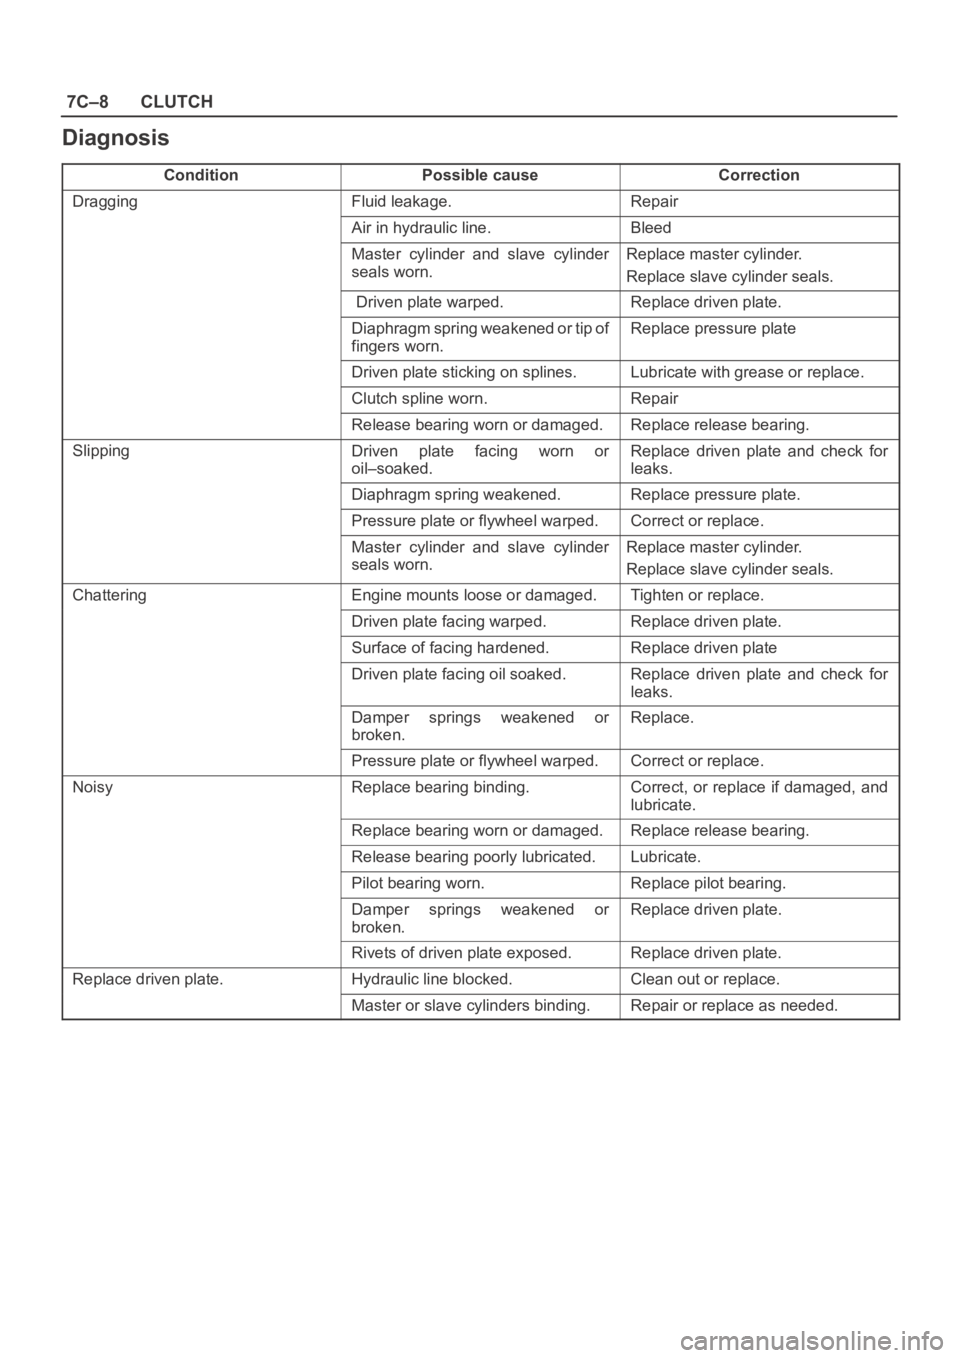
7C–8CLUTCH
Diagnosis
ConditionPossible causeCorrection
DraggingFluid leakage.Repair
Air in hydraulic line.Bleed
Master cylinder and slave cylinder
seals worn. Replace master cylinder.
Replace slave cylinder seals.
Driven plate warped.Replace driven plate.
Diaphragm spring weakened or tip of
fingers worn. Replace pressure plate
Driven plate sticking on splines.Lubricate with grease or replace.
Clutch spline worn. Repair
Release bearing worn or damaged.Replace release bearing.
SlippingDriven plate facing worn or
oil–soaked.Replace driven plate and check for
leaks.
Diaphragm spring weakened.Replace pressure plate.
Pressure plate or flywheel warped.Correct or replace.
Master cylinder and slave cylinder
seals worn.Replace master cylinder.
Replace slave cylinder seals.
ChatteringEngine mounts loose or damaged.Tighten or replace.
Driven plate facing warped.Replace driven plate.
Surface of facing hardened.Replace driven plate
Driven plate facing oil soaked. Replace driven plate and check for
leaks.
Damper springs weakened or
broken. Replace.
Pressure plate or flywheel warped.Correct or replace.
NoisyReplace bearing binding.Correct, or replace if damaged, and
lubricate.
Replace bearing worn or damaged. Replace release bearing.
Release bearing poorly lubricated. Lubricate.
Pilot bearing worn.Replace pilot bearing.
Damper springs weakened or
broken.Replace driven plate.
Rivets of driven plate exposed.Replace driven plate.
Replace driven plate.Hydraulic line blocked.Clean out or replace.
Master or slave cylinders binding.Repair or replace as needed.