1998 NISSAN QUEST door lock
[x] Cancel search: door lockPage 38 of 260
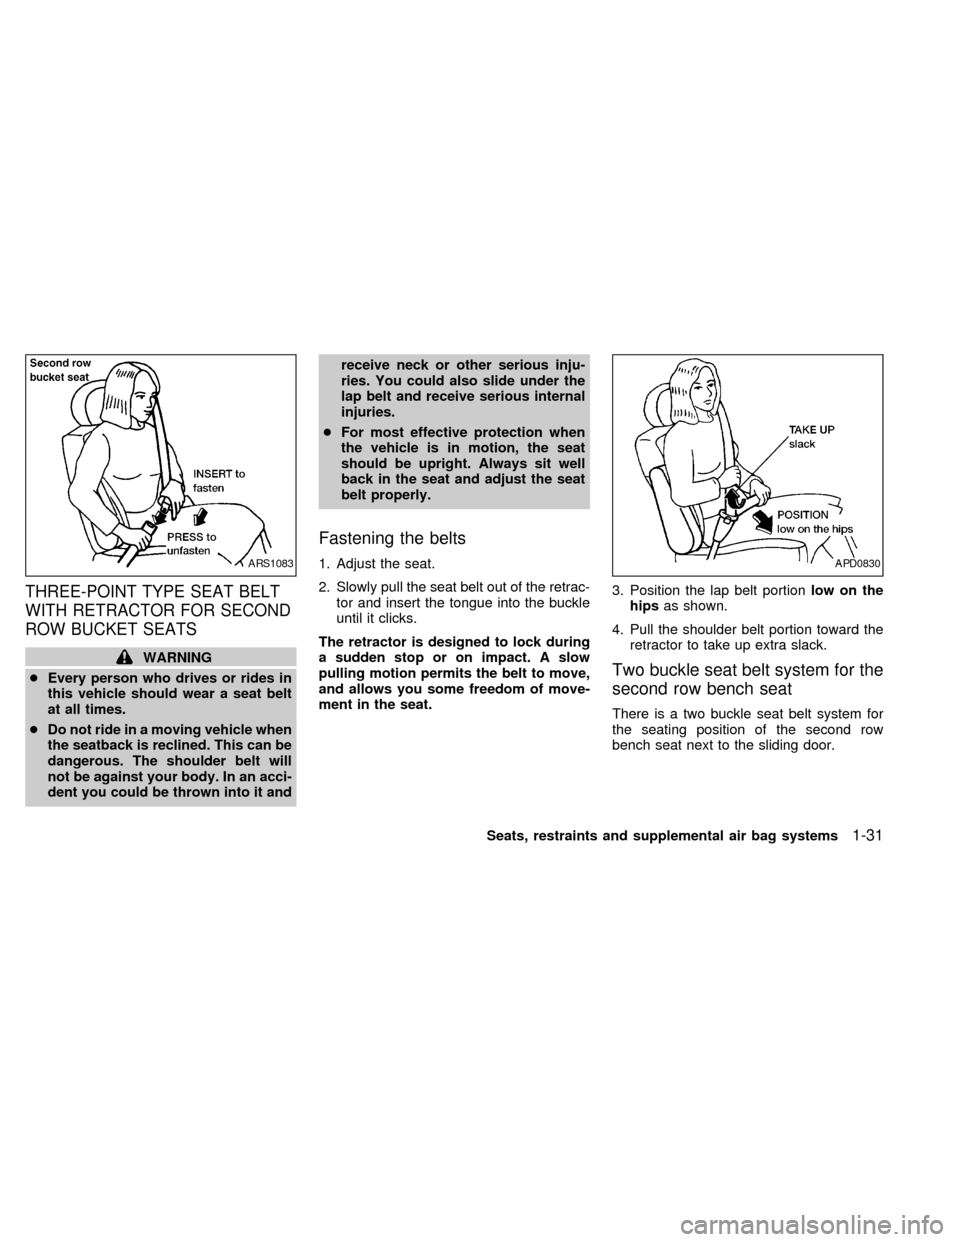
THREE-POINT TYPE SEAT BELT
WITH RETRACTOR FOR SECOND
ROW BUCKET SEATS
WARNING
cEvery person who drives or rides in
this vehicle should wear a seat belt
at all times.
cDo not ride in a moving vehicle when
the seatback is reclined. This can be
dangerous. The shoulder belt will
not be against your body. In an acci-
dent you could be thrown into it andreceive neck or other serious inju-
ries. You could also slide under the
lap belt and receive serious internal
injuries.
cFor most effective protection when
the vehicle is in motion, the seat
should be upright. Always sit well
back in the seat and adjust the seat
belt properly.
Fastening the belts
1. Adjust the seat.
2. Slowly pull the seat belt out of the retrac-
tor and insert the tongue into the buckle
until it clicks.
The retractor is designed to lock during
a sudden stop or on impact. A slow
pulling motion permits the belt to move,
and allows you some freedom of move-
ment in the seat.3. Position the lap belt portionlow on the
hipsas shown.
4. Pull the shoulder belt portion toward the
retractor to take up extra slack.
Two buckle seat belt system for the
second row bench seat
There is a two buckle seat belt system for
the seating position of the second row
bench seat next to the sliding door.
ARS1083APD0830
Seats, restraints and supplemental air bag systems1-31
ZX
Page 50 of 260
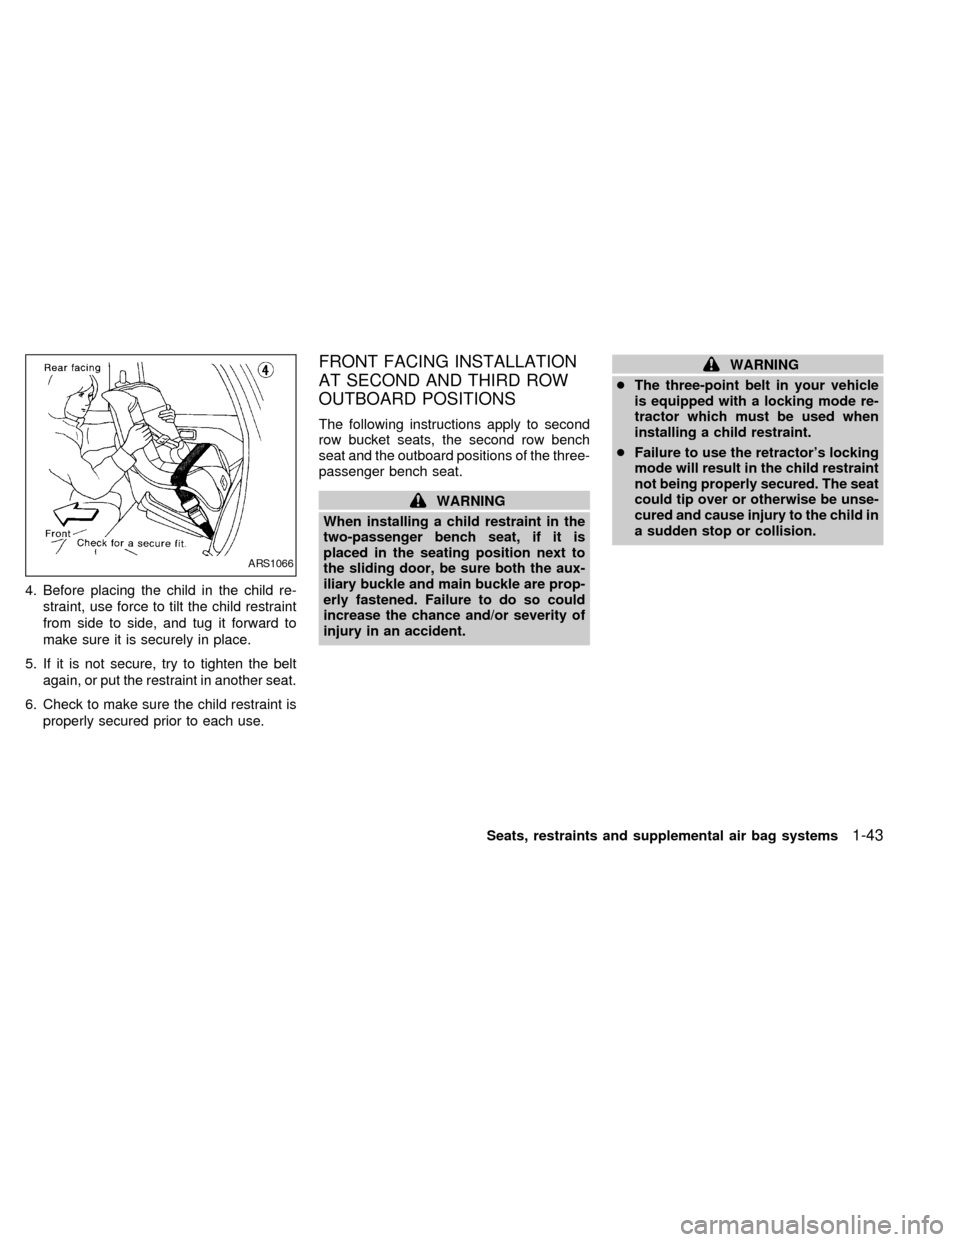
4. Before placing the child in the child re-
straint, use force to tilt the child restraint
from side to side, and tug it forward to
make sure it is securely in place.
5. If it is not secure, try to tighten the belt
again, or put the restraint in another seat.
6. Check to make sure the child restraint is
properly secured prior to each use.
FRONT FACING INSTALLATION
AT SECOND AND THIRD ROW
OUTBOARD POSITIONS
The following instructions apply to second
row bucket seats, the second row bench
seat and the outboard positions of the three-
passenger bench seat.
WARNING
When installing a child restraint in the
two-passenger bench seat, if it is
placed in the seating position next to
the sliding door, be sure both the aux-
iliary buckle and main buckle are prop-
erly fastened. Failure to do so could
increase the chance and/or severity of
injury in an accident.
WARNING
cThe three-point belt in your vehicle
is equipped with a locking mode re-
tractor which must be used when
installing a child restraint.
cFailure to use the retractor's locking
mode will result in the child restraint
not being properly secured. The seat
could tip over or otherwise be unse-
cured and cause injury to the child in
a sudden stop or collision.
ARS1066
Seats, restraints and supplemental air bag systems1-43
ZX
Page 53 of 260
REAR FACING INSTALLATION
AT SECOND AND THIRD ROW
OUTBOARD POSITIONS
The following instructions apply to second
row bucket seats, the second row bench
seat and the outboard positions of the three-
passenger bench seat.
WARNING
When installing a child restraint in the
two-passenger bench seat, if it is
placed in the seating position next to
the sliding door, be sure both the aux-
iliary buckle and main buckle are prop-
erly fastened. Failure to do so could
increase the chance and/or severity of
injury in an accident.
WARNING
cThe three-point belt in your vehicle
is equipped with a locking mode re-
tractor which must be used when
installing a child restraint.cFailure to use the retractor's locking
mode will result in the child restraint
not being properly secured. The seat
could tip over or otherwise be unse-
cured and cause injury to the child in
a sudden stop or collision.
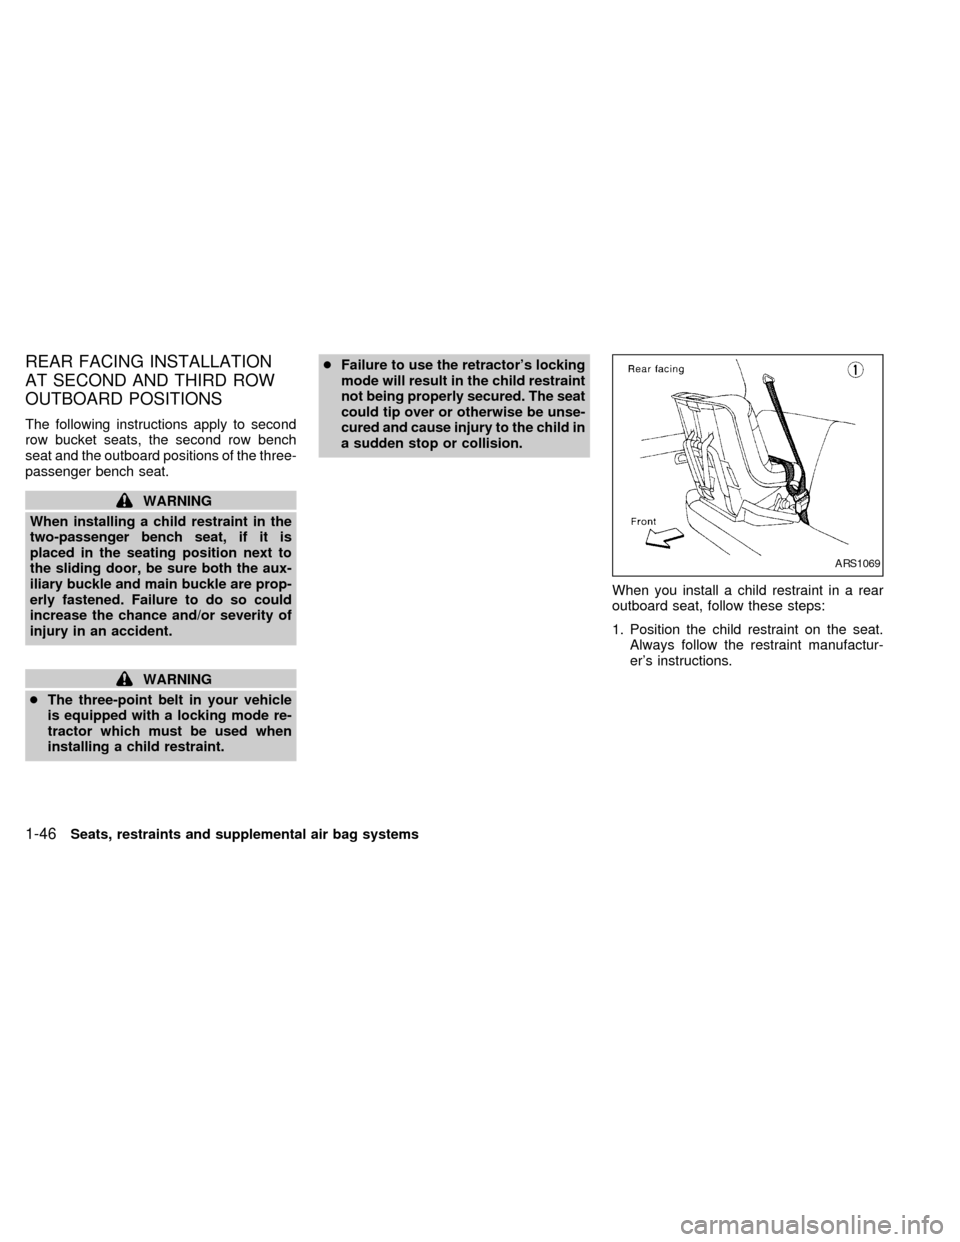
When you install a child restraint in a rear
outboard seat, follow these steps:
1. Position the child restraint on the seat.
Always follow the restraint manufactur-
er's instructions.
ARS1069
1-46Seats, restraints and supplemental air bag systems
ZX
Page 91 of 260

cvehicle ran out of fuel, which caused
the engine to misfire.
cfuel filler cap was left off or improperly
installed, allowing fuel to evaporate
into the atmosphere.
If you suspect that you experienced such a
condition, drive the vehicle to an authorized
NISSAN dealer and have the vehicle in-
spected. Avoid any unnecessary diagnosis
during the service by informing the dealer of
the condition that may have occurred.
The theft warning system provides audio
and visual alarm signals if parts of the
vehicle are disturbed.
How to activate the theft warning
system
1. Close all windows.
2. Remove the key from the ignition switch.
3. Close all doors and the hood. Lock all
doors by pressing the
button on the
multi-remote controller. At this time, the
parking lights blink and the horn chirps to
indicate all doors are locked.The system can be activated even if the
windows are open.
4. Confirm that the SECURITY light, lo-
cated under the hazard warning switch,
illuminates. The SECURITY light illumi-
nates for about 30 seconds and then
begins to flash once every three sec-
onds. The system is now activated.
The theft warning system is NOT activated if
one of the following occurs:
cA door is unlocked or opened, the hood is
opened, or the ignition key is turned to
the ACC or ON position during the 30
seconds in which the SECURITY light
stays on.
cThe SECURITY light blinks at a steady
1/2 second on - 1/2 second off rate
because a door or the hood is open and
the key is not in the ACC or ON position.
When the ignition key is turned to the
ACC or ON position, the SECURITY light
turns off.
IC0005
THEFT WARNING
(if so equipped)
2-10Instruments and controls
ZX
Page 92 of 260

Theft warning system operation
The theft warning system emits the follow-
ing alarm:
cThe headlights and tail lights flash and
the horn sounds intermittently. In addi-
tion, the starter motor does not operate.
cThe alarm automatically turns off after
two to three minutes. However, the alarm
reactivates if the vehicle is tampered with
again. The alarm can be shut off by
unlocking a door with the key or by
pressing the
button on the multi-
remote controller.
The alarm is activated when:
ca door is unlocked or opened without
using the key or the multi-remote control-
ler. This includes unlocking the doors
with the inside door lock switch.
cthe hood is opened.
cthe ignition is placed into the ACC, ON,
or START position without the key in the
ignition.
How to stop the alarm
The alarm stops only by unlocking a door
with the key or by pressing the
button on
the multi-remote controller. The alarm does
not stop if the ignition key is turned to the
ACC or ON position.
If the system does not operate as de-
scribed above, have it checked by an
authorized NISSAN dealer.
To operate the wipers intermittently, adjust
the knob between the S (slow) and F (fast)
positions. For continuous operation, select
LO or HI.
To operate the washer, press on the end of
the wiper knob. For more washer fluid, push
and hold the end of the wiper knob. The
wipers cycle a few times when the washer is
activated. The washer operates in any of
the wiper positions.
AIC0561
WINDSHIELD WIPER AND
WASHER SWITCH
Instruments and controls2-11
ZX
Page 101 of 260
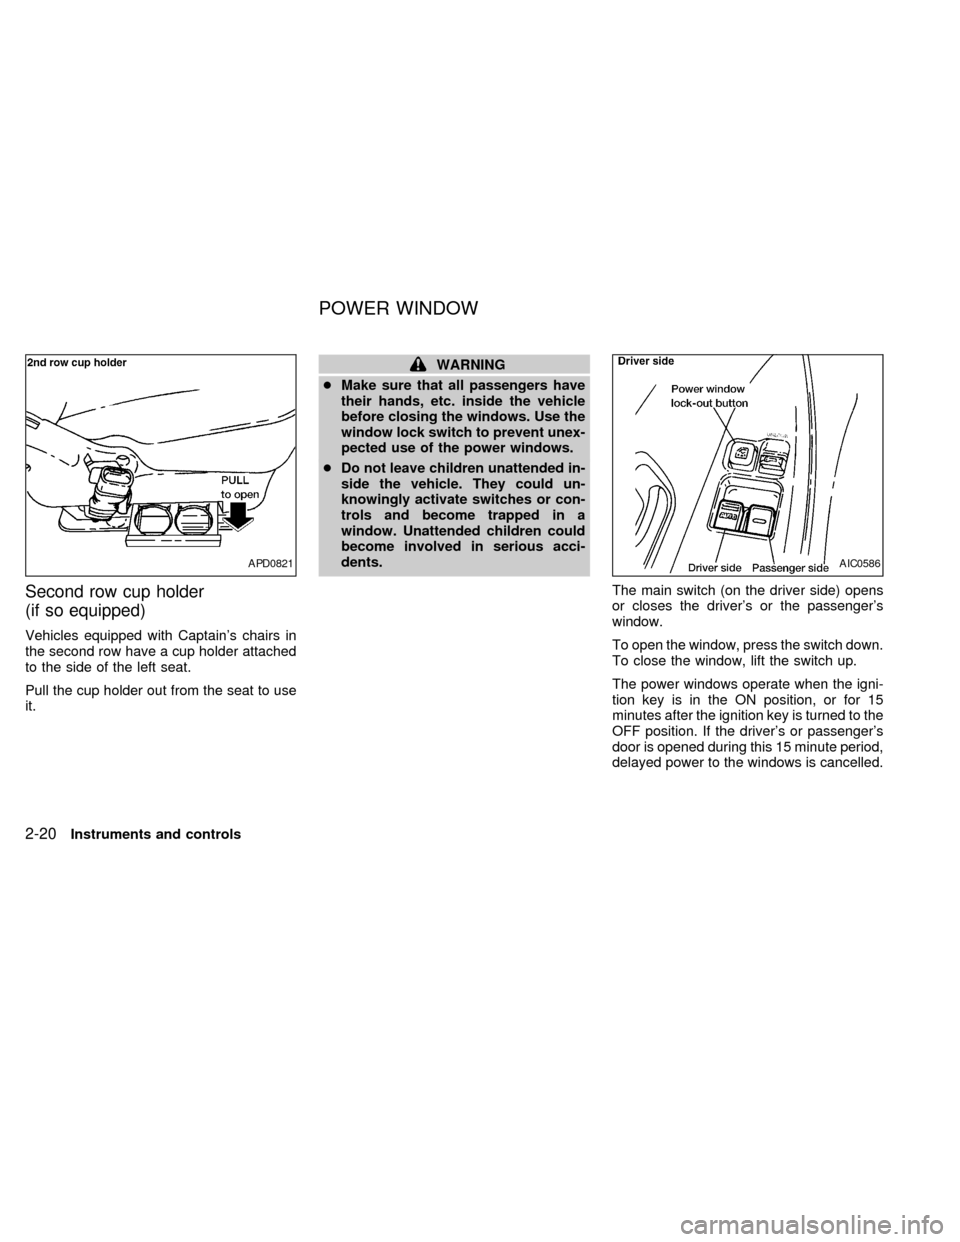
Second row cup holder
(if so equipped)
Vehicles equipped with Captain's chairs in
the second row have a cup holder attached
to the side of the left seat.
Pull the cup holder out from the seat to use
it.
WARNING
cMake sure that all passengers have
their hands, etc. inside the vehicle
before closing the windows. Use the
window lock switch to prevent unex-
pected use of the power windows.
cDo not leave children unattended in-
side the vehicle. They could un-
knowingly activate switches or con-
trols and become trapped in a
window. Unattended children could
become involved in serious acci-
dents.
The main switch (on the driver side) opens
or closes the driver's or the passenger's
window.
To open the window, press the switch down.
To close the window, lift the switch up.
The power windows operate when the igni-
tion key is in the ON position, or for 15
minutes after the ignition key is turned to the
OFF position. If the driver's or passenger's
door is opened during this 15 minute period,
delayed power to the windows is cancelled.
APD0821AIC0586
POWER WINDOW
2-20Instruments and controls
ZX
Page 103 of 260
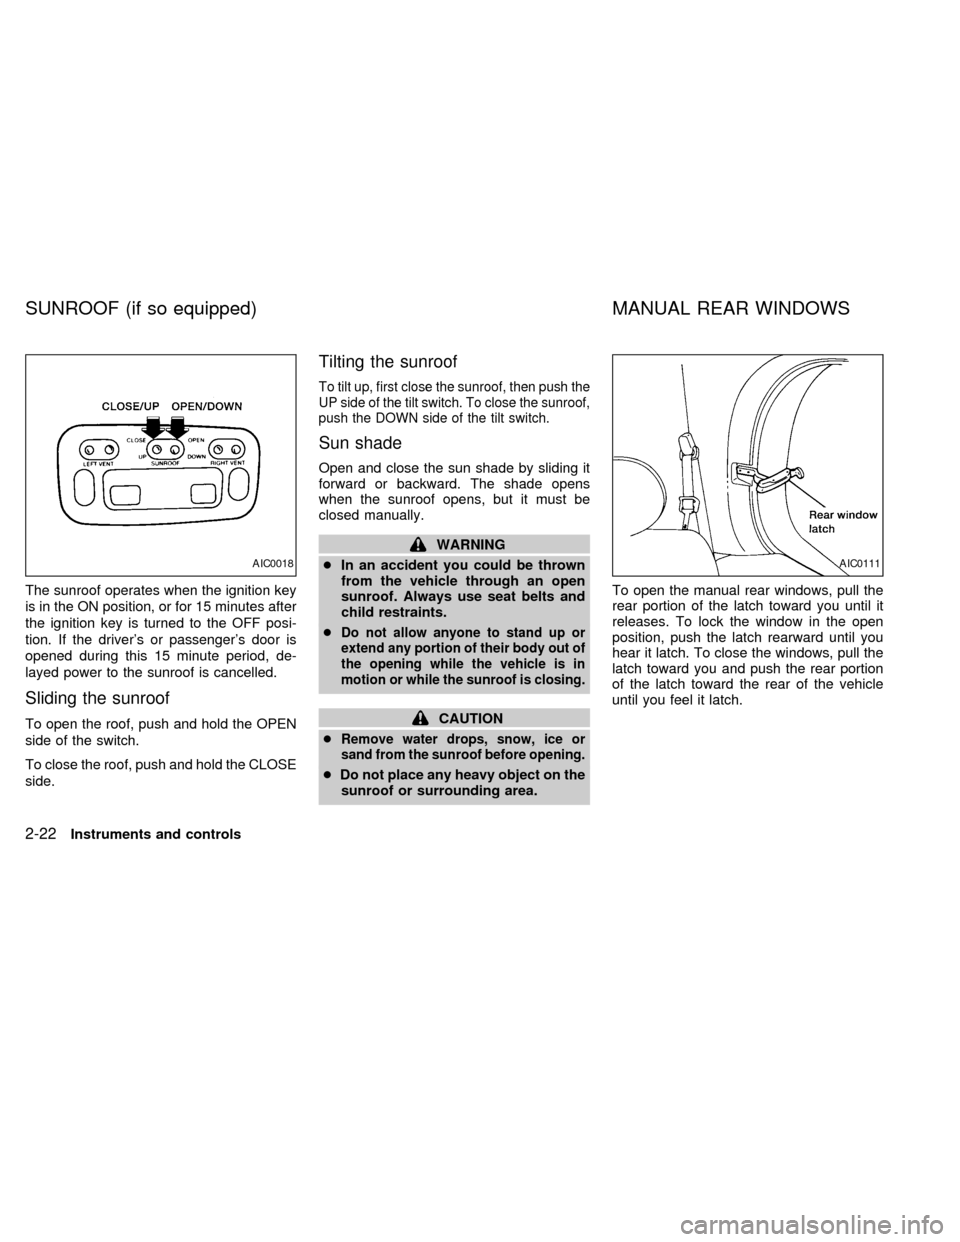
The sunroof operates when the ignition key
is in the ON position, or for 15 minutes after
the ignition key is turned to the OFF posi-
tion. If the driver's or passenger's door is
opened during this 15 minute period, de-
layed power to the sunroof is cancelled.
Sliding the sunroof
To open the roof, push and hold the OPEN
side of the switch.
To close the roof, push and hold the CLOSE
side.
Tilting the sunroof
To tilt up, first close the sunroof, then push the
UP side of the tilt switch. To close the sunroof,
push the DOWN side of the tilt switch.
Sun shade
Open and close the sun shade by sliding it
forward or backward. The shade opens
when the sunroof opens, but it must be
closed manually.
WARNING
cIn an accident you could be thrown
from the vehicle through an open
sunroof. Always use seat belts and
child restraints.
c
Do not allow anyone to stand up or
extend any portion of their body out of
the opening while the vehicle is in
motion or while the sunroof is closing.
CAUTION
c
Remove water drops, snow, ice or
sand from the sunroof before opening.
cDo not place any heavy object on the
sunroof or surrounding area.To open the manual rear windows, pull the
rear portion of the latch toward you until it
releases. To lock the window in the open
position, push the latch rearward until you
hear it latch. To close the windows, pull the
latch toward you and push the rear portion
of the latch toward the rear of the vehicle
until you feel it latch.
AIC0018AIC0111
SUNROOF (if so equipped) MANUAL REAR WINDOWS
2-22Instruments and controls
ZX
Page 104 of 260

Use the vent buttons on the power sunroof
controls to open and close the power rear
windows. To open one of the rear power
windows, press the indented side of the
switch. To close the window, press the
raised side of the switch.
The power rear windows operate when the
ignition key is in the ON position, or for 15
minutes after the ignition key is turned to the
OFF position. If the driver's or passenger's
door is opened during this 15 minute period,
delayed power to the rear windows is can-
celled.The digital clock displays time when the
ignition key is in ACC or ON.
If the power supply is disconnected, the
clock does not indicate the correct time.
Readjust the time.
How to view the clock mode
Push the CLK button to alternate the radio
frequency and the time in the display. In the
clock mode, press any radio function to
automatically display the radio frequency for
AIC0042
AIC0580
POWER REAR WINDOWS
(if so equipped)CLOCK
Instruments and controls2-23
ZX