Page 49 of 260
REAR FACING INSTALLATION
AT THREE-PASSENGER BENCH
SEAT CENTER POSITION
When you install a child restraint in a rear
center seat, follow these steps:
1. Position the child restraint on the seat as
illustrated. Always follow the restraint
manufacturer's instructions.2. Route the seat belt tongue through the
child restraint and insert it into the buckle
unitl you hear and feel the latch engage.
Be sure to follow the child restraint manu-
facturer's instructions for belt routing.3. Remove all slack in the lap belt for a very
tight fit by pulling forcefully on the lap belt
adjustment.
ARS1063ARS1064ARS1065
1-42Seats, restraints and supplemental air bag systems
ZX
Page 52 of 260

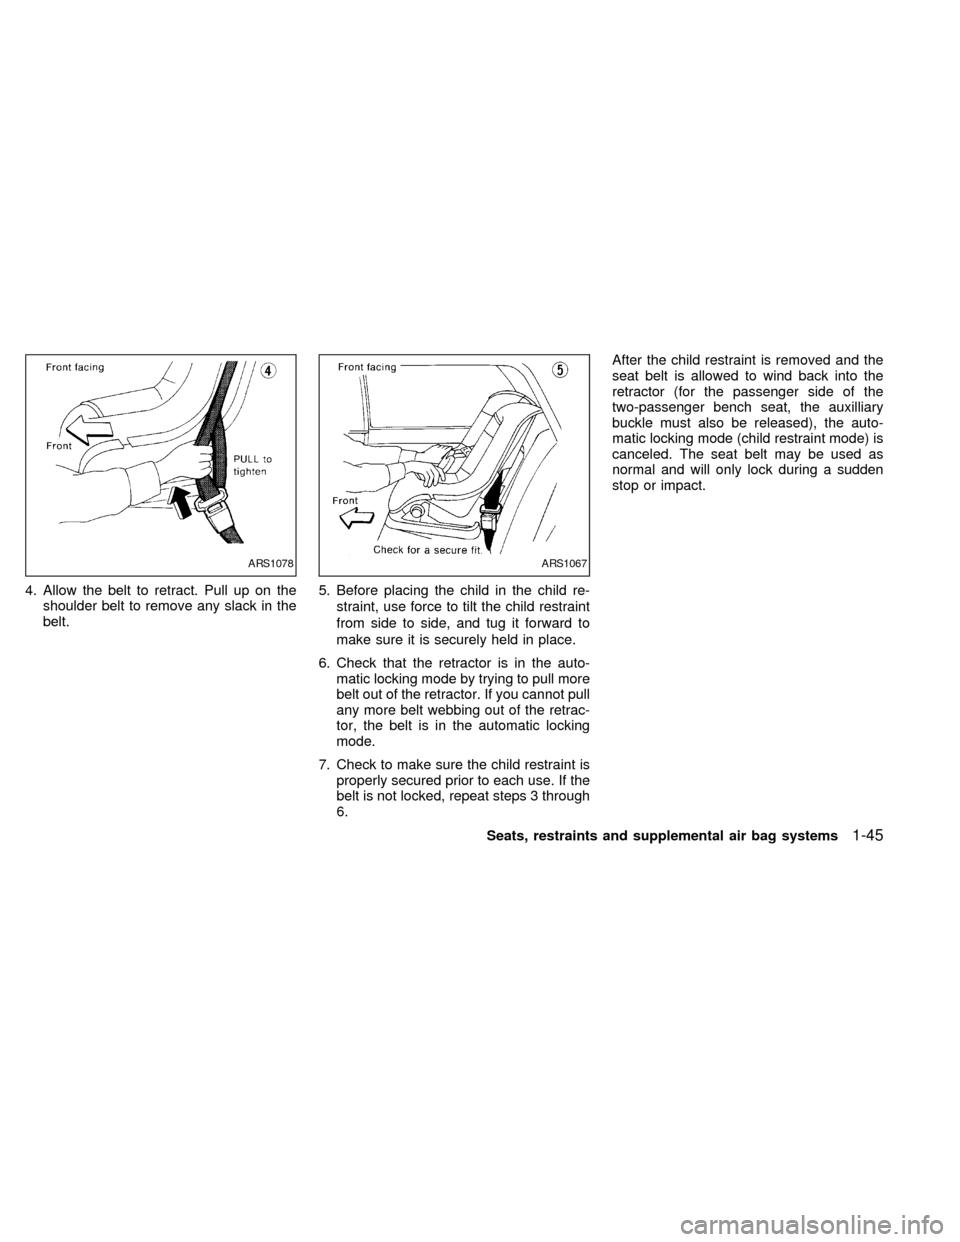
4. Allow the belt to retract. Pull up on the
shoulder belt to remove any slack in the
belt.5. Before placing the child in the child re-
straint, use force to tilt the child restraint
from side to side, and tug it forward to
make sure it is securely held in place.
6. Check that the retractor is in the auto-
matic locking mode by trying to pull more
belt out of the retractor. If you cannot pull
any more belt webbing out of the retrac-
tor, the belt is in the automatic locking
mode.
7. Check to make sure the child restraint is
properly secured prior to each use. If the
belt is not locked, repeat steps 3 through
6.After the child restraint is removed and the
seat belt is allowed to wind back into the
retractor (for the passenger side of the
two-passenger bench seat, the auxilliary
buckle must also be released), the auto-
matic locking mode (child restraint mode) is
canceled. The seat belt may be used as
normal and will only lock during a sudden
stop or impact.
ARS1078ARS1067
Seats, restraints and supplemental air bag systems1-45
ZX
Page 54 of 260
2. Route the seat belt tongue through the
child restraint and insert it into the buckle
until you hear and feel the latch engage.
Be sure to follow the child restraint manu-
facturer's instructions for belt routing.3. Pull on the shoulder belt until all of the
belt is fully extended. At this time, the belt
retractor is in the automatic locking mode
(child restraint mode). It reverts back to
emergency locking mode when the belt is
fully retracted.4. Allow the belt to retract. Pull up on the
shoulder belt to remove any slack in the
belt.
ARS1070ARS1033ARS1071
Seats, restraints and supplemental air bag systems1-47
ZX
Page 55 of 260
5. Before placing the child in the child re-
straint, use force to tilt the child restraint
from side to side, and tug it forward to
make sure it is securely held in place.
6. Check that the retractor is in the auto-
matic locking mode by trying to pull more
belt out of the retractor. If you cannot pull
any more belt webbing out of the retrac-
tor, the belt is in the automatic locking
mode.
7. Check to make sure the child restraint is
properly secured prior to each use. If the
belt is not locked, repeat steps 3 through
6.After the child restraint is removed and the
seat belt is allowed to wind back into the
retractor (for the passenger side of the
two-passenger bench seat, the auxilliary
buckle must also be released), the auto-
matic locking mode (child restraint mode) is
canceled. The seat belt may be used as
normal and will only lock during a sudden
stop or impact.
ARS1072
1-48Seats, restraints and supplemental air bag systems
ZX
Page 57 of 260

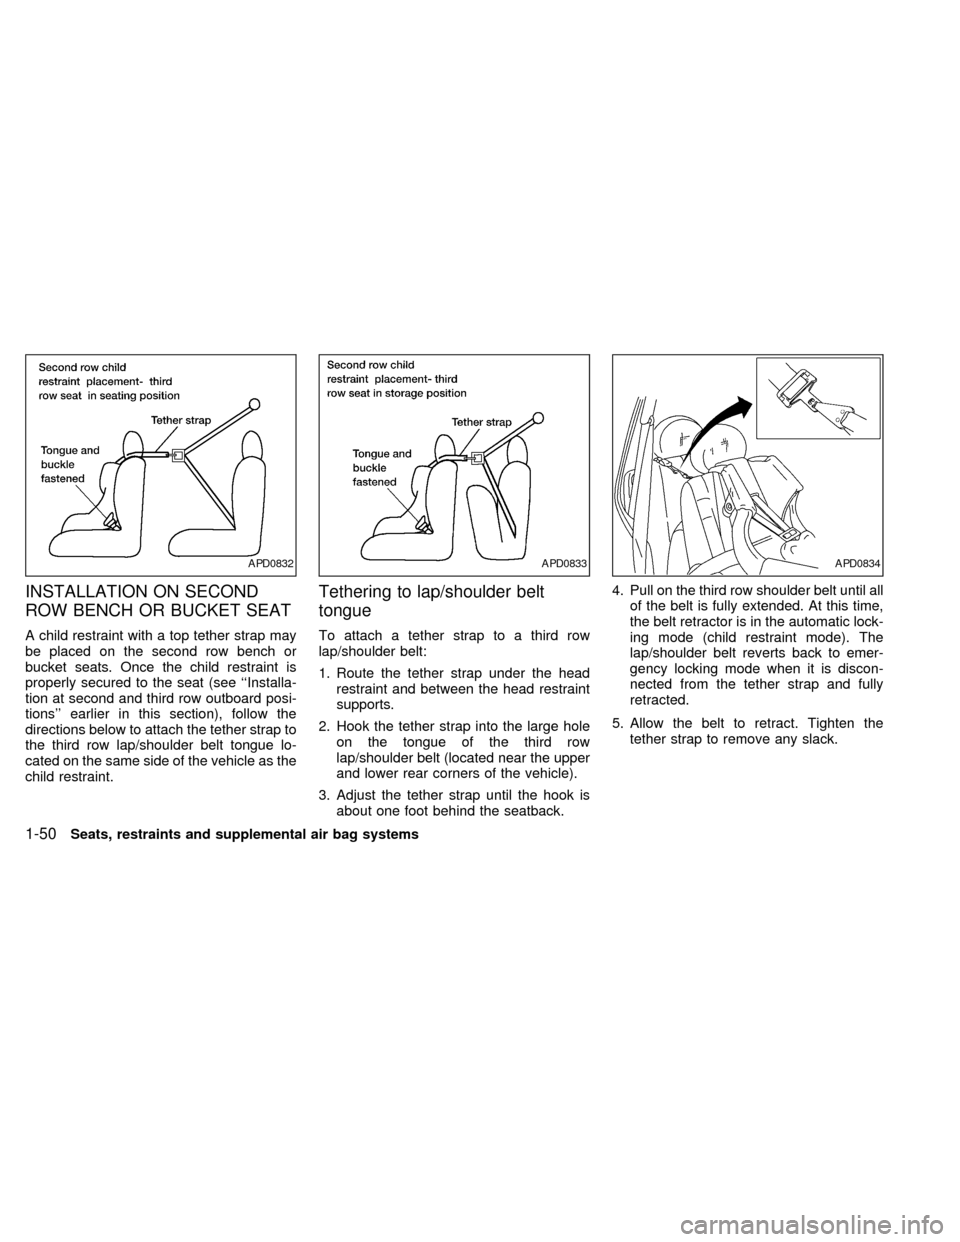
INSTALLATION ON SECOND
ROW BENCH OR BUCKET SEAT
A child restraint with a top tether strap may
be placed on the second row bench or
bucket seats. Once the child restraint is
properly secured to the seat (see ``Installa-
tion at second and third row outboard posi-
tions'' earlier in this section), follow the
directions below to attach the tether strap to
the third row lap/shoulder belt tongue lo-
cated on the same side of the vehicle as the
child restraint.
Tethering to lap/shoulder belt
tongue
To attach a tether strap to a third row
lap/shoulder belt:
1. Route the tether strap under the head
restraint and between the head restraint
supports.
2. Hook the tether strap into the large hole
on the tongue of the third row
lap/shoulder belt (located near the upper
and lower rear corners of the vehicle).
3. Adjust the tether strap until the hook is
about one foot behind the seatback.4. Pull on the third row shoulder belt until all
of the belt is fully extended. At this time,
the belt retractor is in the automatic lock-
ing mode (child restraint mode). The
lap/shoulder belt reverts back to emer-
gency locking mode when it is discon-
nected from the tether strap and fully
retracted.
5. Allow the belt to retract. Tighten the
tether strap to remove any slack.
APD0832APD0833APD0834
1-50Seats, restraints and supplemental air bag systems
ZX
Page 59 of 260

4. Pull on the third row shoulder belt until all
of the belt is fully extended . At this time,
the belt retractor is in the automatic lock-
ing mode (child restraint mode). The
lap/shoulder belt reverts back to emer-
gency locking mode when it is discon-
nected from the tether strap and fully
retracted.
5. Allow the belt to retract. Tighten the
tether strap to remove any slack.
6. Before placing the child in the child re-
straint, use force to tilt the child restraint
from side to side, and tug it forward to
make sure it is securely held in place.
7.
Check that the retractor is in the automatic
locking mode by trying to pull more belt
out of the retractor. If you cannot pull any
more belt webbing out of the retractor, the
belt is in the automatic locking mode.
8. Check to make sure the child restraint is
properly secured prior to each use. If the
belt is not locking, repeat steps 4 through
7.
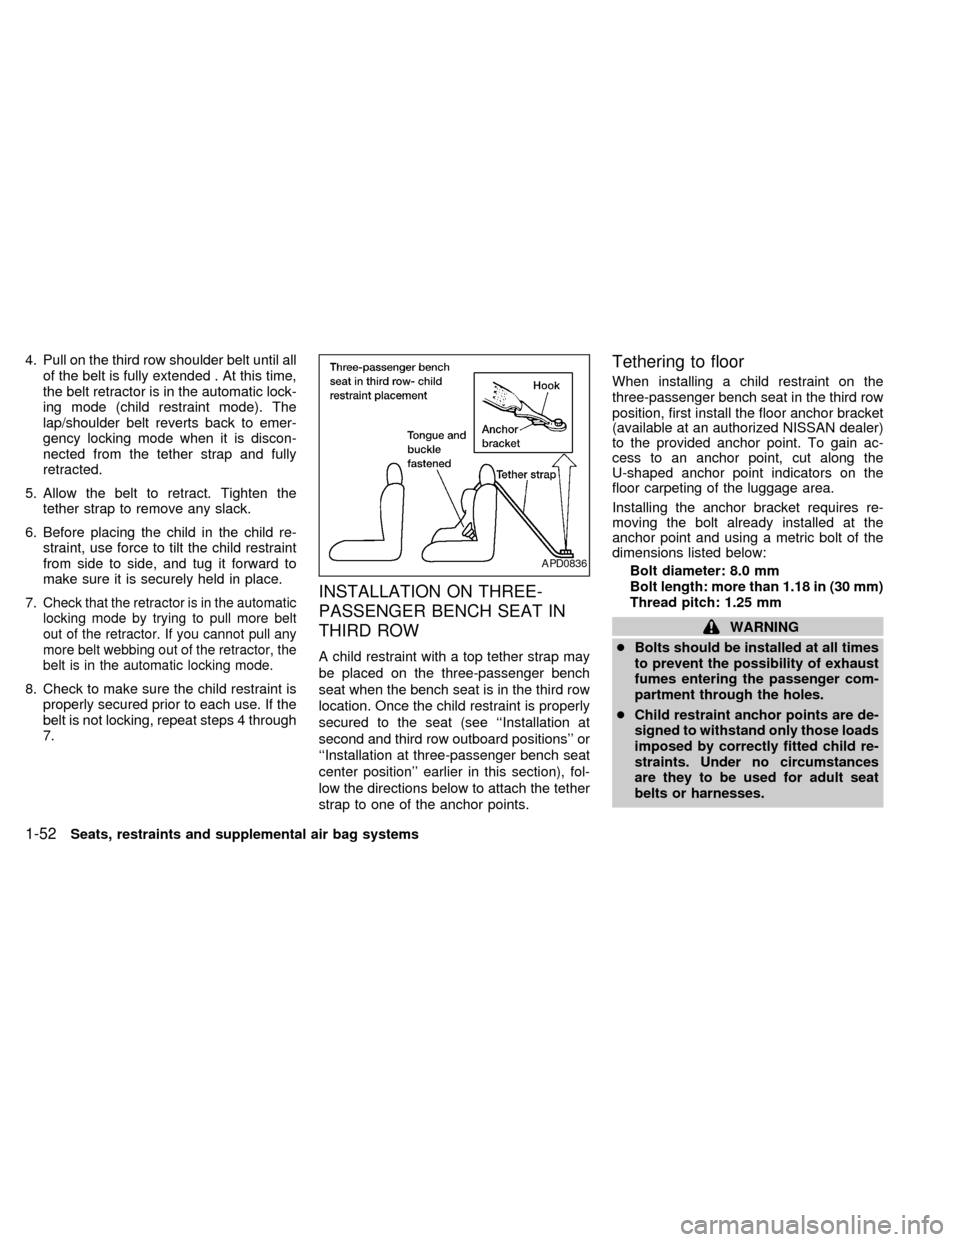
INSTALLATION ON THREE-
PASSENGER BENCH SEAT IN
THIRD ROW
A child restraint with a top tether strap may
be placed on the three-passenger bench
seat when the bench seat is in the third row
location. Once the child restraint is properly
secured to the seat (see ``Installation at
second and third row outboard positions'' or
``Installation at three-passenger bench seat
center position'' earlier in this section), fol-
low the directions below to attach the tether
strap to one of the anchor points.
Tethering to floor
When installing a child restraint on the
three-passenger bench seat in the third row
position, first install the floor anchor bracket
(available at an authorized NISSAN dealer)
to the provided anchor point. To gain ac-
cess to an anchor point, cut along the
U-shaped anchor point indicators on the
floor carpeting of the luggage area.
Installing the anchor bracket requires re-
moving the bolt already installed at the
anchor point and using a metric bolt of the
dimensions listed below:
Bolt diameter: 8.0 mm
Bolt length: more than 1.18 in (30 mm)
Thread pitch: 1.25 mm
WARNING
cBolts should be installed at all times
to prevent the possibility of exhaust
fumes entering the passenger com-
partment through the holes.
cChild restraint anchor points are de-
signed to withstand only those loads
imposed by correctly fitted child re-
straints. Under no circumstances
are they to be used for adult seat
belts or harnesses.
APD0836
1-52Seats, restraints and supplemental air bag systems
ZX
Page 63 of 260
4.Allow the belt to retract. Pull up on the belt
to remove any slack in the belt.5. Before placing the child in the child re-
straint, use force to tilt the child restraint
from side to side, and tug it forward to
make sure it is securely held in place.
6.
Check that the retractor is in the automatic
locking mode by trying to pull more belt
out of the retractor. If you cannot pull any
more belt webbing out of the retractor, the
belt is in the automatic locking mode.
7. Check to make sure the child restraint is
properly secured prior to each use. If the
lap belt is not locked, repeat steps 3
through 6.
After the child restraint is removed and the
seat belt is allowed to wind back into the
retractor, the automatic locking mode (child
restraint mode) is canceled. The seat belt
may be used as normal and will only lock
during a sudden stop or impact.
ARS1074ARS1079
1-56Seats, restraints and supplemental air bag systems
ZX
Page 71 of 260

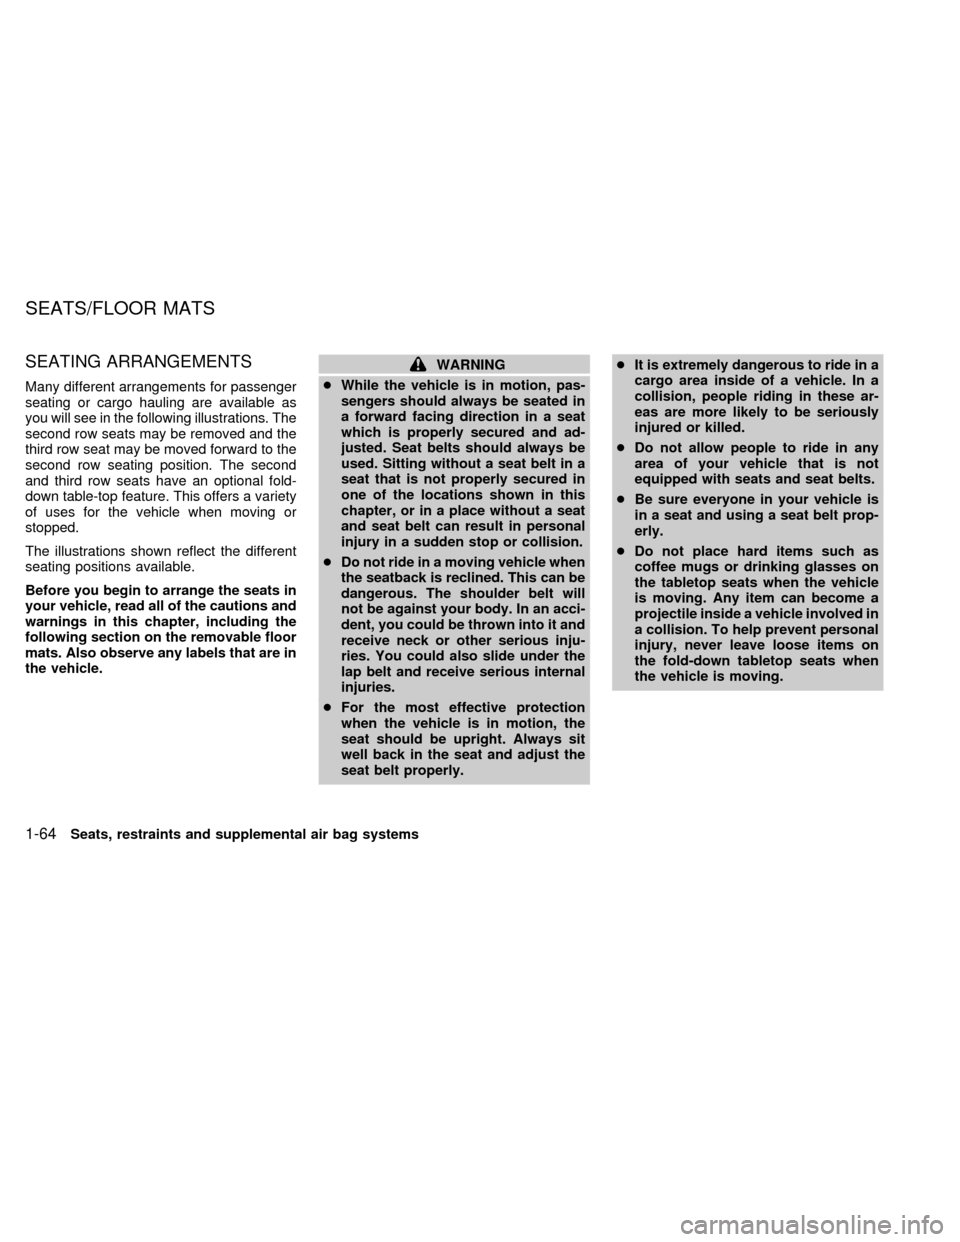
SEATING ARRANGEMENTS
Many different arrangements for passenger
seating or cargo hauling are available as
you will see in the following illustrations. The
second row seats may be removed and the
third row seat may be moved forward to the
second row seating position. The second
and third row seats have an optional fold-
down table-top feature. This offers a variety
of uses for the vehicle when moving or
stopped.
The illustrations shown reflect the different
seating positions available.
Before you begin to arrange the seats in
your vehicle, read all of the cautions and
warnings in this chapter, including the
following section on the removable floor
mats. Also observe any labels that are in
the vehicle.
WARNING
cWhile the vehicle is in motion, pas-
sengers should always be seated in
a forward facing direction in a seat
which is properly secured and ad-
justed. Seat belts should always be
used. Sitting without a seat belt in a
seat that is not properly secured in
one of the locations shown in this
chapter, or in a place without a seat
and seat belt can result in personal
injury in a sudden stop or collision.
cDo not ride in a moving vehicle when
the seatback is reclined. This can be
dangerous. The shoulder belt will
not be against your body. In an acci-
dent, you could be thrown into it and
receive neck or other serious inju-
ries. You could also slide under the
lap belt and receive serious internal
injuries.
cFor the most effective protection
when the vehicle is in motion, the
seat should be upright. Always sit
well back in the seat and adjust the
seat belt properly.cIt is extremely dangerous to ride in a
cargo area inside of a vehicle. In a
collision, people riding in these ar-
eas are more likely to be seriously
injured or killed.
cDo not allow people to ride in any
area of your vehicle that is not
equipped with seats and seat belts.
cBe sure everyone in your vehicle is
in a seat and using a seat belt prop-
erly.
cDo not place hard items such as
coffee mugs or drinking glasses on
the tabletop seats when the vehicle
is moving. Any item can become a
projectile inside a vehicle involved in
a collision. To help prevent personal
injury, never leave loose items on
the fold-down tabletop seats when
the vehicle is moving.
SEATS/FLOOR MATS
1-64Seats, restraints and supplemental air bag systems
ZX