Page 6 of 260
Table of
ContentsSeats, restraints and supplemental air bag systems
Instruments and controls
Pre-driving checks and adjustments
Heater, air conditioner and audio systems
Starting and driving
In case of emergency
Appearance and care
Do-it-yourself
Maintenance
Technical and consumer information
Index
1
2
3
4
5
6
7
8
9
10
11
Page 7 of 260

1 Seats, restraints and supplemental air
bag systems
Seats ......................................................................1-2
Manual front seat adjustment.................................1-3
Power front seat adjustment (if so equipped) ........1-4
Head restraints .......................................................1-6
Armrests .................................................................1-6
Underseat storage tray (if so equipped) ................1-7
Tabletop seats ........................................................1-7
Flexible seating ...................................................1-8
Sliding three-passenger seat ...............................1-14
Supplemental restraint system (supplemental
air bag system).....................................................1-18
Supplemental air bag system...............................1-21
Warning labels......................................................1-23
Supplemental air bag warning light......................1-23
Seat belts .............................................................1-25
Precautions on seat belt usage ...........................1-25
Child safety...........................................................1-26
Pregnant women ..................................................1-27
Injured persons ....................................................1-27
Three-point type with retractor .............................1-28
Three-point type seat belt with retractor for
second row bucket seats .....................................1-31Three-passenger bench seat ...............................1-34
Two-point type without retractor (center of
three-passenger bench seat) ...............................1-36
Seat belt extenders ..............................................1-38
Seat belt maintenance .........................................1-38
Child restraints .....................................................1-39
Front facing installation at three-passenger
bench seat center position ...................................1-40
Rear facing installation at three-passenger
bench seat center position ...................................1-42
Front facing installation at second and third
row outboard positions .........................................1-43
Rear facing installation at second and third
row outboard positions .........................................1-46
Child restraint with top tether strap ......................1-49
Installation on second row bench or bucket
seat .......................................................................1-50
Installation on three-passenger bench seat in
second row ...........................................................1-51
Installation on three-passenger bench seat in
third row................................................................1-52
Integrated child safety seats (if so equipped) ......1-57
ZX
Page 10 of 260
MANUAL FRONT SEAT
ADJUSTMENT
WARNING
cDo not adjust the driver's seat while
driving. The seat may move sud-
denly and could cause loss of con-
trol of the vehicle.
cAfter adjustment, gently rock in the
seat to make sure it is securely
locked.
Forward and backward
Rotate the lever up while you slide the seat
forward or backward to the desired position.
Release the lever to lock the seat in position.
Reclining
To recline the seatback, pull the lever up
and lean back. To bring the seatback for-
ward again, pull the lever and move your
body forward. The seatback moves forward.
Release the lever to lock the seatback in
position.
APD0119
Seats, restraints and supplemental air bag systems1-3
ZX
Page 11 of 260

POWER FRONT SEAT
ADJUSTMENT (if so equipped)
WARNING
cDo not adjust the driver's seat while
driving. The seat may move sud-
denly and could cause loss of con-
trol of the vehicle.
c
Do not leave children unattended in-
side the vehicle. They could unknow-
ingly activate switches or controls.
Unattended children could become
involved in serious accidents.
Operating tips
cThe motor has an auto-reset overload
protection circuit. If the motor stops dur-
ing operation, wait 30 seconds, then re-
activate the switch.
cDo not operate the power support seat
for a long period of time when the engine
is off. This discharges the battery.
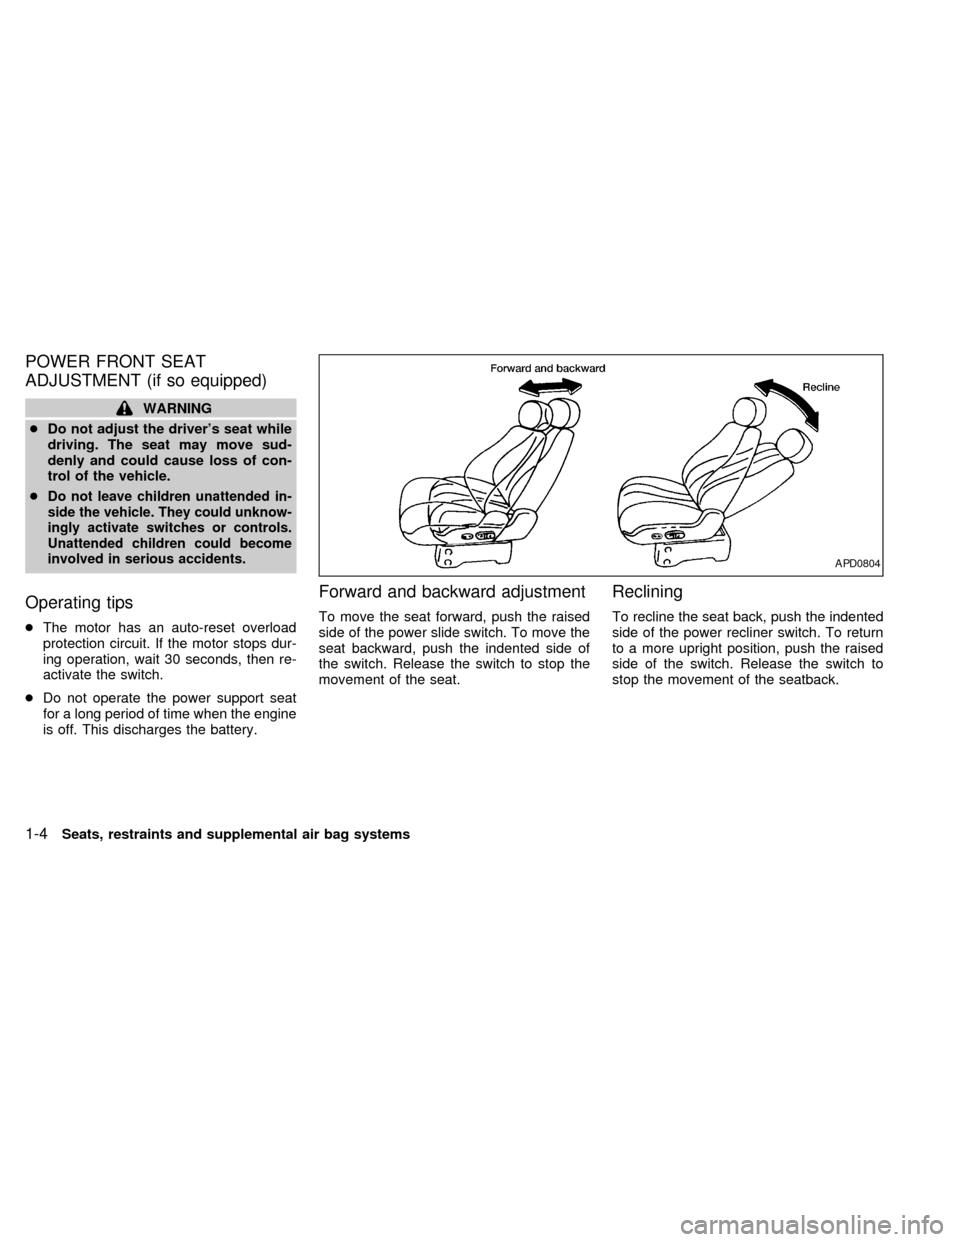
Forward and backward adjustment
To move the seat forward, push the raised
side of the power slide switch. To move the
seat backward, push the indented side of
the switch. Release the switch to stop the
movement of the seat.
Reclining
To recline the seat back, push the indented
side of the power recliner switch. To return
to a more upright position, push the raised
side of the switch. Release the switch to
stop the movement of the seatback.
APD0804
1-4Seats, restraints and supplemental air bag systems
ZX
Page 12 of 260
Seat height adjustment
To raise the height of the seat, push the
raised side of the power seat height switch
and release it when the desired position has
been reached. To lower the height of the
seat, push the indented side of the switch
and release it when the desired position has
been reached.
Lumbar support
To inflate the lumbar support, push the
raised side of the power lumbar switch and
release it when the desired position has
been reached. To deflate the lumbar sup-
port, push the indented side of the switch.
The power lumbar pump motor continues to
operate after the lumbar support is fully
inflated. Release the switch when the lum-
bar stops inflating.
APD0555APD0805APD0806
Seats, restraints and supplemental air bag systems1-5
ZX
Page 13 of 260
HEAD RESTRAINTS
Adjust the head restraints so the top is level
with the tops of your ears.
To raise the head restraint, pull it up. To
lower, push in the release button and push
the head restraint down.
WARNING
Head restraints should be adjusted
properly as they may provide signifi-
cant protection against injury in an ac-
cident. Do not remove them. Check the
adjustment after someone else uses
the seat.
Some seat arrangements may require re-
moval of the head restraints when the seat
is in a storage position and not to be used by
passengers.
ARMRESTS
To use the armrests on any seat, pull them
down to the resting position.
PD1176MAPD0022
1-6Seats, restraints and supplemental air bag systems
ZX
Page 15 of 260

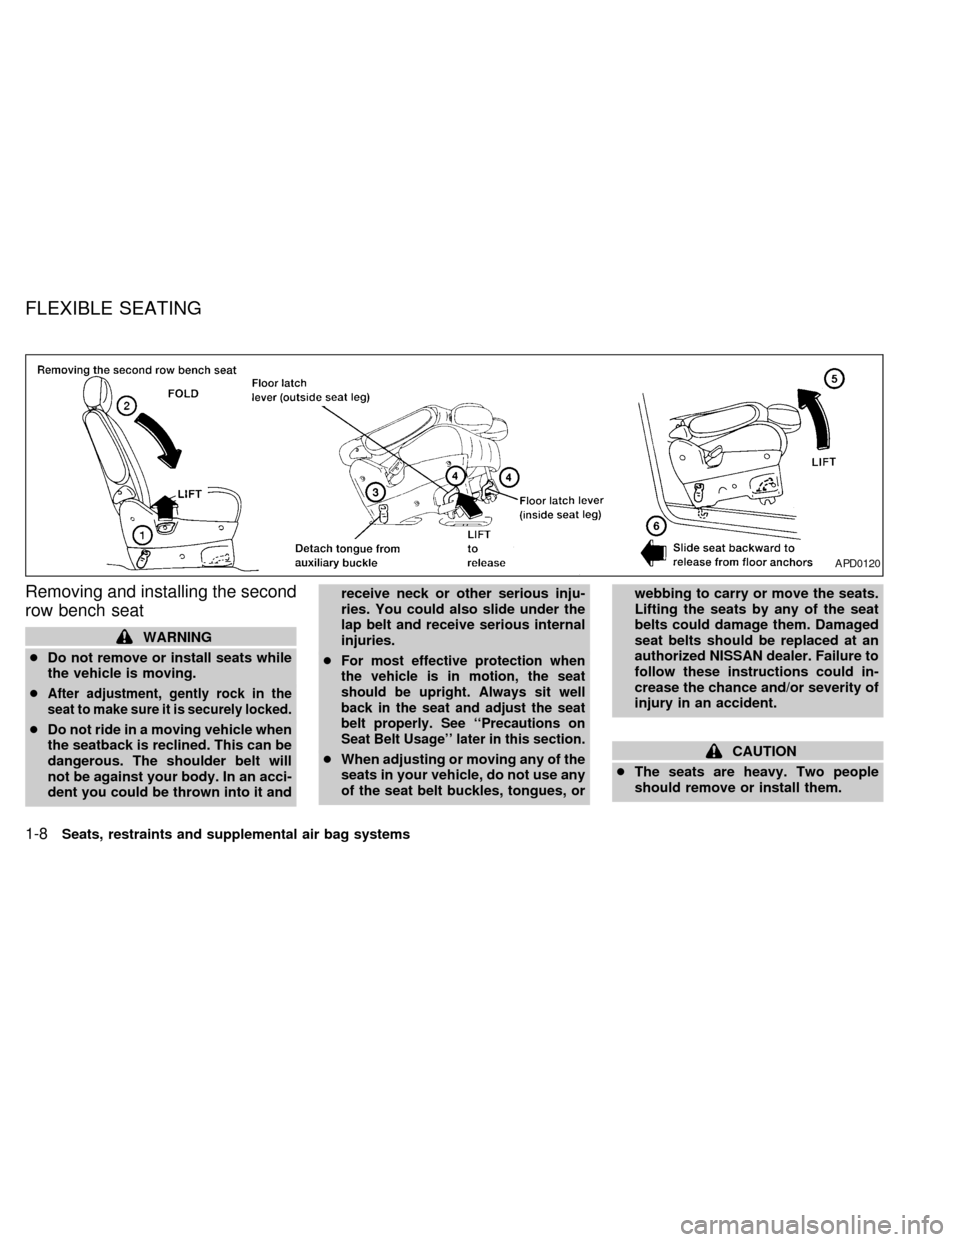
Removing and installing the second
row bench seat
WARNING
cDo not remove or install seats while
the vehicle is moving.
c
After adjustment, gently rock in the
seat to make sure it is securely locked.
cDo not ride in a moving vehicle when
the seatback is reclined. This can be
dangerous. The shoulder belt will
not be against your body. In an acci-
dent you could be thrown into it andreceive neck or other serious inju-
ries. You could also slide under the
lap belt and receive serious internal
injuries.
c
For most effective protection when
the vehicle is in motion, the seat
should be upright. Always sit well
back in the seat and adjust the seat
belt properly. See ``Precautions on
Seat Belt Usage'' later in this section.
cWhen adjusting or moving any of the
seats in your vehicle, do not use any
of the seat belt buckles, tongues, orwebbing to carry or move the seats.
Lifting the seats by any of the seat
belts could damage them. Damaged
seat belts should be replaced at an
authorized NISSAN dealer. Failure to
follow these instructions could in-
crease the chance and/or severity of
injury in an accident.CAUTION
cThe seats are heavy. Two people
should remove or install them.
APD0120
FLEXIBLE SEATING
1-8Seats, restraints and supplemental air bag systems
ZX
Page 17 of 260

Removing second row bucket seats
WARNING
cDo not remove or install seats while
the vehicle is moving.
cAfter adjustment, gently rock in the
seat to make sure it is securely
locked.
cDo not ride in a moving vehicle when
the seatback is reclined. This can be
dangerous. The shoulder belt will
not be against your body. In an acci-
dent you could be thrown into it andreceive neck or other serious inju-
ries. You could also slide under the
lap belt and receive serious internal
injuries.
c
For most effective protection when
the vehicle is in motion, the seat
should be upright. Always sit well
back in the seat and adjust the seat
belt properly. See ``Precautions on
Seat Belt Usage'' later in this section.
cWhen adjusting or moving any of the
seats in your vehicle, do not use any
of the seat belt buckles, tongues, or
webbing to carry or move the seats.
Lifting the seats by any of the seat
belts could damage them. Damaged
seat belts should be replaced at your
NISSAN dealer. Failure to follow
these instructions could increase
the chance and/or severity of injury
in an accident.
CAUTION
cThe seats are heavy. Two people
should remove or install them.cDo not sit in seats that have been
removed from the vehicle. They may
tip over and you could be injured.
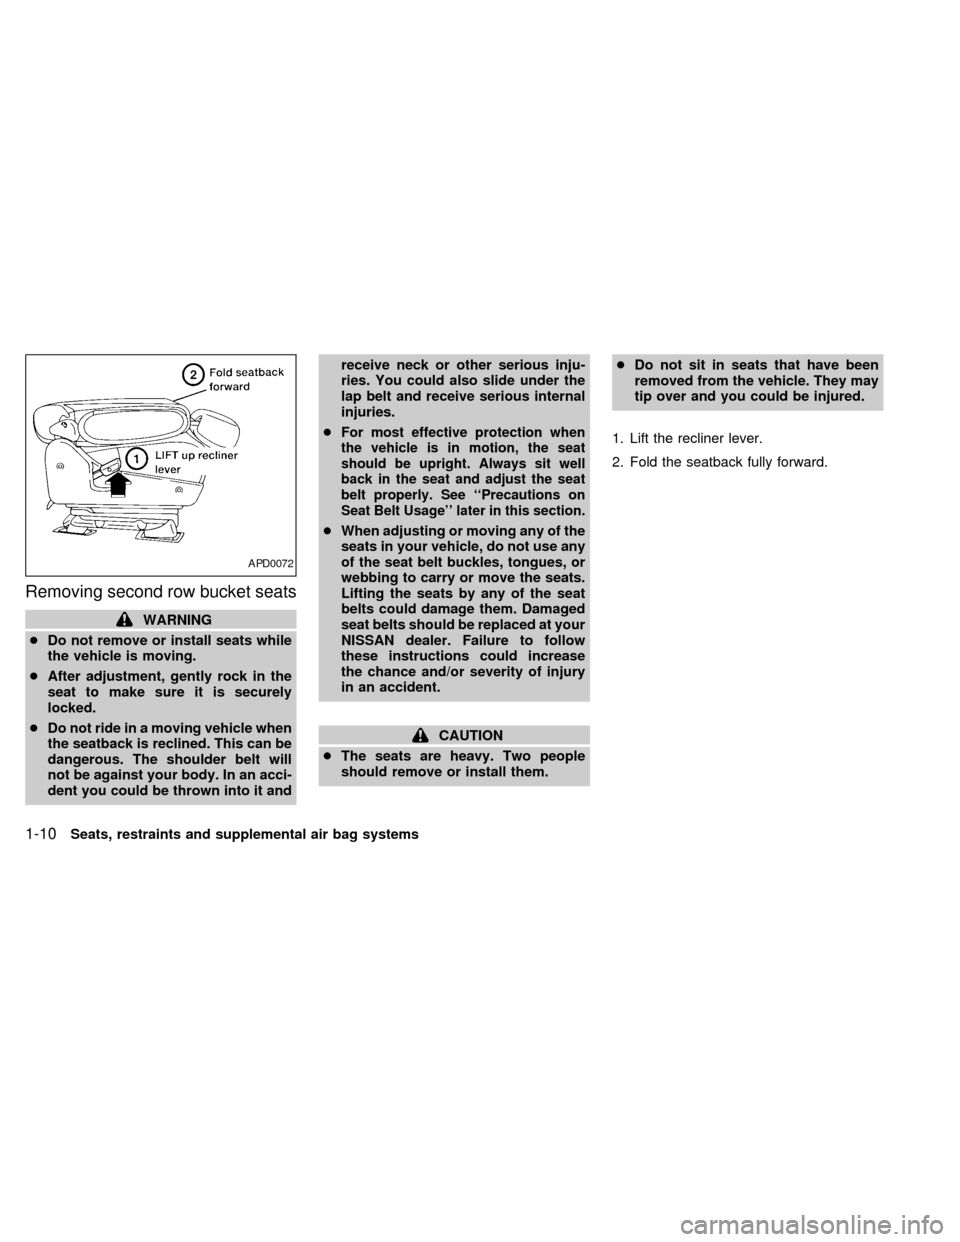
1. Lift the recliner lever.
2. Fold the seatback fully forward.
APD0072
1-10Seats, restraints and supplemental air bag systems
ZX