Page 2054 of 2490

Interior Trim and Ornamentation - Interior Trim
Description and Operation
Carpets
The passenger compartment carpet is a one piece moulded constr uction with integral sound deadening material, heel mats
and driver's footrest. The carpet is attach ed to the vehicle floor by plastic clips fitted below the door treadplates. Removal of the carpet necessitates re moval of the front seats, lifting of the centre console rear extens ion and removal of the heelboard
carpet.
Fascia
The full width, slush moulded, soft feel PVC fascia is mounted on an injection moulded armature and is faced with wood
veneer. In addition to the air conditioning and central, outer and demisting vents, it accepts instrument packs dedicated to
market requirements and a centrally mounted analogue clock.
Doors
The one-piece door casings are trimmed in UEV to match the seating, with wood veneer at the waistline and a carpet insert
at the front lower corner. Each casing is secured to the door inner panel by fir tree press fast eners along the lower section,
two armrest fixings at the centre and vene er panel dowels and fixings at the top. The armrests which are common to front
and rear doors, are trimmed in matching leather or UEV according to specification. The door switchpacks, dedicated to
driver and front or rear passenger, are in corporated in the armrests. A speaker is in stalled in the lower section of each door
and a tweeter is incorporated behind each interior door handle escutcheon. Where premium ICE is fitted, the front tweeters
are installed in the upper A posts.
A, B, C and D Posts
On each side,a grained UEV finisher trimmed to match the headlining is secured to the 'A' post and cantrail by fir tree
fasteners locating in BIW apertures. The upper 'D' post finisher is trimmed and secured in the same manner. The single
piece'B/C' post finishers, also finished in grained matching UEV, each have a front se at belt exit aperture and are secured to
the BIW by four spring clips and two fir tree fasteners.
Headlining
The one-piece headlining consists of a 6mm thick polyurethane foam membrane covered with suede effect knitted polyester. The headlining is secured to the BIW roof by body tangs, the roof console, sun visors, combined grab handles and coat
hooks, the cantrail finishers and where fitt ed, the sliding roof finisher and clips.
Trunk
Carpet covered trims line the trunk and are secured by fir tr ee fasteners to the sides and front inner panel. The carpet
covered, two-section, removable trunk fl oor provides access to the spare wheel and wheel changing equipment, the battery
and electrical carrier. The floor board rests on the spare wheel, with the front and rear edges locating in blocks on the fuel
tank backboard and the rear of the body. The support blocks provide for two floor he ight settings to accommodate either a
space saver or full size spare wheel.A moulded finisher covering the rear of the trunk below the sill is secured to the rear
panel by tabs and fir tree fasteners. Finish er panels fitted to the rear lamp units provide trunk interior access to the lamps.
The trunk lid underside is fitted with a removabl e moulded liner and two trunk illumination lights.
Page 2080 of 2490
Interior Trim and Ornamentation - Luggage Compartment Front Trim
Panel
Removal and Installation
Removal
Installation
1.
Remove battery cover.
2. Remove trunk floor carpet.
3. Remove and discard the two fir tree fasteners securing the
front liner.
4. Remove liner from trunk.
1. Position liner in trunk.
2. Using new fir tree fasteners, secu re liner to front of trunk.
3. Fit trunk floor carpet.
4. Fit battery cover.
Page 2081 of 2490
Interior Trim and Ornamentation - Luggage Compartment Lid Trim Panel
Removal and Installation
Removal
Installation
1. Remove trunk lamp assemblies. Refer to 86.45.16.
2. Release the three warning triang le securing clips and remove
warning triangle.
3. Slacken and remove warning triangle mounting bracket
securing screws an d remove bracket.
4. Remove covers from trunk latc h finisher securing bolts,
slacken and remove bolts and remove finisher.
5. Remove and discard the eighteee n trunk lid liner fasteners and
remove liner from vehicle.
Page 2082 of 2490
1.
Position liner on trunk lid and pass lamp harness multiplugs
through apertures.
2. Align and fully seat liner on trunk lid and secure with new
fasteners.
3. Position finisher over trunk lid latch, fit and tighten securing
bolts and fit bolt covers..
4. Position warning triangle mounti ng bracket and fit and tighten
securing screws.
5. Install triangle on mounting br acket and secure with clips.
6. Install trunk lamp assemblies. Refer to 86.45.16.
Page 2083 of 2490
Interior Trim and Ornamentation - Luggage Compartment Rear Trim Panel
Removal and Installation
Removal
Installation
1. Remove tail lamp covers.
2. Remove trunk floor and battery cover. Refer to operations in
this section.
3. Remove and discard the two fir tr ee fasteners securing finisher
to trunk rear panel.
4. Pull rear finisher upwards to release upper spring clips and
remove finisher from trunk.
1. Position finisher on trunk rear panel and press firmly
downwards to engage spring clips.
2. Fit and fully seat fir tree fasteners.
3. Fit trunk floor and battery cover. Refer to operations in this
section.
4. Fit tail lamp covers.
Page 2084 of 2490
Interior Trim and Ornamentation - Luggage Compartment Side Trim Panel
Removal and Installation
Removal
Installation
1.
Remove trunk floor carpet.
2. Remove trunk front liner. Refer to 76.19.31.
3. Remove trunk rear finisher. Refer to 76.19.44.
4. Remove literature pack from tr unk side liner (RH side only).
5. Remove side liner from trunk.
1. Position and fully seat side liner in trunk.
2. Install literature pack on side liner (RH side only).
3. Fit trunk rear finisher.Refer to 76.19.44.
4. Fit trunk front liner. Refer to 76.19.31.
5. Fit trunk floor carpet.
Page 2099 of 2490

Exterior Trim and Ornamentation - Exterior Trim
Description and Operation
Body Front
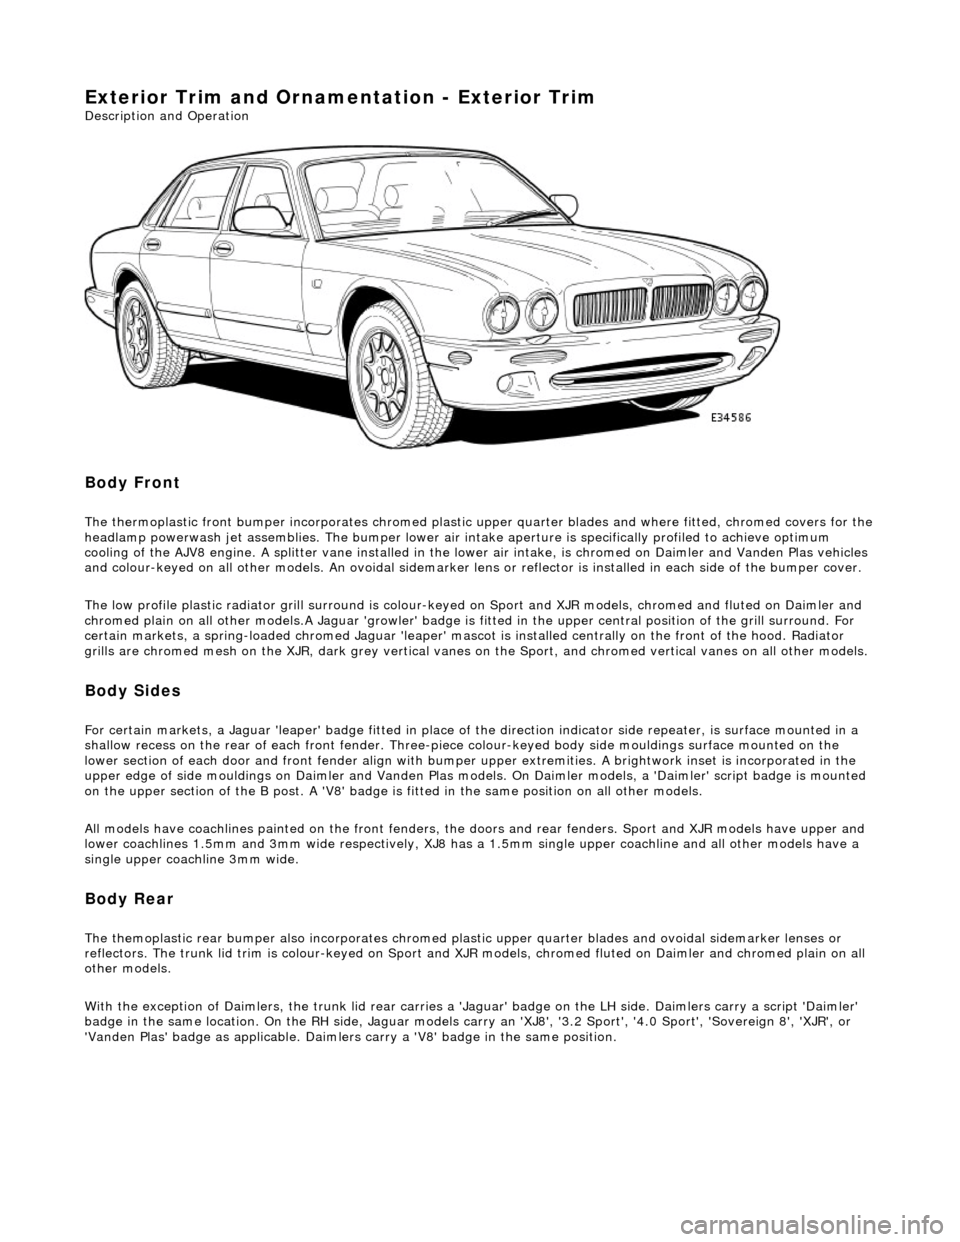
The thermoplastic front bumper incorporates chromed plastic upper quarter blades and where fitted, chromed covers for the headlamp powerwash jet assemblie s. The bumper lower air intake aperture is specifically profiled to achieve optimum
cooling of the AJV8 engine. A splitter vane installed in the lowe r air intake, is chromed on Daimler and Vanden Plas vehicles
and colour-keyed on all other models. An ov oidal sidemarker lens or reflector is installed in each side of the bumper cover.
The low profile plastic radiator grill surround is colour-keyed on Sport and XJR mo dels, chromed and fluted on Daimler and
chromed plain on all other models .A Jaguar 'growler' badge is fitted in the upper central positi on of the grill surround. For
certain markets, a spring-loaded chromed Ja guar 'leaper' mascot is installed centrally on the front of the hood. Radiator
grills are chromed mesh on the XJR, dark grey vertical vanes on the Sport, and chromed ve rtical vanes on all other models.
Body Sides
For certain markets, a Jaguar 'l eaper' badge fitted in place of the direction indicator side re peater, is surface mounted in a
shallow recess on the rear of each fro nt fender. Three-piece colour-keyed body side mouldings surface mounted on the
lower section of each door and front fender align with bumper upper extremities. A brightwork inset is incorporated in the
upper edge of side mouldings on Daimler and Vanden Plas models. On Daimler models, a 'Daimler' script badge is mounted
on the upper section of the B post. A 'V8' badge is fitted in the same position on all other models.
All models have coachlines painted on th e front fenders, the doors and rear fender s. Sport and XJR models have upper and
lower coachlines 1.5mm an d 3mm wide respectively, XJ8 has a 1.5mm single upper coachline and all other models have a
single upper coachline 3mm wide.
Body Rear
The themoplastic rear bumper also inco rporates chromed plastic upper quarter blades and ovoi dal sidemarker lenses or
reflectors. The trunk lid trim is colour-keyed on Sport and XJ R models, chromed fluted on Daimler and chromed plain on all
other models.
With the exception of Daimlers, the trunk lid rear carries a 'Jaguar' badge on the LH side. Daimlers carry a script 'Daimler'
badge in the same location. On th e RH side, Jaguar models carry an 'XJ8', '3.2 Sport', '4.0 Sport', 'Sovereign 8', 'XJR', or
'Vanden Plas' badge as applic able. Daimlers carry a 'V8' badge in the same position.
Page 2105 of 2490
Exterior Trim and Ornamentation - Luggage Compartment Lid Badges
Removal and Installation
Removal
Installation
1.
Apply protective tape to area immediately surrounding and up
to the badge edge.
2. Using a thin plastic lever and a fulcrum of suitable material
positioned on the taped area, carefully ease the badge free.
3. Remove protective tape.
4. Using white spirit, remove any residual adhesive.
1. Ensure that contact area is clean and dry.
2. Remove backing sheet from badge.
3. Ensuring correct alig nment with trunk lid recess and where
applicable lock aperture and pr ess badge firmly into position.
4. Clean affected area and apply su itable polish to trunk lid and
badge.