Page 2360 of 2490

Safety Belt System - Safety Belt System
Description and Operation
Front Seat Belts
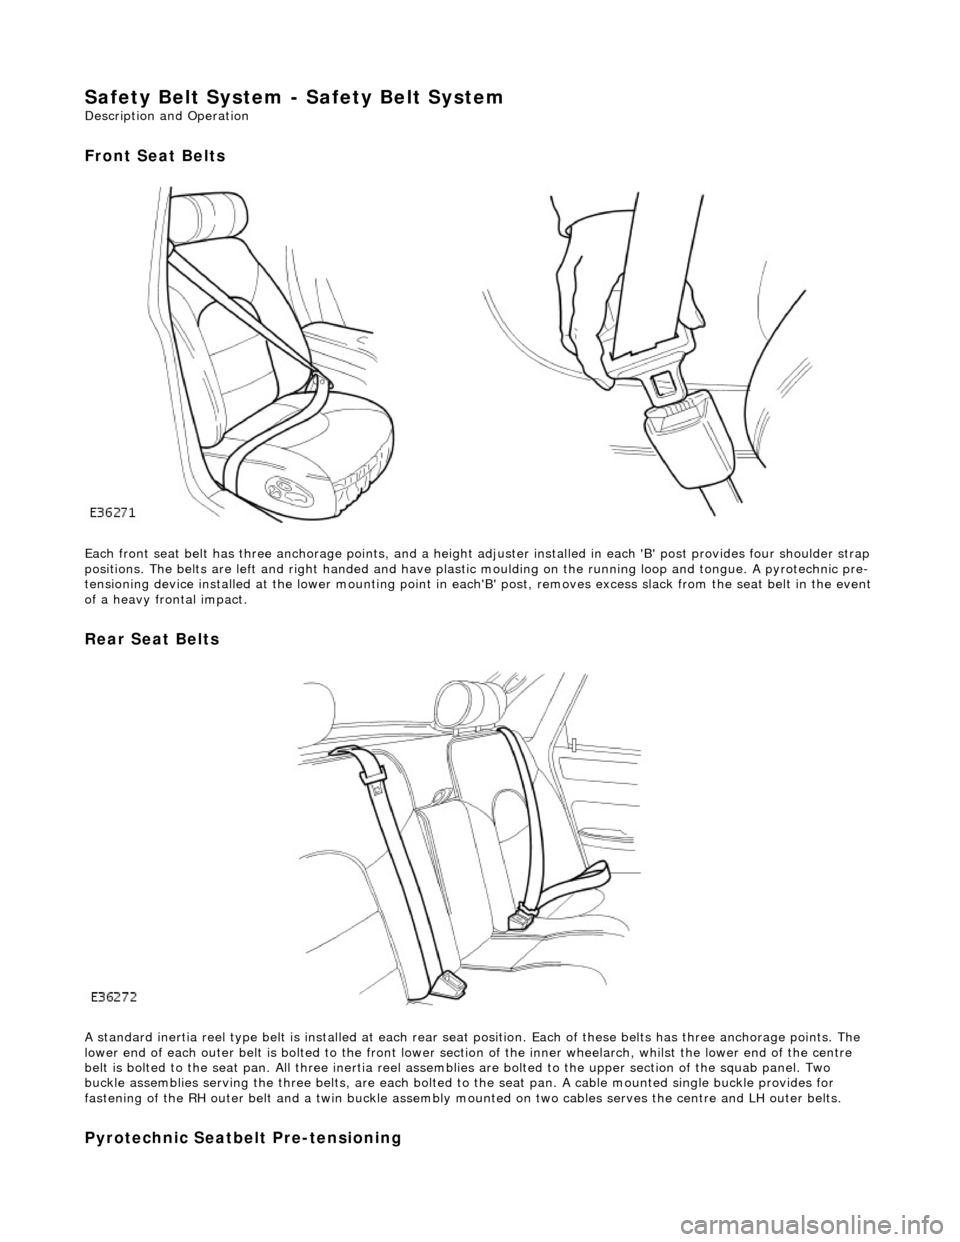
Each front seat belt has three anchorage points, and a height adjuster installed in each 'B' post provides four shoulder strap
positions. The belts are left and right ha nded and have plastic moulding on the r unning loop and tongue. A pyrotechnic pre-
tensioning device installed at the lower mounting point in each 'B' post, removes excess slack from the seat belt in the event
of a heavy frontal impact.
Rear Seat Belts
A standard inertia reel type belt is installed at each rear seat position. Each of these belts has three anchorage points. The
lower end of each outer belt is bolted to the front lower section of the inner wheelarch, whilst the lower end of the centre
belt is bolted to the seat pan. All thr ee inertia reel assemblies are bolted to the upper section of the squab panel. Two
buckle assemblies serving the three belts, are each bolted to the seat pan. A cable mounted single buckle provides for
fastening of the RH outer belt and a twin buckle assembly mounted on two cables serves the centre and LH outer belts.
Pyrotechnic Seatbelt Pre-tensioning
Page 2361 of 2490

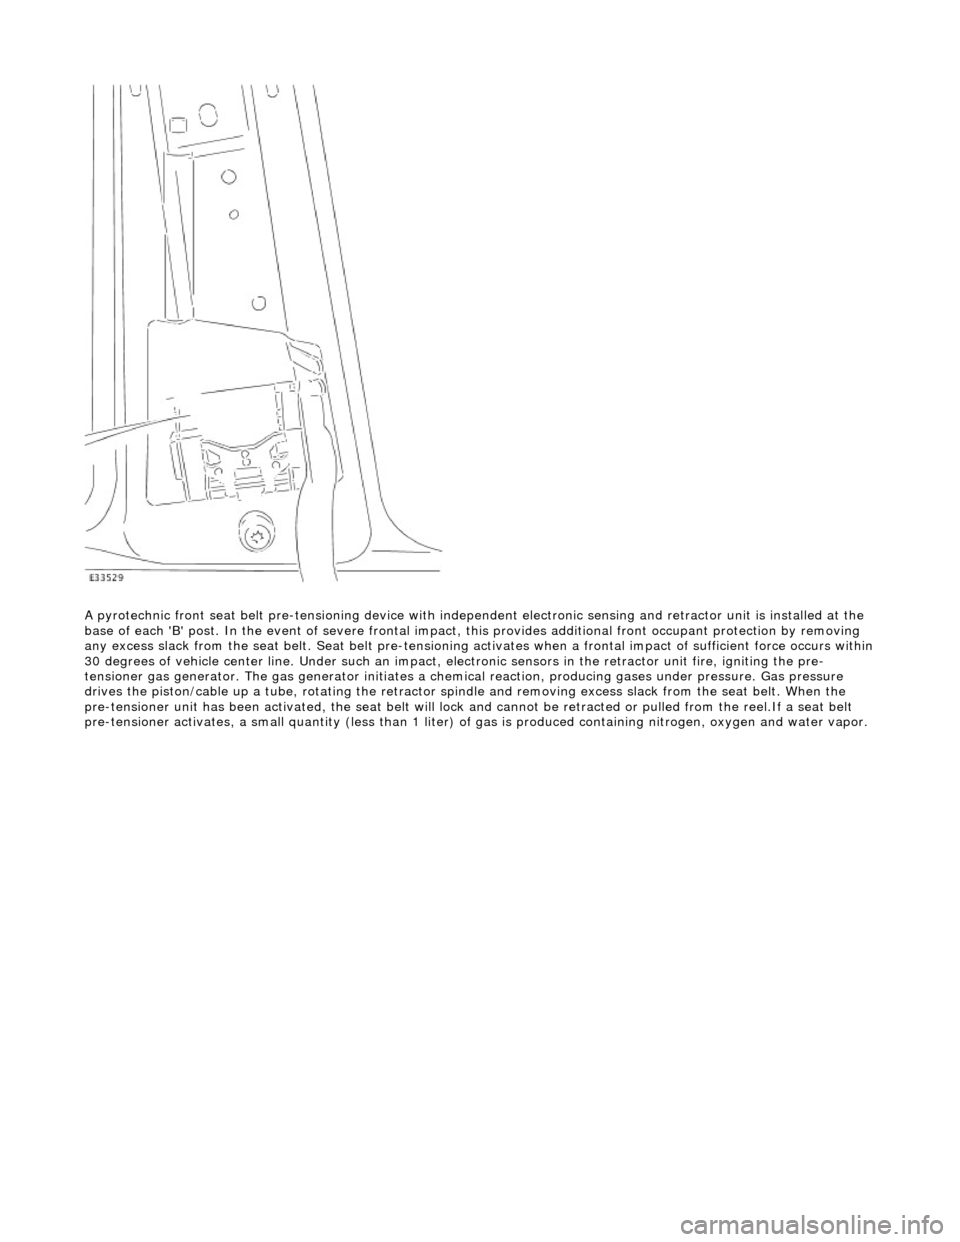
A pyrotechnic front seat belt pre-tensioning device with independent el ectronic sensing and retractor unit is installed at the
base of each 'B' post. In the event of se vere frontal impact, this provides additional front occupant protection by removing
any excess slack from the seat be lt. Seat belt pre-tensioning activates when a frontal impact of sufficient force occurs within
30 degrees of vehicle center line. Under such an impact, el ectronic sensors in the retractor unit fire, igniting the pre-
tensioner gas generator. The ga s generator initiates a chemical reaction, producing gases under pressure. Gas pressure
drives the piston/cable up a tube, rotating the retractor sp indle and removing excess slack from the seat belt. When the
pre-tensioner unit has been activated, the seat belt will lock and cannot be retracted or pulled from the reel.If a seat belt
pre-tensioner activates, a small quantity (less than 1 liter) of gas is produced containing nitrogen, oxygen and water vapor.
Page 2362 of 2490

Safety Belt System - Front Safety Belt Retractor
Removal and Installation
Removal
• WARNINGS:
IF A SEAT BELT PRETENSIONING UNIT IS INADVERTENTLY RUPTURED AND INGESTION AND/OR INHALATION
OCCURS, FIRST AID MUST BE APPLIED AND MEDICAL ADVICE SOUGHT.
NO ATTEMPT MUST BE MADE TO DISMANTLE A PRETENSIONING RETRACTOR UNIT. THERE ARE NO SERVICEABLE
PARTS.
WHEN HANDLING A RETRACTOR UNIT PISTON HOUSING, THE PISTON MUST ALWAYS BE POINTED DOWNWARDS
AND AWAY FROM ONE'S SELF AND OTHER PERSONNEL AND FINGERS MUST BE KEPT AWAY FOM THE TAKE-UP SPOOL
MECHANISM.
ANY PRETENSIONING UNIT DROPPED FROM A HEIGHT GREA TER THAN 0.3M (12 INCHES) MUST NOT BE FITTED TO A
VEHICLE.
UNACTIVATED PRE-TENSIONING UNIT COMPONENTS CONTAIN A SOLID, FLAMMABLE MATERIAL.
1. Position seat fully forward for access.
2. Remove battery cover and disc onnect ground cable from
battery terminal. Refer to 86.15.19.
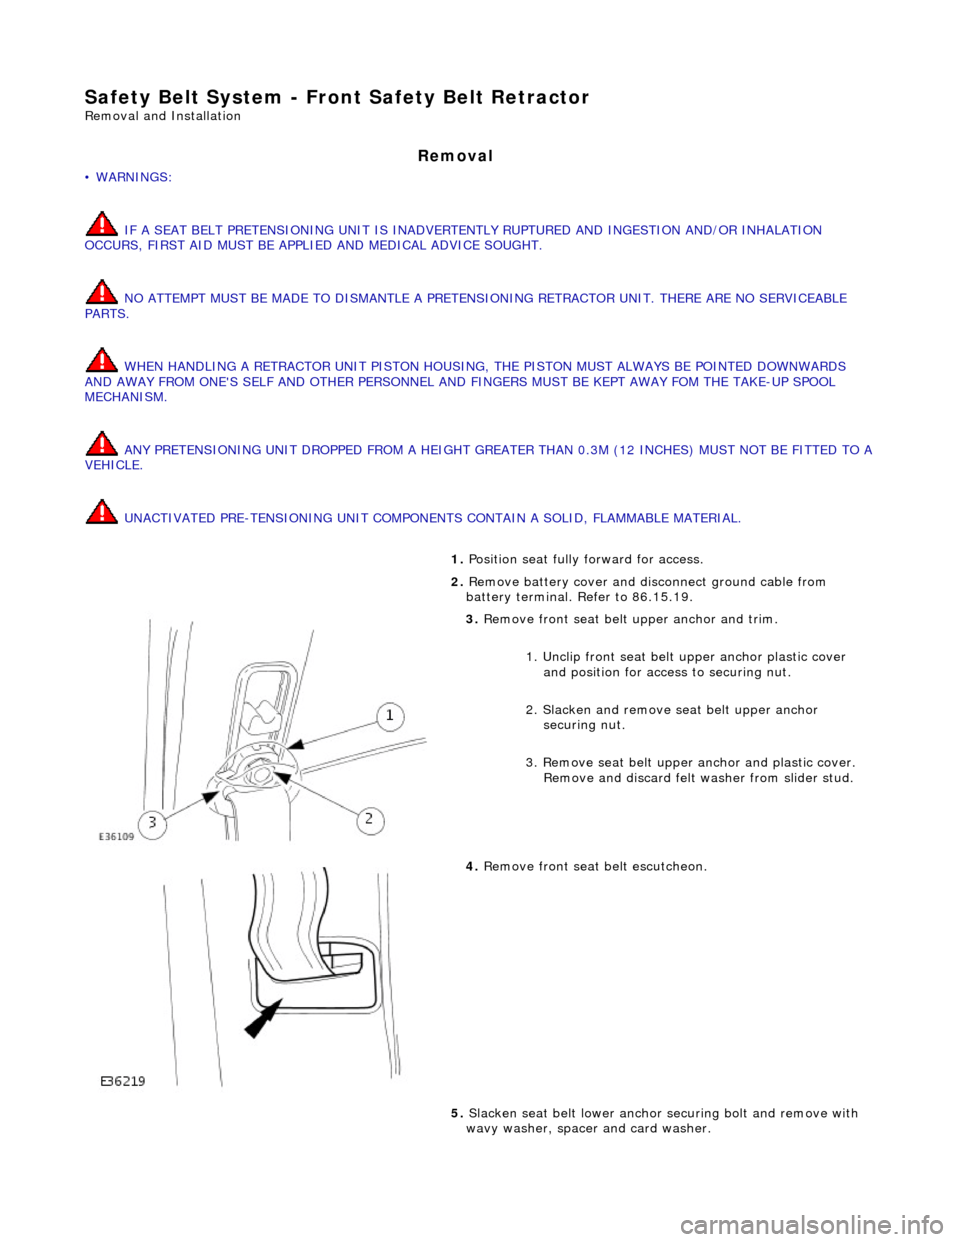
3. Remove front seat belt upper anchor and trim.
1. Unclip front seat belt upper anchor plastic cover
and position for access to securing nut.
2. Slacken and remove se at belt upper anchor
securing nut.
3. Remove seat belt upper anchor and plastic cover. Remove and discard felt washer from slider stud.
4. Remove front seat belt escutcheon.
5. Slacken seat belt lower anchor securing bolt and remove with
wavy washer, spacer and card washer.
Page 2363 of 2490
Installation
6. Remove 'B' post casing fo r access. Refer to 76.13.08.
7. Pass seat belt anchor plate through 'B' post casing and
remove casing from vehicle.
8. Slacken and remove two screws se curing seat belt guide to 'B'
post and position belt guide along seat belt.
9. Slacken and remove bolt securing seat belt pretensioner to 'B'
post.
10. Withdraw belt and pretensioner assembly from 'B' post and
remove from vehicle.
1. Position pretensioner in 'B' post , align with fixing holes and fit
Page 2364 of 2490
and fully tighten
securing bolts.
2. Position seat belt guide on 'B' post and fit and fully tighten the
two securing screws.
3. Position 'B' post casing in vehicle and pass seat belt anchor
plates and tongue through aperture.
4. Fit 'B' post casing. Refer to 76.13.08.
5. Fit securing bolt and wavy washer to seat belt anchor. Fit
spacer and card washer to bolt and fit and fully tighten securing
bolt.
6. Fit felt washer with paper ba cking outwards, onto height
adjuster stud
7. Position upper anchor on height adjuster stud, fit and tighten
securing nut and fit pl astic cap over nut.
8. Connect ground cable to battery terminal and fit battery cover.
Refer to 86.15.15.
9. Return seat to original position.
Page 2365 of 2490
Safety Belt System - Rear Safety Belt Retractor
Removal and Installation
Removal
1. Remove rear seat cushion. Refer to 76.70.37.
2. Remove rear headrests.
3. Slacken and remove bolt securi ng lower anchor to front of
inner wheel arch.
4. Slacken and remove bolt securing belt buckle cable to seat
pan and remove belt buckle assembly from vehicle.
5. Remove escutcheon.
1. Using a flat-bladed screwdriver in the two rectangular apertures, carefully withdraw
escutcheon from top of seat squab.
2. Remove escutcheon from belt via split in moulding.
6. Pass seat belt lower anchor plate and tongue through squab
aperture.
Page 2366 of 2490
Installation
7. Remove seat squab for access using extension of undisturbed
belts to achieve clearance from inertia reels. Refer to 76.70.38.
8. Slacken and remove two bolts and washer securing inertia reel
assembly to top of squab panel and remove belt assembly from
vehicle.
1. Position inertia reel assembly at top of squab panel and fit and
tighten securing bolts.
2. Pass belt tongue and lower anchor plate through aperture at
top of seat.
3. Fit escutcheon over seat belt an d fit and firmly seat in squab
aperture.
4. Position lower anchor plate at inner wheelarch (seat pan for
centre seat belt) and fit and tighte n securing bolt.
5. Position buckle assembly (and lo wer anchor plate if centre belt)
on seat pan and fit and tighten cable securing bolt.
6. Position and secure rear se at squab. Refer to 76.70.38.
7. Fit rear seat cushion. Refer to 76.70.37
Page 2367 of 2490
Safety Belt System - Safety Belt Shoulder Height Adjuster
Removal and Installation
Removal
Installation
1.
Position front seat forward for access.
2. Remove battery cover and disconnect ground cable from battery
terminal. Refer to 86.15.19.
3. Remove seat belt upper anchor. Refer to 76.73.10
4. Remove 'B'post trim. Refer to 76.13.08.
5. Slacken and remove seat belt heig ht adjuster securing bolts and
remove adjuster from 'B' post.
6. Remove fibre washers, spacers an d bolts from height adjuster.
1. Fit securing bolts, spacers and fi bre washers to height adjuster.
2. Position adjuster on 'B' post an d fit and tighten securing bolts.
3. Fit 'B' post trim pad. Refer to 76.13.08.
4. Fit seat belt upper an chor. Refer to 76.73.10
5. Connect ground cable to battery terminal and fit battery cover.
Refer to 86.15.15.