Page 51 of 378
Downloaded from www.Manualslib.com manuals search engine Securing a Child Restraint in a
Rear Seat Position
You’ll be using the lap-shoulder belt. See the earlier part
about the top strap
if the child restraint has one. Be sure
to follow the instructions that came with the child
restraint. Secure the child
in the child restraint when and
as the instructions say.
1. Put the restraint on the seat.
2. Pick up the latch plate, and run the lap and shoulder
portions
of the vehicle’s safety belt through or
around the restraint. The child restraint instructions
will show you how.
1-40
Page 52 of 378
Downloaded from www.Manualslib.com manuals search engine 4. Buckle the belt. Make sure the release button is
positioned
so you would be able to unbuckle the
safety belt quickly if you ever had to.
5. To tighten the belt, pull up on the shoulder belt while
you push down on the child restraint.
If you’re using
a forward-facing child restraint, you may find it
helpful to use your knee to push down on the child
restraint as you tighten the belt.
directions to be sure it is secure.
6. Push and pull the child restraint in different
To remove the child restraint, just unbuckle the vehicle’s
safety belt and let it go back all the way. The safety belt
will move freely again and be ready to work for an adult
or larger child passenger.
1-41
Page 53 of 378
Downloaded from www.Manualslib.com manuals search engine Securing a Child Restraint in the Right
Front Seat Position
Your vehicle has a right front passenger air bag. Never
put a rear-facing child restraint in this seat. Here’s why:
--
1 ’ A child in a rearfacing child restraint can be
seriously injured or killed if the right front
passenger’s air bag inflates, even though your
vehicle has Next Generation frontal
air bags. This
is because the back of the rearfacing child
restraint would be very close to the inflating
air
bag. Always secure a rearfacing child restraint
in the rear seat.
You’ll be using the lap-shoulder belt. See the earlier pan
about the top strap if the child restraint has one. Be sure
to follow the instructions that came with the child
restraint. Secure the child in the child restraint when and as the instructions say.
1-42
Page 54 of 378
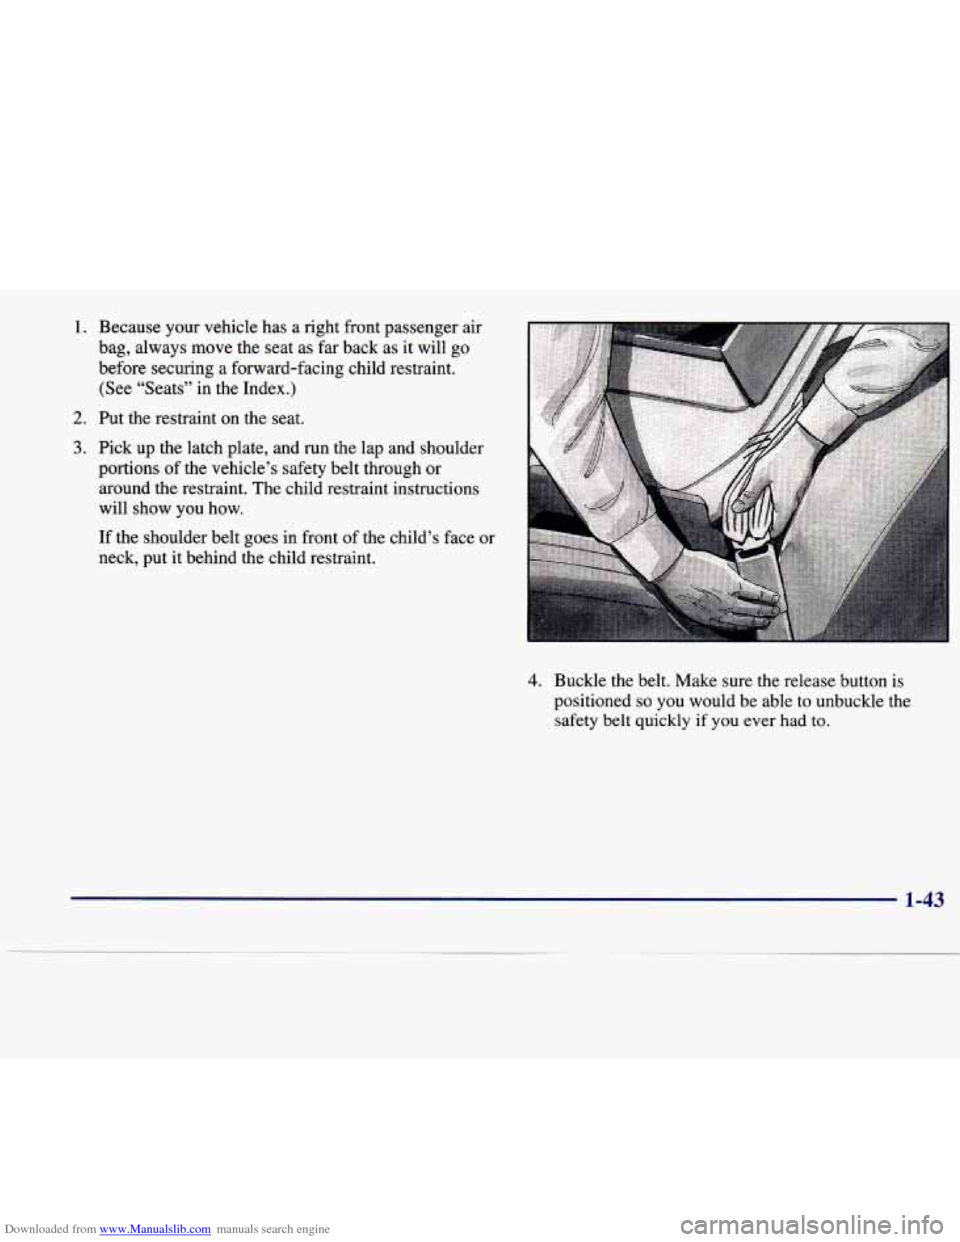
Downloaded from www.Manualslib.com manuals search engine 1.
2.
3.
Because your vehicle has a right front passenger air
bag, always
move the seat as far back as it will go
before securing a forward-facing child restraint. (See “Seats” in the Index.)
Put the restraint on the seat.
Pick up the latch plate, and run the lap and shoulder
portions of the vehicle’s safety belt through or
around the restraint. The child restraint instructions
will show
you how.
If the shoulder belt goes in front of the child’s face or
neck, put it behind the child restraint.
4. Buckle the belt. Make sure the release button is
positioned
so you would be able to unbuckle the
safety belt quickly
if you ever had to.
1-43
Page 64 of 378
Downloaded from www.Manualslib.com manuals search engine There is a master key that
works in
all of the lock
cylinders (driver’s door, glove box,
trunk and
ignition). There is also a
valet key which only operates the driver’s door
and the ignition.
Both the master and valet keys have a transponder
embedded into the key for security and theft deterrence.
The keys also come with a bar code tag. Keep the bar
code tag in a safe place. If you lose your key you will be
able to have a new one made using the bar code tag.
The replacement key must have a transponder embedded
in it.
NOTICE:
Your vehicle has a number of new features that
can help prevent theft. You can have a lot of
trouble getting into your vehicle
if you ever lock
your key inside and you may have to damage
your vehicle to get in. Be sure you have an extra key.
2-3
Page 67 of 378

Downloaded from www.Manualslib.com manuals search engine Rear Door Security Lock
Your vehicle is equipped
with rear door security
locks that help prevent
passengers from opening
the rear doors of your
vehicle from the inside.
To use this lock:
1. Move the lever on the door all the way up to the
2. Close the door.
3. Do the same thing to the other rear door lock.
The rear doors of your vehicle cannot be opened from
the inside when this feature
is in use.
When you want to open a rear door when the security
lock is on:
1. You may unlock the door by using the remote keyless
entry transmitter, the
fkont door power lock switch or
by manually
lifting the rear door lock knob.
ENGAGED position.
2. Then open the door from the outside.
To cancel the rear door lock:
1. You may unlock the door by using the remote
keyless entry transmitter, the front door power lock
switch or by manually lifting the rear door lock
knob. Open the door from the outside.
2. Move the lever all the way down.
3. Do the same for the other rear door.
The rear door locks will now work normally.
Anti-Lockout Feature
Leaving your key in any ignition position with any door
open will disable the use of the power door lock
switches and the remote keyless entry lock function. If
you close the doors,
you can lock them by using the
power door lock switches or the
RKE system. It is
always recommended that you remove the ignition key
when locking your vehicle.
The anti-lockout feature can be overridden by holding
the power door lock switch for three seconds or longer.
Leaving Your Vehicle
If you are leaving the vehicle, open the door, set the
locks from the inside, get out and close the door.
Page 73 of 378
Downloaded from www.Manualslib.com manuals search engine This feature is used to secure the trunk lid if it will not
close completely, such as when carrying large packages
in the trunk.
1. Attach the end loop of the tie down to the retainer
located at the center of the
trunk sill (See View B).
2. Attach the clip end of the tie down to the D-ring on
the trunk lid. (See View A).
3. Tighten the tie down by pulling the free end of the
cord until secure.
4. To remove the tie down, press the clip end to release
and loosen the cord.
Trunk Storage System (Option)
A
The trunk storage system can be used to organize many
different items inside the trunk. The storage system
(A)
is located on top of the spare tire cover (B).
To install the storage system:
1. Remove the mat from the floor of the trunk. Remove
the handle from the spare tire panel and store it with
the spare tire.
2-12
Page 74 of 378

Downloaded from www.Manualslib.com manuals search engine 2.
3.
4.
Place the trunk storage system on the center of the
trunk floor (the cut-out portion of the storage system
should be facing the front
of the vehicle). Slide the
storage system fully forward.
Center the storage system access hole over the area
where the spare tire panel handle was located.
Position the storage system as needed and then
secure it with the retainer.
Attach the removable net to the slots located on the
side and front of the divider walls.
Once in place, the storage system can be moved forward
or rearward for convenience and easy accessing of
stored items.
The following steps explain how to remove the trunk
storage system for cleaning
or in case you need to access
the spare tire. Follow all of these steps
if the storage
system is in the open position. Begin with Step
2 if the
system is already closed.
1. Fully close the trunk storage system.
2. Slide the storage system fully forward.
6. Replace the mat on the floor of the trunk.
There is also a small storage compartment located on the
right
of the trunk in the side trim panel. You can access
the compartment by lifting the panel door.
Rear Seat -ass-Through Door
The rear seat pass-through release is located in the
3. Remove the retainer by turning it to the left. trunk. To release the pass-through door, press
the button
4. Remove the trunk storage system from the trunk.
rear-seat armrest must be pushed down for the
5. Replace the spare tire panel handle. pass-through door to open.
You may close the door
located in
the center of the trunk panel. Note that the
from inside the vehicle.
2-13